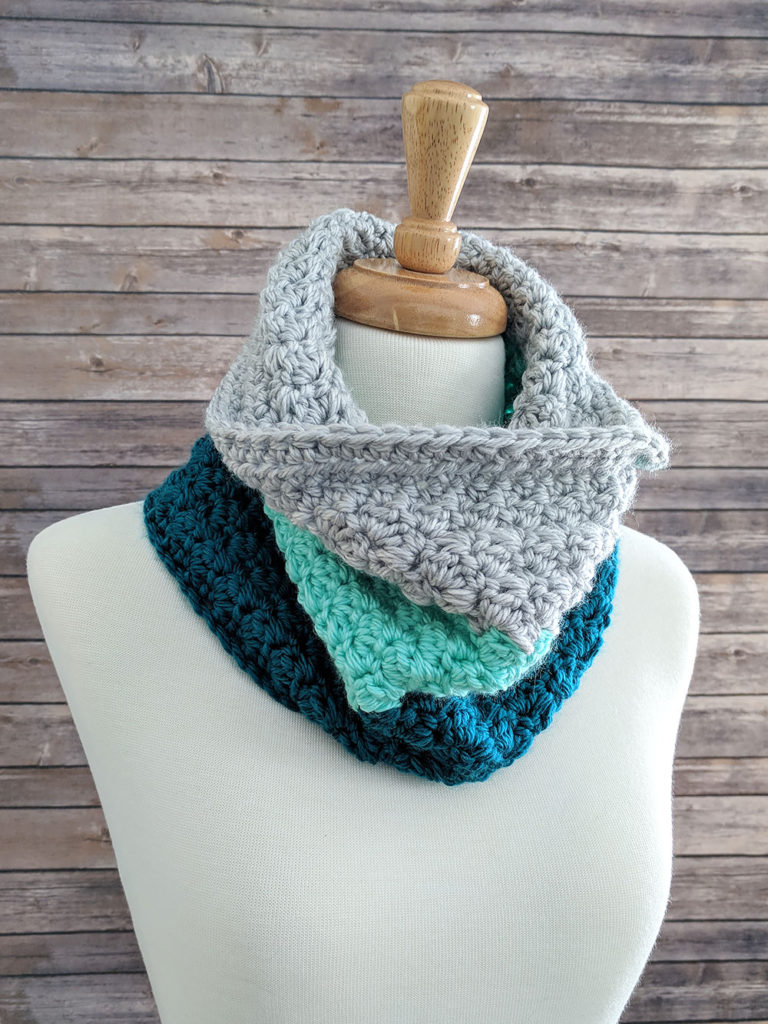
How to Crochet the Harlequin Stitch + Video Tutorial
Learn to crochet the beautiful Harlequin Stitch in the step by step video tutorial below. This stitch is best worked in stripes, so grab your favorite yarn colors and join me!
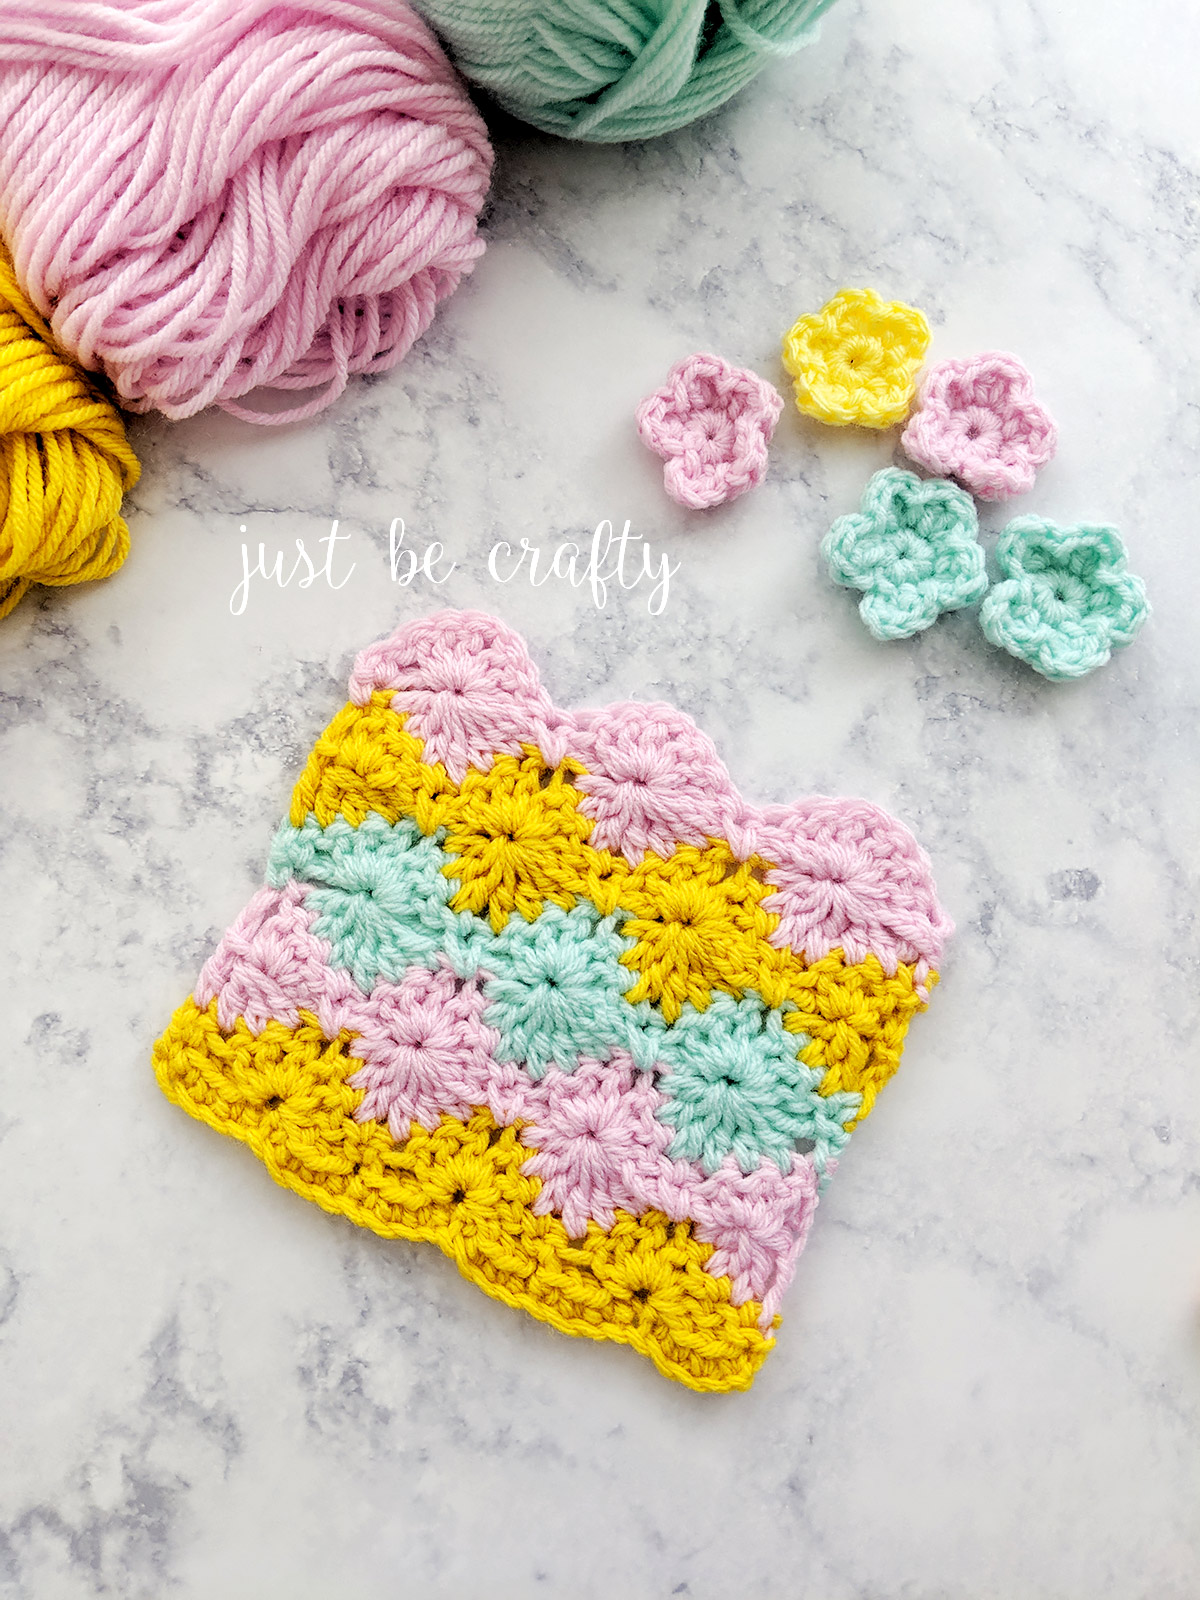
Hello and welcome back to my blog! Today I am sharing a fun stitch with you – the Harlequin stitch! The harlequin stitch is a really pretty vintage stitch used in a lot of older afghans. Often times I’ve seen this stitch with stripes of orange, green, brown and black so I thought it might be fun to show off this stitch with some fresh spring colors!
Inspiration to recreate the stitch…
A few weeks ago we went to see the new Pet Sematary movie. Have you seen this yet??? (It’s super scary!) Anyway, one of the little girls in the movie had a pink and white striped harlequin stitch blanket! It was only on the screen for a couple seconds so most folks probably wouldn’t have even noticed it… only avid crocheters and knitters! I loved it, which in turn inspired me to recreate the stitch!
I’m currently working a harlequin stitch blanket now, and I can’t wait to share all the details! In the meantime, I’m posting this tutorial so you can learn the stitch and be ready when I release the blanket pattern!

Video Tutorial
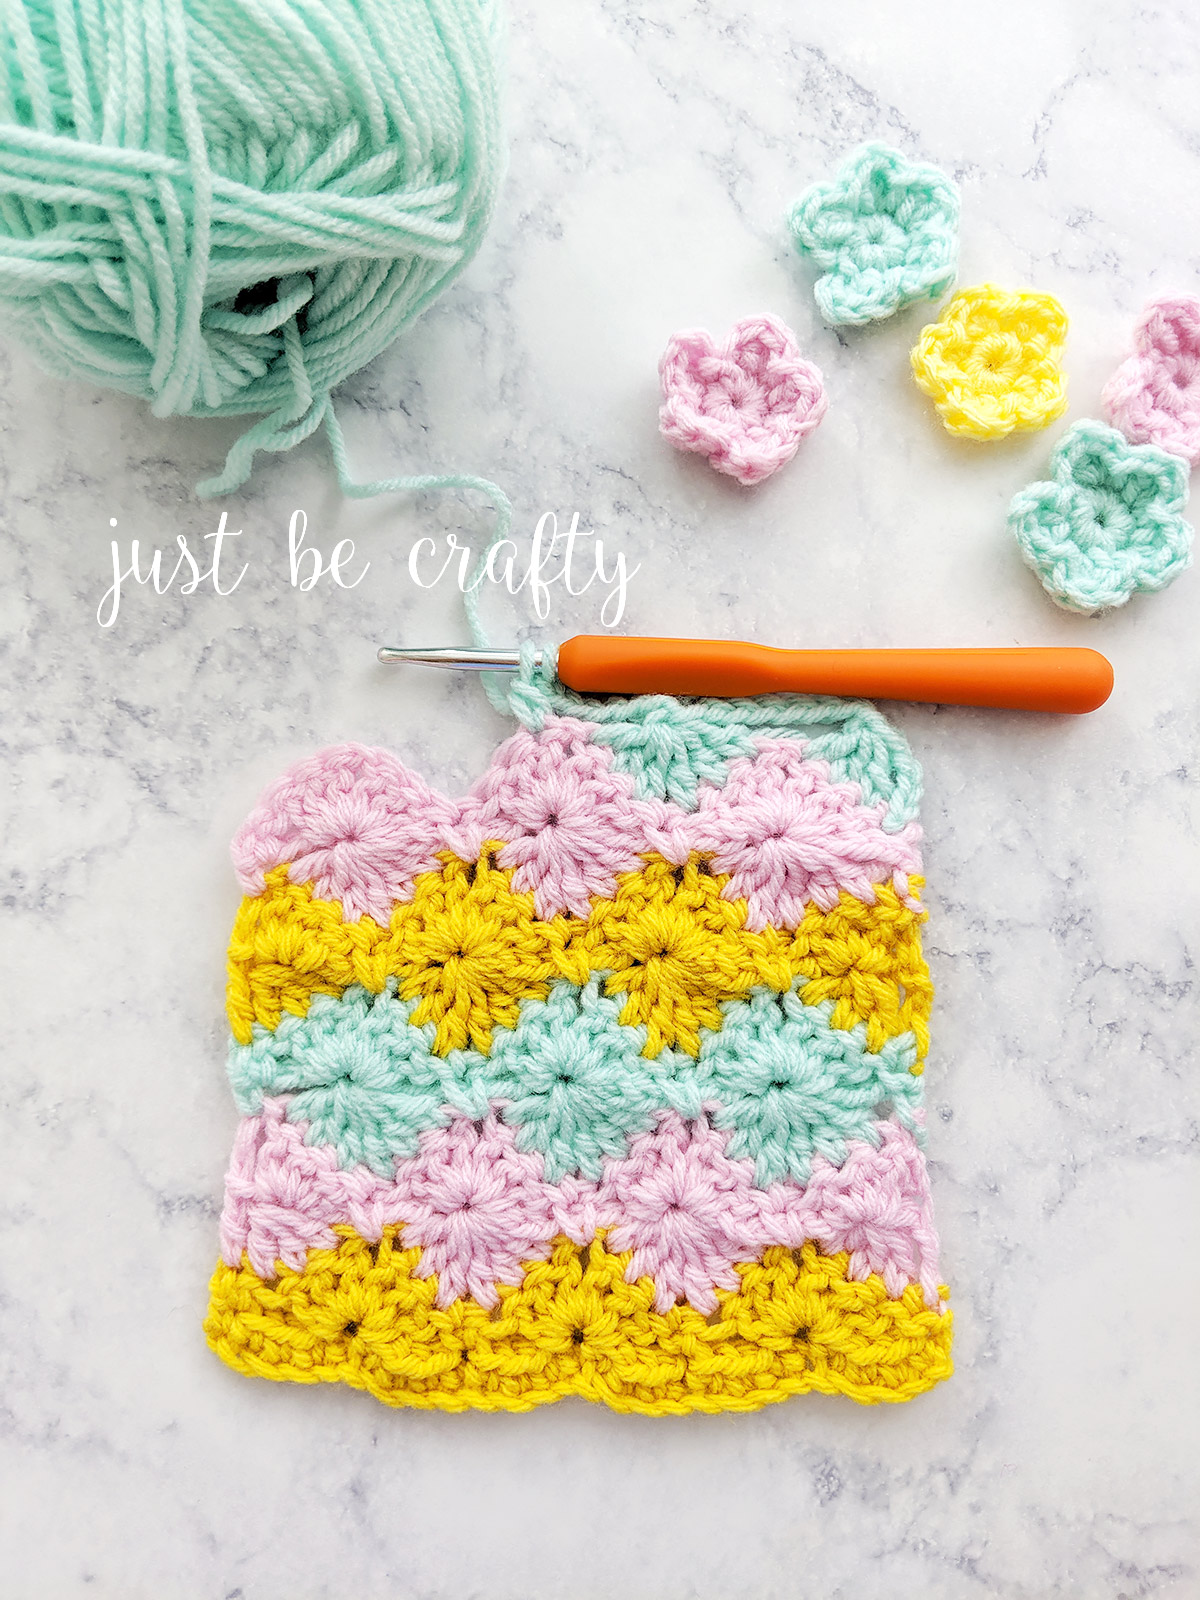
In this video tutorial, I break down the Harlequin Stitch step by step and show you exactly how to accomplish this technique. The skill level for this tutorial is intermediate and higher. I wouldn’t recommend this as your first stitch to learn unless you’re a seriously determined beginner!
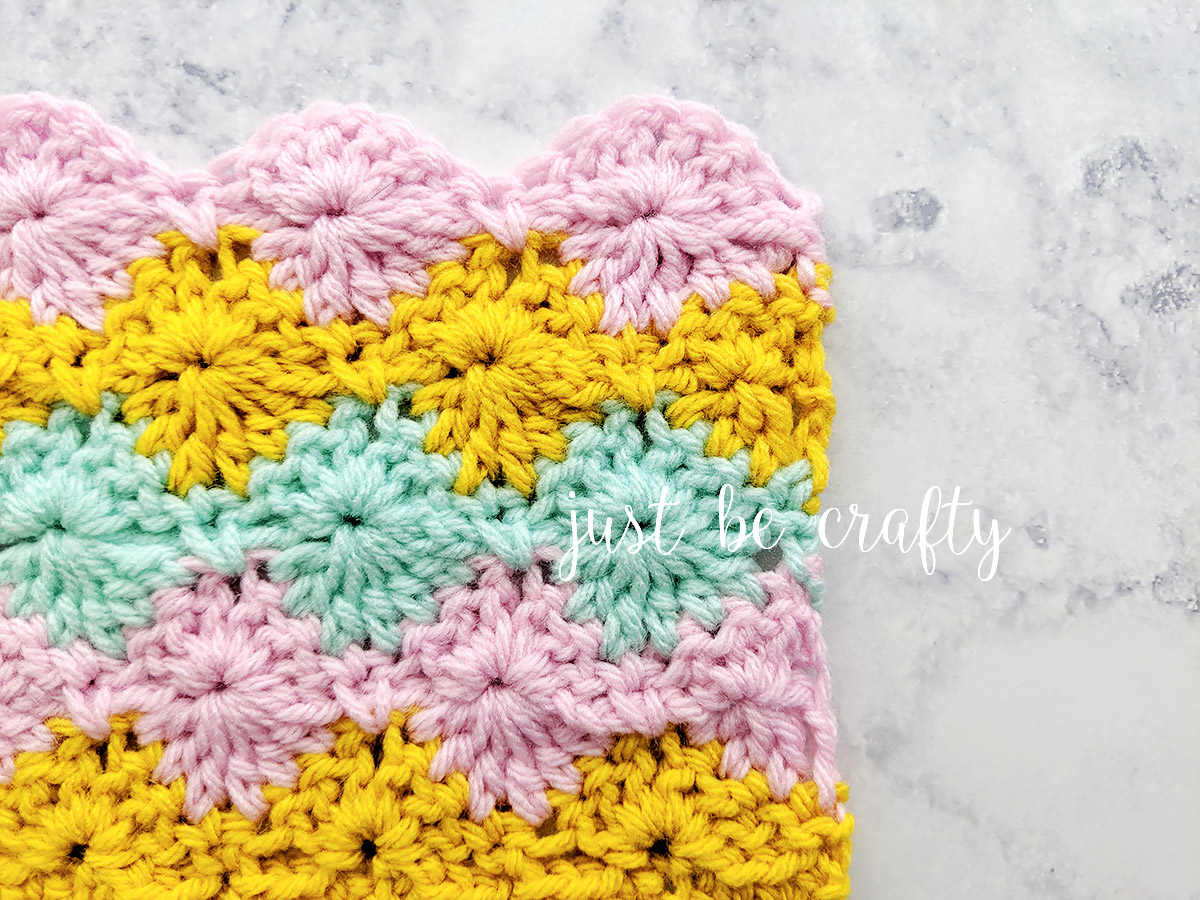
This stitch is not difficult, but it does require you to pay particular attention to the first few rows. Rows 1 – 6 of the stitch each differ slightly, but once you hit Row 6, you will be doing a 4 row repeat!
Pattern
NOTE: The Harlequin stitch is worked in multiples of 8 stitches. Once you reach your multiple of 8 for your foundation chain, add an additional 2 chains.
This post contains affiliate links. For more information please see my disclosures page.
Materials
- Big Twist Value in colors: Light Rose, Light Teal, Gold
- 5.0 mm hook (I use this set)
- Scissors
- Yarn needle
Key
- ch – chain
- dec – decrease
- dc – double crochet
- prev – previous
- sc – single crochet
- st – stitch
- tog – together
Pattern
Ch 26
Row 1: Starting in 2nd ch from hook sc across the row; turn.
Row 2: Ch 1, sc in 1st st, sk 3 st, *(3 dc, ch 1, 3 dc) in next st, sk 3 st, sc; repeat from * to end of row; turn.
Row 3: Ch 3, dc next 3 st tog, ch 7, * dc next 6 dc’s tog (skipping over the center sc), ch 7; repeat from * until 3 dc’s remain; dc last 3 dc’s tog; dc in next st; turn
Row 4: Ch 3, make 3 dc in top of 3 dc dec st from prev row, sc the ch 1 and ch 7 sp from previous 2 rows tog (by inserting your hook into the ch 1 sp from two rows down), * make (3 dc, ch 1, 3 dc) into next dec st, sc the ch 1 and ch 7 sp from previous 2 rows tog (by inserting your hook into the ch 1 sp from two rows down); repeat from * until you reach the last 3 dc dec st, make 3 dc into that 3 dc dec st, dc into top of turning ch; turn.
Row 5: Ch 4, dc next 6 dc tog (skipping over the center sc), * ch 7, dc next 6 dc tog (skipping over the center sc) repeat from * to end, ch 3, sc into top of turning ch; turn.
Row 6: Ch 1, sc in 1st st, make (3 dc, ch 1, 3 dc) into top of next dec st, *sc ch 7 and ch 1 sp from previous 2 rows tog, make (3 dc, ch 1, 3 dc) into of next dec st; repeat from * to end, sc in 1st ch of starting ch 4 from prev row; turn.
Row 7: Repeat Row 3
Row 8: Repeat Row 4
Row 9: Repeat Row 5
Repeat Rows 6 – 9 until desired length.

Enjoy!


Absolutely loved this tutorial and I’m so glad I discovered you!
Thank you so much! I’m glad you enjoyed the tutorial!
Do you have a printable pattern? I like to crochet while we travel and don’t get internet on the road!
Have you ever made this as a baby blanket using a lighter weight yarn, like a 3, lighter than worsted?
I have not tried that yet, but that sounds lovely!
Hi! I love this pattern, but I need to print it out so i can work on it on my travels. Do you have a printable version? Thanks so much! CJ