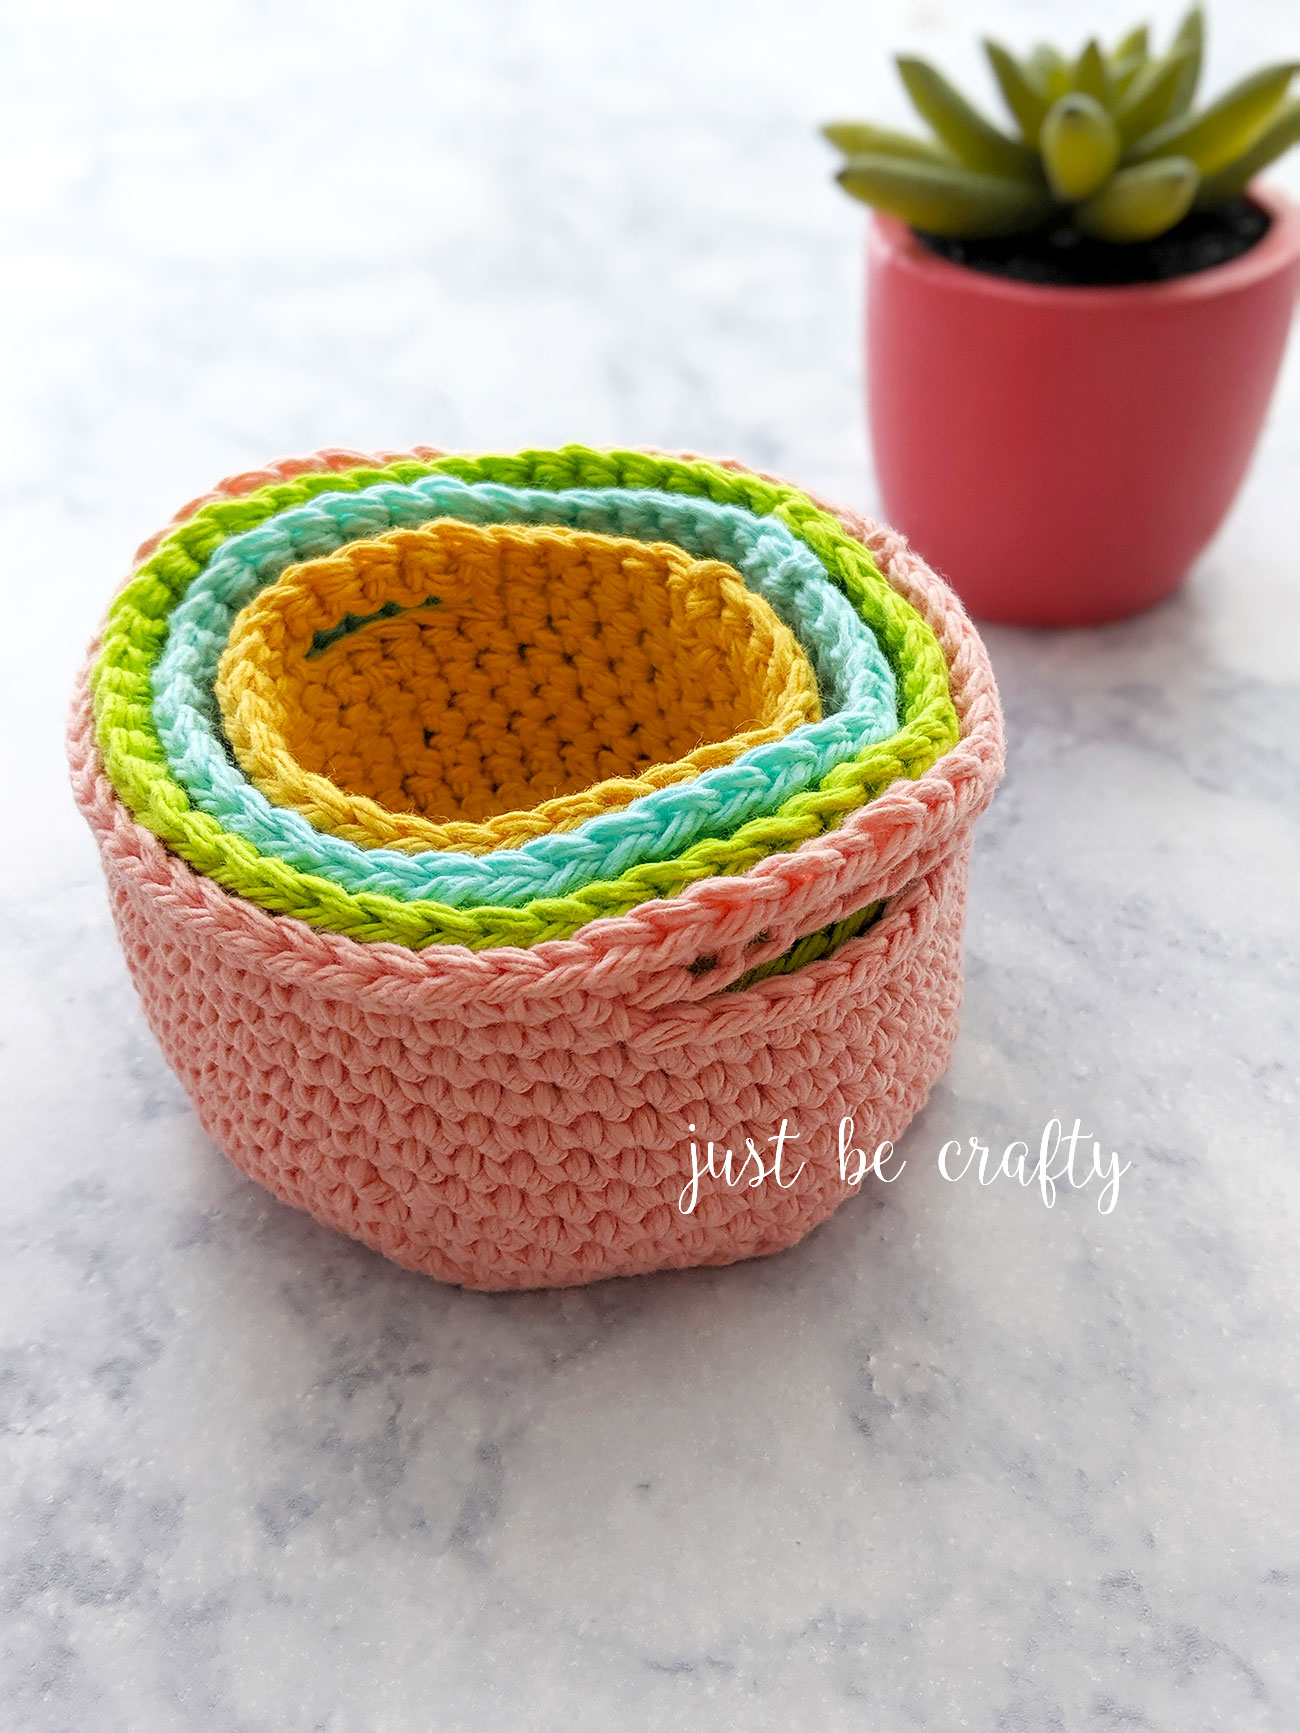
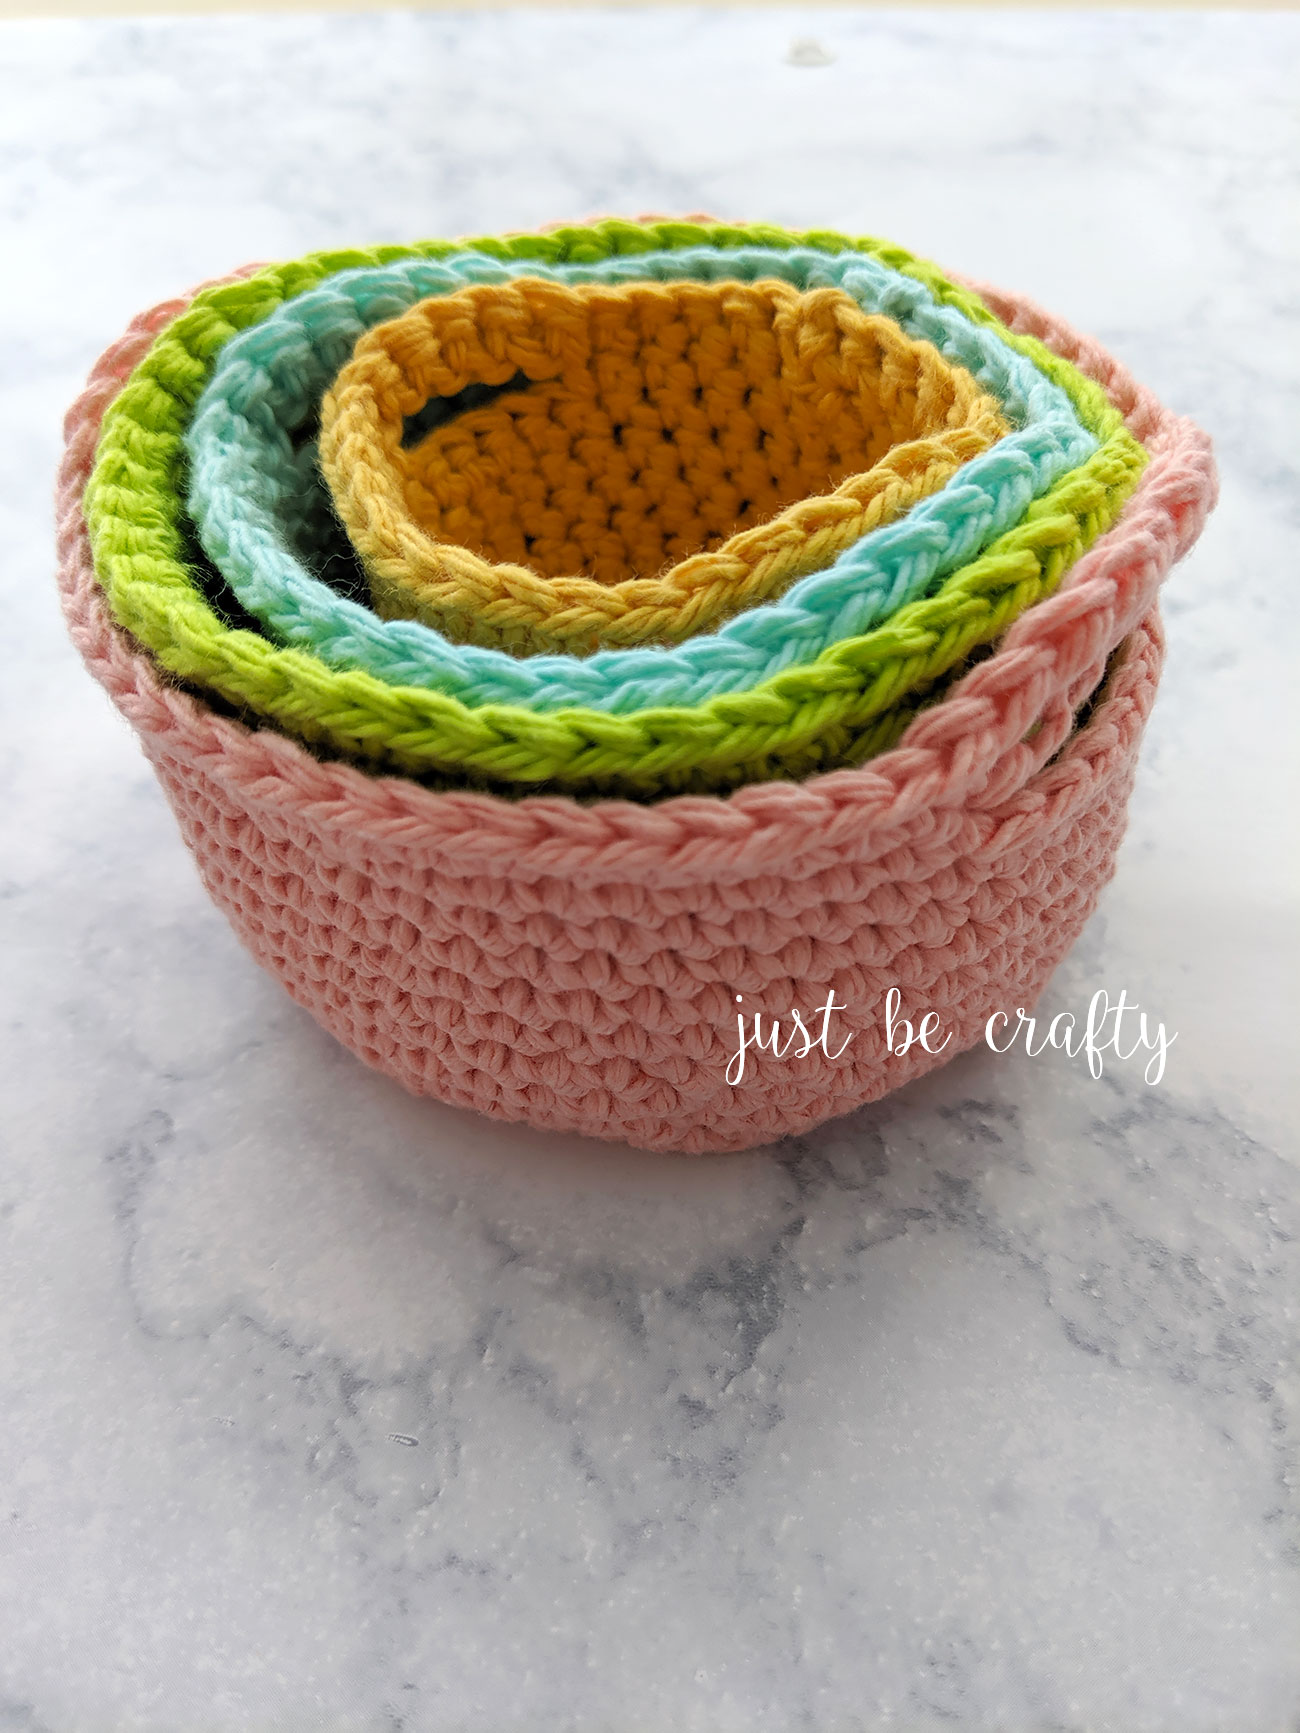
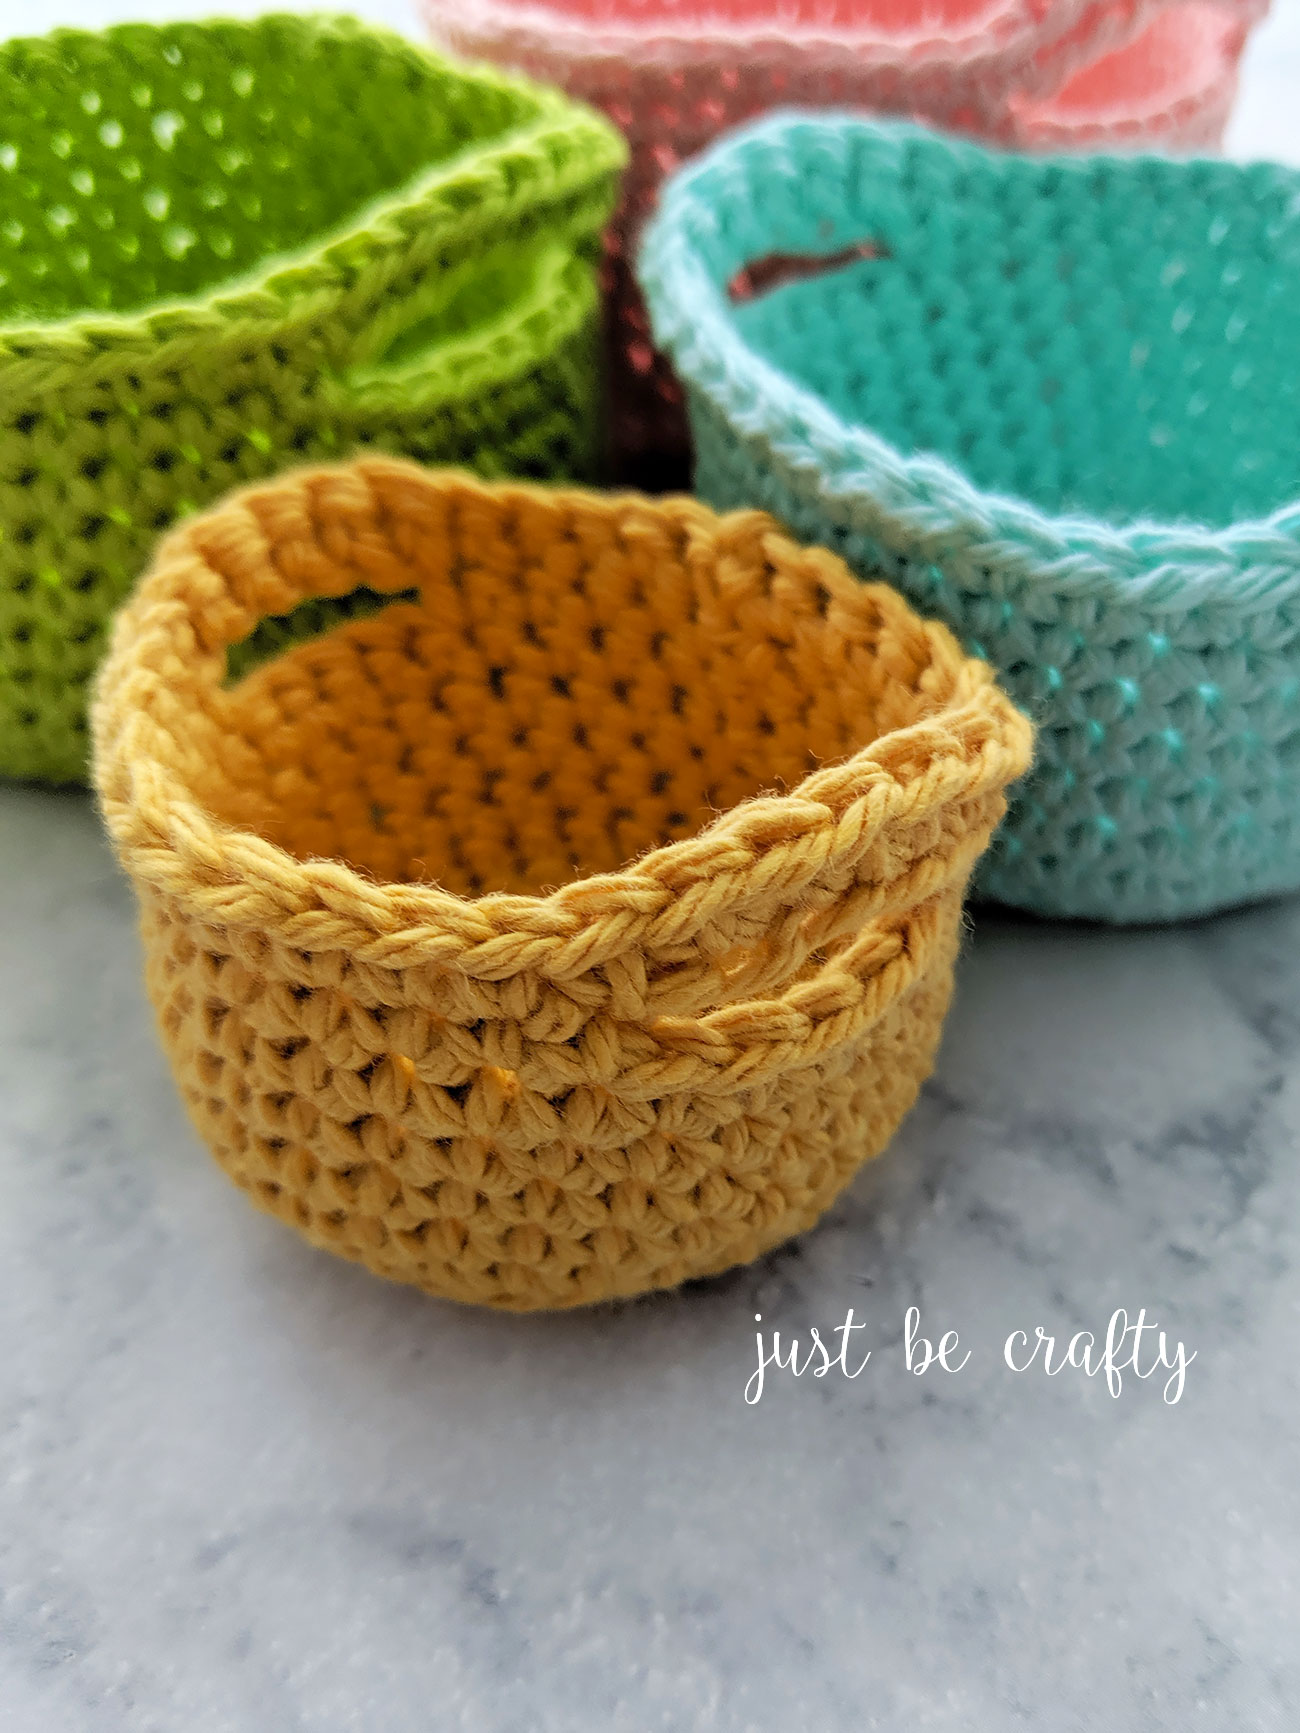
This post covers step by step how to make this adorable Crochet Nesting Mini Basket set. Keep on reading to find the photo tutorial and full written patterns!
Hello and welcome to my blog!
As usual, I am so happy you are here because today I am sharing a *new* tutorial of one my oldest and dearest patterns – the Crochet Mini Basket!
I originally wrote this pattern back in 2015 and to this day it remains one of my most popular posts.

In reviewing that post a few weeks ago I quickly realized that if I only had the crochet knowledge back then that I have today, I would have approached writing this pattern in a completely different way!
Want all basket sizes in one easy to read PDF? Grab the ad-free printable version here!
As with most skills the more time you put into something and the more you learn you end up finding new and better ways of doing things.
Does that mean that the old pattern is wrong? No. But is there a more simplified and easier way to do it – yes! And that’s what today’s post is!
This post is kind of a long one and I really hope you find it helpful! If you make a mini basket set for yourself, be sure to let me know in the comments below!
What to expect from this post…
In this post I walk you through a series of photos that will show you exactly how to make smallest basket of the Crochet Nesting Mini Basket set!
And below the photo tutorial, you will find the full quick reference written patterns for each of the four sizes shown. To view the photo tutorial and written patterns keep on reading below!
Crochet Nesting Mini Basket Pattern Tutorial
Want to print this pattern? Grab the ad-free printable version here!
*This post may contain affiliate links. Please see my disclosures page for more information.
All patterns on this blog are for personal use only and may not be redistributed, copied, blogged, or sold as your own. You may sell items made by my patterns as long as the item is made by you personally (not mass produced) and that proper credit is given back to me and my site, Just Be Crafty. You may not use my photos for your online sales listings.
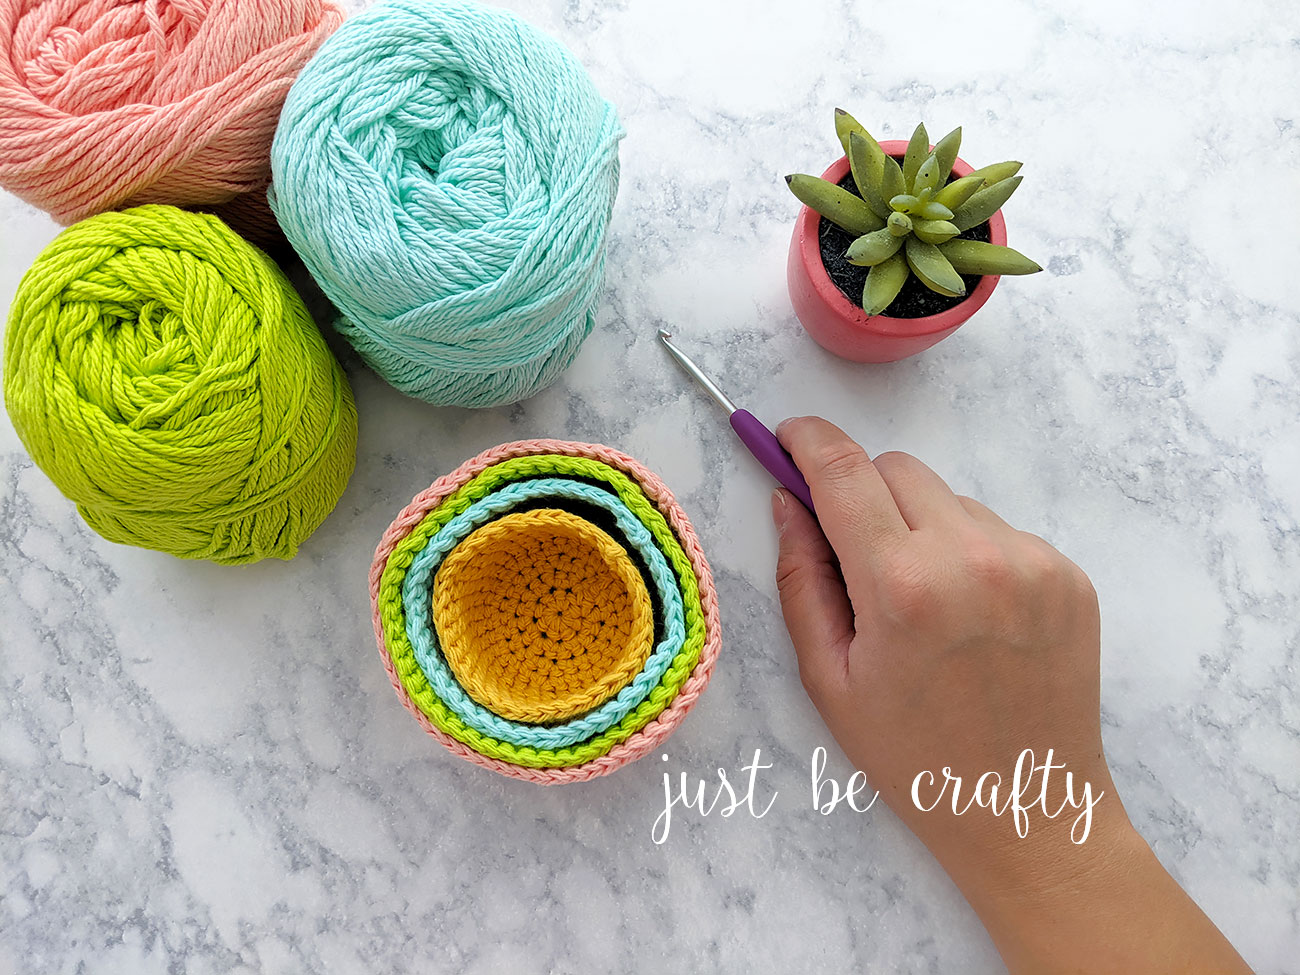
Materials
- Lily Sugar’n Cream 100% cotton yarn 2 oz balls in colors Coral Rose, Beach Glass, Hot Green
- Peaches & Creme 100% cotton yarn 2 oz ball in color gold
- 4.0 mm crochet hook (The hook pictured is part of the luxurious Clover Amour Set that I purchased from Michael’s.)
- Scissors
- Yarn needle
Difficulty
- Intermediated beginner or higher.
Gauge
- 7 rounds of single crochet in a flat circle = approximately 3.25 inches
Abbreviations
- ch – chain
- ea – each
- inc – increase (make 2 sc in same stitch)
- sc – single crochet
- sl st – slip stitch
- st – stitch
Finished Measurements
[table id=2 /]
Crochet Nesting Mini Basket photo tutorial starts here!
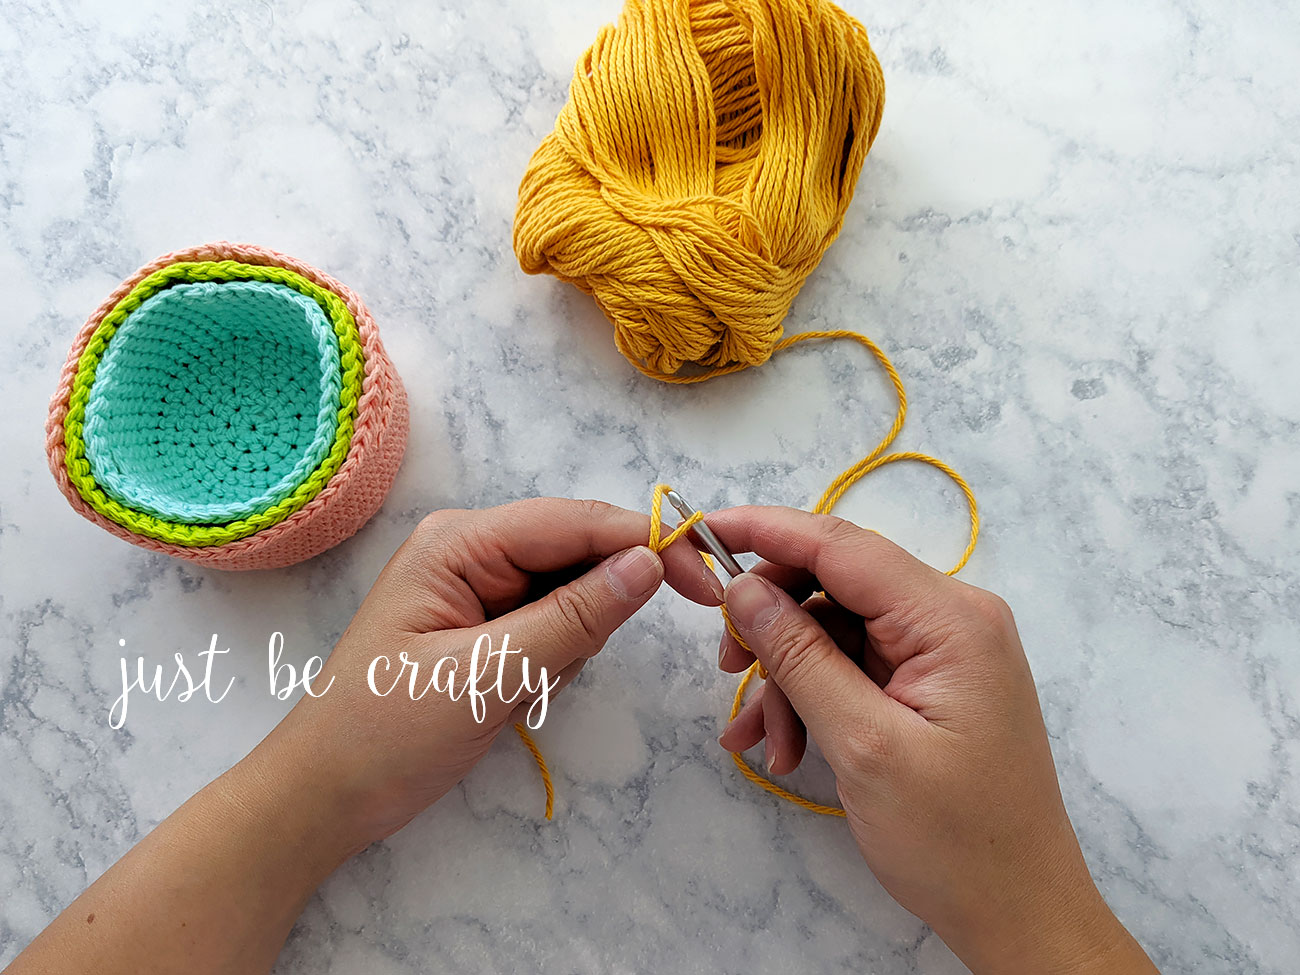
Step 1:
- Start with the magic ring.
Step 2:
- Make 8 sc in the magic ring. Join with 1st st of round using sl st. (8)

Step 3:
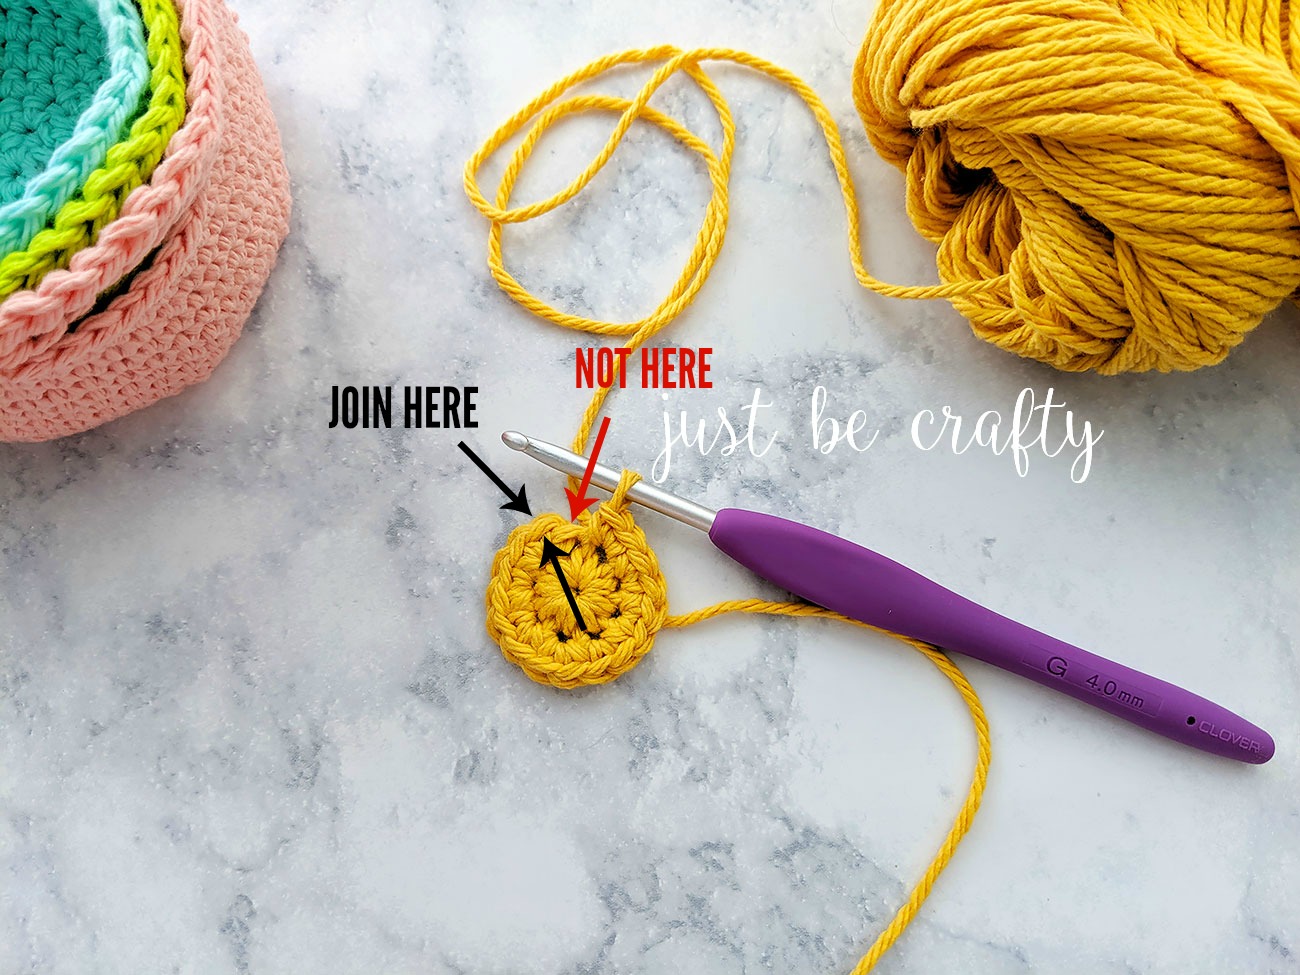
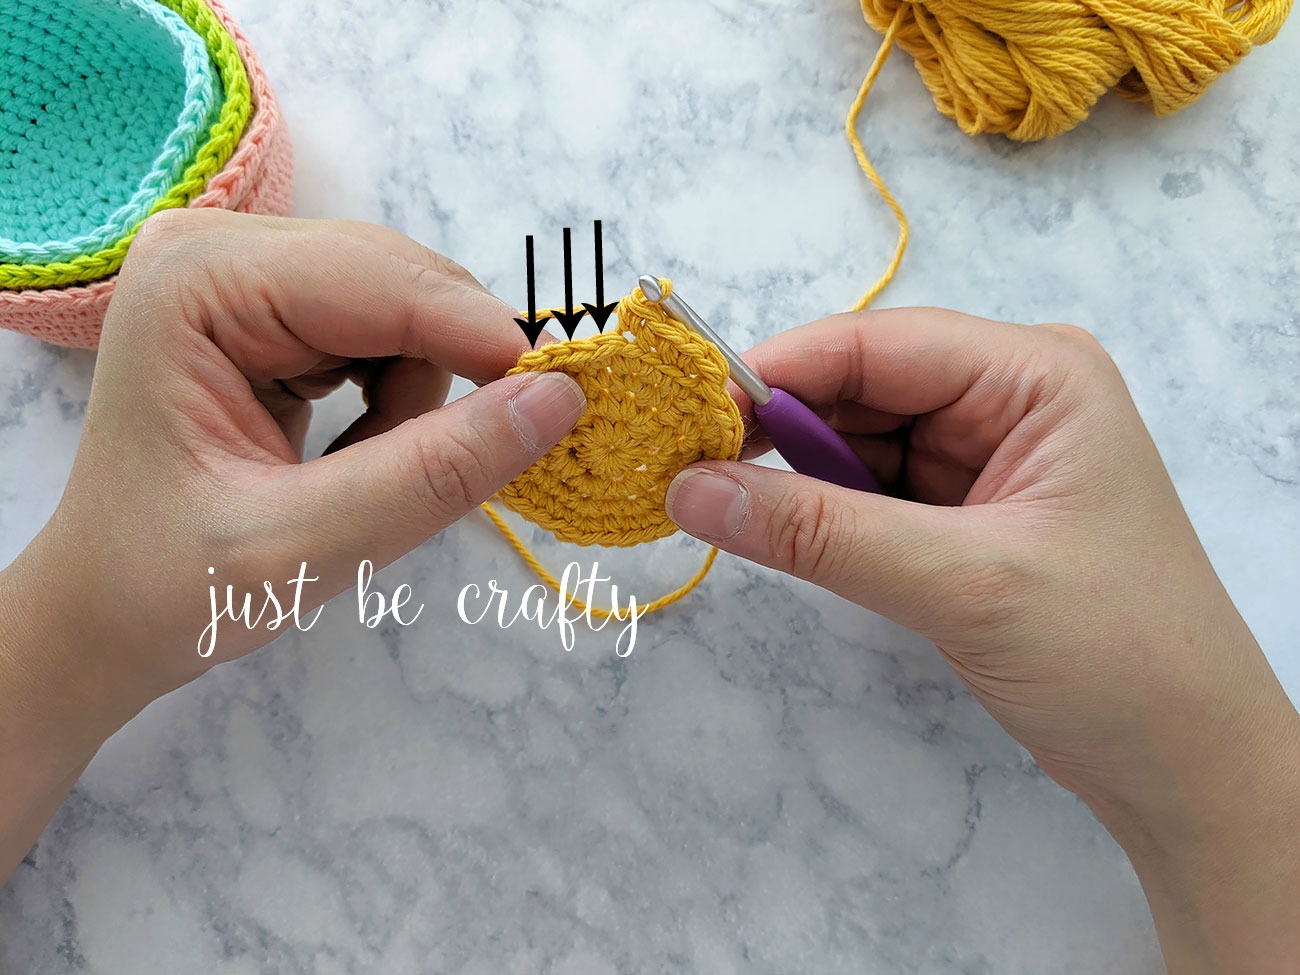
- ch 1, starting in same stitch you just slipped into, make 2 sc in every stitch around. Join with 1st st of the round using sl st. (16)
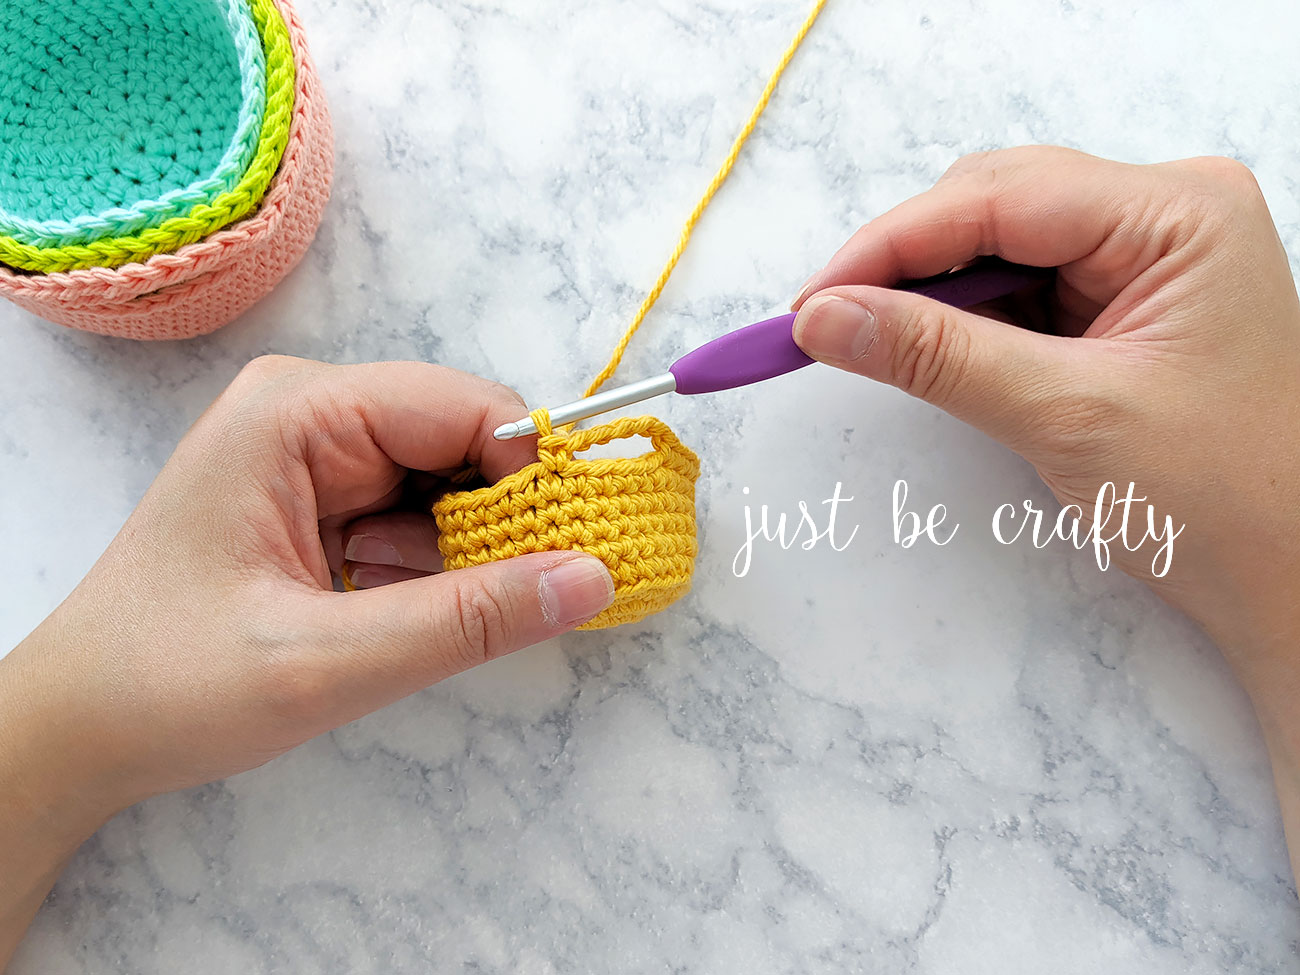
- Photo below shows where you should be making your sl st join!
Step 4:
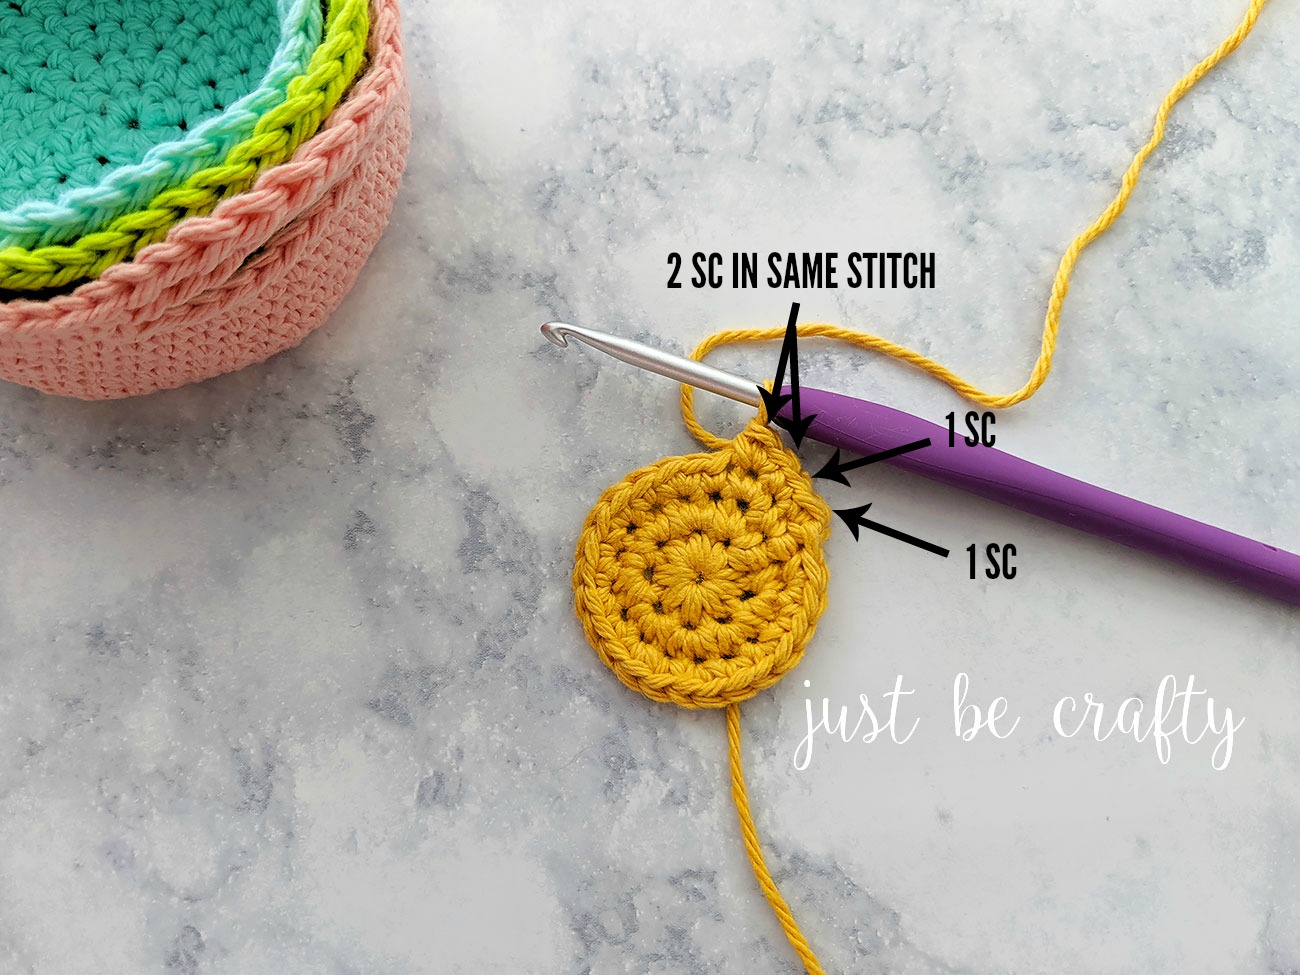
- ch 1, starting in same stitch you just slipped into, make 1 sc, make 2 sc into next st, *sc into next st, make 2 sc into next st; repeat from * to end. (24)
- In other words, you’ll be increasing in every other stitch.

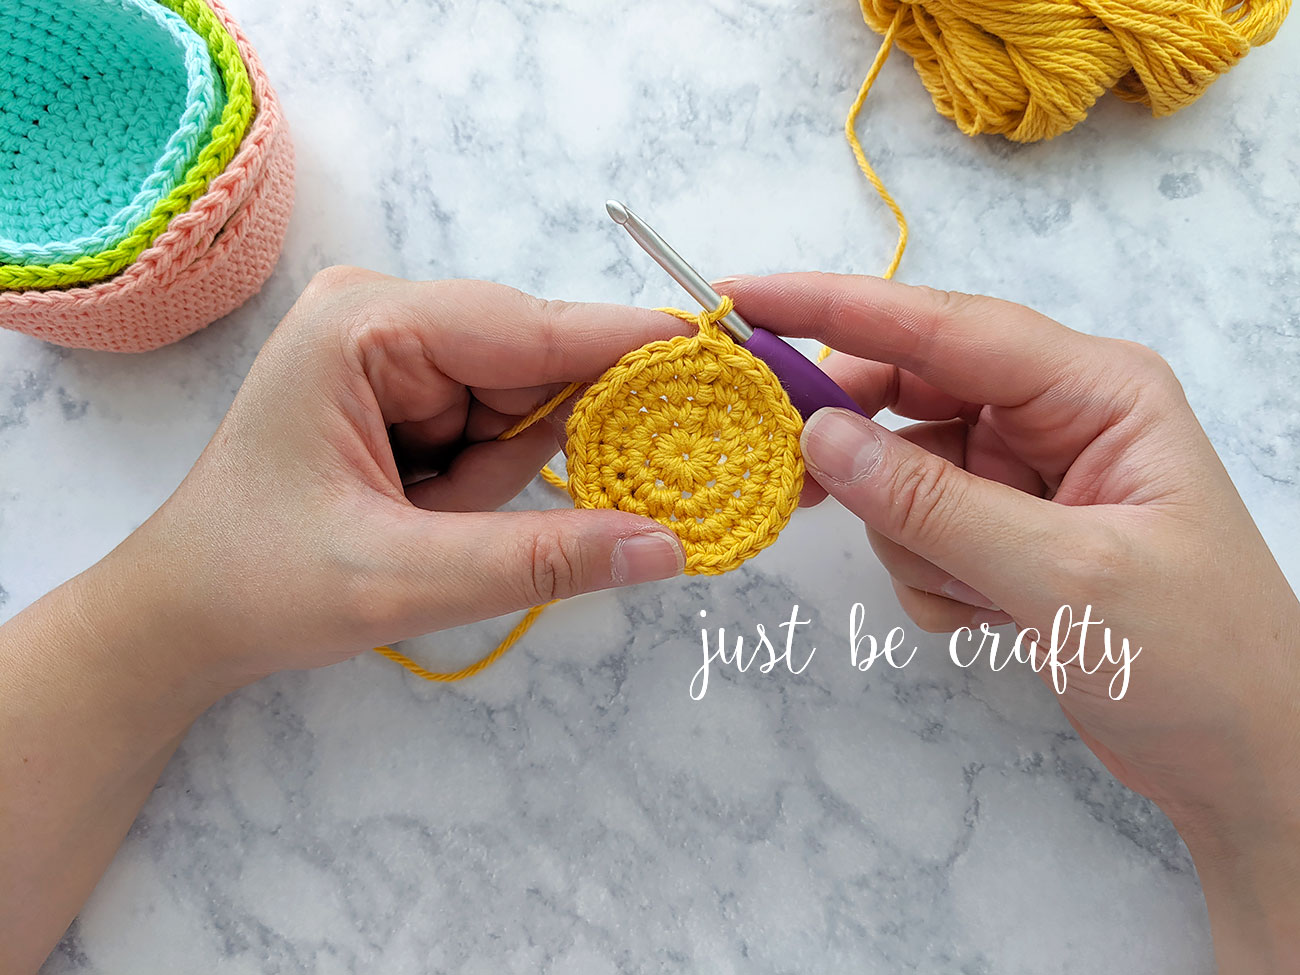
Step 5:
- Join with 1st stitch of round using slip stitch. Use photo below as a guide.

Step 6:
- ch 1, starting in same stitch you just slipped into, make a sc, then sc into next stitch, then make 2 sc into next st, * make 1 sc in ea of the next 2 st, 2 sc in next st; repeat from * until end. (32)
- In other words you’ll be increasing in every 3rd stitch.
Step 7:
- Join with 1st st of round using sl st. Ch 1.
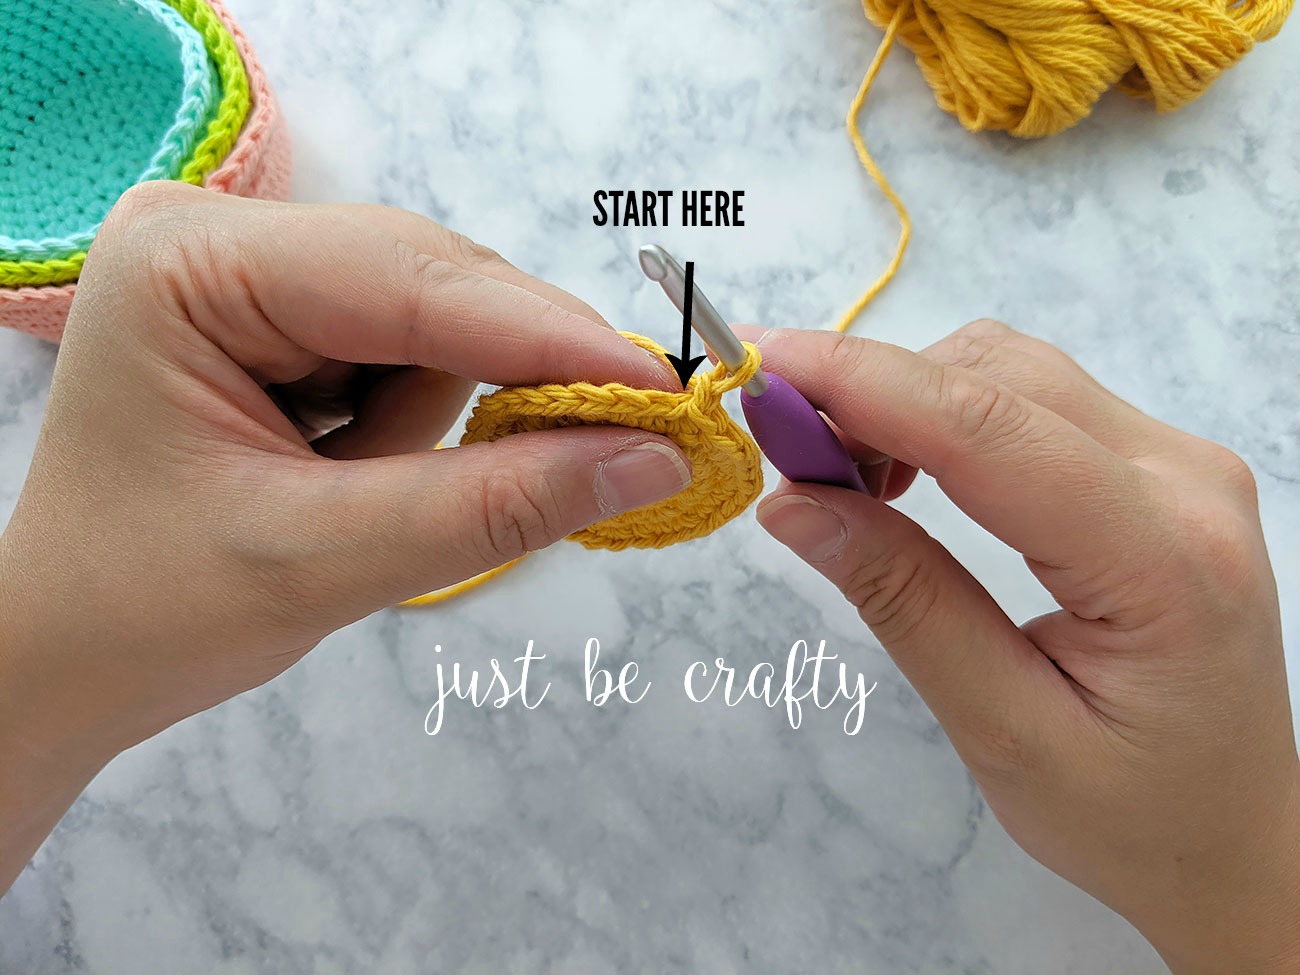
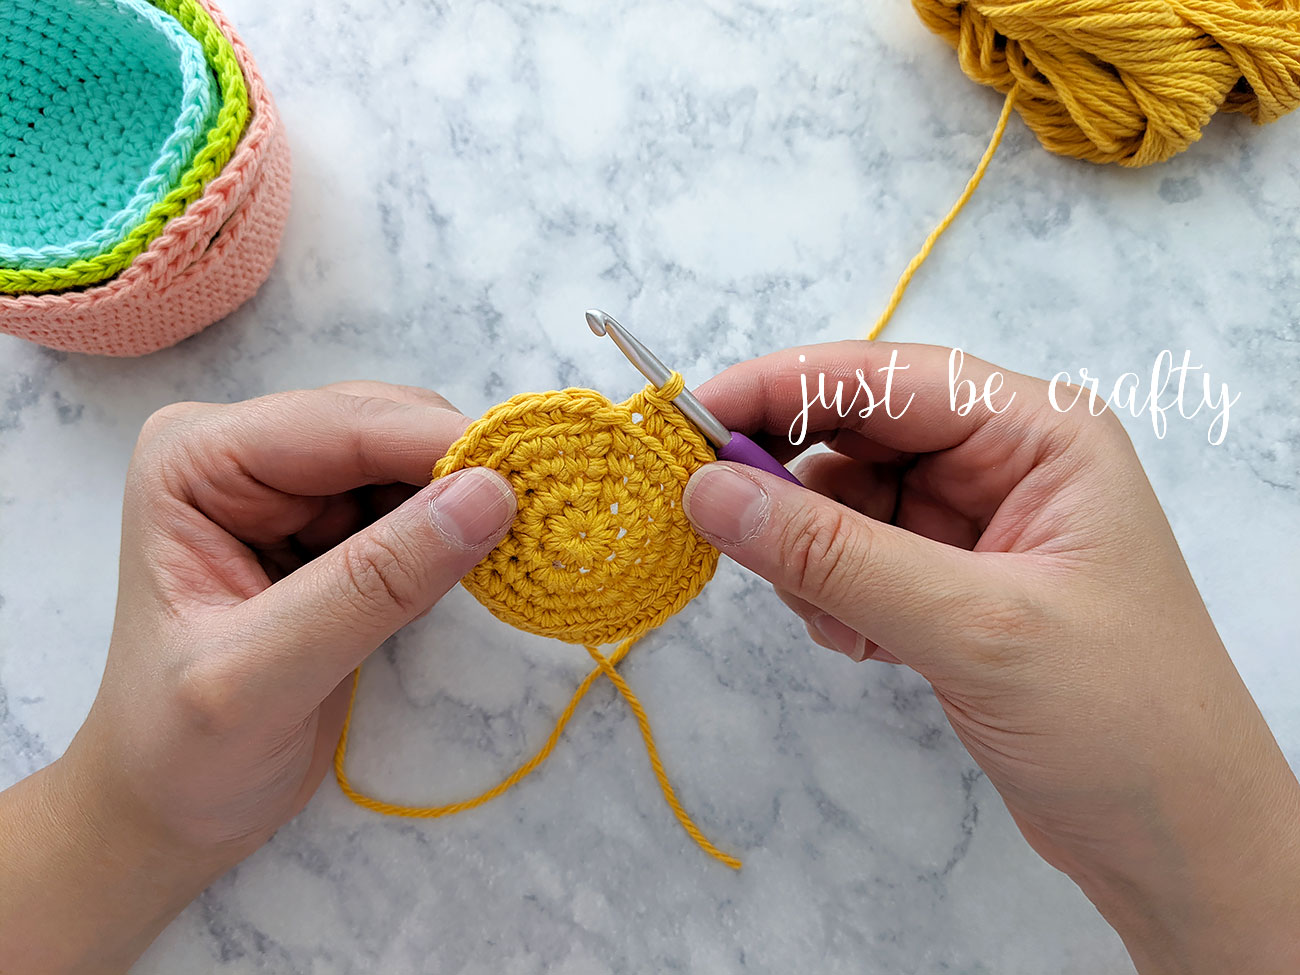
Step 8:
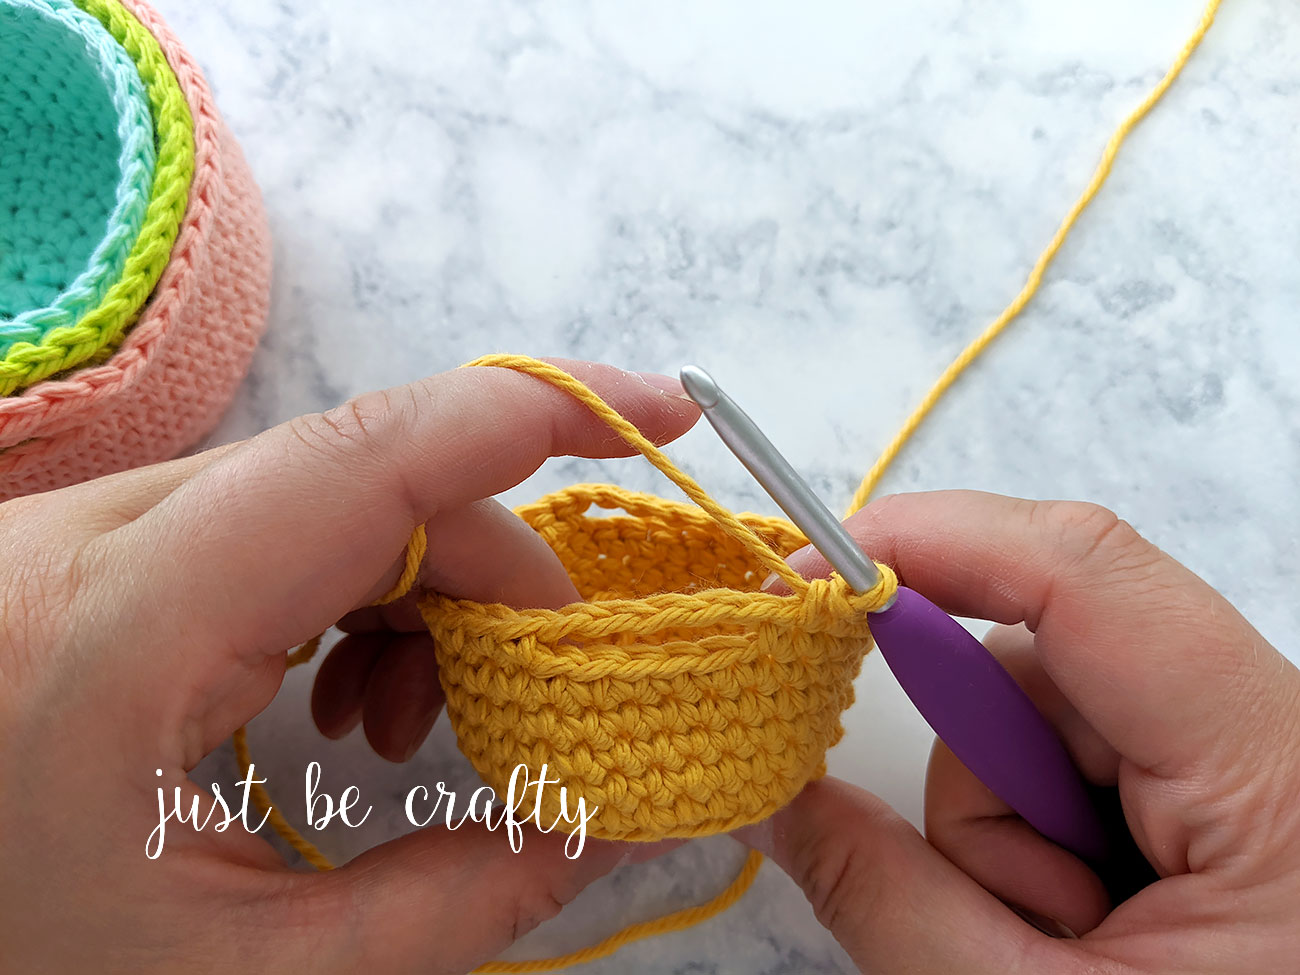
- Starting in the same stitch you just slipped into, sc into the back loop only of each stitch. Use photo below as a guide on where to start.
Step 9:
- Continue making 1 sc in each stitch around in the back loop only.
Step 10:
- Once you’ve made it all the way around, join with 1st st of the round using a sl st. (32)
Step 11:
- Ch 1, starting in same stitch you just slipped into, sc in each stitch around (in both front and back loops) like usual. Join with 1st st of round using sl st. (32)
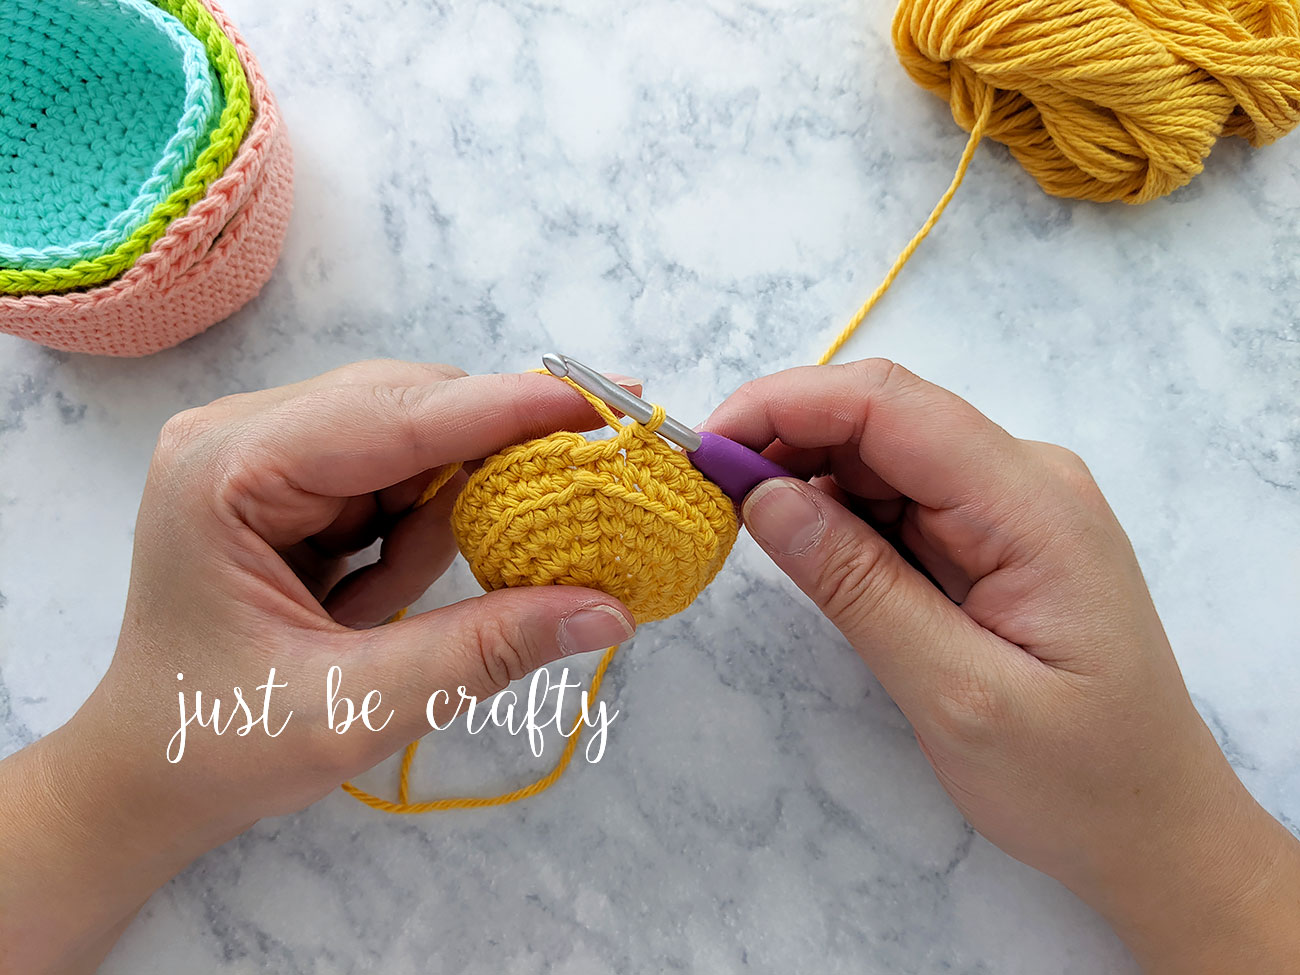
Step 12:
- Repeat step 11 three more times.
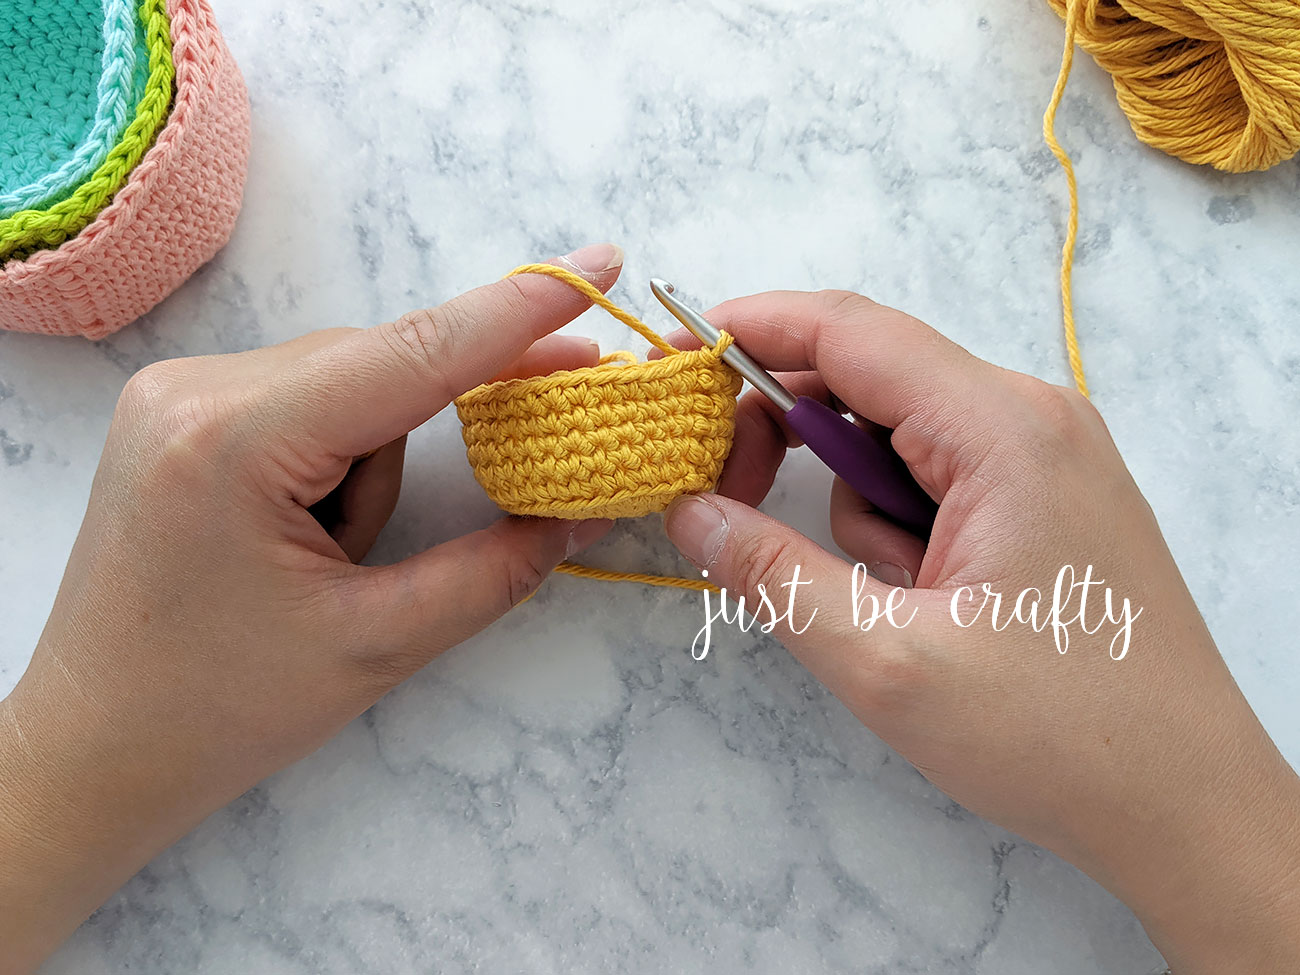
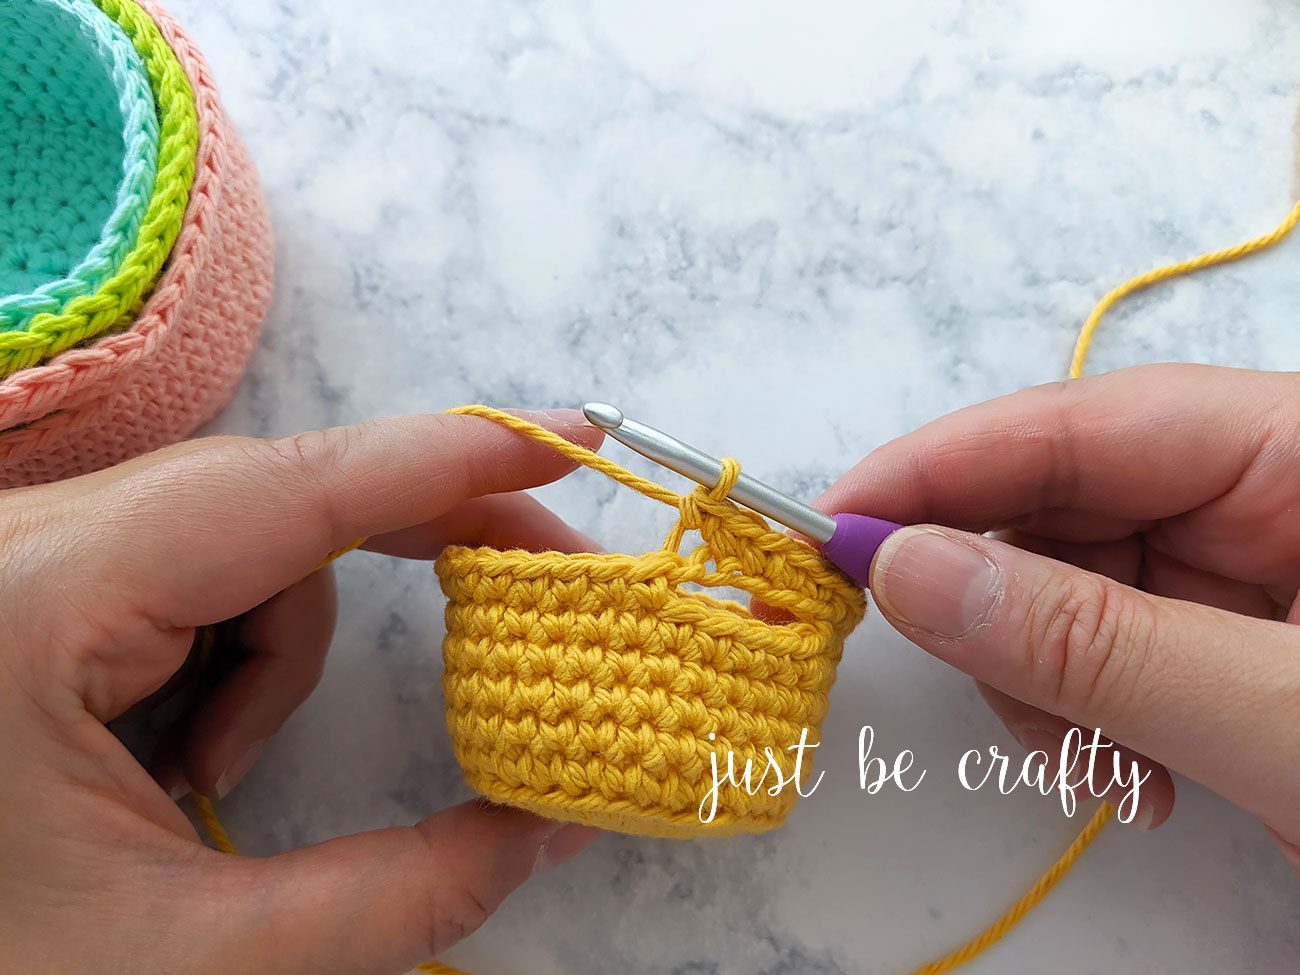
Step 13:
- Ch 1, starting in the stitch you just slipped into, sc in each of the next 6 st. Ch 5.

Step 14:
- Skip 5 stitches and make a sc in next stitch, taking care to not twist your chain (or your handles will be twisted)!
Step 15:
- sc in next 10 stitches, ch 5, sk 5 stitches and sc in next stitch, sc in each st to end of round. Join with 1st st of round using sl st.

Step 16:
- Ch 1, starting in same stitch you just slipped into, sc in each st around.
Step 17:
- Once you reach your first handle, sc in each of the 5 handle chains, sc around to other handle.

Step 18:
- Sc in each of these handle chains too. Continue to sc in each st around. Join with 1st st of round using sl st.
Step 19:
- Cut yarn and pull tail through the loop on your hook.

Step 20:
- Pull tight to secure!
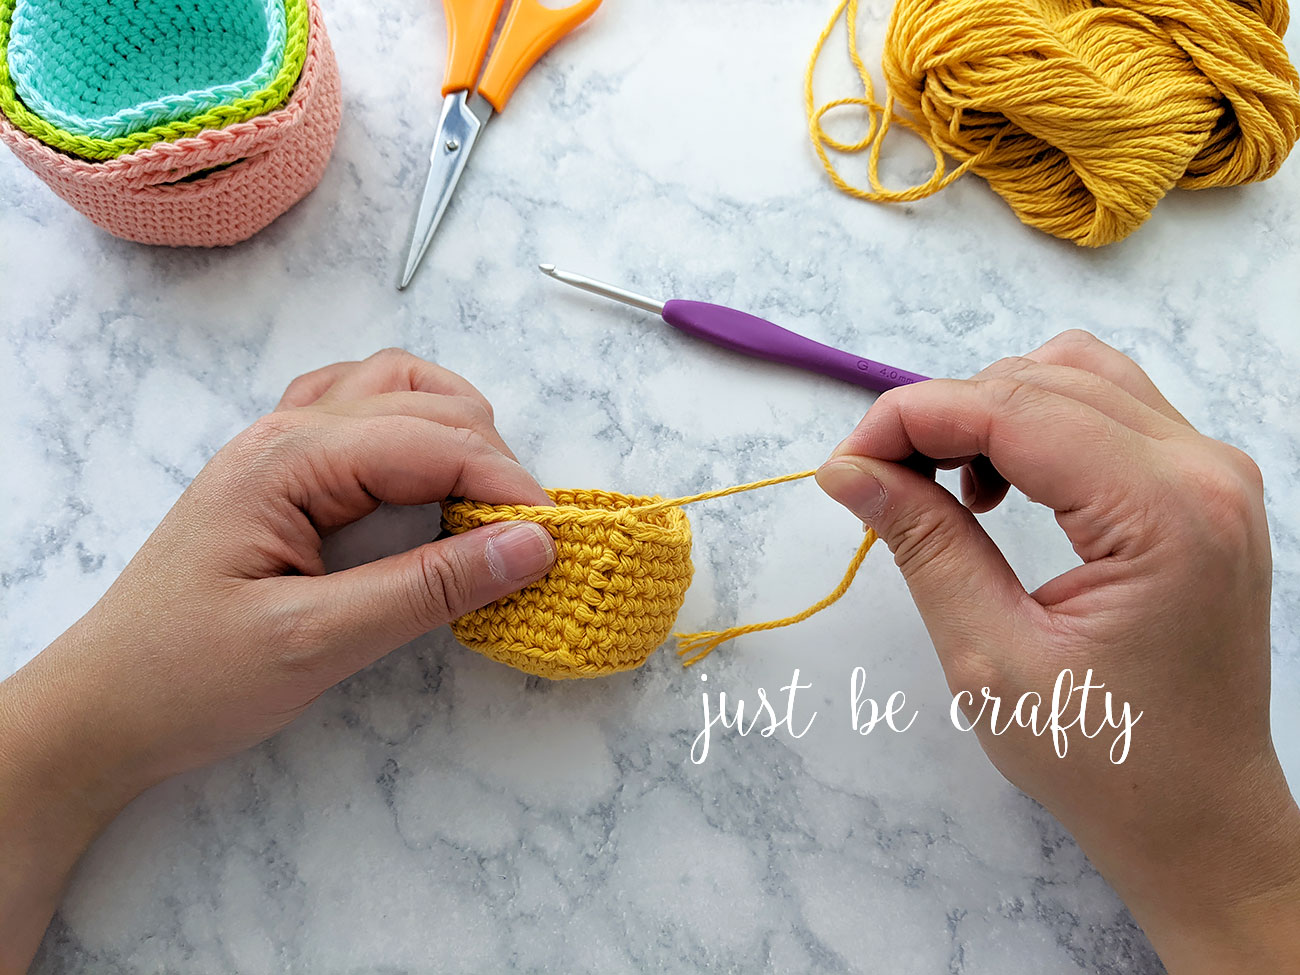
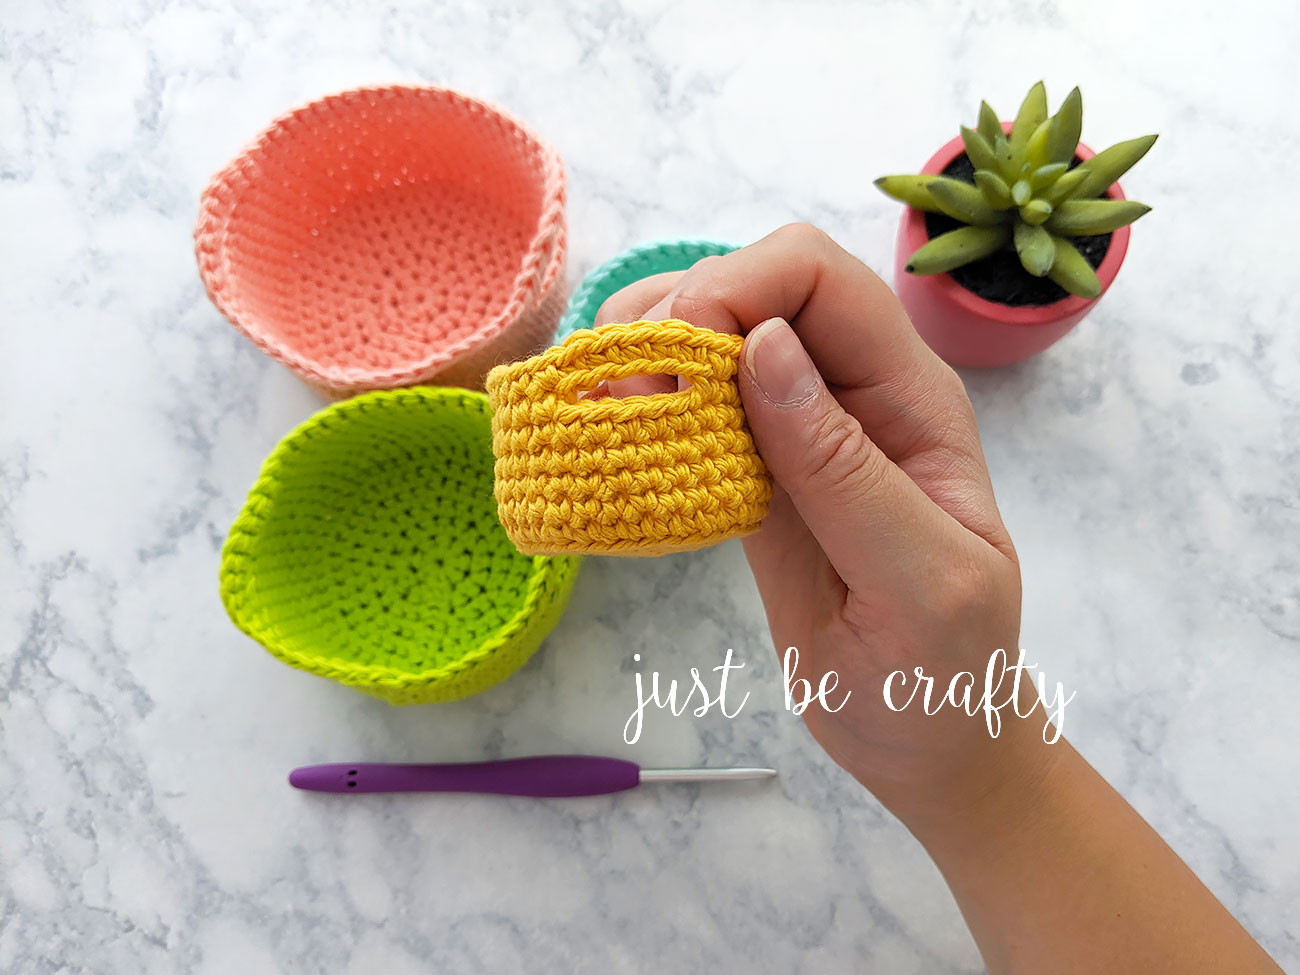
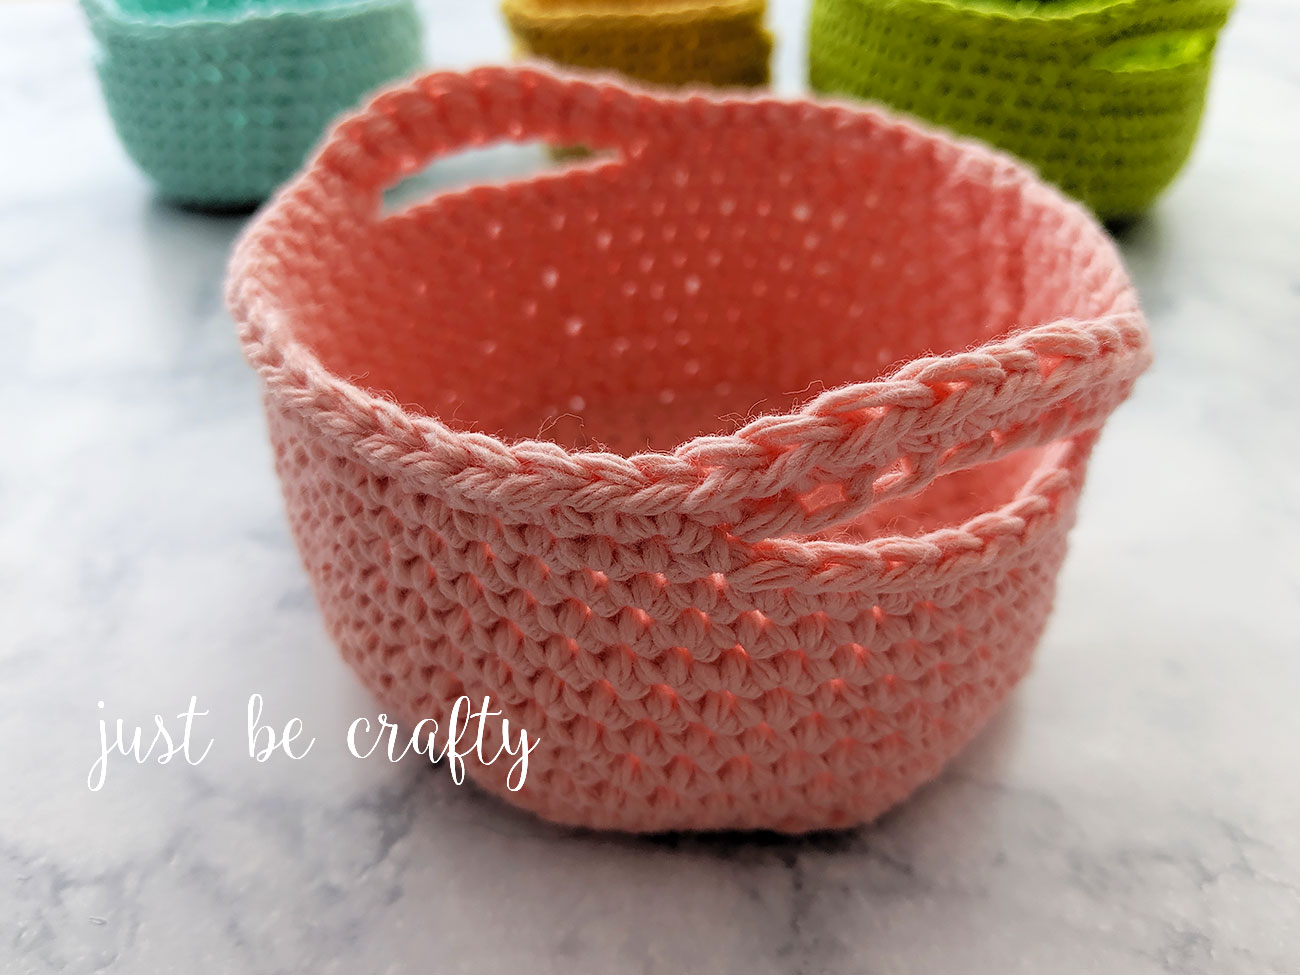
Step 21:
- Weave in all ends. Yay! You’ve just made the smallest basket of this mini nesting set!
- Use these steps for reference when making the larger sizes. Note: As each basket gets larger you will have more rounds and higher stitch counts.
To see the written patterns for all four sizes, keep scrolling below!

Want all basket sizes in one easy to read PDF? Grab the ad-free printable version here!
Crochet Nesting Mini Basket Written Patterns
NOTE (for all sizes):
- You will begin each round with a ch 1 (the ch 1 will not count as a stitch).
- You will be making single crochets in each stitch around, and the pattern will tell you which stitches to make your increases.
- At the end of each round, you will join with the 1st stitch of the round using sl st.
Largest Crochet Nesting Mini Basket
Round 1: Make 8 sc in magic ring (8)
Round 2: inc in every stitch around (16)
Round 3: inc in every 2nd stitch around (24)
Round 4: inc in every 3rd stitch around (32)
Round 5: inc in every 4th st around (40)
Round 6: inc in every 5th st around (48)
Round 7: increase in every 6th stitch around (56)
Round 8: in back loop only, sc in each st around (56)
Rounds 9 – 15: sc in each stitch around (in both loops)
Round 16: sc in next 10, ch 8, sk 8 stitches, sc in next 20 st, ch 8, sk 8 st, sc in next 10.
Round 17: sc in each st and handle ch around.
Cut yarn and secure. Weave in ends!
Medium Crochet Nesting Mini Basket
Round 1: Make 8 sc in magic ring (8)
Round 2: inc in every stitch around (16)
Round 3: inc in every 2nd stitch around (24)
Round 4: inc in every 3rd stitch around (32)
Round 5: inc in every 4th st around (40)
Round 6: inc in every 5th st around (48)
Round 7: in back loop only, sc in each st around (48)
Rounds 8 – 13: sc in each stitch around (in both loops)
Round 14: sc in next 9, ch 7, sk 7 stitches, sc in next 17 st, ch 7, sk 7 st, sc in next 8.
Round 15: sc in each st and handle ch around.
Cut yarn and secure. Weave in ends!
Small Crochet Nesting Mini Basket
Round 1: Make 8 sc in magic ring (8)
Round 2: inc in every stitch around (16)
Round 3: inc in every 2nd stitch around (24)
Round 4: inc in every 3rd stitch around (32)
Round 5: inc in every 4th st around (40)
Round 6: in back loop only, sc in each st around (40)
Rounds 7 – 11: sc in each stitch around (in both loops)
Round 12: sc in next 7, ch 6, sk 6 stitches, sc in next 14 st, ch 6, sk 6 st, sc in next 7.
Round 13: sc in each st and handle ch around.
Cut yarn and secure. Weave in ends!
Smallest Crochet Nesting Mini Basket
Round 1: Make 8 sc in magic ring (8)
Round 2: inc in every stitch around (16)
Round 3: inc in every 2nd stitch around (24)
Round 4: inc in every 3rd stitch around (32)
Round 5: in back loop only, sc in each st around (32)
Rounds 6 – 9: sc in each stitch around (in both loops)
Round 10: sc in next 6, ch 5, sk 5 stitches, sc in next 10 st, ch 5, sk 5 st, sc in next 6.
Round 11: sc in each st and handle ch around.
Cut yarn and secure. Weave in ends!


Thank you so much for this pattern! I can do this! Bless you for sharing!
Sharon A Maxwell
I love the details and photos you put into the pattern. Can’t wait to try it!
Thank you so much! 🙂
I did it! Just relearning crochet and your instructions are so easy to follow. I’m going to make a couple more right away.
Oh good, I’m so glad you found the pattern easy to follow! These baskets are totally addicting once you get started!
These are adorable! Would they be as sturdy if I used an acrylic worsted weight yarn instead of the cotton? Thanks 🙂
Hi Kate!
They should be! You would just want to make sure that you are a using a hook that is 1 – 2x smaller than the recommended hook for your particular yarn. Tight stitches are what will make the basket more sturdy! Happy crocheting!
Hi,
I really love these baskets and the photo’s you made look very useful. Thank you for sharing it. I just have the problem I can’t make it without a video.. Are you going to make a video of it in the future? I would really like to make it then!!!
Thank you!
What a fun and quick project! Found this pattern and used it to teach my 13 year old neighbor to crochet as a rewarding end result of the learning process. Seems to be working well 🙂 I myself have learned during quarantine and this is such a pleasant little workup that I am indeed obsessed – made 3 in a row of previous pattern and now see the updated pattern set of 4 so probably gonna make another size with this update. Love that you redid pattern to format I am more used to! not much difference but…… consistency doesn’t hurt for us newbies. Thank you very much for sharing your time and talent!!!!
Hi Brittany,
Thank you for the free pattern. I made a set of 3 nesting mini baskets today. I used Easter pastel colors, a medium worsted weight (4) yarn, and size G/6 – 4.25mm hook. They are adorable! Thanks again.
Hi Merrie! They sound lovely! I’m so glad you enjoyed the pattern!
Hi Brittany,
I found your site when looking for mini baskets to crochet. It was exactly what I was looking for! Your instructions were very easy to follow and they came out beautifully. I’ll definitely be making more for gifts at Christmas and of course for myself as well. I look forward to more projects you wish to share. Stay safe, Be well. Diane
These are perfect for what I’ve been needing in my bathroom for eye shadow. Can’t wait to try them. Thank you so much!
Enjoy!!
Great pattern (and website in general—this is my first crochet project EVER and I had to refer to each of your instructions on how to do every kind of stitch as well 😂)!!
Question: why join every round instead of just doing it continuously with a stitch marker? Would it work to do it continuously as well??
I’m a beginner at crochet (have always been a knitter) and have just finished your small nesting basket. The instructions were easy to follow and I found the photos very helpful. My only concern is that the basket does curl inwards a little at the top – this is not a problem as it still looks ok, but I was wondering if I’m doing anything wrong. I don’t think I’m crocheting tightly as my knitting has always been fine.