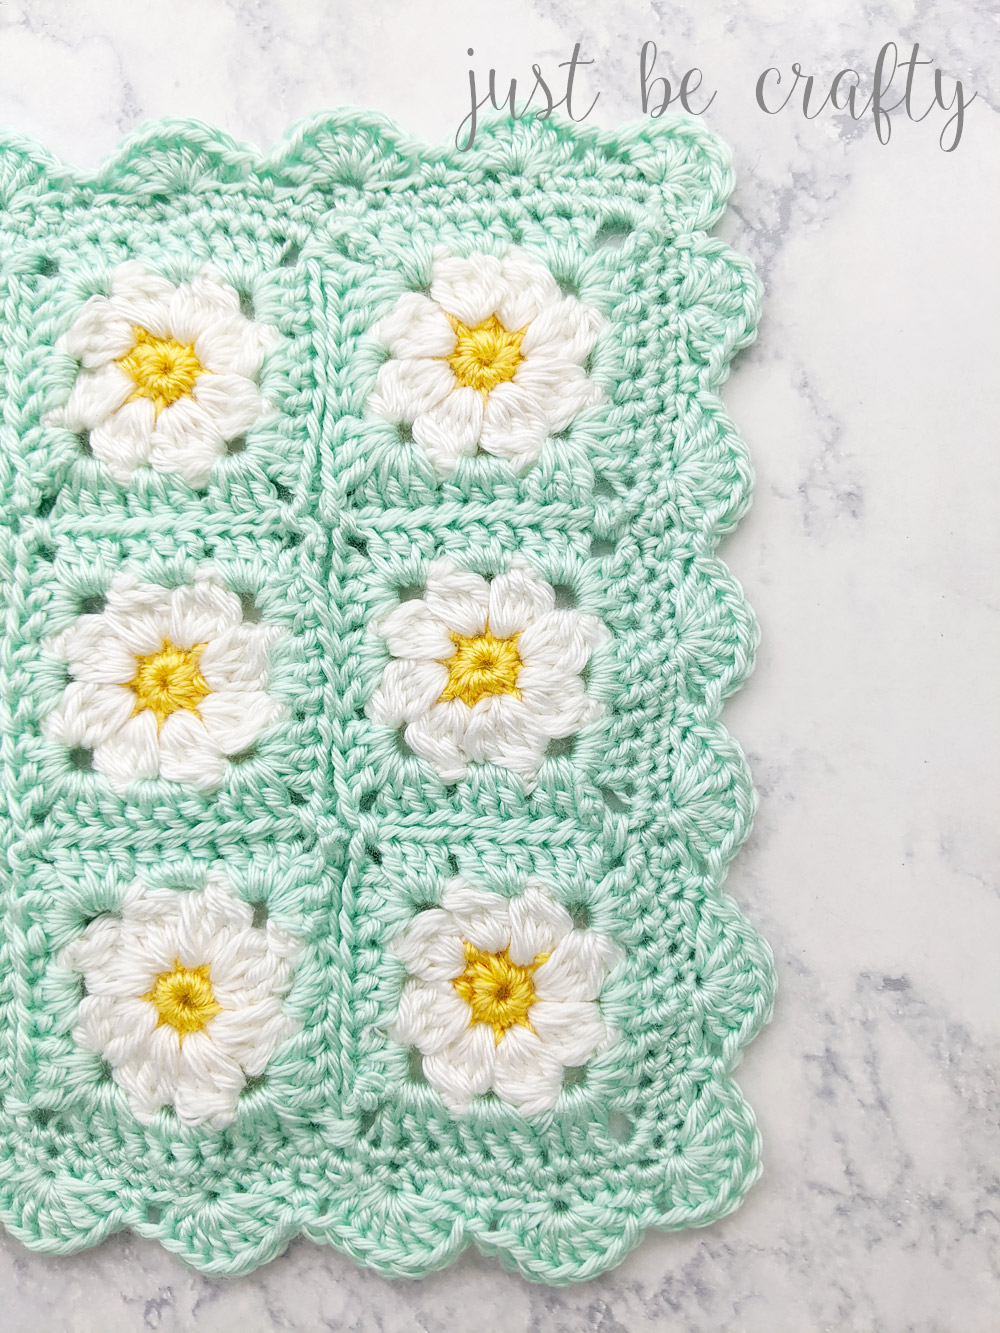
If you’ve been making my Dainty Daisy Granny Squares and are ready to turn them into a blanket—this post is for you! In this step-by-step tutorial, I’ll show you exactly how to join your squares together and finish your blanket with a soft, scalloped border.
This method uses a flat slip stitch seam and simple crochet stitches—perfect for beginners or anyone looking for a clean, flexible join.
- Watch the full video tutorial below (keep on scrolling!)
- Get the ad-free, printable PDF pattern here: Grab the printable pattern
- Haven’t made your squares yet? Click here for the full daisy square pattern + tutorial.
Today’s post is highly requested and way long overdue! You’ve asked and I’m finally sharing – how to join your squares to make a Dainty Daisy Granny Square Blanket! I’ve also tacked on a simple tutorial on how to add a scalloped border for a finishing touch!
For all the information you’ll need to join your squares and finish your blanket, keep reading below.

This post contains affiliate links. For more information please see my disclosures page.
Prefer to Print Your Patterns?
If you prefer to print and want the whole pattern in one easy place (from making the squares to assembly), Grab the PDF version of the Dainty Daisy Granny Square Blanket Pattern here!
Save for Later!
Love this pattern, but don’t have time to crochet it now? Save on Pinterest to make later!
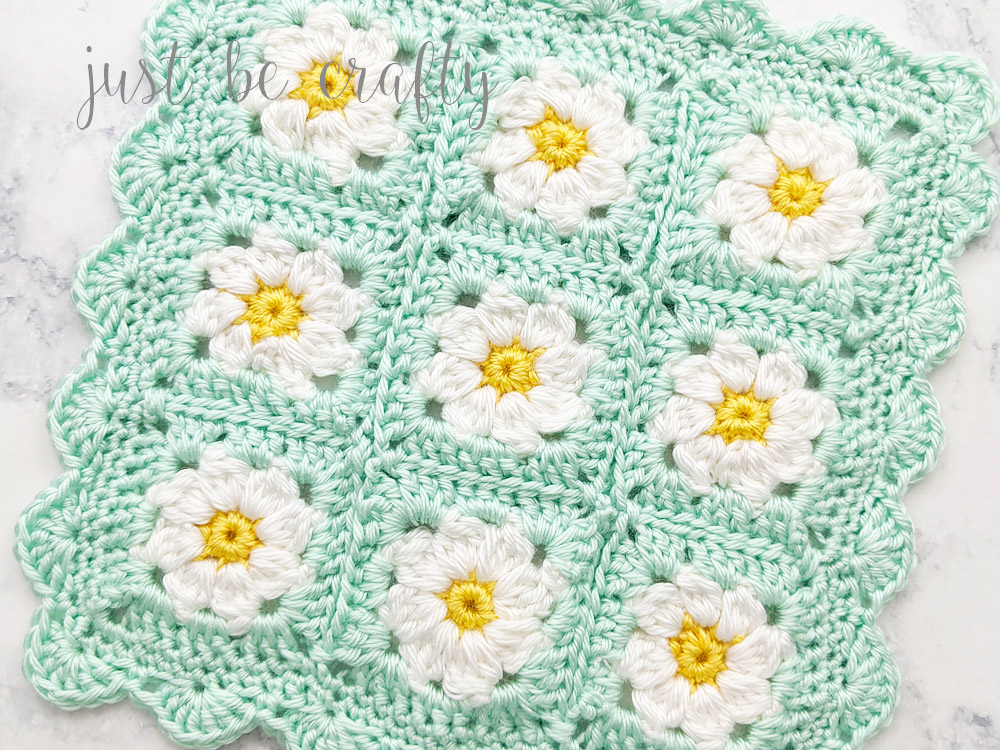
The Dainty Daisy Granny Square Blanket
Materials
- Caron Simply Soft in colors Sunshine, Soft Green and White. See below for amounts.
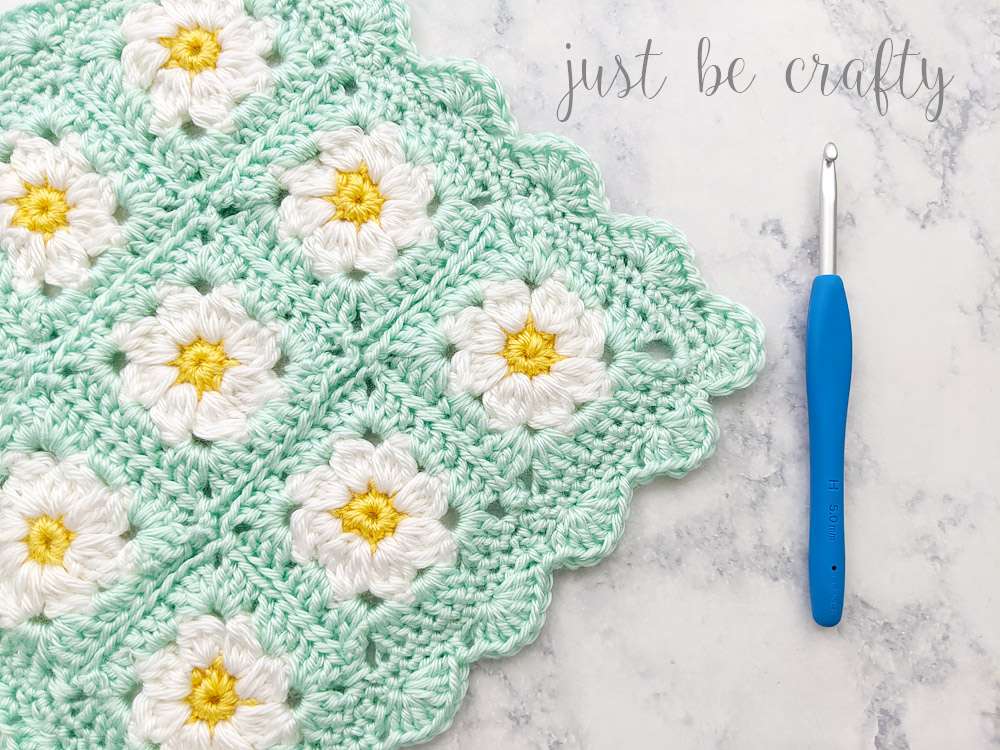
- Hook – 5.0 mm
New to crochet? Learn about all the tools you need to get started, plus get a FREE printable checklist. Click here to learn more!
Common Blanket Sizes & Layout
*Measurements do not include the scalloped blanket border.

Each square measures to about 2.5 inches by 2.5 inches. I know the above square counts seem rather large, but these tiny squares whip up so fast!
Visual Learner? Watch the video tutorial!
To join your squares check out my video tutorial or see the written instructions below!
How to Join Dainty Daisy Granny Squares Into a Blanket
Visualize how you want your blanket to look. With the front sides facing up, arrange your squares flat out in front of you in the exact way you would like your blanket.
Tip: You may want to snap a photo to reference as you piece your blanket together.
Joining Vertically
We are going to start by joining all of the vertical rows of the Dainty Daisy Granny Square Blanket first.
Vertical Row 1:
Take the rightmost column of squares and flip each one over onto the square to the immediate left with the wrong sides facing out.
Rotate 90 degrees to the left, and line up your stitches.
Starting with the right most squares – make a slip knot. Insert your hook into the corner space of both your first two lined up squares. Slide the slip knot onto your hook from the back and then chain one to join together.
Make 1 single crochet in the same corner space.
Next, with your stitches lined up, slip stitch the outer loops of the squares together.
Keep slip stitching across the row catching only the outer loops.
Once you reach the next corner space, make 1 single crochet in that corner space. Grab your next two squares. Line up those stitches as well.
Make 1 single crochet into the ch space.
Repeat the process of slip stitching the squares together catching the outer loops of both layers only.
Keep repeating this process through until the end of your last two squares of the row.
Cut yarn and secure.
Open your work. We are now ready to work on our next vertical row.
Vertical Row 2:
Grab your next vertical row of squares and line them up to the left of your joined piece. Flip each square over onto the square of it’s immediate right. Wrong sides should be facing out.
Rotate your wowork 90 degrees to the right. We will be working from right to left.
Next, with your stitches lined up, slip stitch the outer loops of the squares together.
Keep slip stitching across the row catching only the outer loops.
Once you reach the next corner space, make 1 single crochet in that corner space. Grab your next two squares. Line up those stitches as well.
Make 1 single crochet into the ch space.
Repeat the process of slip stitching the squares together catching the outer loops of both layers only.
Repeat process until the end of your last two squares of the row.
Cut yarn and secure.
Open your work. We are now ready to work on our next vertical row.
Repeat steps of Vertical Row 2 for all remaining vertical rows.
Open your work. We are now ready to join our horizontal rows.

Joining Horizontally
Lay your blanket flat out in front of you with the right side facing up.
We will now be working from top to bottom.
Take your top horizontal row and flip it down on top of the second horizontal row. The right sides of your top two horizontal rows should be touching.
Working from right to left, begin with your slip knot and join your first squares together with a ch1 and sc in that same ch space.
Line up your stitches and slip stitch the outermost loops together. Once you reach the chain space areas that were already joined together vertically, make a chain 2 and skip over that space and continue on to your next squares.
Continue slip stitching the outer loops of the squares together.
Repeat this process across the row.
Once you reach the last squares of the row, make a single crochet in the last chain space.
Cut yarn and secure.
You will continue working in this fashion by folding the horizontal rows inward so the right sides face each other.
Repeat above steps for all remaining horizontal rows.
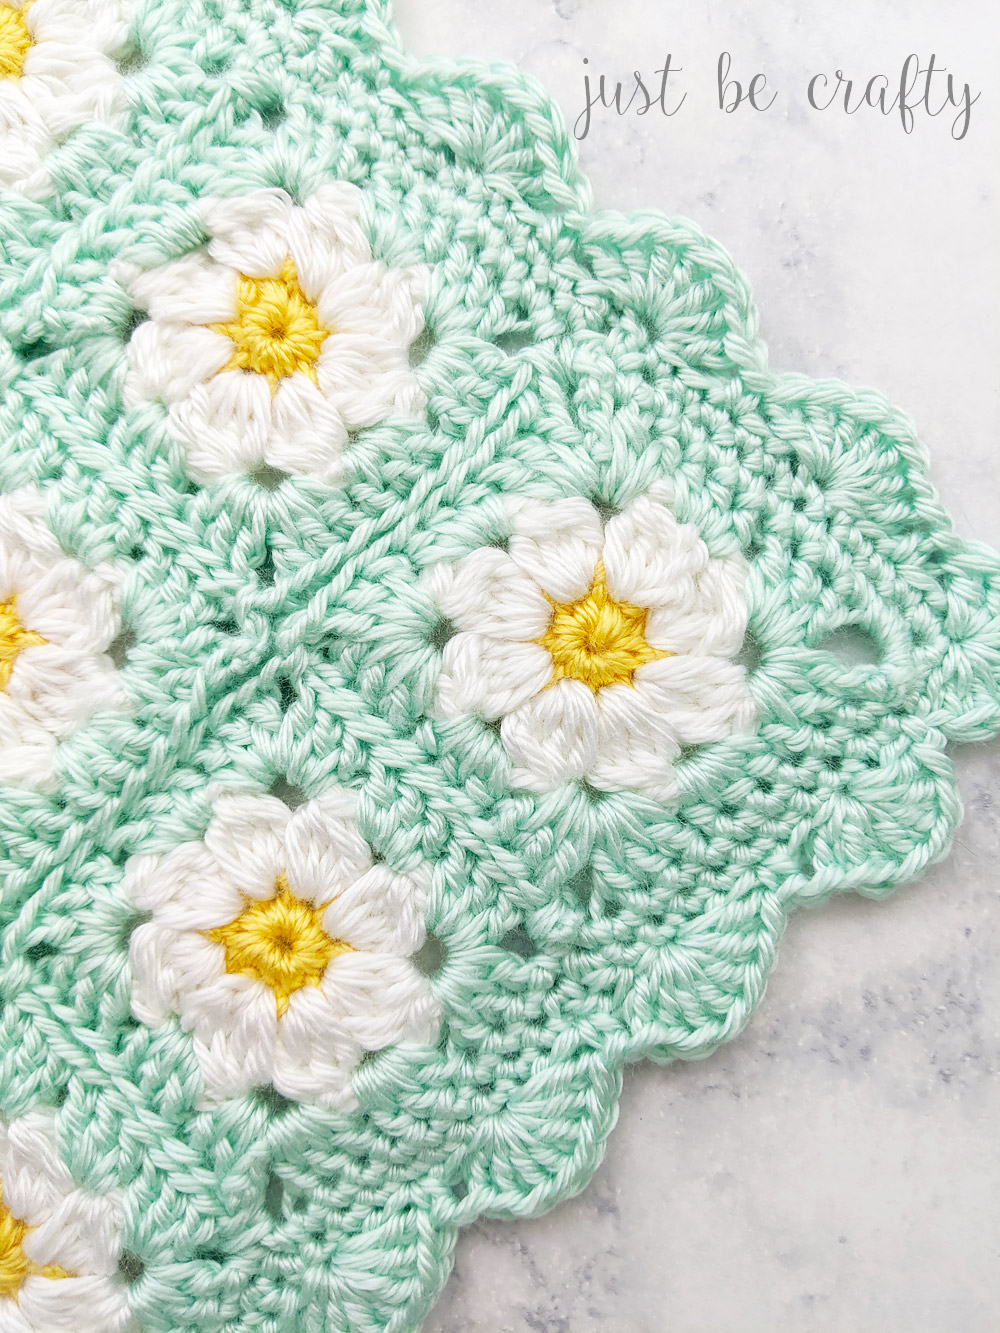
How To Add A Scalloped Border
Round 1: Starting in any corner, ch 1 and make 3 single crochets in that same corner space. Single crochet across your edge making 1 sc in each stitch. Make 1 sc in each ch space. Keep repeating around, making 3 sc in each of the three remaining blanket corners.
Join with the first stitch of the round using a slip stitch.
You may notice that your edging is not smooth in the areas where the squares are joined where it bows inward a bit. To fix this, you can add an additional round of single crochets, but make double crochets in the stitches over your chain spaces.
If a double crochet seems too high, you can try using half double crochets instead. You’ll see that by adjusting your stitches, it will straighten out that edge.
If you do not have this problem make the entire round single crochets.
Round 2: Repeat another round of single crochet making 3 single crochets in each corner, and double crochets in the stitches over your square joins. At end of round do not join.
Round 3: Sk 2 stitches, make 7 dc’s in the next stitch, *sk 2 stitches, sc in next stitch Sk 2 stitches, make 7 dc’s in the next stitch; repeat from * to the end of the round.
Scallop Edge Note: You may not have the exact stitch count left at the end of the round and that’s ok. Adjust as you need to.
Cut your yarn and secure.
Weave in your ends.
Looking for more granny square fun? Check out the Circle To Square Granny Square Pattern!
🧶 Tag me on Instagram @justbecraftyblog if you make this. I love seeing your daisy blankets in the wild!
Enjoy!
Love this pattern?