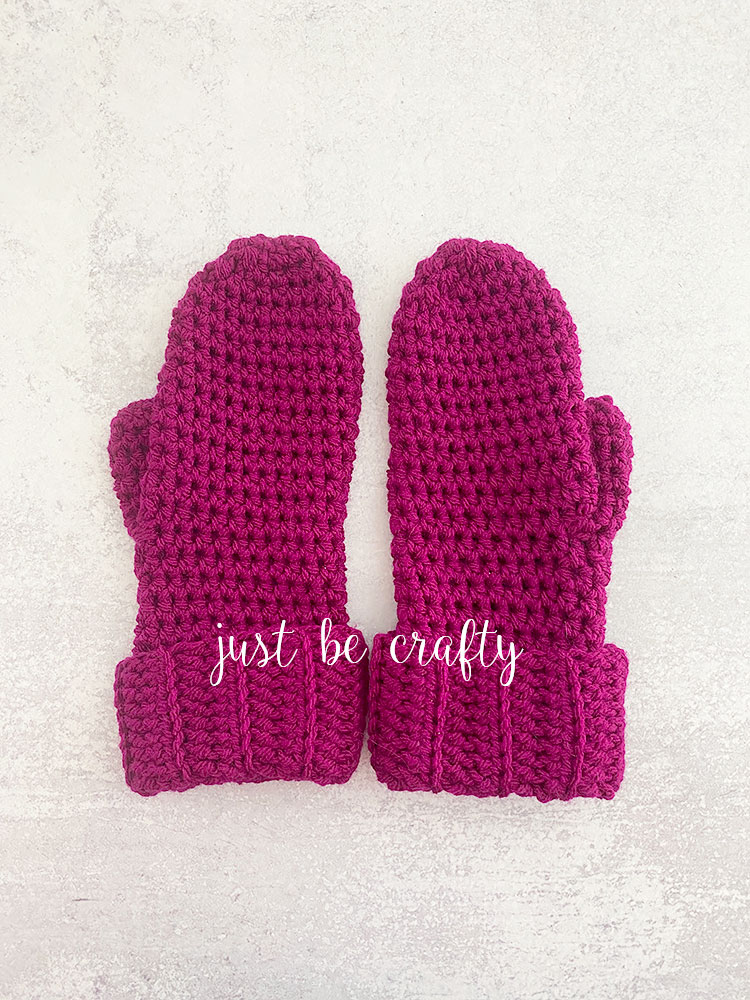
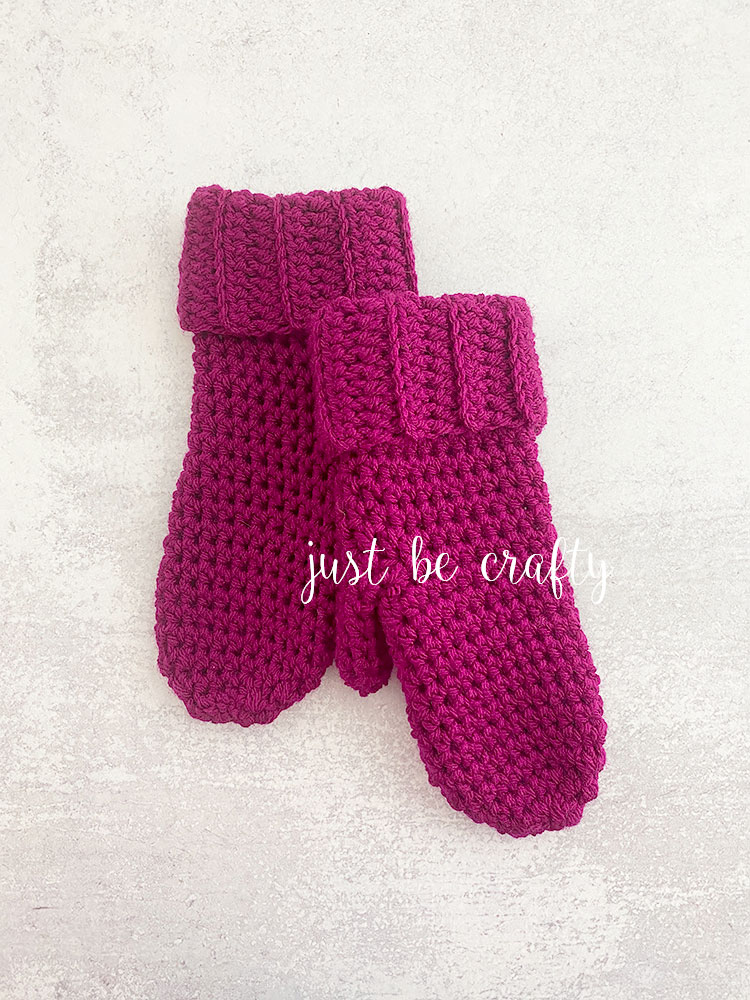
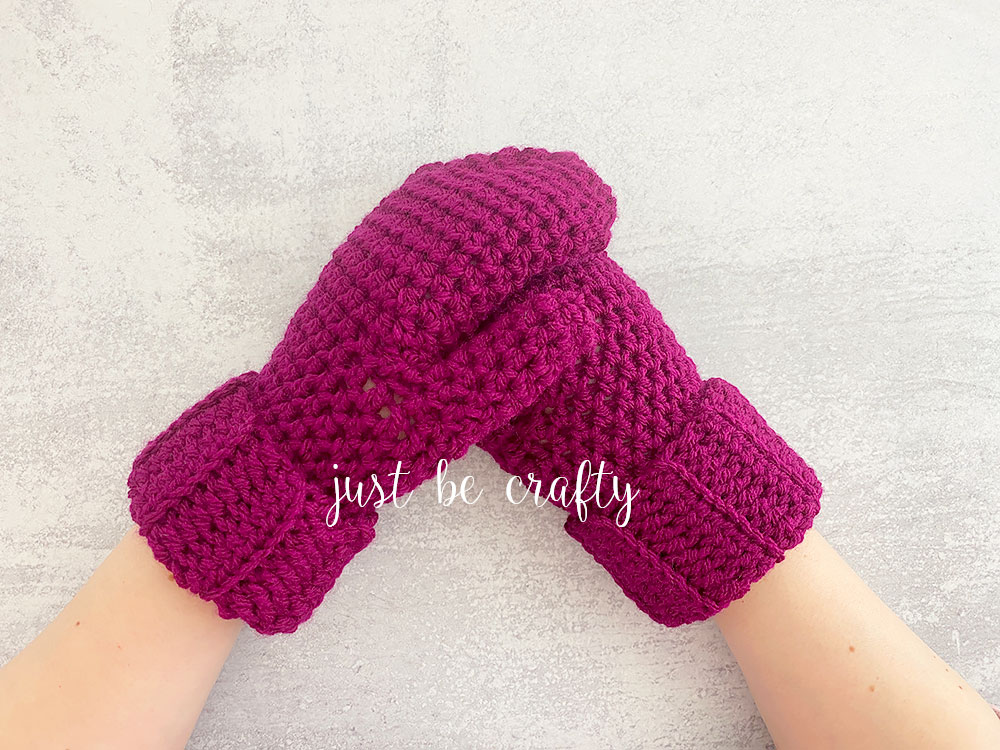
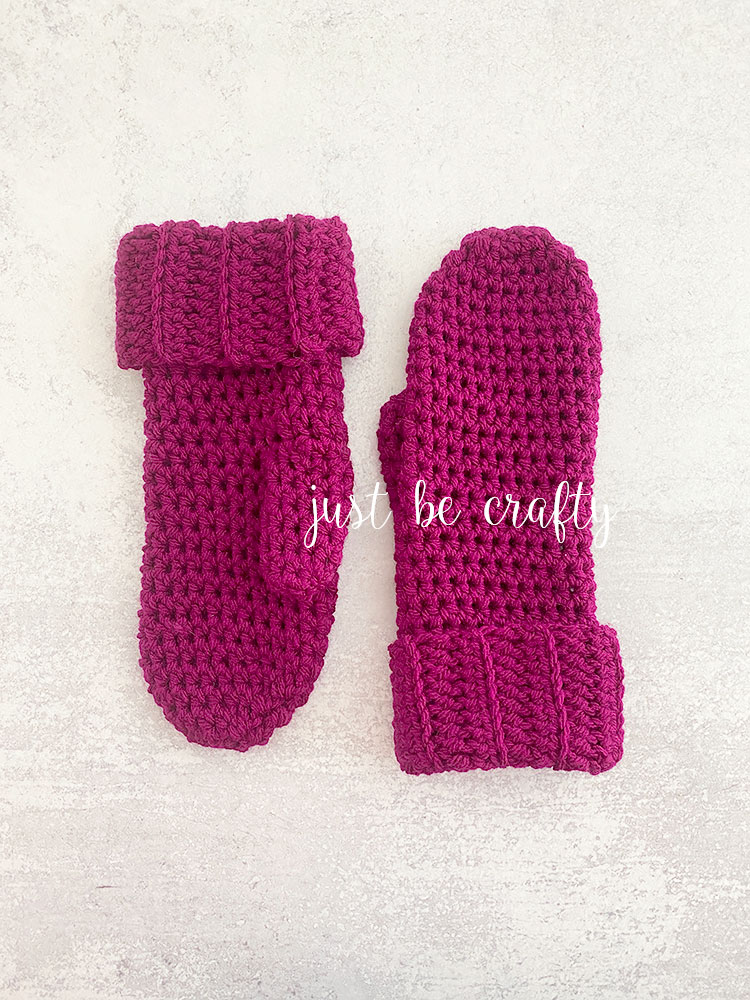
The Boysenberry Mittens are the perfect companion to the Boysenberry Triangle Shawl. Whip up both and you’ve got yourself an amazing gift that any family member or friend would love to have! And the best part? They are beginner friendly!
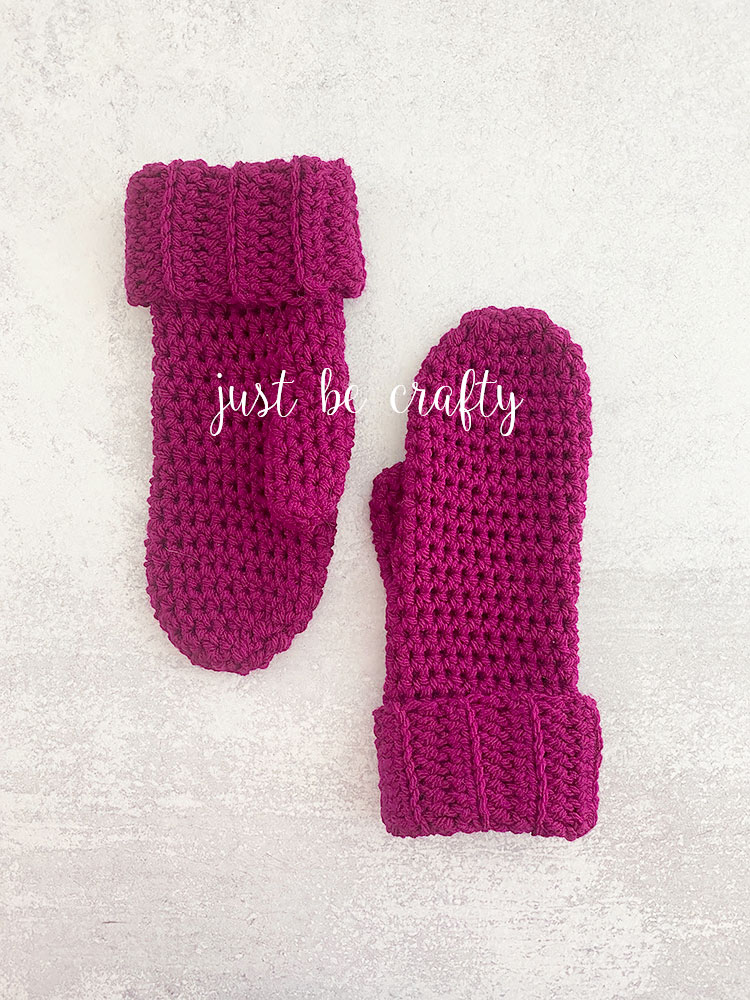
Today I have a fun new pattern to share with you, the crochet Boysenberry Mittens! These mittens are beautiful on their own but were specifically designed to match the Boysenberry Triangle Shawl. If you missed the shawl pattern you can find it here!
I’m so excited to share this pattern with you, not only because its a super fun project but because it’s really affordable too. I am a huge fan of making fun crochet things but on a budget, so that’s why for this project I turned to Red Heart. Red Heart has so many fun and trendy colors and their yarns never break the budget.
For the Boysenberry Mittens I wanted to make something that felt luxurious but wouldn’t cost a ton, so I choose Red Heart With Love Yarn. Its a really great choice when you want a yarn thats inexpensive but super soft AND squishy. The squish factor is real with this yarn and resulted in some really comfy mittens.
And this wasn’t sponsored by Red Heart or anything, I just really love this yarn! (But Red Heart – I’m here if you’re listening!!)
I hope you enjoy this pattern and tutorial! If you do, be sure to snap a picture of your shawl and tag me on Instagram @justbecraftyblog and use the hashtag #justbecrafty for a chance to be featured on my page!
BOYSENBERRY MITTENS PATTERN
This post might contain affiliate links. If you make a purchase from one of my links, I may receive a small commission (at no additional charge to you). For more information please see my policies page. Thank you for your continued support and knitting/crocheting along with me!
Printable pattern options:
- Purchase the ad-free printable PDF pattern HERE from my Etsy shop.
- Join the Just Be Crafty Club! Gain instant access this pattern PDF download as well my ENTIRE PDF pattern library ad-free! Click HERE for more information!
Finished Measurements & Sizing
- One size – adult
Gauge
- 7 stitches by 5 rows of hdc in the round = about 2 inches
Materials
- 6.0 mm crochet hook
- 1 ball Red Heart With Love (pictured in Boysenberry; Red Heart Supersaver Gold was used in video tutorial)
- 100% acrylic, med – 4 weight yarn, each With Love ball is 370 yards
- Yarn Needle
- Stitch Markers
- Tape Measure
- Gauge Checker
- Scissors
Key (in US terms)
- ch – chain
- ea – each
- hdc – half double crochet
- hdcbl – half double crochet in back loop only
- hdc invisible decrease – yarn over, insert hook into front loop of next stitch, draw up a loop, insert hook into front loop of next st, draw up a loop, yarn over and draw through all loops on your hook. You’ve just made an invisible decrease!
- prev – previous
- st – stitch
Video Support
- I made video tutorials that will walk you through this entire project! See links below!
Pattern notes:
- When working in the round, do not join rounds. Joining rounds will result in a seam on your mittens.
Boysenberry Mittens Pattern
Make 2.
[The Cuff]
Worked flat.
Ch 18
Row 1: Working in the foundation chain back bar and starting in 3rd ch from hook, hdc across, turn. (16)
Row 2: ch 2, hdcbl in each st across, turn. (16)
Rows 3 – 16: repeat Row 2
Do not cut yarn.
Fold piece in half so that the starting and ending edges are touching. Line up your stitches and sl st together to form cuff.
[The Wrist]
Begin working in rounds. Do not join rounds. Use seam on cuff to eyeball approximate beginning and ends of rounds.
Round 1: ch 1, make 24 sc evenly around cuff. (24)
Round 2: hdc in each st around (24)
Rounds 3 – 5: repeat Round 2
[Making the Thumb Hole]
The thumb will be worked over 6 stitches and centered over your cuff seam.
Round 6: hdc in each stitch around, stopping 3 stitches before the end of your round (which is marked by your cuff seam), dc into last 3 st of round (24)
Round 7: 1 dc into each of the next 3 st, hdc into each st until you’ll reached the dc st from the previous round. Ch 6.
Round 8: sk over 6 dc from round below, starting in next st, hdc into ea st around.
NOTE: Once you reach the chains for the thumb hole, work your hdc into the upper ch strand of each ch. (You’ll use the bottom ch strand to work your thumb later on.)
If making this mitten for yourself, try it on now to see if thumb placement is comfortable for you. If not, feel free to undo the Thumb Hole rounds and add or take away Wrist rounds to get thumb placement comfortable for you.
Rounds 9 – 16: hdc in ea st around (24)
Round 17: hdc into ea st around stopping 1 st before the end of the round.
If making this mitten for yourself, try it on again now. The mitten height should be about level with your pinky. If not, add or take away hdc rounds so that the mitten height is level with your pinky before moving on to the decrease rounds.
[Decreasing]
Decreases begin.
Place stitch markers in next two stitches. Starting count at 2nd st marker, count over 12 st, place a 3rd marker in 12th stitch. Place a 4th marker in next st.
You should now have 4 stitch markers on your piece marking the side edges of your mitten. The marked stitches will be your decrease stitches.
Decrease Round: Pull out last worked stitch, so that you now have 1 unworked stitch before your 1st st marker; hdc invisible decrease (see Key for explanation) over next two stitches, replace marker into new decreased st, hdc invisible decrease over next two stitches, replace marker into new decreased stitch, hdc in to ea st around until there is 1 unworked st before the next st marker; hdc invisible decrease over next two st, replace marker into new decreased stitch, hdc invisible decrease over next two st, replace marker into new decreased stitch, hdc into ea st around until there is 1 unworked st before next st marker;
Repeat Decrease Round until 12 stitches remain.
Fasten off, leaving long tail. Thread tail into a yarn needle and whip stitch into ea st around working from inside the mitten out. Once you reach back around to the beginning, gently pull tail to cinch mitten hole closed.
Whip stitch the top to close any remaining gaps. Pull tail to inside of your mitten, secure and weave in.
[Making the Thumb]
Lay mitten flat out in front of you with the thumb whole face up. (Mitten cuff should be positioned towards the bottom.)
Your thumb hole is made out of the 6 dc stitches (we’ll call this the thumb’s Bottom Outline) and the 6 chains we made (we’ll call this the thumb’s Top Outline)
Attach yarn to third stitch of the thumb’s Bottom Outline.
Round 1: ch 1, starting in same stitch, hdc, hdc invisible decrease over next two st (stitch 5 & 6 of our Bottom Outline), make a hdc decrease over your corner (NOTE: these will be side stitches between the thumb’s Bottom & Top Outlines); hdc decrease over next two Top Outline stitches, make 1 hdc in each of the next two stitches, make a hdc decrease over next two Top Outline stitches, hdc decrease over your next corner, hdc invisible decrease in next two Bottom Outline stitches, hdc into next st; (10)
Rounds 2 – 6: hdc into each st around; (10)
If making this mitten for yourself, try it on again now. The mitten thumb height should be about level with your own thumb. If not, add or take away hdc rounds so that the thumb height is level with your thumb.
Fasten off, leaving long tail. Thread tail into a yarn needle and whip stitch into ea st around working from inside the mitten thumb out. Once you reach back around to the beginning, gently pull tail to cinch thumb hole closed.
Whip stitch the top to close any remaining gaps. Pull tail to inside of your mitten, secure and weave in.
[Finishing]
Weave in any remaining tails. Turn right side out. Fold mitten cuff upward.
Repeat entire pattern for second mitten.
Enjoy!


I hv never made mittens & want to try these as I hv a neighbour who runs errands 4 me all the time (I hv lymphedema & severe osteo-arthritis in my hip so do not get around very well). She requested I make her a pair of mittens. I found this pattern & really want to try this & wanted to try the R.H. With Love yarn as u suggested (sounds nice) but was wondering with this colour (love it) is it colorfast – I do not want to make them then she has trouble with them “bleeding” once they r wet. Can u pls tell me if this colour wud bleed – wud much appreciate any help u can give me – the site does not state whether or not it does. Many tks for yr help. Love so many of yr patterns – tk u 4 sharing them with us. Stay safe in these times.
Hi Helen! Thank you for your question! I have not personally had any issues with Red Heart Yarns bleeding when wet or heard of others having this happen to them. But I do not know if it is officially colorfast, to be certain you would want to reach out to the manufacturer (https://www.yarnspirations.com/). Though the yarn label does indicate that it should only be washed with like colors but I think that’s standard laundering instructions.