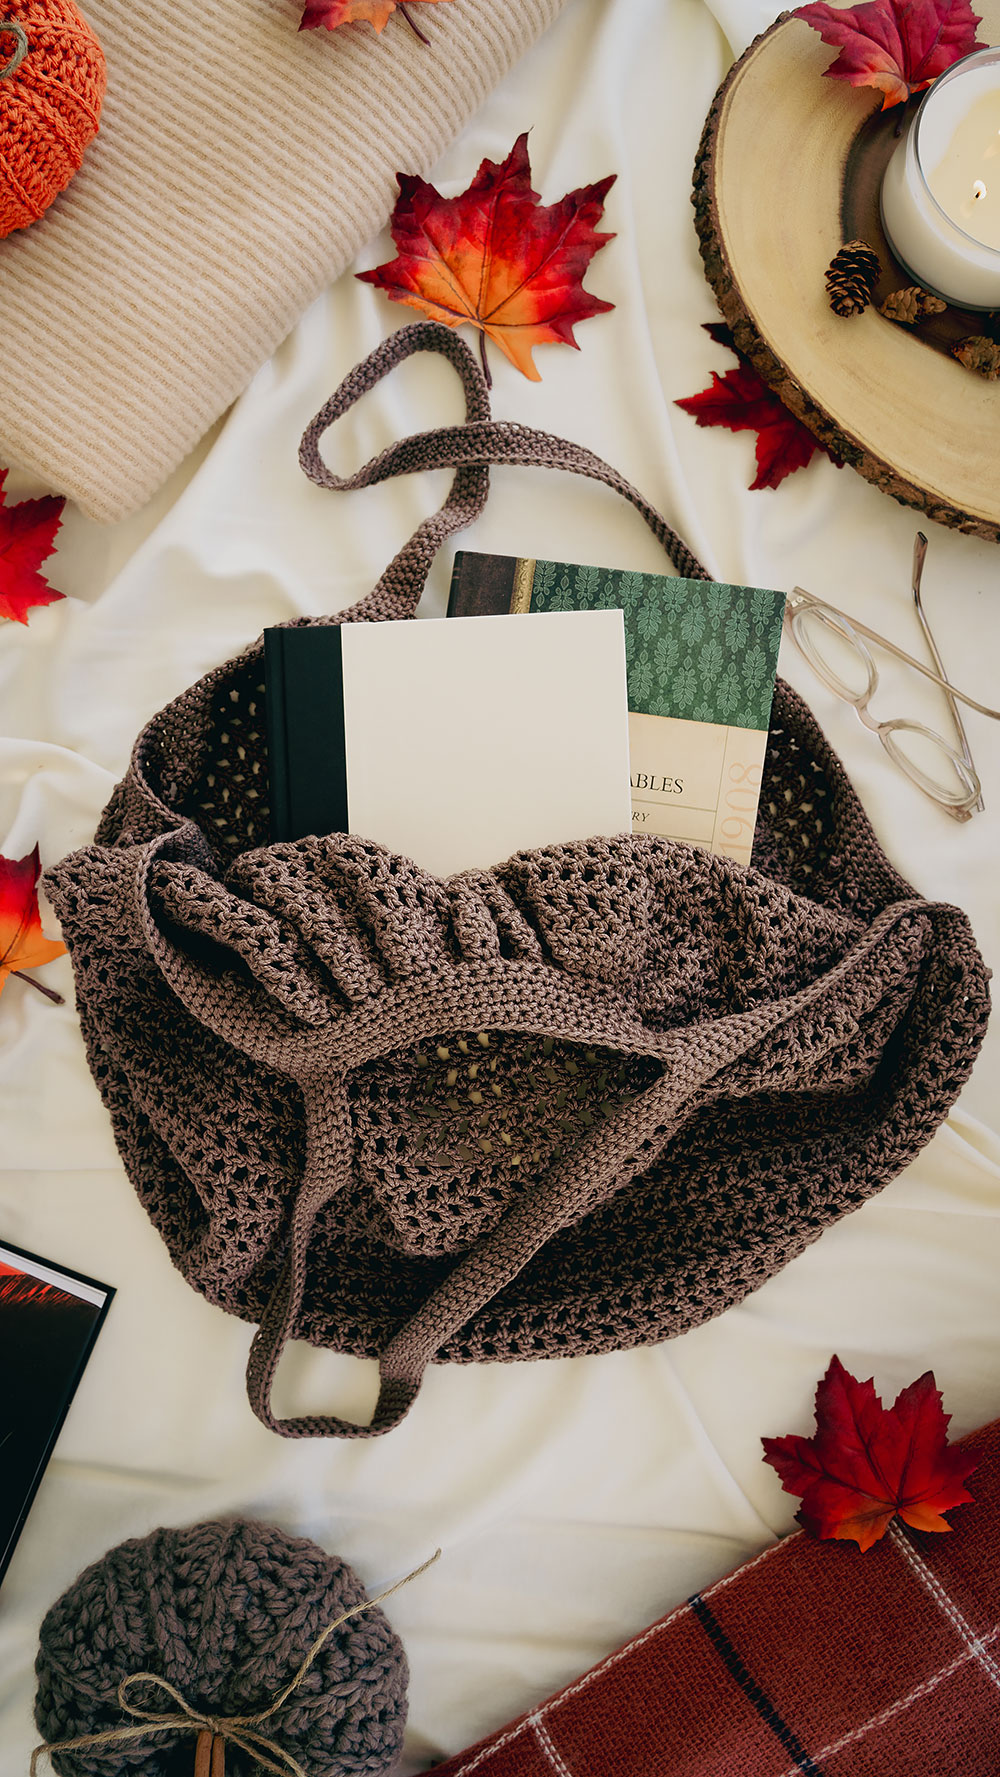
This cozy, beginner-friendly crochet tote bag was inspired by two of my favorite things: Fall in New York City and the movie You’ve Got Mail. There’s something magical about the changing leaves, the crisp air, and the romantic feel of the city during autumn. And what better way to celebrate that than by crocheting yourself a market bag to enjoy this lovely surrounding?
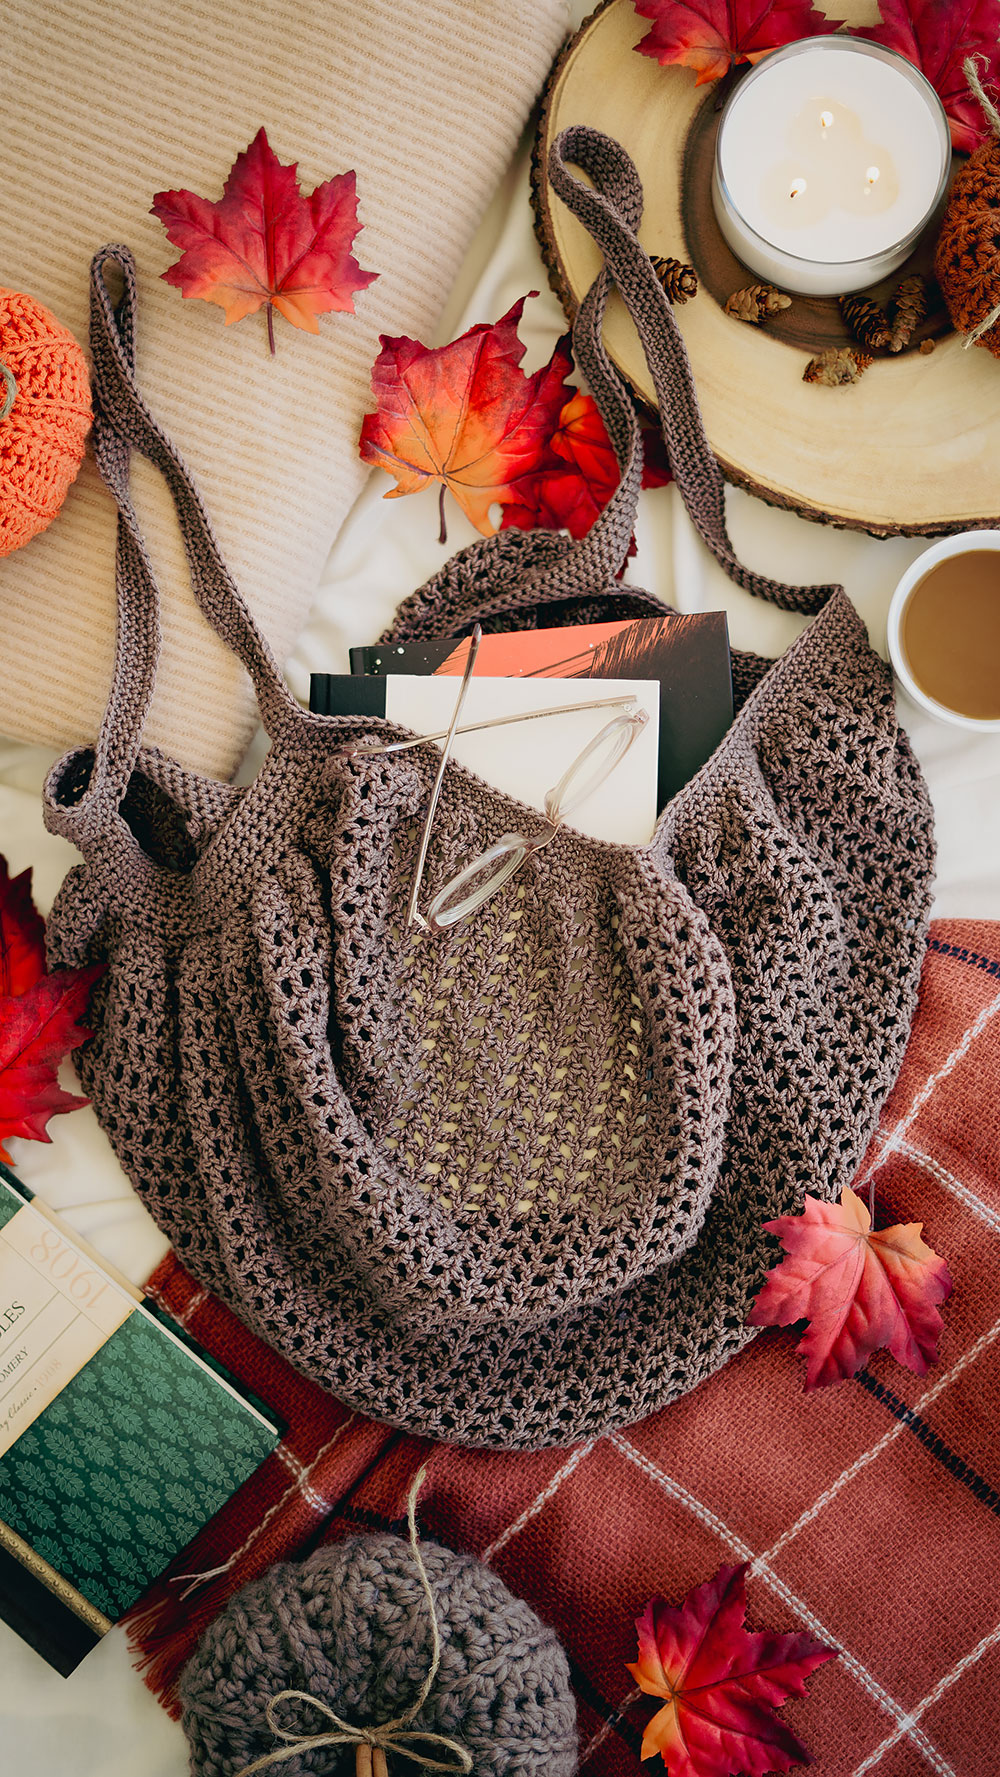
In You’ve Got Mail, Kathleen Kelly owns a charming little bookshop called “The Shop Around the Corner.” I can just imagine her walking down the streets of Manhattan, carrying a tote just like this—perfect for holding a stack of new books or a warm coffee to-go. Whether you’re visiting a small local bookshop or just running errands around town, this market bag is the perfect companion.
A Crochet Bag That’s Cute and Stylish
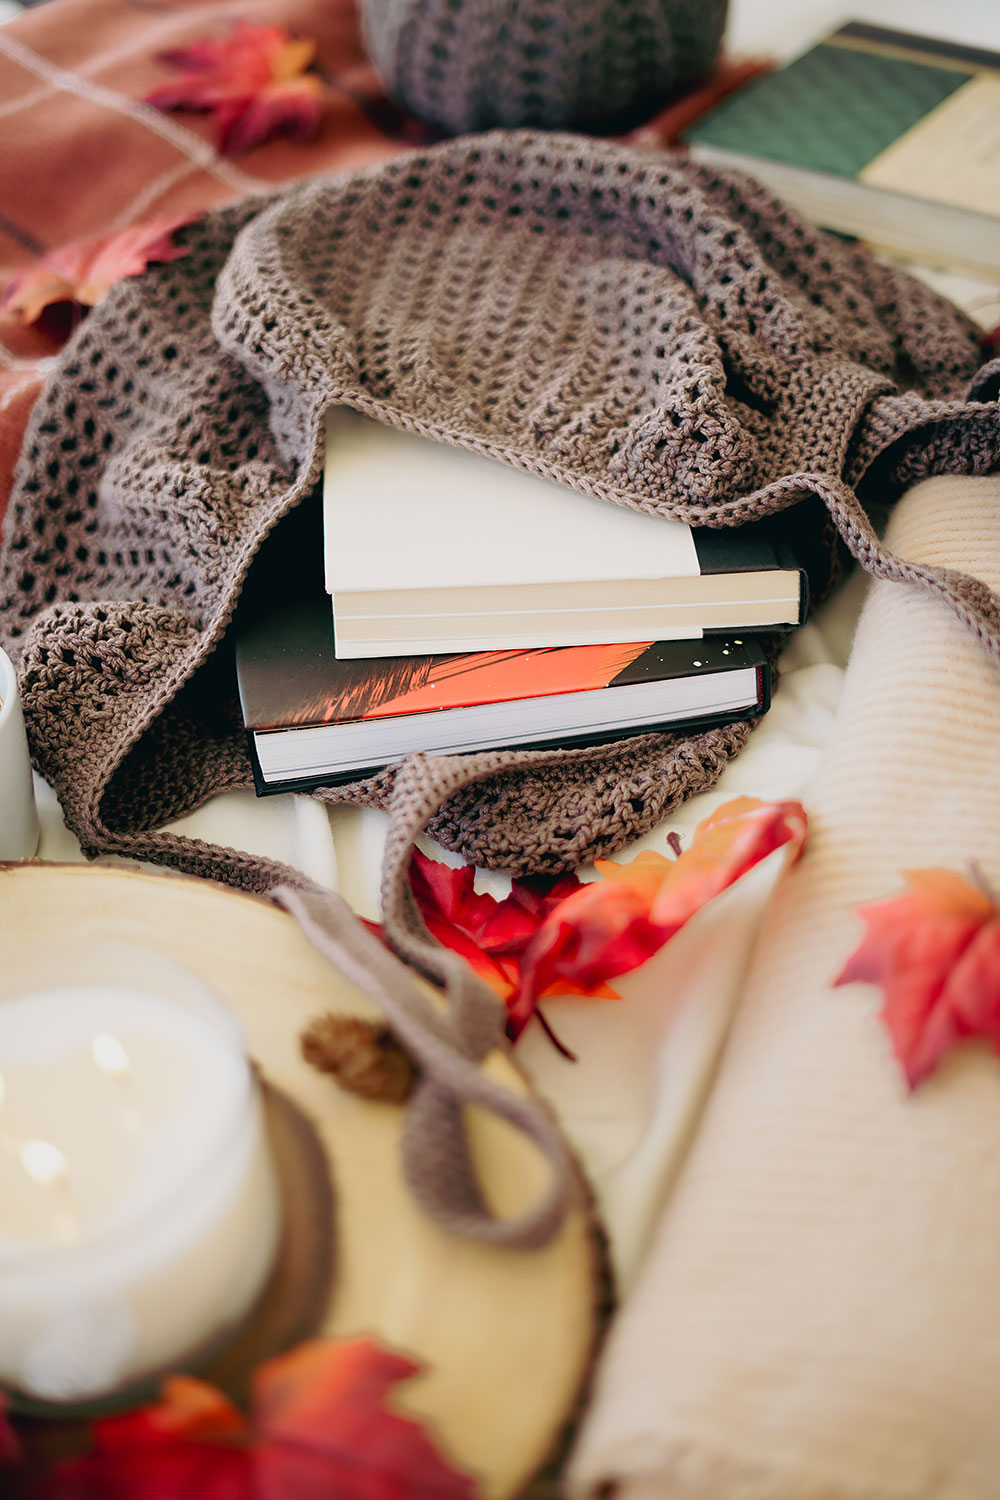
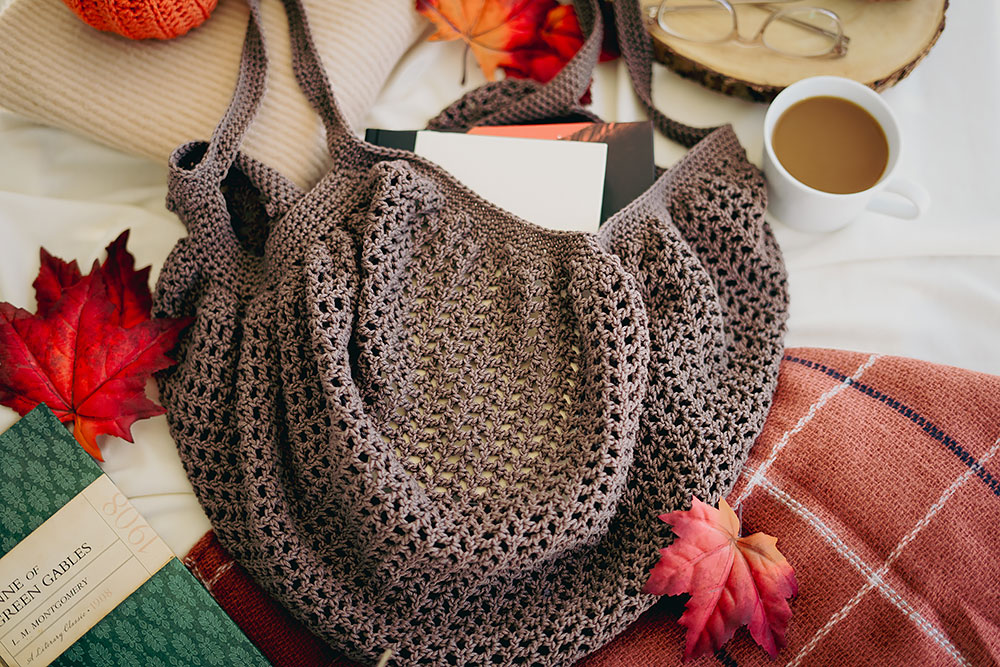
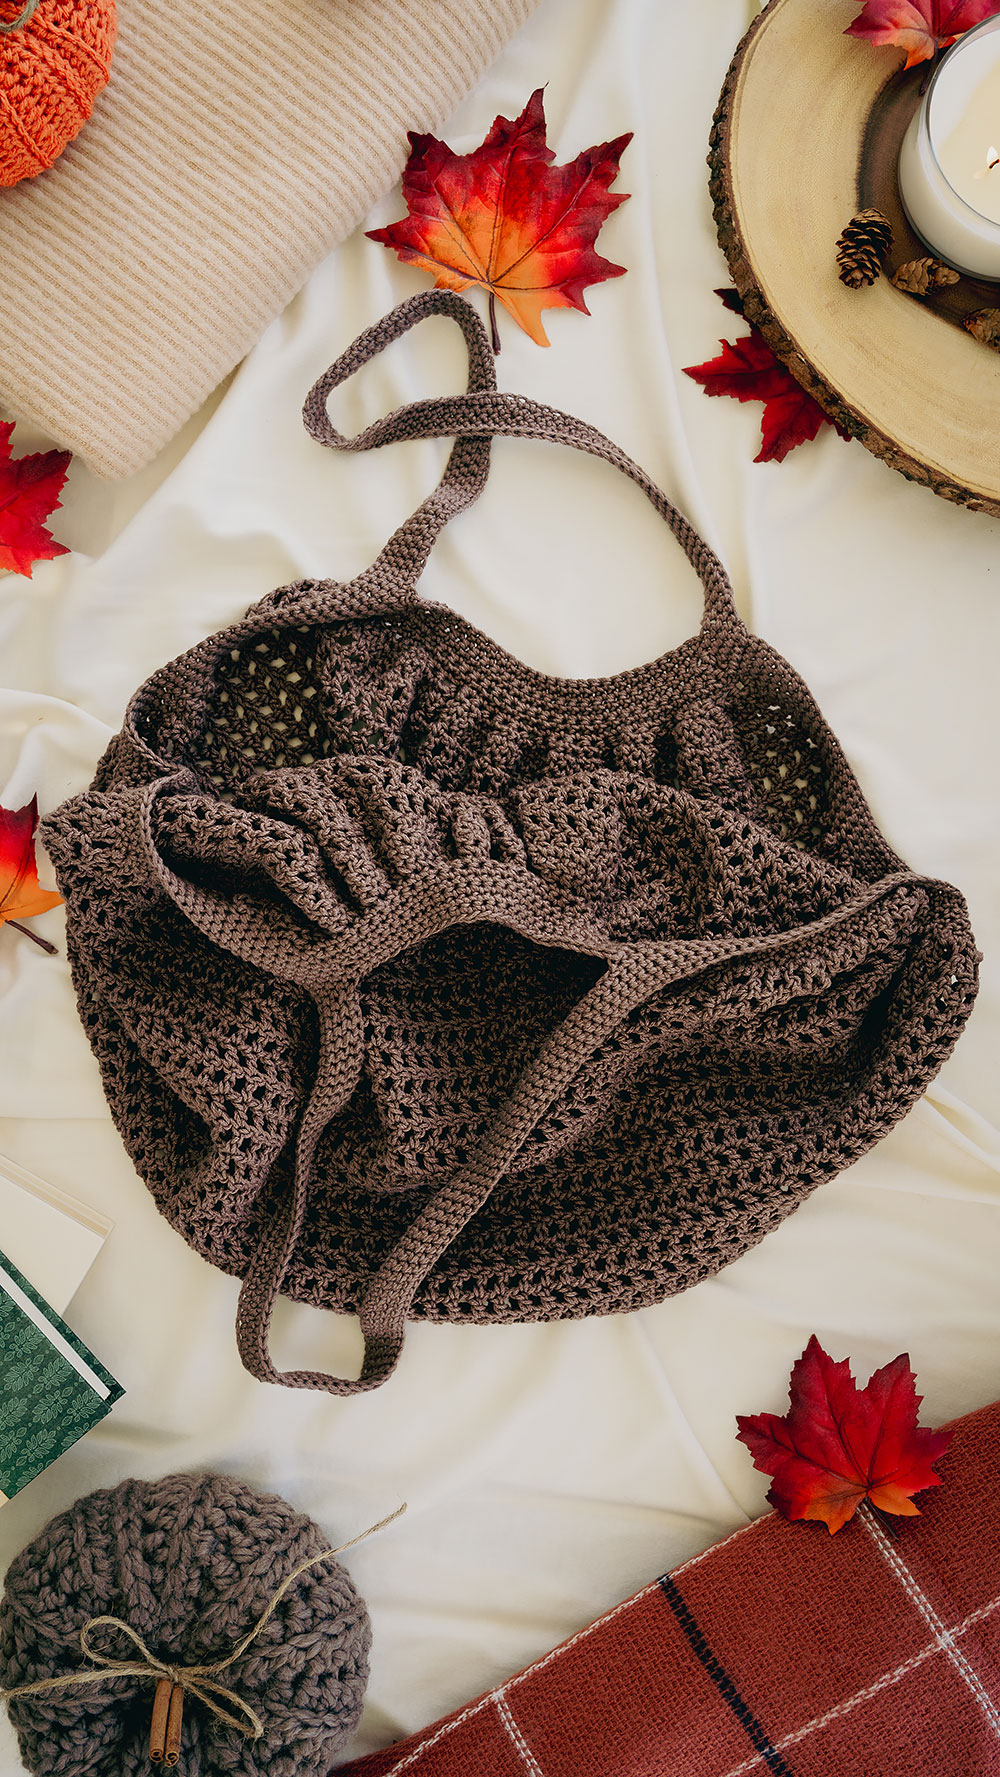
This tote bag designed with a crocheted mesh stitch, making it light, stretchy, and ideal for carrying anything from fresh produce to your current reading list. The open design and simplicity of the construction is where the function is meeting beauty.
The Construction of the Bag
The Fall Bookshop Market Bag is designed to be both pretty and functional. The body of the bag is made up of a simple mesh stitch pattern, giving it a classic market bag look with plenty of stretch. The mesh portion is crocheted flat to create a large square, and the front and back bands are worked separately. Once those parts are completed, the handles and sides of the bag are crocheted in the round to give the bag its final shape.
A Crochet Bag That’s Beginner Friendly
This construction method makes it a straightforward project for beginners who have learned basic stitches like single crochet, double crochet, and chaining. You’ll find that while the pattern is simple, the final result is a beautifully constructed bag that’s perfect for beginners or intermediate crocheters looking to create something practical yet stylish.
Why This Market Bag is Perfect for Beginners
If you’ve just started your crochet journey, this market bag pattern is a perfect next step after mastering the basics. (But not before, my friend! See some of these beginner projects if you’re not quite ready for this one yet!) Not only is it a fun and rewarding project, but it also will let you practice important skills like as working in the round, creating a mesh stitch, and handle construction. It’s definitely a project that can build your confidence AND it’s something that you’ll actually be able to use.
Because of the open fabric that the mesh stitch creates, the bag actually works up quite quickly, allowing you to see progress as you work. Its the progress as you work that helps keep you motivated to finish. We all need a quick win, especially when we are new!
Which Yarn is Best for Crochet Bags?
For crochet bags, it’s important to choose a yarn that is durable but stretching is inevitable. Its just part of a crocheted bag. I recommend using cotton or a cotton-blend yarn for most crochet bags, including this Fall Bookshop Market Bag. Cotton yarns have a natural strength that can help your bag hold up over time.
For this specific pattern, I used Lion Brand 24/7 Cotton, a 100% mercerized cotton yarn. Mercerized cotton is ideal for bags because it has a slight sheen, and resists fraying and pilling. You could also use other medium-weight cotton yarns if you want to explore different textures or colors.
Customizing The Color of Your Bag
While the Fall Bookshop Market Bag looks great in the neutral, earthy tone of Lion Brand 24/7 Cotton in Café Au Lait, feel free to make it your own. You can switch up the yarn color to suit your personal style or the season (doesn’t have to be for just fall!). Imagine a deep burgundy for a rich autumn look, or perhaps a soft pastel for springtime market strolls. You could even try adding stripes by alternating colors every few rows for a funkier look!
What Crochet Stitch is Good for Bags?
The best crochet stitches for bags are sturdy and durable, yet flexible enough to provide some stretch. For this pattern, we use a combination of double crochet stitches and chain to create a mesh fabric that’s both lightweight and strong.
How to Crochet a Bag for Beginners Step by Step – The Overview
1. Choose the Right Yarn and Hook:
Start with a yarn that’s easy to work with—cotton or a cotton blend is ideal because it’s sturdy and can handle weight without stretching out too much. For this pattern, a medium-weight cotton yarn like Lion Brand 24/7 Cotton is recommended. You’ll also need a 4.5mm crochet hook to achieve the right tension.
2. Master the Basic Stitches:
For this pattern, you’ll need to know how to:
- Chain (ch)
- Single crochet (sc)
- Double crochet (dc)
- Half double crochet (hdc)
- Slip stitch (sl st)
If you’re comfortable with these stitches, you’re ready to go!
3. Work the Bag Flat:
Start by working the body of the bag flat. You’ll create a large square mesh by working rows of double crochets with chain spaces in between. This creates the open, airy structure of the bag, perfect for a market tote.
4. Add the Bands:
Once your mesh body is complete, you’ll work the front and back bands in half double crochet (hdc) and single crochet (sc). These bands provide structure and ensure that your bag can carry heavier items without stretching.
5. Crochet in the Round for the Handles:
Finally, the sides and handles of the bag are crocheted in the round. The handles are created by chaining a set number of stitches and then connecting them to the body of the bag. This part is super easy and makes the bag ready for use!
Video Tutorial
The Crochet Fall Bookshop Market Bag Pattern Tutorial is geared for intermediate beginners and higher and assumes you already know the following skills:
- chaining
- single crochet
- half double crochet
- double crochet
- slip stitch
That’s it! Once you’ve mastered those skills, I’m confident you can tackle this pattern!
Below you’ll find both left and right handed tutorials!
Left handed
Right Handed
Crochet Fall Bookshop Market Bag – Written Pattern
Gain access to this pattern PDF as well as the entire Just Be Crafty printable pattern PDF Library! Click here for more information.
Only need the Fall Bookshop Market Bag Pattern? Purchase the printable PDF here!
*This post may contain affiliate links. Please see my disclosures page for more information.
All patterns on this blog are for personal use only and may not be redistributed, copied, blogged, or sold as your own. You may sell items made by my patterns as long as the item is made by you personally (not mass produced) and that proper credit is given back to me and my site, Just Be Crafty. You may not use my photos for your online sales listings.
For more information please see my Pattern Permissions Page.
Materials
- 3 balls Lion Brand 24/7 Cotton in Cafe Au Lait
- Each ball 100% mercerized cotton, #4- medium weight yarn, 186 yds, 3.5 oz.
- Total yardage required: about 558 yds
- 4.5 mm hook (I use this set.)
- Yarn needle
- Scissors
Gauge
- 4 inches = 10 st (dc + ch 1) by 9 rows of pattern stitch
Finished Measurements
- Width at widest – approximately 21 inches
- Depth – approximately 13 inches
Key
- ch chain
- dc double crochet
- hdc half double crochet
- pm place marker
- sl st slip stitch
- st stitch
- sc single crochet
- sk skip
Notes
- The body / mesh portion of the bag is first worked flat – back and forth in rows. You will be forming a large mesh square that is approximately 25 in. x 25 in. The edging for the front and back of the bag are worked flat – back and forth in rows as well.
- The handles and edging for the sides of the bag are then worked in the round.
Crochet Fall Bookshop Market Bag – Pattern starts here
WORKING THE BODY OF THE BAG
Ch 126
Row 1: Starting in 6th ch from hook, dc and *ch 1, sk a ch, dc in next ch. Repeat from * to end of row. Turn.
Row 2: Ch 4 (counts as 1st dc and ch 1), dc in next dc, ch 1, *dc in next dc, ch 1. Repeat from * to end of row. Place last dc in 4th ch of starting ch from previous row. Turn.
Row 3: Ch 4 (counts as 1st dc and ch 1), dc in next dc, ch 1, *dc in next dc, ch 1. Repeat from * to end of row. Place last dc in 3rd ch of starting ch 4 from previous row. Turn. (You should have 62 dc’s including the starting ch that counts as a st.)
Repeat Row 3 until piece measures 25 inches from starting edge, or until the length is the same measurement as the width.
WORKING THE FRONT BAND OF BAG
Row 1: Ch 3 (counts as 1st hdc and ch 1), *hdc in next st, ch 1. Repeat from * to end of row. Place last hdc in 3rd ch of starting ch 4 of previous row. Turn. (62)
Row 2: Ch 2 (counts as 1st sc and ch 1), *sc in next st, ch 1. Repeat from * to end of row. Place last sc in 2nd ch of starting ch 3 from previous row. Turn. (62)
Starting chains will no longer count as a stitch past this point.
Row 3: Ch 1, sc in each st across. Turn. (62)
Row 4 (decrease row): Ch 1, sc first two st together, *sc next two st together. Repeat from * to end of row. Turn. (31)
Rows 5 – 6: Ch 1, sc in each st across. Turn. (31)
Row 7: Ch 1, sc first two st together, sc in each st across until 2 st remain unworked, sc last two st together. Turn. (29)
Row 8: Repeat Row 7 (27)
Rows 9 – 10: Ch 1, sc in each st across, turn. (27)
Cut and secure yarn.
WORKING THE BACK BAND OF BAG
Rotate work so that the bottom edge is now arranged towards the top. Attach yarn to ch in rightmost corner (or leftmost corner if left handed).
Repeat Rows 1 – 10 of the FRONT BAND OF BAG.
At end of Row 10, do not turn work, and do not cut yarn. You will now be working in rounds.
WORKING BAG SIDES AND HANDLES
Round 1: Ch 1, sc in same st (last st of Row 10), pm to mark this as 1st st of round and make 9 more sc evenly along side band edge, making last sc in the first ch space you reach.
Sc in each bar along side edge. Make 10 sc along side of next band, making last st in corner st. Ch 90, sk band top edge, make sure ch is not twisted, sc in next corner st. Make 9 more sc along band side edge, making last band sc in the first ch space you reach.
Sc in each bar along side edge. Make 10 sc along side of next band, making last st in corner st. Ch 90, sk band top edge, make sure ch is not twisted, sc in in 1st st of round.
Replace marker in new st.
Next Steps
Arrange bag flat with handles towards the top and bottom of bag arranged to the bottom. Working one side at a time, line up side bag stitches and mark center stitch with a st marker. Repeat on opposite side.
Stitch markers will indicate decrease placement.
Round 2: Sc into each st until two st remain unworked before next st marker. Sc next two st together, sc, replace marker, sc next two st together, continue working in sc into each st and handle chain until two st remain unworked before next st marker, sc next two st together, sc, replace marker, sc next two st together, continue working in sc into each st and handle chain to end of round.
Rounds 3-4: Replace marker, repeat Round 2.
Round 5: Replace marker, then sc in each st around.
Sl st 3 stitches (to even out edge).
Fasten off. Weave in all ends.
Steam or wet block if needed. Enjoy!
Frequently Asked Questions
Q: How long does it take to crochet this bag?
A: On average, it may take around 5-8 hours to complete this bag, depending on your crochet speed and experience level. Beginners may take a bit longer, but the straightforward pattern allows you to progress quickly.
Q: Can I use a different yarn for this pattern?
A: Yes! While I recommend a sturdy cotton yarn, you could experiment with different fibers. Just be mindful that some fibers, like acrylic, might stretch more over time, affecting the bag’s shape.
Q: How do I care for my crochet market bag?
A: Since this pattern uses cotton yarn, you can machine wash your bag on a gentle cycle and lay it flat to dry. However, always check the specific care instructions on your yarn label.