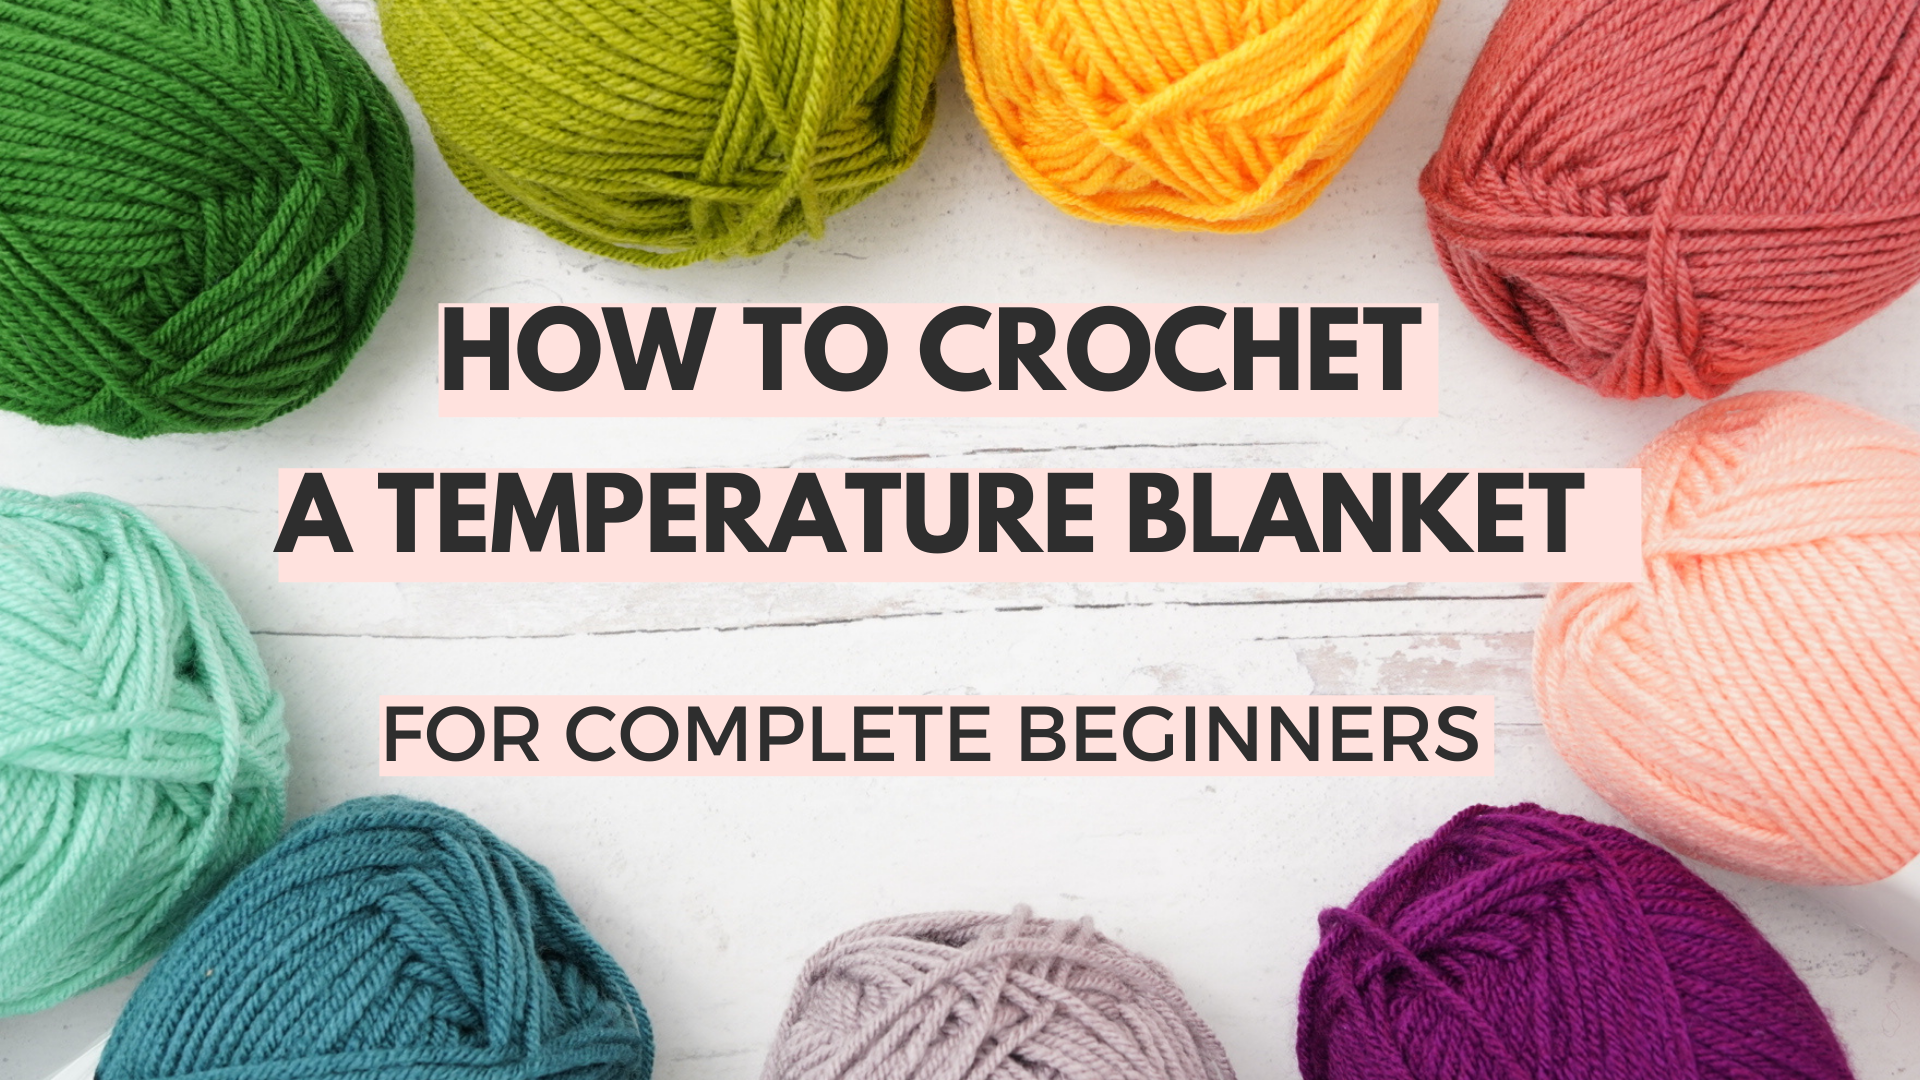
How To Make A Crochet Temperature Blanket
Today we are talking all about how to crochet a temperature blanket from start to finish and I’m going to get you and your materials organized in 4 easy steps.
What is a temperature blanket?
Temperature Blanket (tem•per•a•ture, blan•ket)
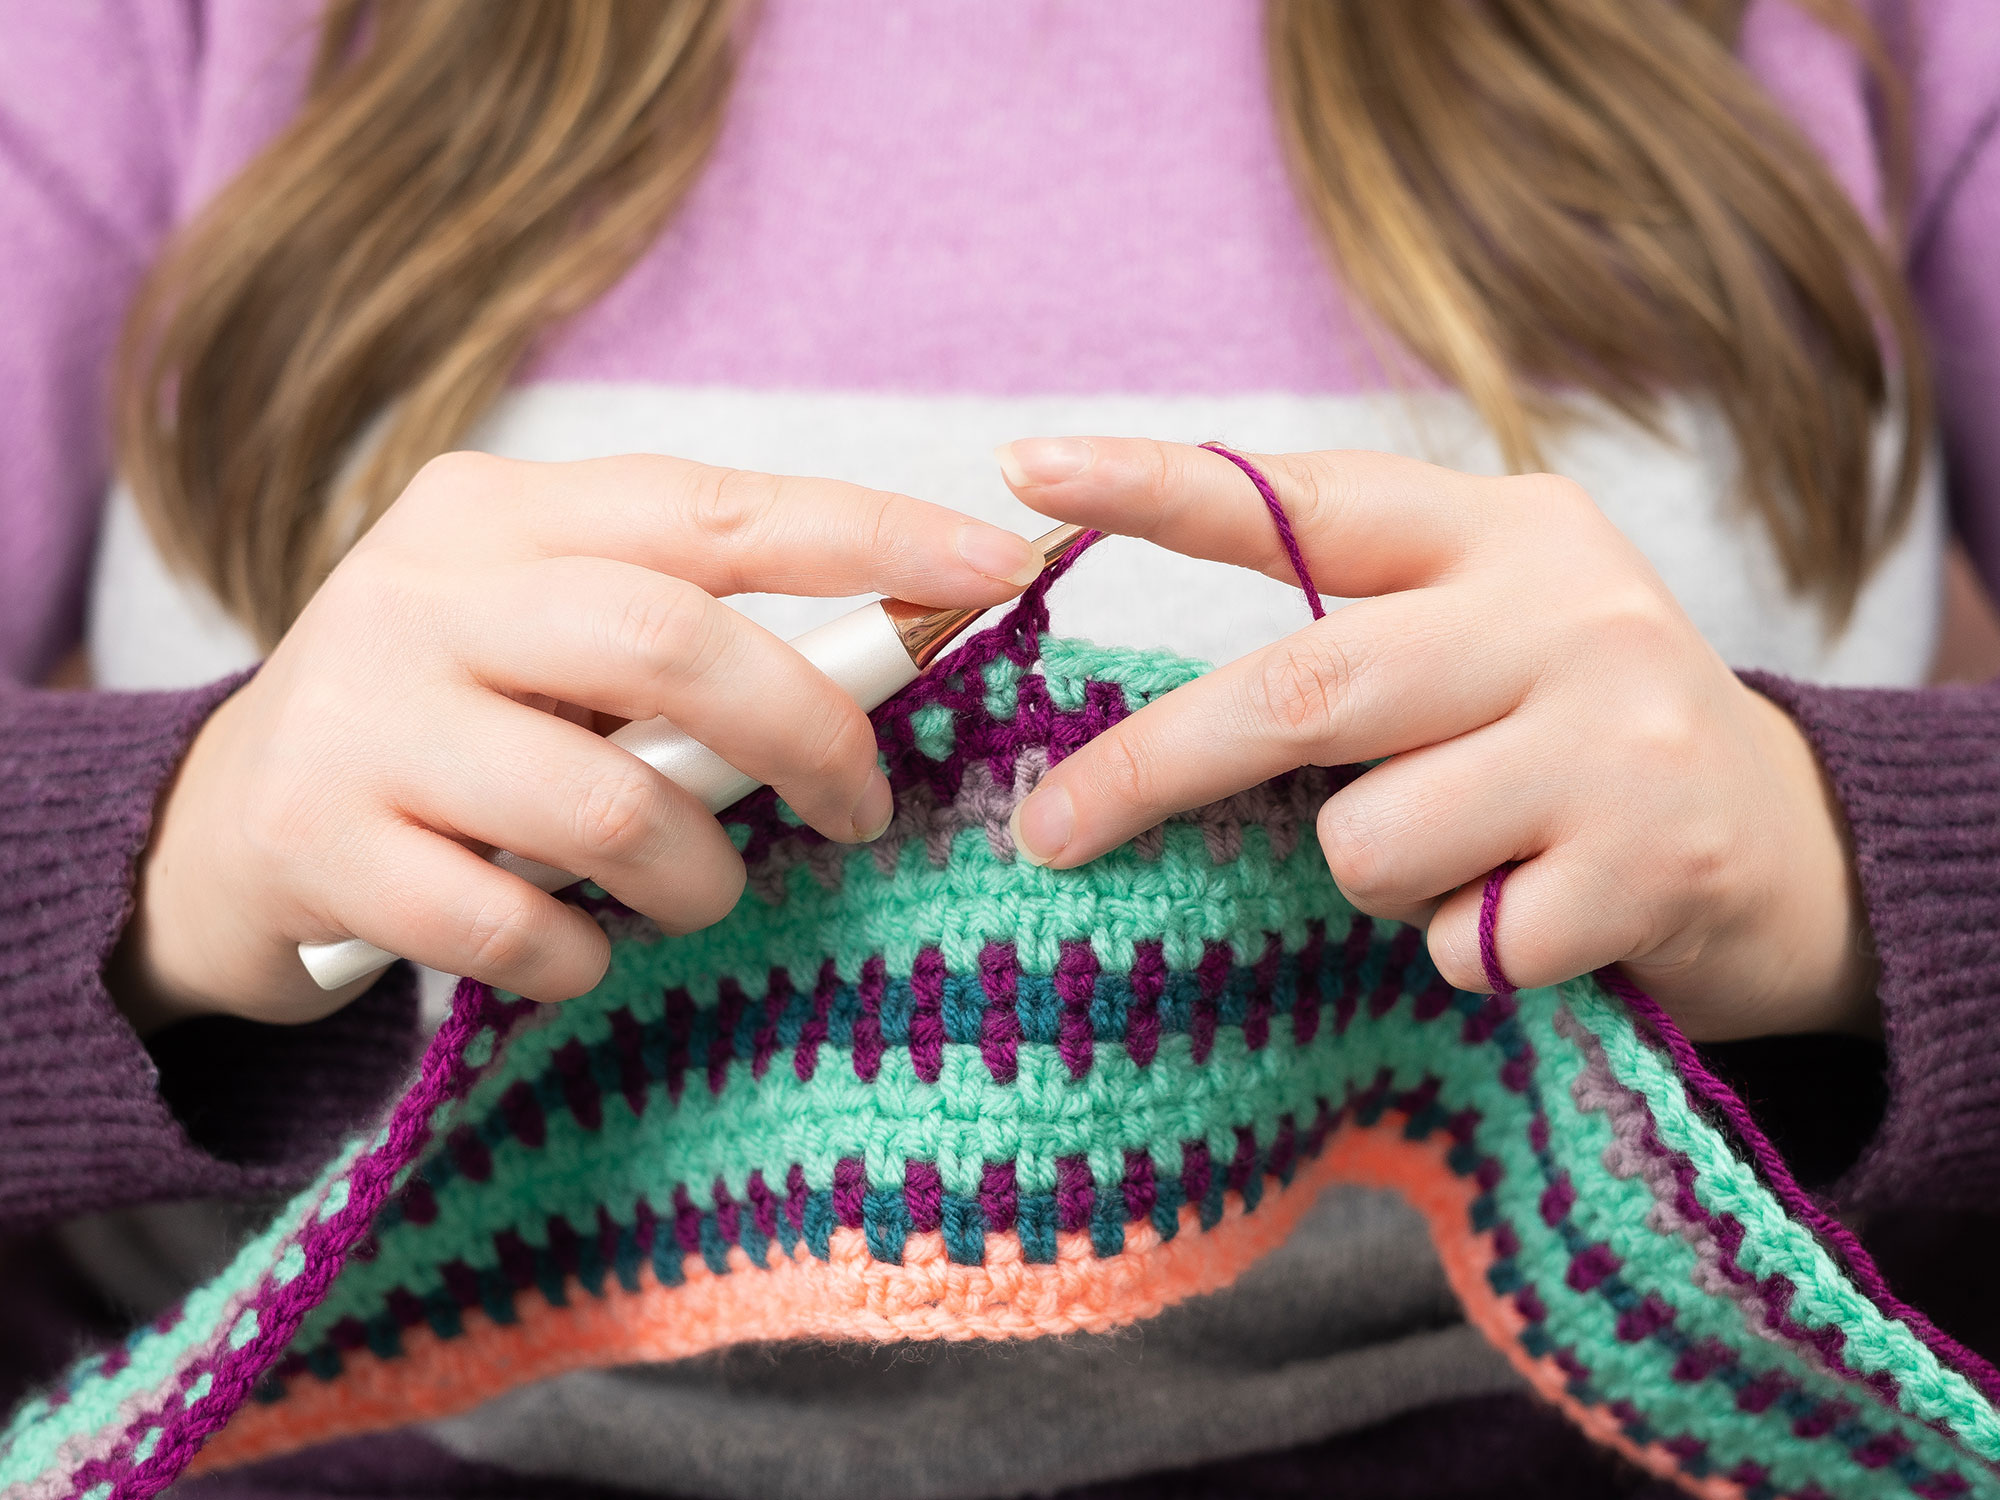
Put simply, a temperature blanket is a colorful blanket where each crocheted row represents one day of the year. The colors of each row are determined by the temperature of the day, and you assign a color to each temperature (more on this later)!
It’s a year long project that you commit to crocheting daily, weekly, monthly or whatever is right for you [hello New Year’s resolution!]. And if you stick to it, you’ll be ringing in the next New Year with a beautiful (and really big!) blanket to snuggle up in.
Blast from the past?
Your temperature blanket doesn’t need to be based on the current year! Basing the blanket on a past year can be a really great way to remember a special time in either your’s or a loved one’s life.
Video Help
In this video I talk you through this entire blog post. I chat all about how you can plan out your temperature blanket as well as help you find a way to organize your project that best suites you! Remember, this is a year long project so you want to make sure you stay as organized as possible to help you stick to it for the whole year!
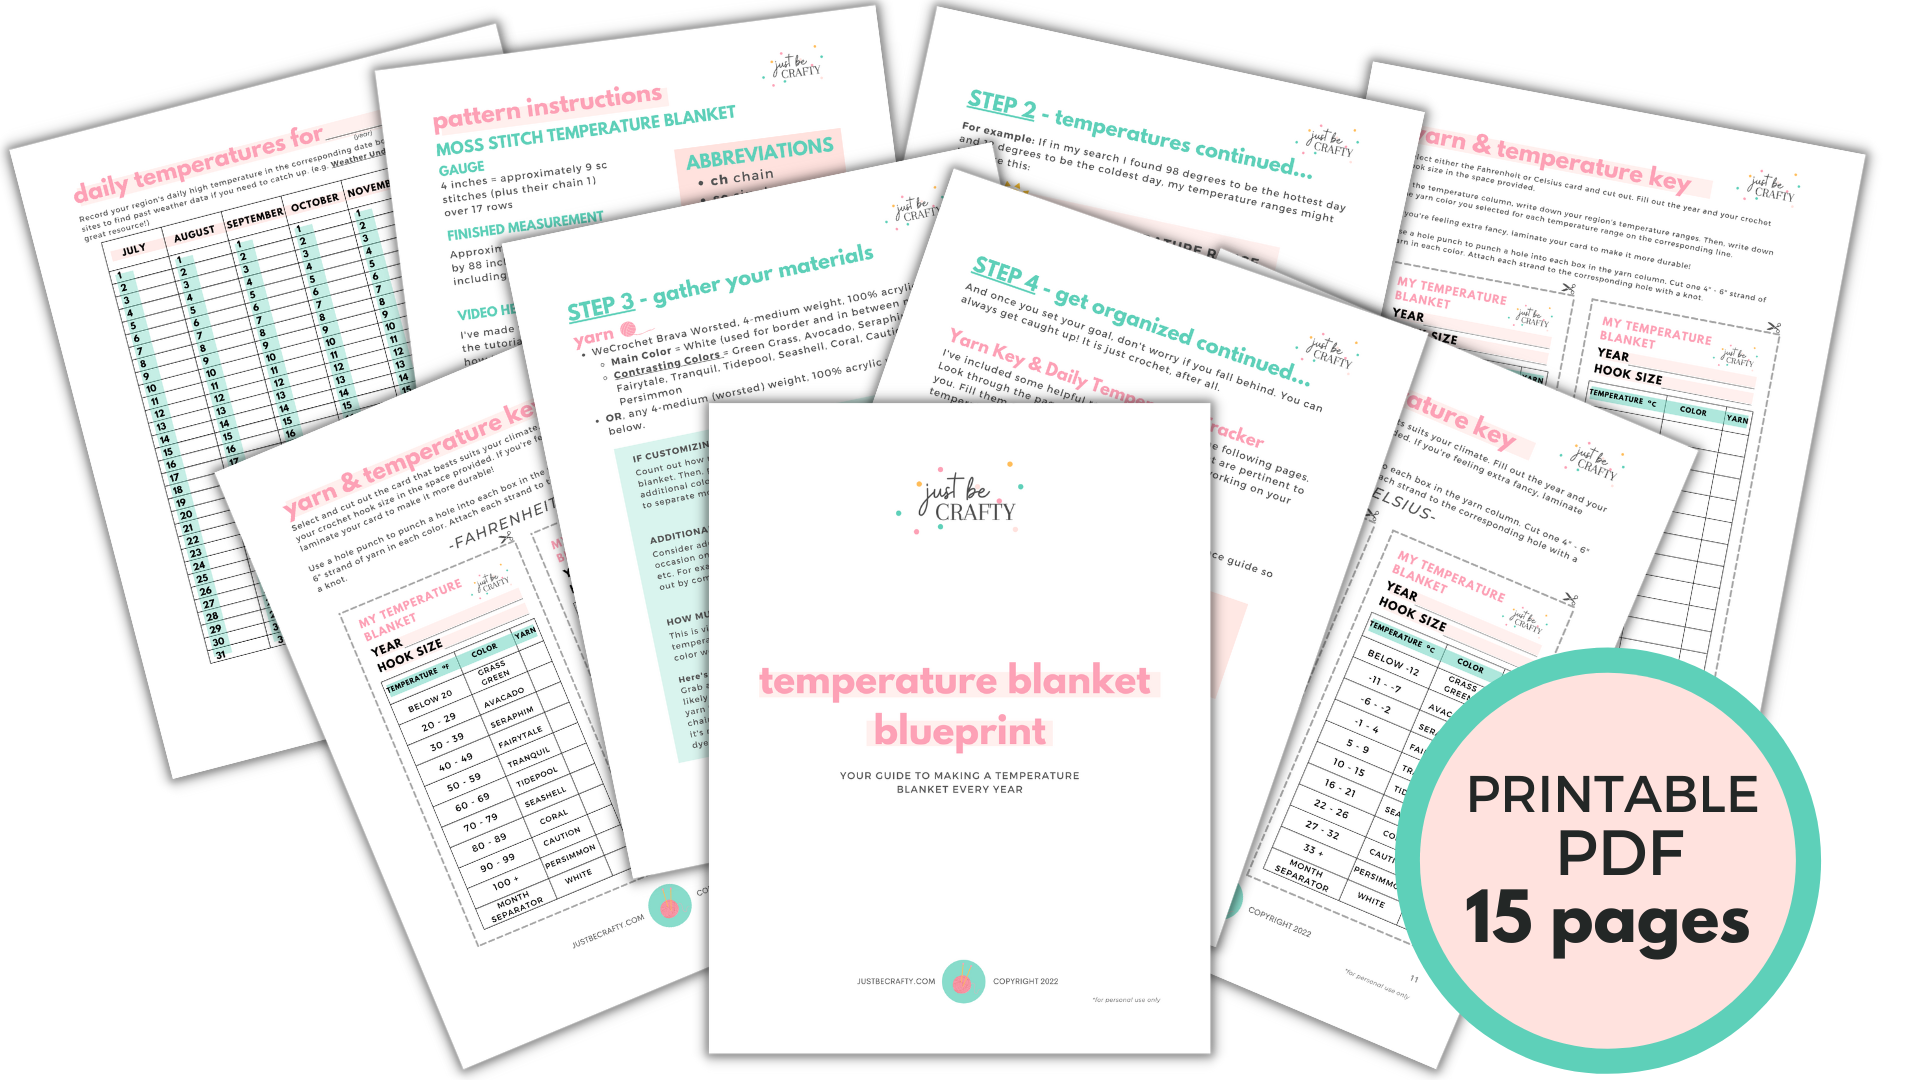
Temperature Blanket Blueprint
To help you take your temperature blanket project to the next level, I made a super fun PDF that you can print out and make a binder (just like the one I show in my video). The Blueprint includes all the steps in today’s blog post but in an ad-free printable format that will guide you through planning out your blanket.
The pdf also incudes:
- Daily temperature trackers (+ one for leap years!)
- The Yarn and Temperature Key
- In both Fahrenheit and Celsius
- Includes 2 blank keys so that you may customize your temperatures and yarn colors
Purchase the Temperature Blanket Blueprint here.
OR, gain access to the Temperature Blanket Blueprint as well as my entire PDF pattern library. For more information click here.
But, you don’t need to the Temperature Blanket Blueprint to stay organized, you can totally use a notebook! I give instructions on how to setup your notebook below!
How To Plan Out Your Temperature Blanket
Step 1: pick the year
Select the current year OR a special year from the past (think: anniversary, birth year, graduation, etc.) This would make a wonderful gift!
If using a year from the past, just make sure you’re able to find temperature data for the special year you have in mind.
Step 2: find your temperatures
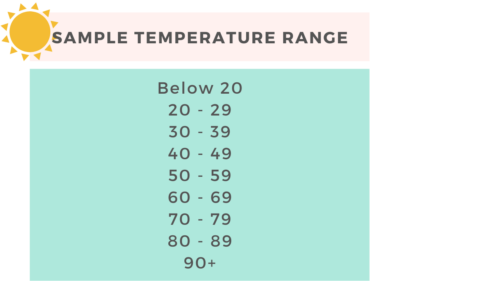
Decide on a series of temperature ranges that make the most sense for your location. Don’t worry, this is super easy!
Simply open Google and type “average monthly temperatures for [your location] ” into the search bar. And click search!
Looking at the daily high temperatures, find the highest and lowest temperatures for the year. Write these numbers down.
For example: If in my search I found 98 degrees to be the hottest day and 12 degrees to be the coldest day, my temperature ranges might look like this:
In the Temperature Blanket Blueprint, I’ve made a few templates with common temperature ranges in both Fahrenheit and Celsius. You’ll also find two blank templates if the given ranges don’t work for your region or, if you want to customize your colors. And if you’re using a notebook, you already know you have free range here!
If you get behind on recording your daily temperatures or are basing your blanket on a year in the past, you can usually find daily temperature data pretty easily with a quick internet search.
I’ve found Weather Underground to be very helpful for both current, and past year temperature data.
Step 3: gather your materials
MATERIALS
- WeCrochet Brava Worsted, 4-medium weight, 100% acrylic yarn:
- Main Color = White (used for border and in between months)
- Contrasting Colors = Green Grass, Avocado, Seraphim, Fairytale, Tranquil, Tidepool, Seashell, Coral, Caution, Persimmon
- OR, any 4-medium (worsted) weight, 100% acrylic yarn; see notes below.
- 5.5 mm crochet hook
- scissors
- yarn needle
- notebook OR binder
- pen
- hole punch
- laminator (optional)
IF CUSTOMIZING YOUR COLORS
- Count out how many temperature ranges you’ll be using in your blanket. Then, pick out one color per temperature range. Select one additional color to be your main color. The main color will be used to separate months and also used for the border.
ADDITIONAL COLORS & SPECIAL OCCASIONS:
- Consider adding an additional contrast color to mark a special occasion on your blanket such as a birth, anniversary or graduation, etc. For example, on the row of a special date, make that line stand out by completing a few stitches of that row in a contrast color.
HOW MUCH OF EACH COLOR WILL I NEED?
- This is virtually impossible to know. Because we won’t know the daily temperature until after it happens, we won’t know how much of each color we’ll actually need.
Here’s what I suggest…
- Grab at least one skein of each color to get you started. Since you’ll likely be getting yarn as you go, I suggest getting a mass produced yarn that you know is readily available to you whether online or in a chain craft store. That way you can buy yarn as you need it and since it’s mass produced, colors will likely be more consistent in differing dye lots.
Step 4: get organized
Should I really crochet one row every single day?
You can, but you don’t have to! Decide on a crochet frequency that works best for you.
- daily
- weekly
- monthly
- whenever I feel like it
Look at this project like you would any other goal. Decide on a crochet frequency that feels right for you. Because if you do, you’ll be more likely to see this year long project through to the very end.
And once you set your goal, don’t worry if you fall behind. You can always get caught up! It is just crochet, after all.
Decide your method of tracking – Notebook or Binder (+ PDF)
You can grab the printable PDF here OR, use a notebook and follow the below instructions.
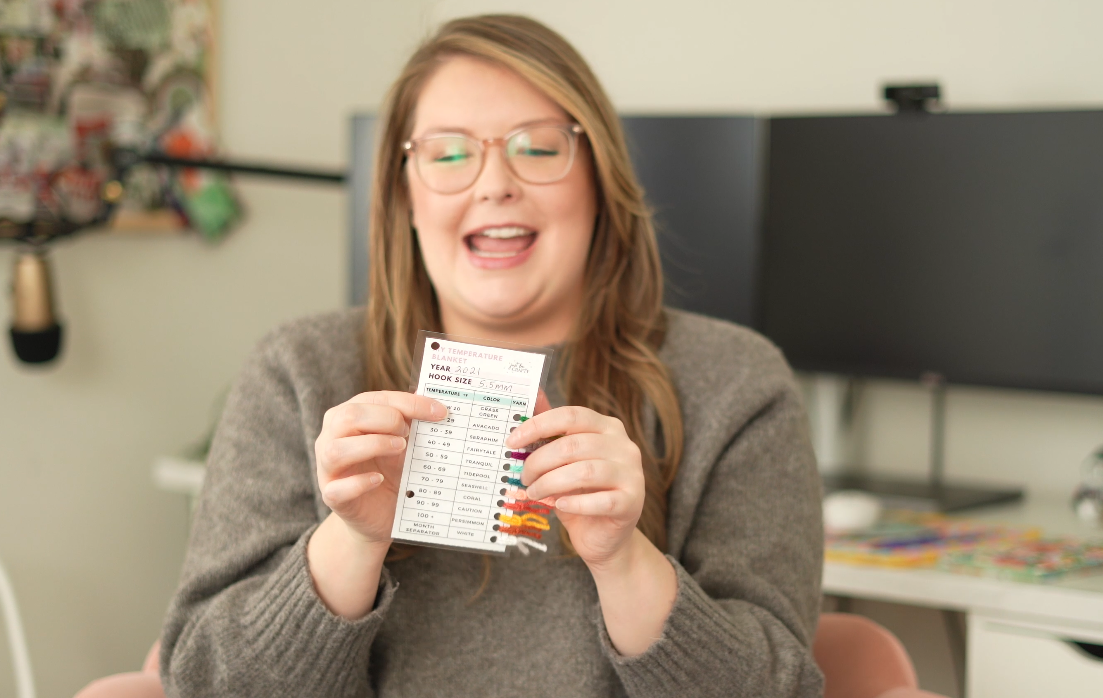
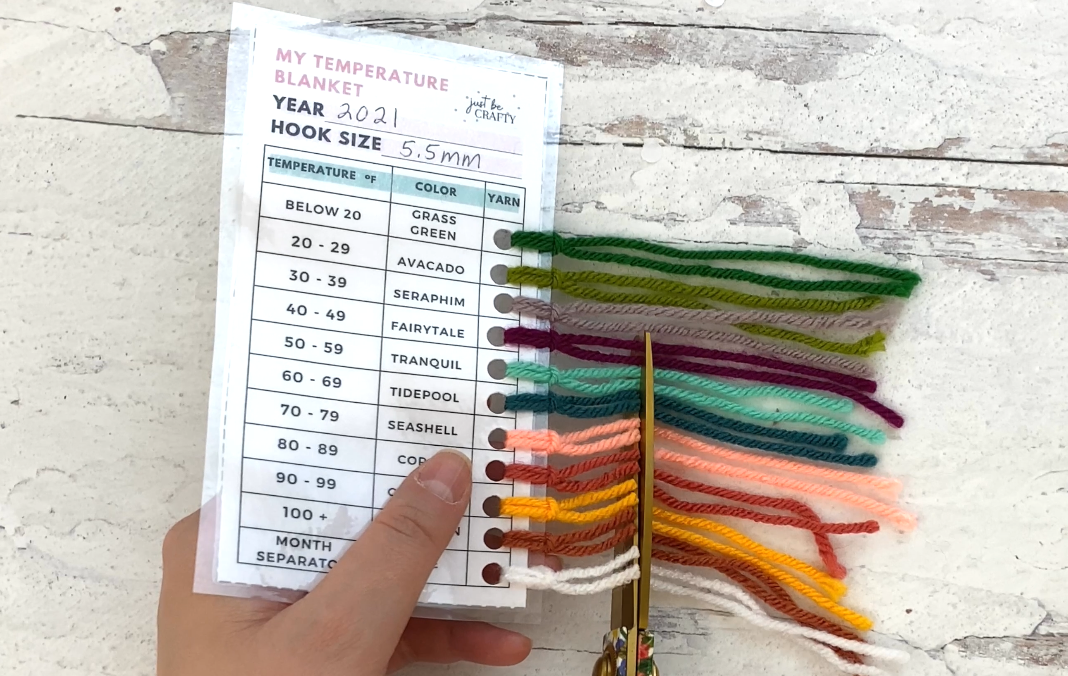
Make a Yarn & Temperature Key
Grab all of your yarn, and cut out about 5 – 6 inch strips of each color you’ll be using in your blanket.
I like to designate the first page of my notebook to my Yarn & Temperature Key. Here I will write out my chosen year and hook size and then I’ll separate the rest of my page into three columns:
- Column 1: list out your temperature ranges
- Column 2: list out your corresponding colors to each temperature range
- Column 3: reinforce side edge with tape and then make one hole punch per row (if spaces are too close together, stagger your hole punches). Knot each color to corresponding hole punch.
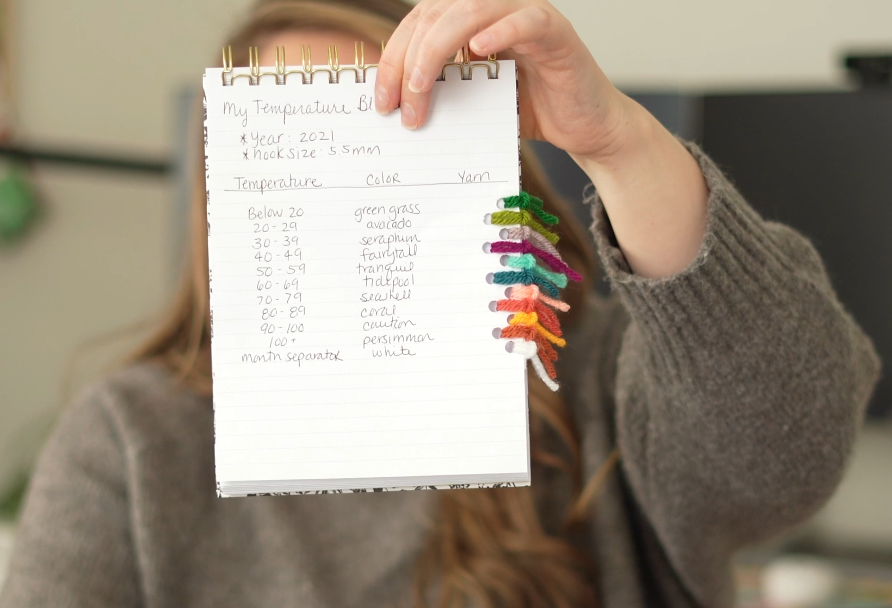
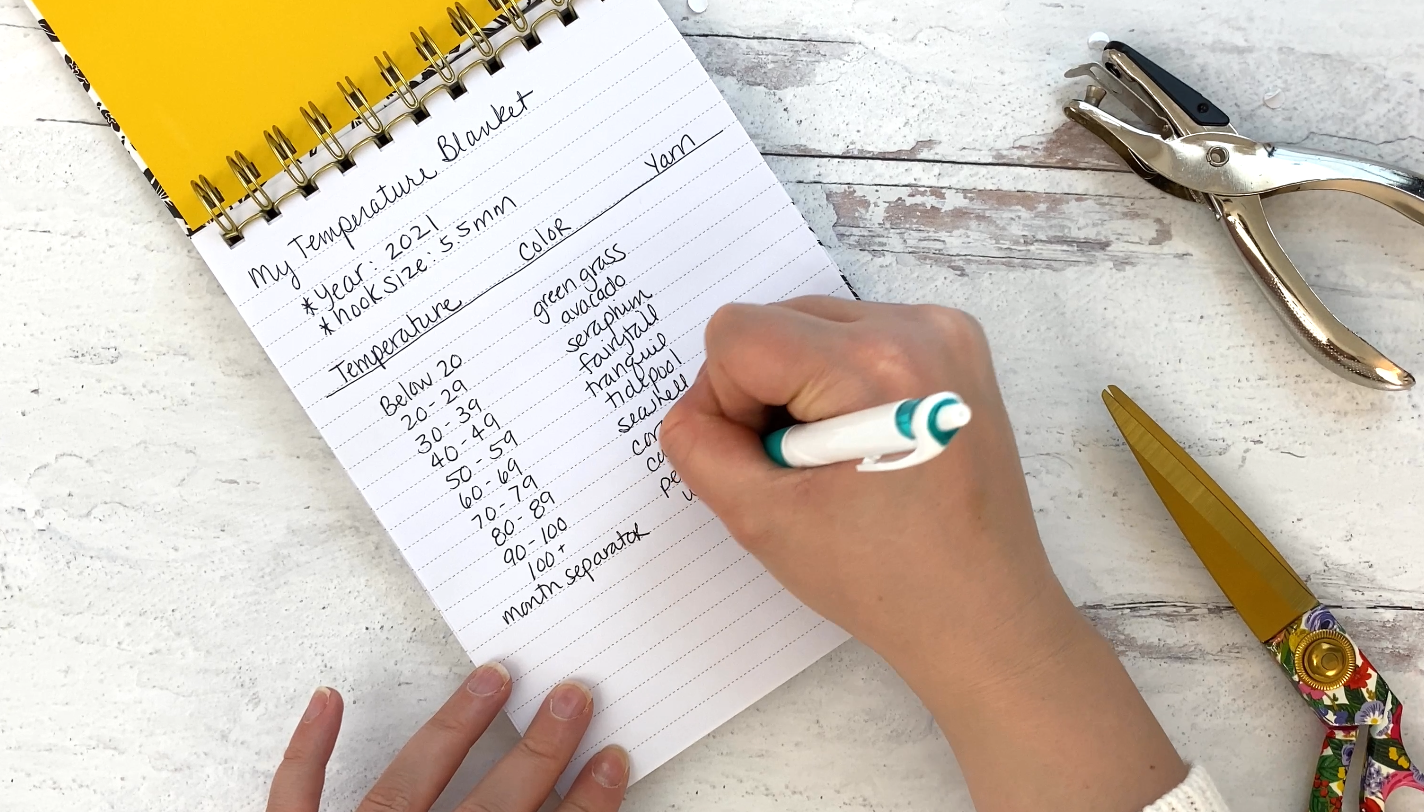
Your key is done!
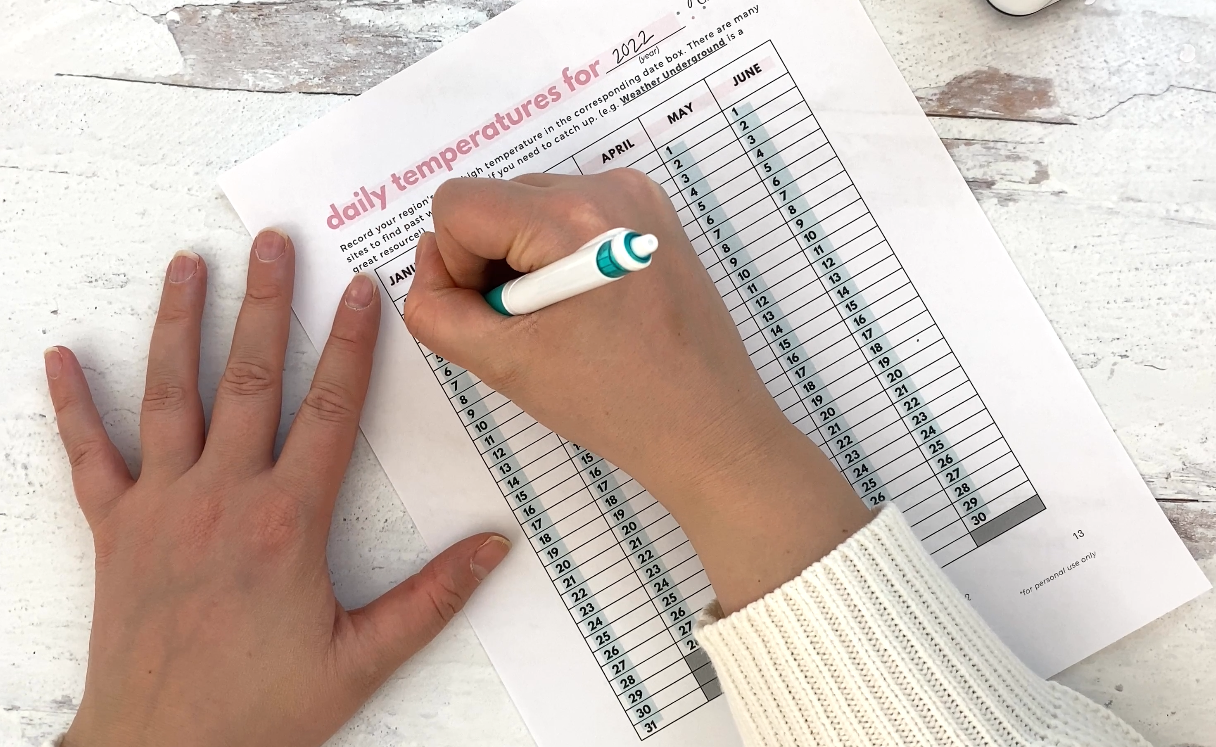
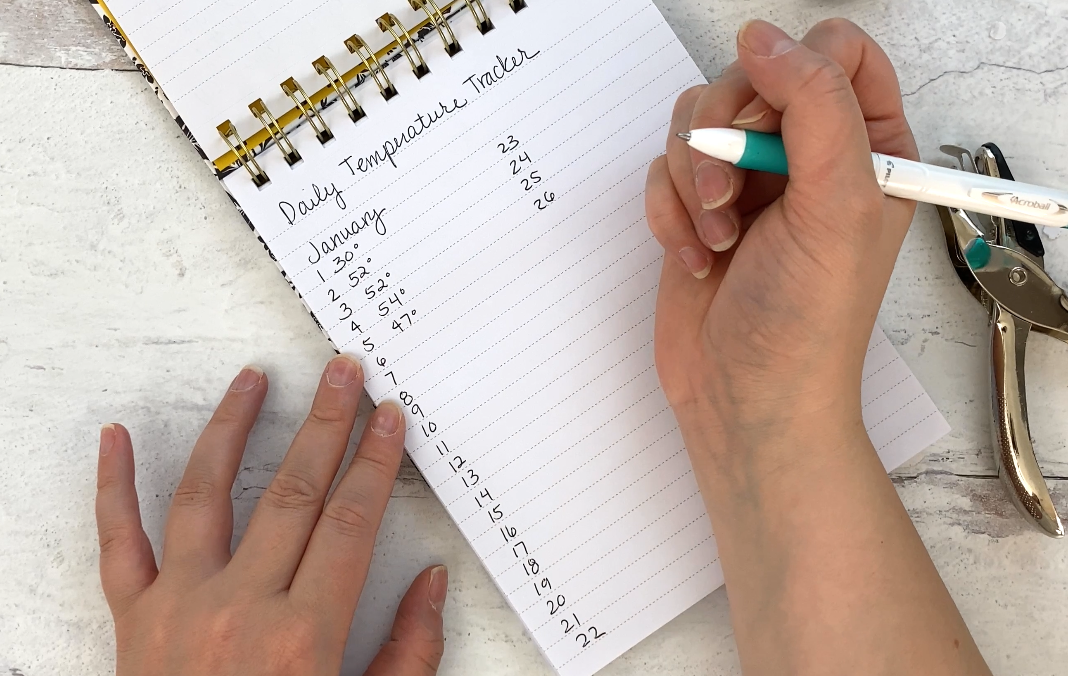
Make a Daily Temperature Tracker
You’ll want to designate one month to each page. Start by writing the month at the top of the page and then list out the dates one by one down each line. Be sure to make not of any special dates that you might want to embellish with a few stitches of a contrasting color (as mentioned in my video).
Time to get started on the blanket!
At this point you should be completely organized and ready to start your blanket. I typically like to sit down and crochet each week, so on Sunday all find all my temperatures for the previous week and write them down in my tracker. As I crochet each row, I’ll mark them off by highlighting each row after I’ve completed it so that way I can always keep my place.
And that’s it, you should be all set to get started on a successful temperature blanket!
Share your progress with me and others by snapping a picture and sharing on Instagram! Use the hashtag #JBC2022temperatureblanket and #justbecrafty so I can see your beautiful blanket!
Will you be making a temperature blanket this year?? Let me know in the comment section below!
Crochet Temperature Blanket Pattern – Starts here:
Gauge
- 4 inches = approximately 9 sc stitches (plus their chain 1) over 17 rows
Finished Measurement
- Approximately 56 inches wide by 88 inches long. (Not including border.)
Stitch Tutorial
I’ve made video tutorials to help walk you through the moss stitch. In the tutorials I go over how to do the moss stitch, change colors, and how to weave in your ends as you go.
- Right handed: https://youtu.be/-UxxDb451RM
- Left handed: https://youtu.be/5DoLcejJ-fQ
Pattern Notes
- Use your Daily Temperature Tracker to record the temperature everyday. As you complete each row be sure to cross out the corresponding day to keep your place!
- Use your Yarn & Temperature Key to figure out which color to use for each given day.
- Separate months by crocheting two rows of your Main Color between each month.
- To save yourself later, weave in your ends as you go by crocheting over your tails as you work. See video tutorial link listed in the VIDEO HELP section for help with this!
Key
- ch chain
- sc single crochet
- sl st slip stitch
- sp space
- st stitch
Written Pattern
With Day 1 color, ch 254 (if altering width – must be an even number)
ROW 1: Starting in 4th ch from hook, sc, *ch 1, sk a ch, sc in next ch; repeat from * across row; turn.
ROW 2: Ch 2, sc in next ch 1 sp, * ch 1, sc in next ch 1 sp; repeat from * to end of row; last sc of row should be placed in starting ch sp from previous row; turn.
Repeat ROW 2 for the remainder of the project.
Cut yarn and attach colors as needed (use tutorial for help).
Once you have completed an entire month of rows, crochet two rows of moss stitch in Main Color.
End with color assigned to last day of the year. Cut yarn and weave in any remaining tails.
BORDER
Attach Main Color to any corner.
Round 1: Ch 1 and make 3 sc in same corner space. Sc evenly around blanket, making 3 sc in each corner. Join with 1st stitch of round using a sl st.
Round 2: Ch 1, single crochet in each stitch making 3 sc in each corner st.
Repeat Round 2 for a total of 5 rounds. Cut yarn, weave in ends.
Enjoy!
This sounds like a wonderful idea for Christmas gifts!! Love how organized you are with a binder!
Thanks so much Debra! I hope you enjoy!
Looks like a great idea! My favorite color is blue.
Yay! Check your email! 🙂
Love it! Blue, is my favorite!
Love it! Love dark green.
Yay! Check your email! 😀
The YouTube / Instagram giveaway has been closed. Thank you so much to those that entered. All winners have been contacted – be sure to check your emails!
Hi! Can you tell me how many rows you did per day?
Hi Kim! I suggest doing one row per day!