Crochet Checkered Triangle Hair Scarf Pattern (C2C Tutorial)
Learn how to make this super fun crochet checkered triangle hair scarf. Follow along with the step by step video tutorial, or just follow the written pattern!
About the pattern
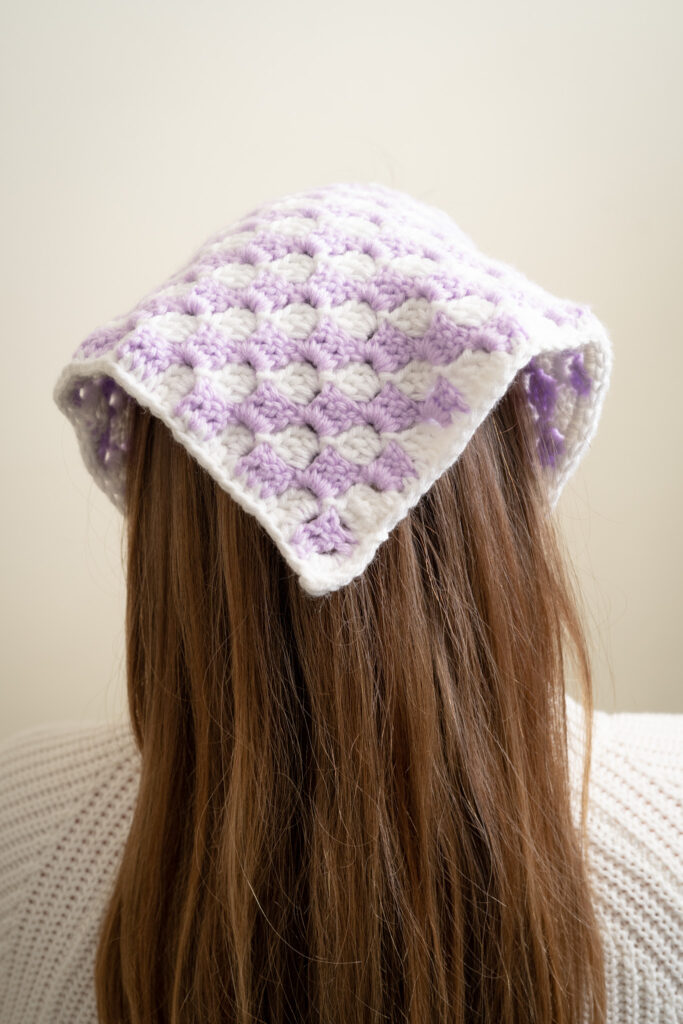
As a millennial who grew up in the 90s and early 2000s, I loved the resurgence of 70s fashion, including triangle bandana hair scarves. This checkered crochet version is a nostalgic and fun project.
Crochet Techniques Used:
This pattern is ideal for intermediate beginners and uses the following crochet stitches/skills:
- Chaining
- Single crochet
- Half double crochet
- Double crochet
- Triple crochet
- Slip stitch
The scarf pattern uses the corner to corner crochet technique also known as C2C crochet. If you are unfamiliar with the technique, I do over it in more detail in my Corner to Corner Crochet Tutorial, which I have linked in the helpful resources section below. I do go over the C2C technique in this pattern video as well, but I highly suggest checking out that tutorial first, before starting this project.
Once you have all these techniques under your belt, I’m confident you can tackle this pattern.
Step-by-Step Instructions:
Follow the written pattern and step-by-step video tutorial to create your checkered triangle hair scarf. If you’re new to the C2C technique, refer to our detailed Corner to Corner Crochet Tutorial linked below.
Helpful Resources
Video Tutorial for Checkered Triangle Hair Scarf
Corner to Corner Crochet Tutorial
See my photo tutorial here, or check out the video below:
Crochet Checkered Triangle Hair Scarf Pattern
Prefer to print? Learn about my membership program. Get big discounts on patterns or gain instant access to all my patterns and ebooks in one place! Click here to learn more information.
Just want the Crochet Checkered Hair Scarf Pattern? Purchase the printable PDF here!

*This post may contain affiliate links. Please see my disclosures page for more information.
All patterns on this blog are for personal use only and may not be redistributed, copied, blogged, or sold as your own. You may sell items made by my patterns as long as the item is made by you personally (not mass produced) and that proper credit is given back to me and my site, Just Be Crafty. You may not use my photos for your online sales listings.
Skill Level
- Beginner / Intermediate
Materials
- Big Twist Value (or any #4 medium weight, 100% acrylic yarn)
- 2 colors of your choice – a main color + a contrasting color
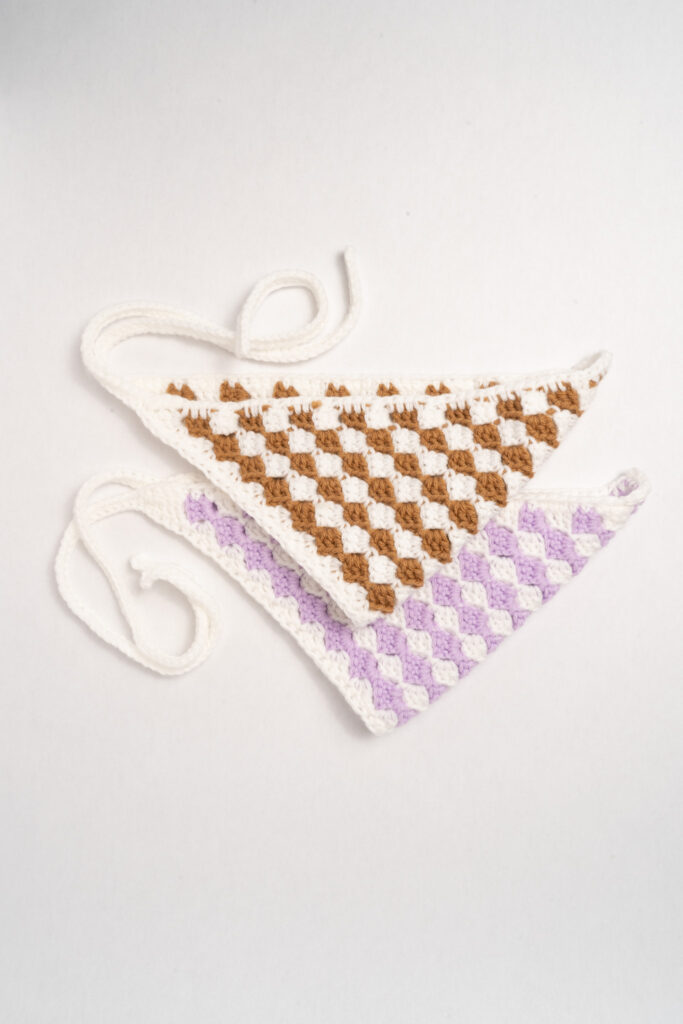
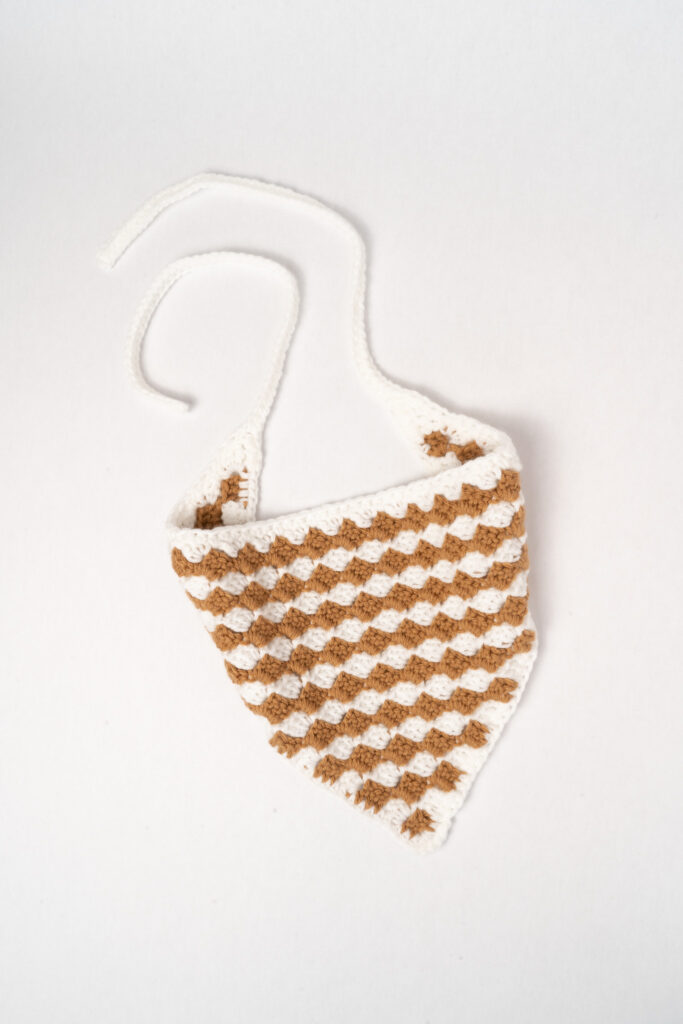
- Pictured in Ivory (main color) and Camel & Lilac (contrasting colors)
- 5.0 mm hook (I use this set)
- Scissors
- Yarn needle
- Blocking boards & straight pins (I have this set),
- and a steamer OR spray bottle filled with plain water
Gauge
- 7 x 7 block C2C square = approximately 5 in. (13 cm) blocked.
Sizing & Finished Measurements
- One size
- Approximately 9.25 in. (24 cm) from top edge to triangle point, by 19 in. (48 cm) wide, flat. (Measurement does not include ties.)
Key
- ch chain
- ch sp chain space
- dc double crochet
- sl st slip stitch
- sp space
- st stitch
- tr triple crochet
Notes
- Construction: In this project you will use the corner-to-corner (C2C) crochet technique to form a triangle. Main color and contrasting color are alternated each row, by breaking the yarn, and starting each row with a new color. Once triangle reaches the specified dimensions, the main color will be used to create the border and ties for the hair scarf.
- Color Changes: At the end of each row you will change colors. Color changes will begin on the last dc of the row. Once you’re on your last dc, stop before completing the last YO. Cut yarn and YO with new color. Continue as directed.
- Front & Back: This stitch is reversible but you’ll want to designate a front and a back. For consistency purposes, even numbered rows will mark the front of the work.
- The Border: Make border sc stitches in between each vertical dc, and 1 sc stitch along the side of each horizontal dc, as they face you, unless otherwise noted.

CHECKERED TRIANGLE HAIR SCARF PATTERN – Starts here:
With contrasting color, ch 6.
Row 1: Starting in 4th ch from hook, dc in each ch across.
Cut yarn, attach new color, and turn.
Row 2: Ch 6, starting in 4th ch from hook, dc in each ch across, sl st into ch sp of the block from the 1st row, ch 3, make 3 dc in same ch sp.
Cut yarn, attach new color, and turn.
Row 3: Ch 6, starting in 4th ch from hook, dc in each ch across, sl st into ch sp of next block, ch 3, make 3 dc in same ch sp, sl st into ch sp of next block, ch 3, make 3 dc in same ch sp; turn.
Cut yarn, attach new color, and turn.
Row 4: Ch 6, starting in 4th ch from hook, dc in each ch across, *sl st into ch sp of next block, ch 3, and make 3 dc in same ch sp; repeat from * until you’ve completed the last block of the row.
Cut yarn, attach new color, and turn.
Rows 5 – 17: Repeat Row 4. Row 17 should be a contrasting color. Cut yarn, attach main color, and turn.
Row 18: Ch 5, starting in 2nd ch from hook, make a sc, hdc in next ch, dc in next ch, tr in next ch, *sl st into ch sp of next block, ch 1, sc and tr in same ch sp; repeat from * until you’ve completed the 2nd to last block. Sl st into ch sp of last block, make a sc, hdc, dc, and tr in same ch sp.
Do not cut yarn. Do not turn work.
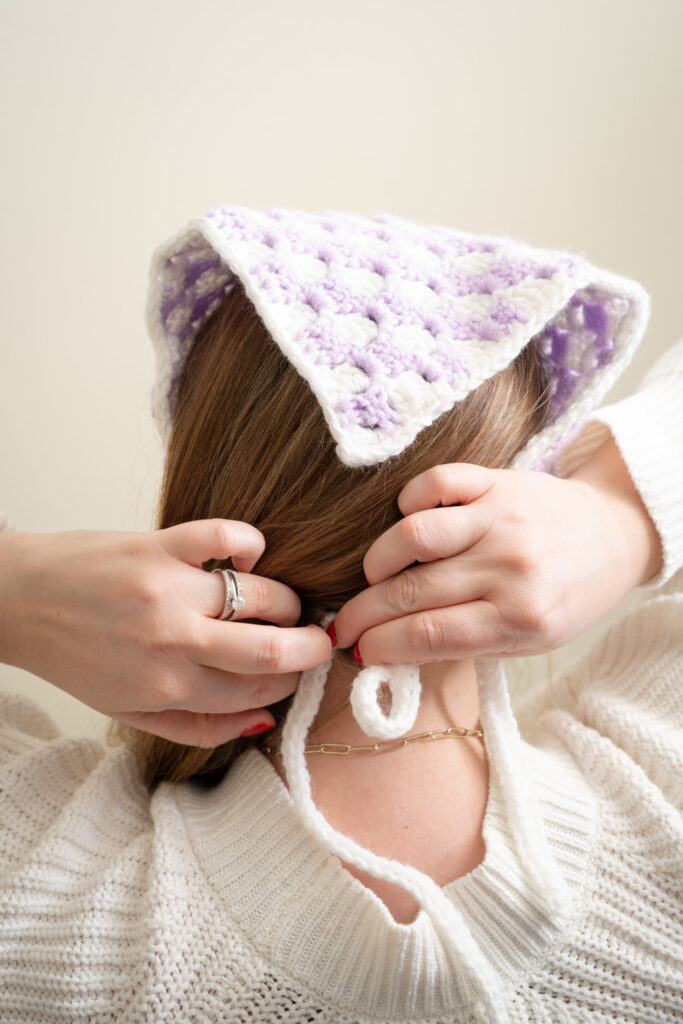
The Border & Making the Ties
You will now be working in the round. See notes.
With the front side facing up, ch 53. Starting in 2nd ch from hook, make a sc into each ch across until you reach back to the C2C triangle.
Make 2 sc on the side of the tr. Then sc evenly along the side edge until you reach the tip of the triangle. Make 4 sc in the ch sp of the block marking the triangle’s tip. Then, sc evenly along other side, ending with 4 sc in each of the 4 remaining stitches of the triangle.
Ch 53. Starting in 2nd ch from hook, make a sc into each stitch across until you reach back to the C2C triangle.
Make a sc into each of the next 4 st’s ending with the tr, then sc into sp between the tr and the next sc; sc into next sc, sc into next tr, sc into sp between the tr and the next sc; repeat from * until you reach the last 4 st’s. Make 1 sc in each of the next 4 st; sl st into next st to join round.
Fasten off.
Finishing
Weave in all ends.
Blocking
Lay blocking boards out in front of you. Arrange hair scarf onto blocking boards and pin in place to proper measurements listed in the pattern. Lightly steam OR spritz with plain water using a spray bottle until lightly dampened. Let dry. Once dried, remove all pins.
Attach into hair and enjoy!
