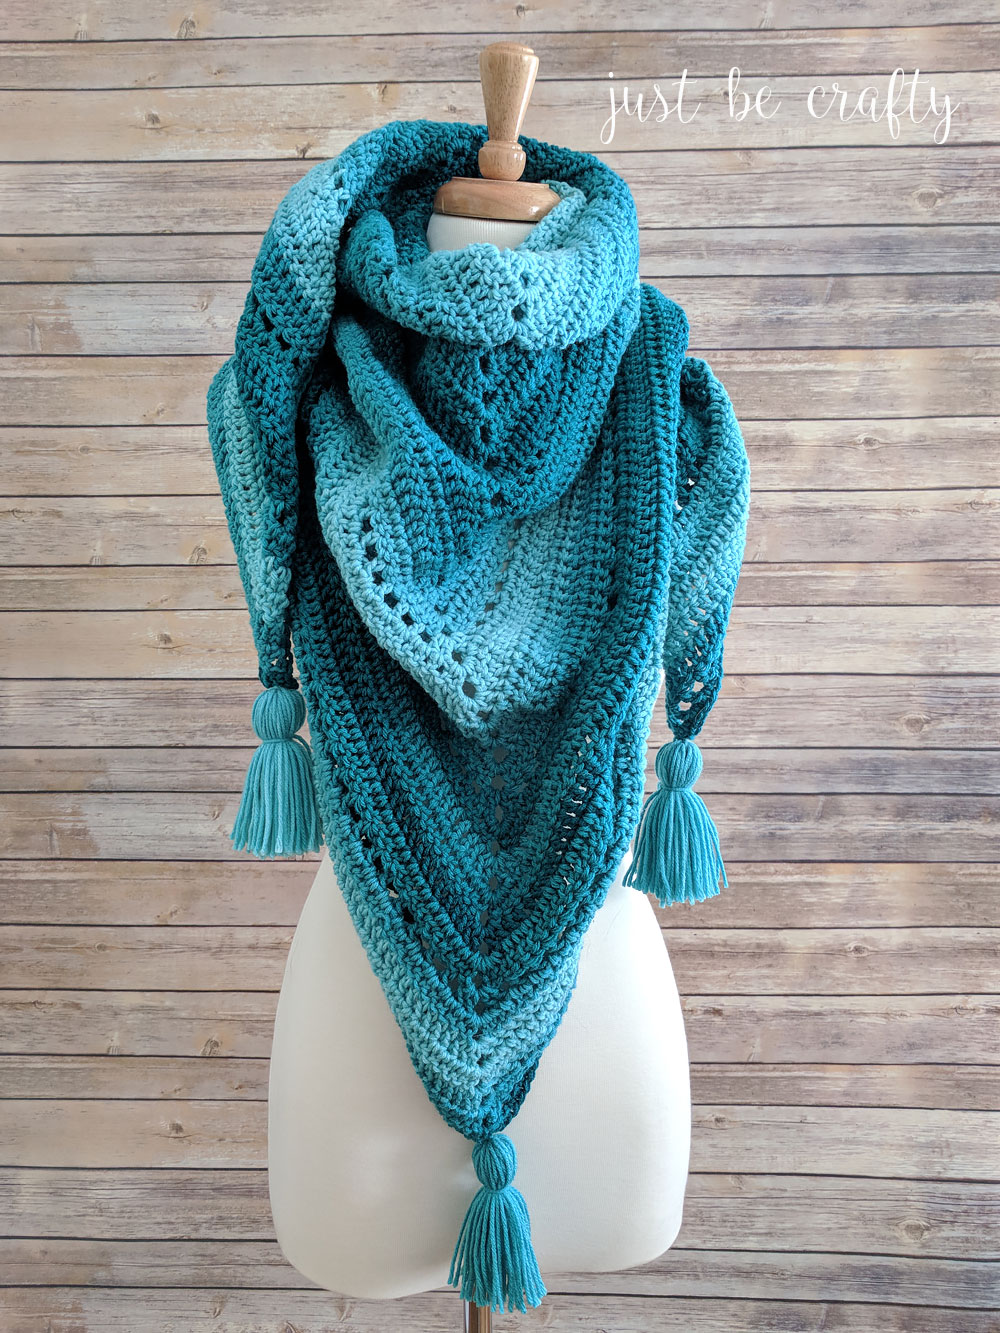
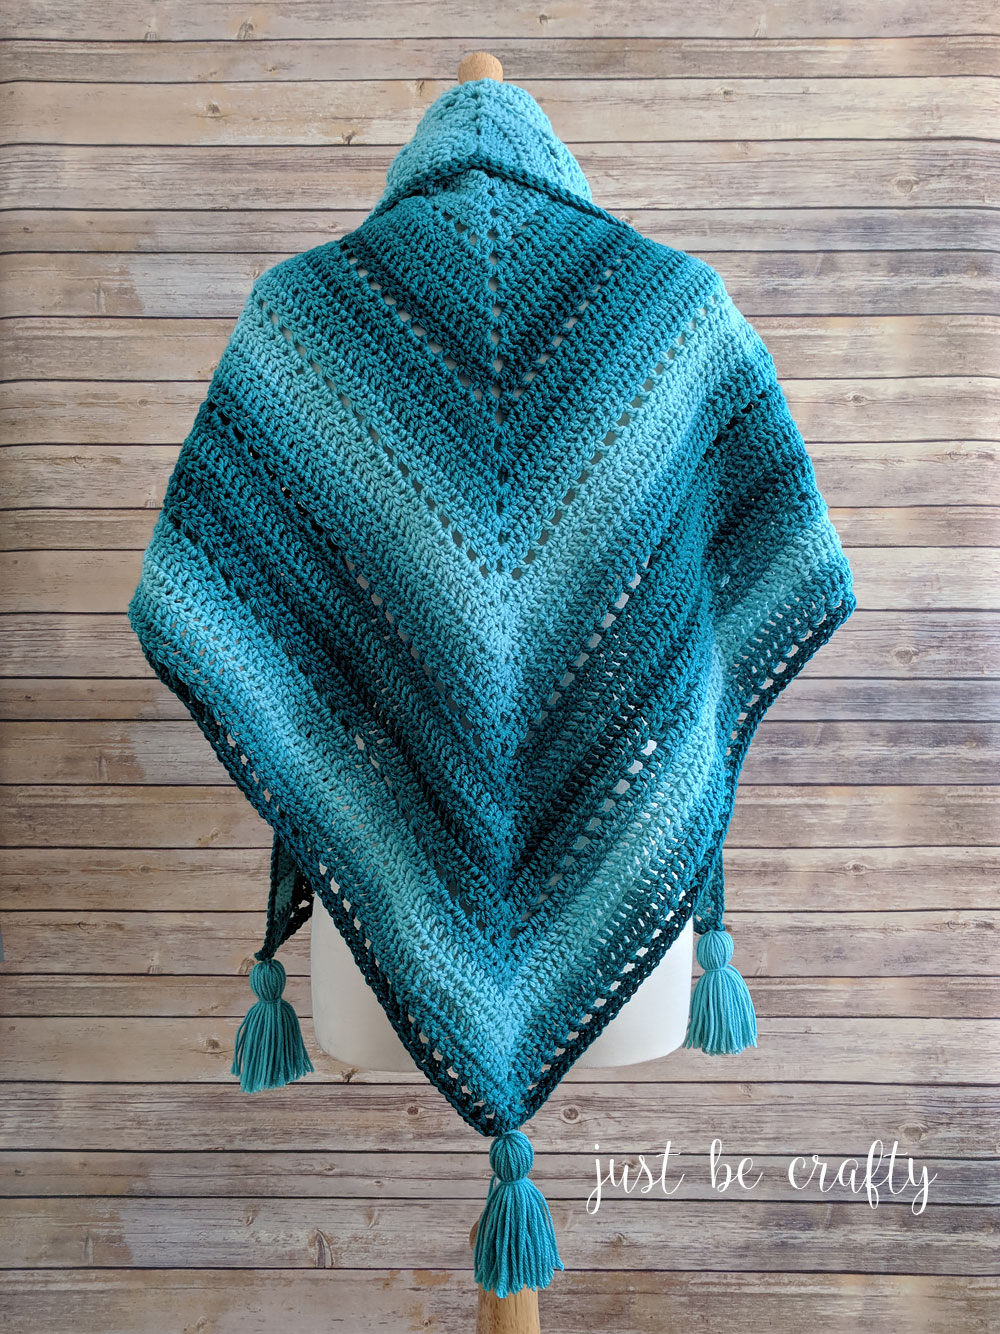
The Crochet Triangle Shawl is the perfect project to make as we transition into Spring. It’ll keep you warm when you feel a chill, but light enough to catch a nice warm breeze!
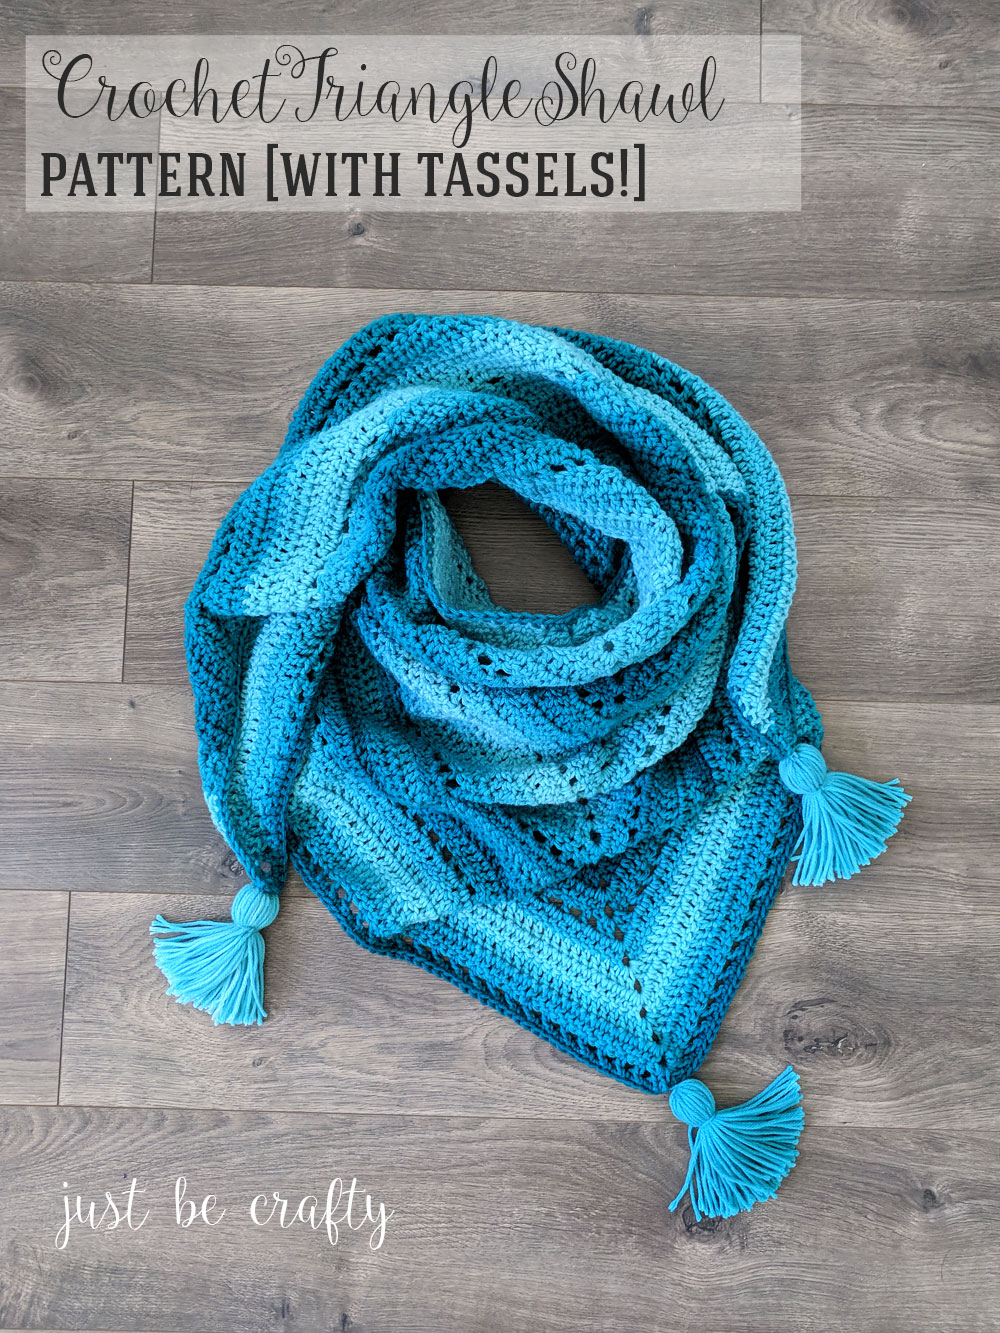
Today I am sharing the Crochet Triangle Shawl [with tassels!] Pattern! This simple and affordable project has the potential to be one of my top wardrobe staples as we transition from winter into spring and I think if you give it a try it will be one of your staples too!
Shawls are perfect for this time of year as you can easily wrap yourself up when you feel a chill and loosen it up a bit to fall around your arms and shoulders if you get too hot.
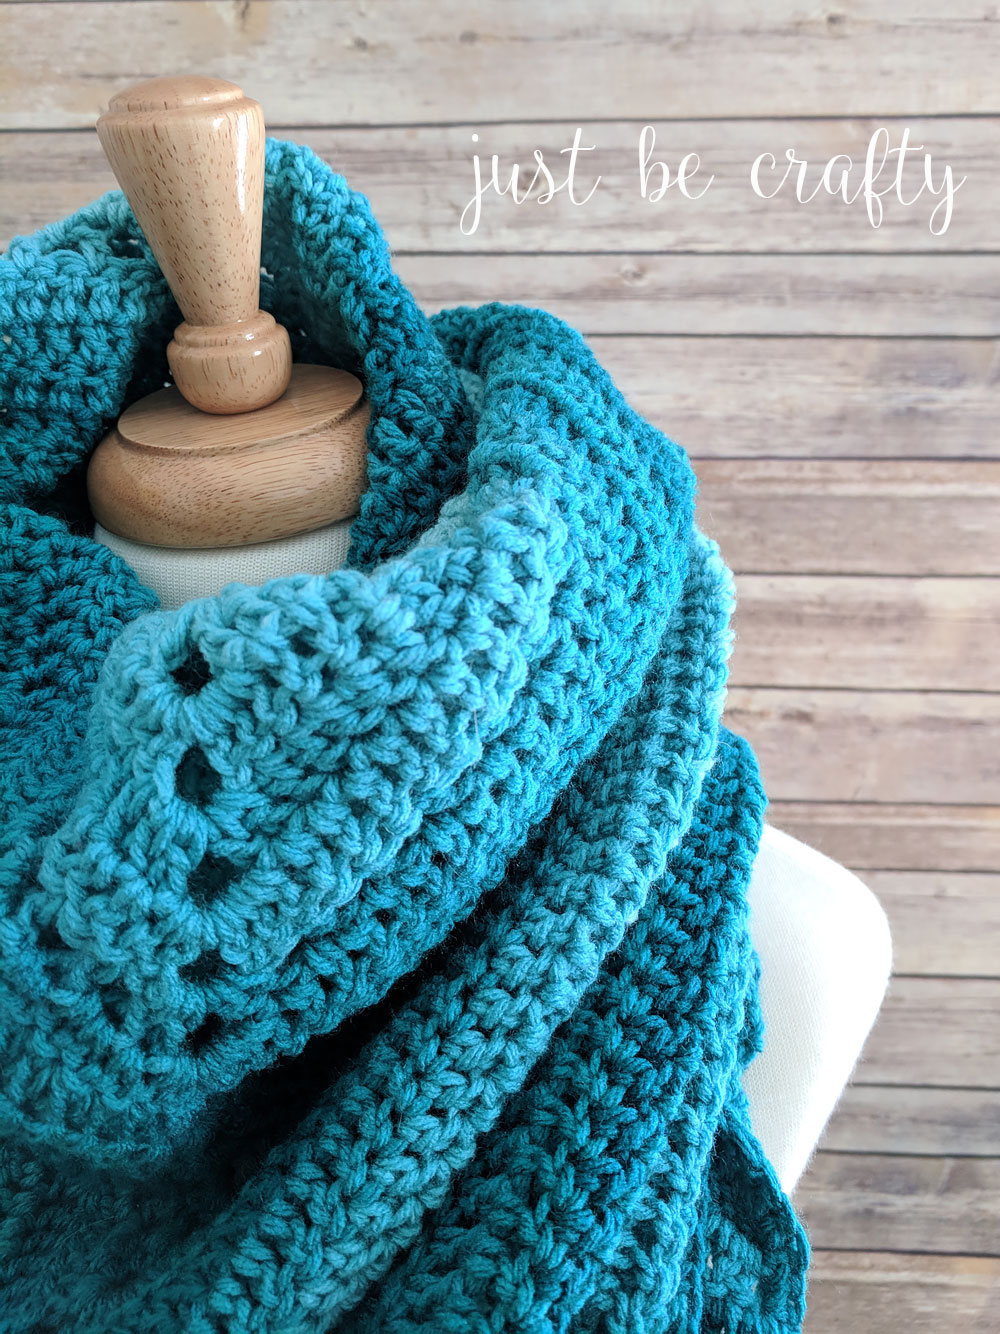
This pattern features Red Heart Ombre and I have to say I really LOVE how it turned out. The ombre effect gives off a beautiful monochromatic striping so you get gorgeous subtle color changes without having to change yarn colors and weave in any extra ends! (Umm… sign me up!)
This was my first time using Red Heart Ombre yarn and I really enjoyed it. I enjoyed it so much that I actually have another crochet scarf pattern in the works that will feature this yarn as well! So yes, Ombre is a keeper! 🙂
If you’d like to give this pattern a try for yourself, keep on scrolling!


This post contains affiliate links. For more information please see my disclosures page.
Crochet Triangle Shawl Pattern
Materials
- 2 skeins Red Heart Super Saver Ombre (Finished shawl pictured in Deep Teal; tutorial shawl pictured in Spearmint)
- 5.5mm crochet hook
- Sharp scissors (You want really sharp scissors for your tassels! So be careful!)
- 3″ by 4.5″ cut piece of cardboard or sturdy posterboard
- Yarn needle
Key
- ch – chain
- dc – double crochet
- sk – skip
- sl st – slip stitch
- sp – space
- st – stitch
Gauge
- 4 inches is equal to approximately 12 dc by 7 rows
Finished Measurement
- One size fits all
- Approximately 63 inches wide (along top edge) with a 39 inch depth (from middle top edge to triangular peak)
- Sizing notes
- For a larger size, purchase additional skeins and complete repeats until you reach your your desired fit.
- For a smaller size, make less repeats than what the pattern calls for. Make repeats until you reach your desired fit.
Note
- The starting ch 3 of each row will count as a stitch, unless otherwise noted.
Pattern
Row 1: In magic ring, ch 3 (counts as a dc) and make 5 dc, ch 2, 6 dc; turn (12)
You will be working back and forth in rows.
Row 2: Ch 3, dc in same st as ch 3, dc in each st up to ch 2 sp, make 2 dc, ch 2, 2 dc in ch sp, dc to end making 2 dc in the 3rd ch of the ch 3 from previous row; turn (18)
Rows 3 – 5: Repeat Row 2. (Please note that as you crochet each row, the stitch count will increase. So after completing Row 3, you will end with 24 stitches, and so on.)
Row 6: Ch 3, dc in same st as ch 3, ch 1, sk a st, *dc, ch1, sk a st; repeat from * until you reach ch 2 sp (you should end w/ a ch 1, sk a stitch when you arrive at the ch 2 sp); 2 dc, ch 2, 2 dc in ch 2 sp, ch 1, sk a st, * dc, ch 1, sk a st; repeat from * to end of row, make 2 dc in 3rd ch of ch 3 from previous row; turn.
Row 7: Ch 3, dc in same st as ch 3, dc in ch sp, dc in dc, continue making dc’s in each stitch and ch 1 sp until you reach the center ch 2 sp, 2 dc, ch 2, 2 dc in ch 2 sp, continue making dc’s until end of row, making 2 dc’s in the 3rd ch of the ch 3 from previous row; turn.
Rows 8 – 11: Repeat Row 2
Row 12: Repeat Row 6
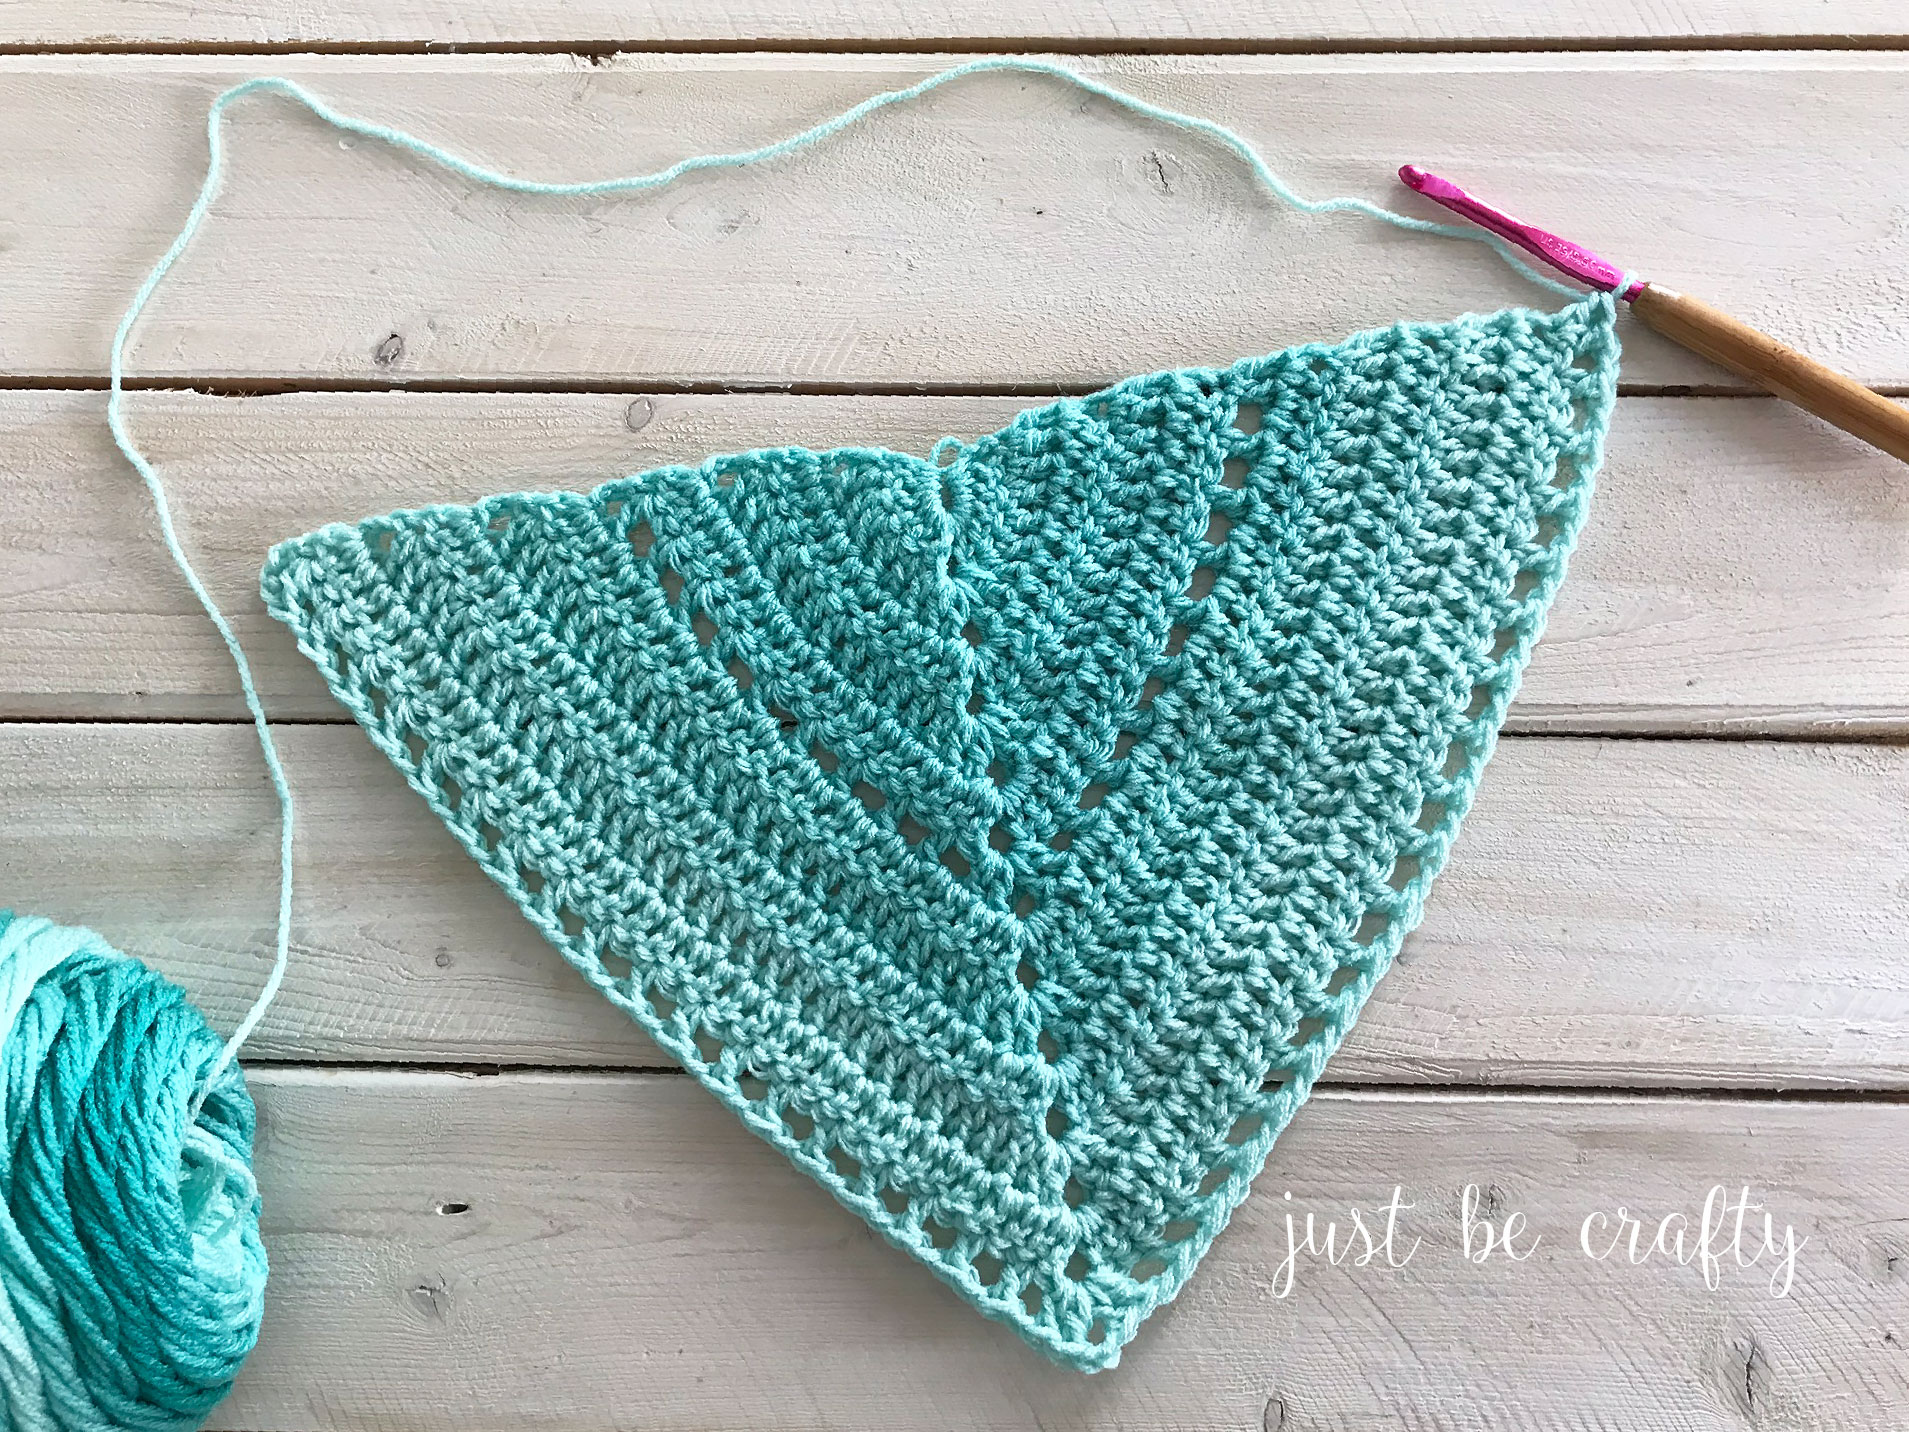
Repeat Repeat Rows 7 – 12, six times.
Border Round
Lay piece flat in front of you with whichever side you would like to be the front. Position so that the flat edge is at the top, and the triangular portion is towards the bottom.
Start at the top right corner. (If you are not already at the top right corner, cut yarn and secure. Attach yarn at top right corner.)
Ch 1, (ch 1 does not count as st) make 3 sc in corner stitch that you are currently in and sc across top edge, making 2 sc per row; in top center stitch make 1 dc; make 3 sc in second corner. I had approximately 187 stitches (not counting my corners) along my top edge – this doesn’t have to perfect! Sc in each st along triangular bottom, making 3 sc in the center ch 2 sp. Join with 1st sc of round using a sl st.
Cut yarn, weave in ends.
Yarn Tassel Tutorial [make 3]
See photo tutorial below!
See full size image here.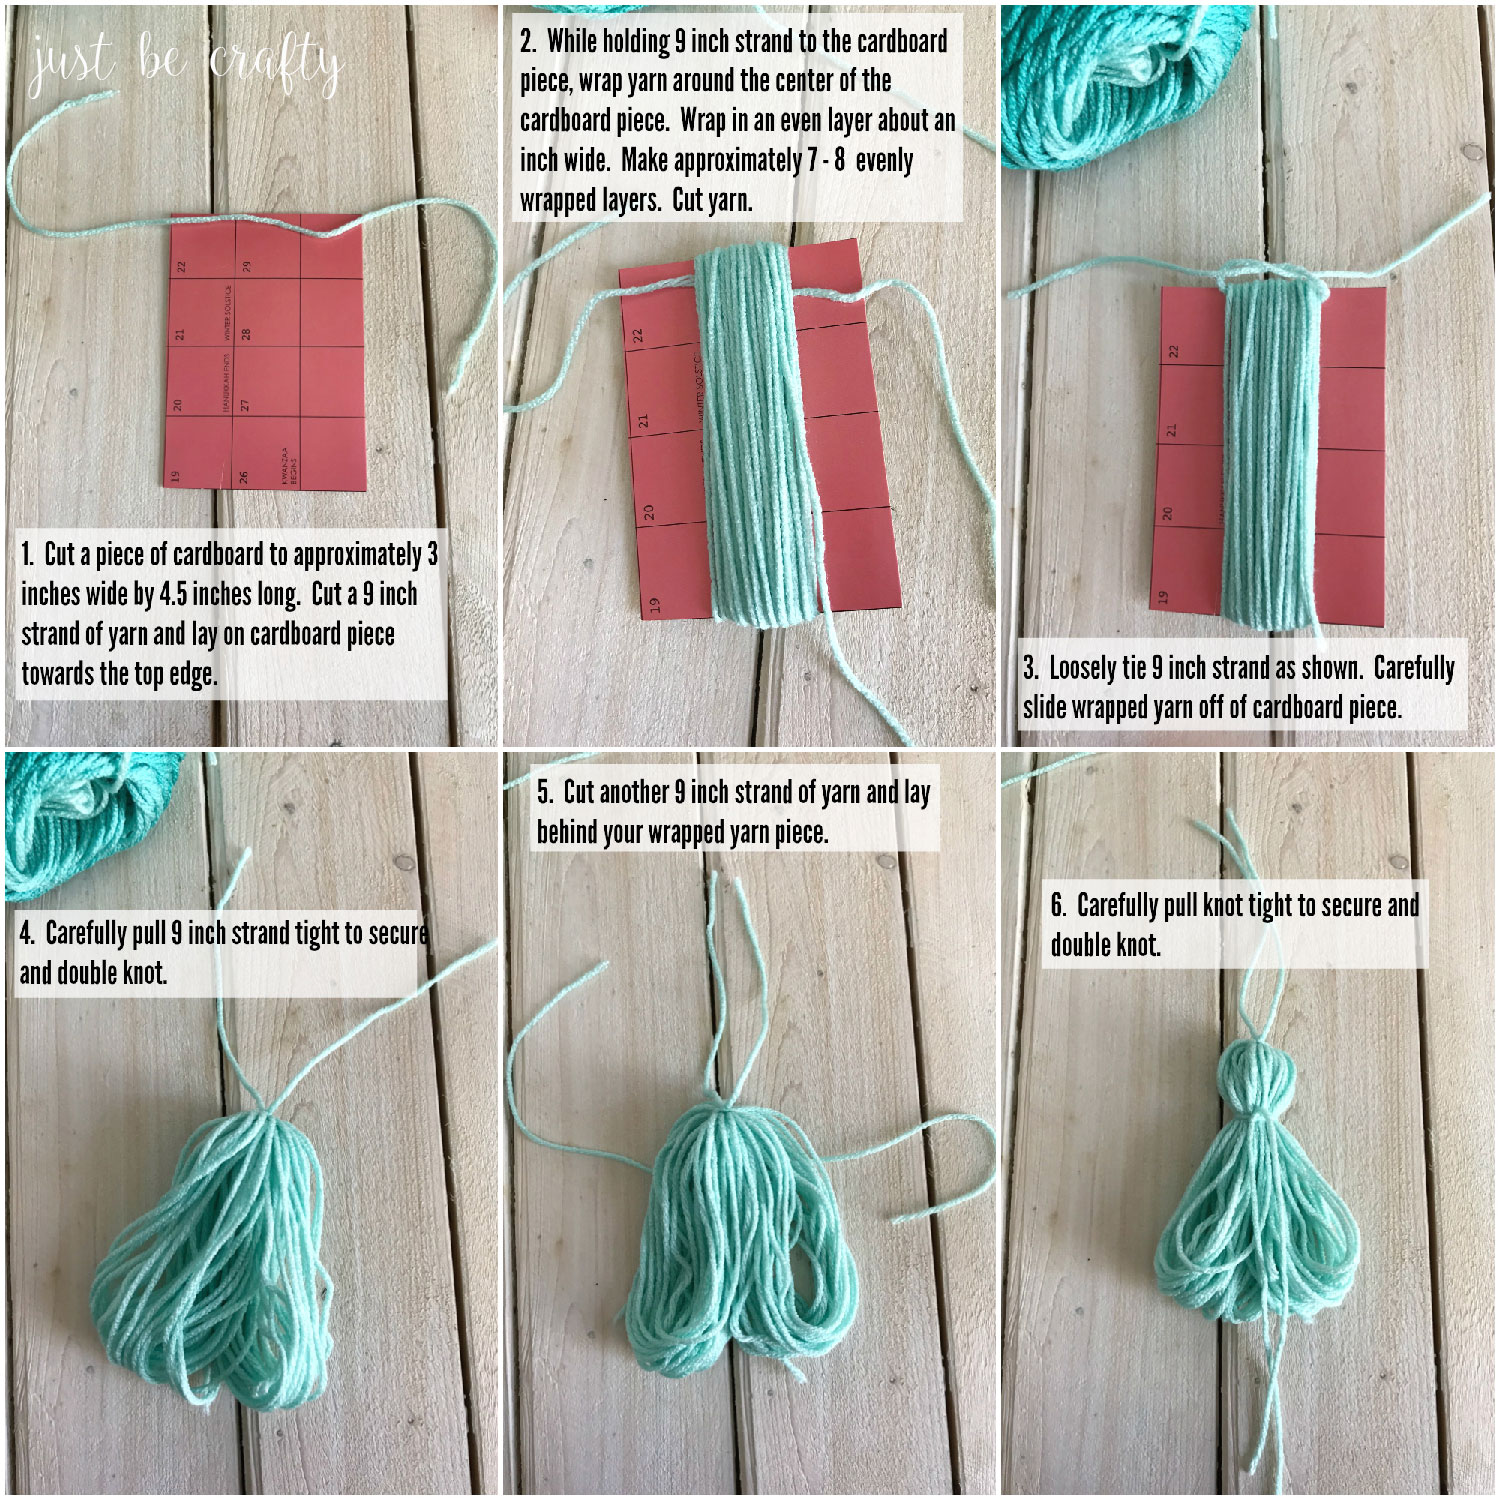

Tie tassels to each corner of the scarf and secure. Weave in any ends.


Enjoy!