The Crochet Afghan Quilt – Three Part Series will turn your pile of yarn balls into a brand new beautiful blanket! Today’s post features Part 2 of the series and will cover everything you need to know about assembling your afghan. Purchase the ad-free full pattern in printer ready format here.
Hello and Happy Tuesday! The blanket featured in today’s photos is comprised of multiple small corner-to-corner crochet squares joined together to make one squishy blanket. There’s a lot to love about the corner-to-corner crochet technique but what I love most is that it looks complicated when in actuality its really quite easy once you get the hang of it!
I have broken the pattern into a three part series in order to take a deeper dive into how to complete each step. If you are a new crocheter, or maybe haven’t even tackled your first project yet, I invite you to participate in this series! I also invite seasoned crocheters to join in too! 
Today’s post is Part 2 of the series. If you missed Part 1, you can catch up here!
Below is an outline of the Crochet Afghan Quilt Series and what you can expect to see covered each week.
Part 1:
Part 1 is all about the Corner-to Corner (C2C) technique, and how to make a square! If you’re new to the world of C2C, the technique can be a bit intimidating at first. This is why I have provided both a video tutorial and a photo tutorial guide to help get you started. The tutorial covers:
-
What is C2C?
-
Materials needed for the entire project
-
C2C increasing
-
Color changes
-
C2C decreasing
If you missed Part 1, you can check it out here.
Part 2:
In today’s post we are picking up where we left off last week to cover everything you need to know about assembling your blanket together! Today’s post covers:
-
Blocking your squares
-
Arranging your squares into a beautiful layout
-
Joining your squares together
Part 3:
Part 3 of the series will be released Tuesday, February 19th, 2019! In this post we will pickup where we left off this week and cover everything you need to know about the finishing touches of your blanket. This section will cover:
-
Creating the blanket border
-
Weaving in your ends
This post contains affiliate links. For more information please see my disclosures page.
Crochet Afghan Quilt Series Part 2: Assembling Your Blanket
Purchase the ad-free full pattern in printer ready format here.
Part 2 Materials:
- Your 25 completed C2C squares
- Towel
- A nearby sink
- Large clean flat surface/floor space
- 6.0mm crochet hook
- Scissors
- Blocking Kit – optional (before I had a blocking kit, I used an old yoga mat and straight pins – this works well in a pinch!)
- Oscillating fan – optional
- Main color yarn (I used Caron One Pound in Off White)
Blocking Your Squares
Do I need to block?
- Blocking is an important finishing touch for many knit and crochet pieces. Blocking makes for a more professional finished look as it gives you a chance to shape your piece into the proper form and measurement.
- While not required, I highly suggest blocking your squares. In a project such as this or even a granny square blanket where multiple small pieces will be put together to form a large project, it is highly likely the sizes of your pieces will vary.
- If your squares are not the same size before joining together, some squares will likely pucker while others will appear stretched. The end result is a wonky bubbled blanket that you spent hours on! (Trust me, I have learned this the hard way!) Blocking solves this problem and will give you a beautiful blanket that lays flat!
How to block?
There are many different methods for blocking knitting and crochet. For this project, I suggest the following:
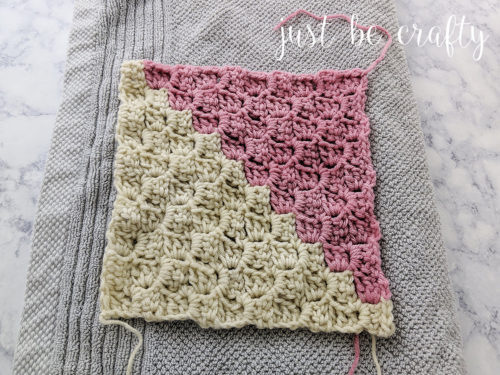
Step 1: Measure the height and width of all of your squares. Take the largest square measurement and remember this measuremet for Step 4. My measurement was 8.5 inches.

Step 2: Gently dampen your squares in room temperature water. Lay flat out on a towel.
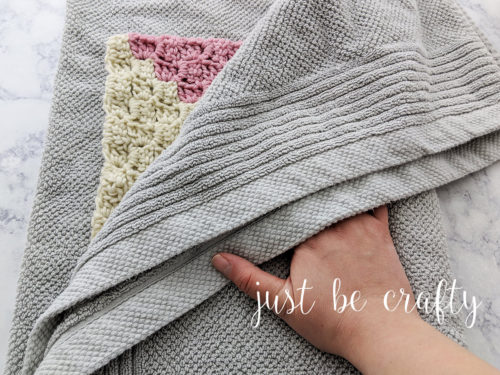
Step 3: Fold towel around your square. Gently press into the towel to draw any excess water out of the square.
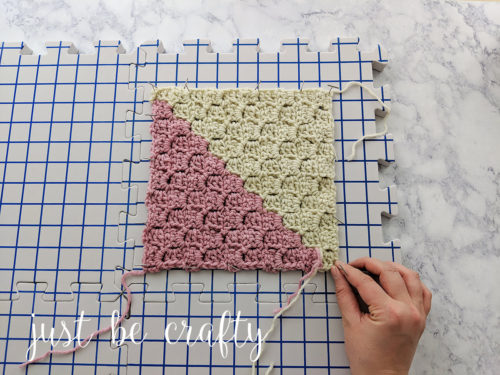
Step 4: On a blocking foam board, shape your squares into the measurement from Step 1. Pin in place. I use this blocking set, but if you don’t have one you can simply lay flat to the proper measurement OR use an old Yoga mat (that you don’t really care about) and secure the shape with straight pins.
Note: It is helpful to pin the square in place to ensure it stays in the correct measurement as it dries.
Allow piece to fully dry. Repeat process for all squares.
Tip: Place an oscillating fan nearby to help speed up the drying process.
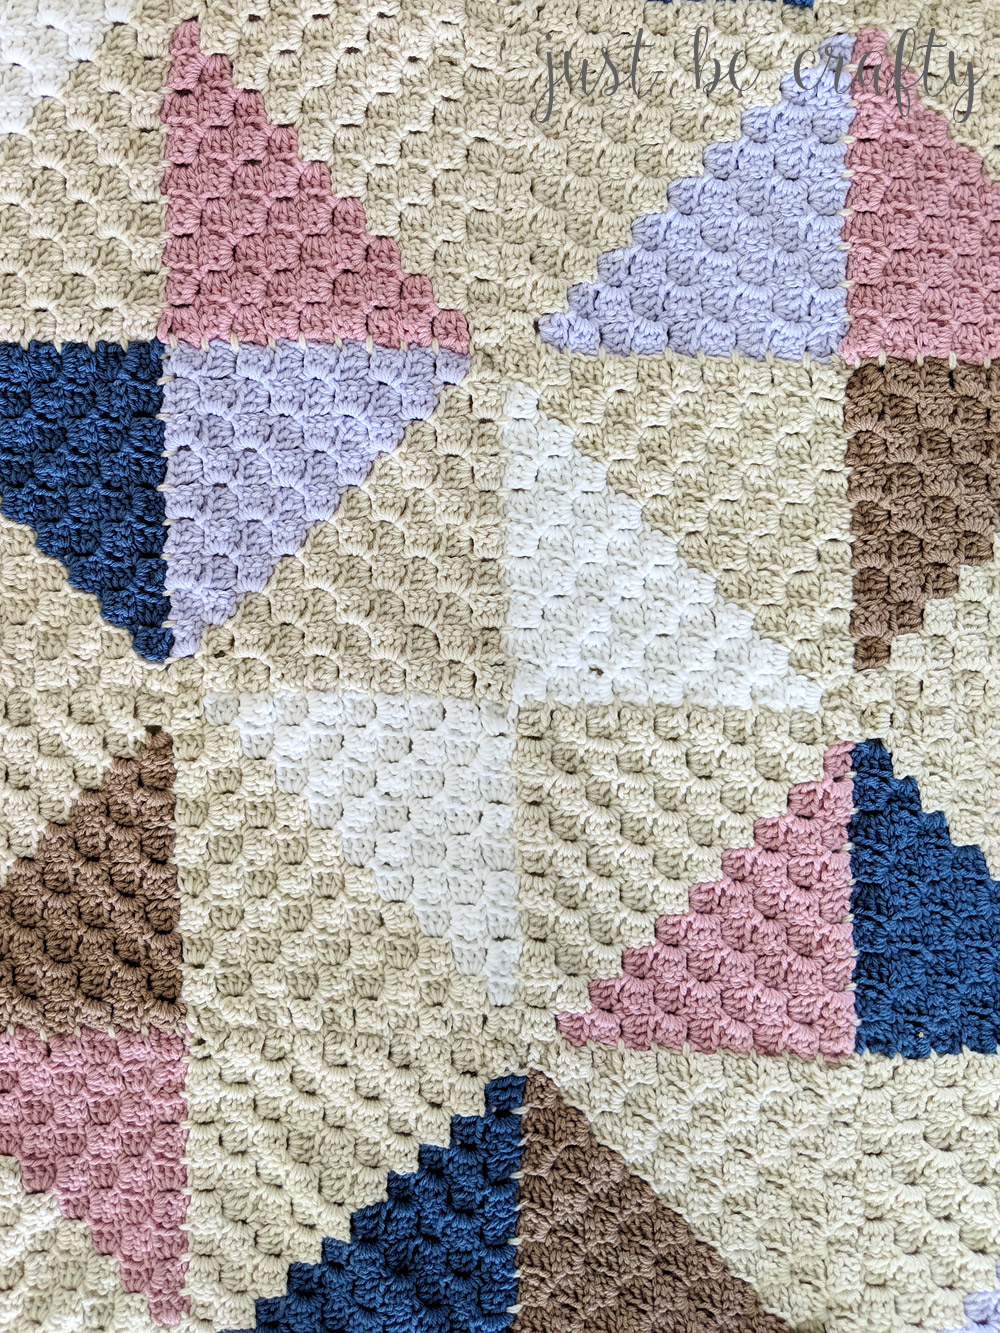
Arranging Your Square Layout
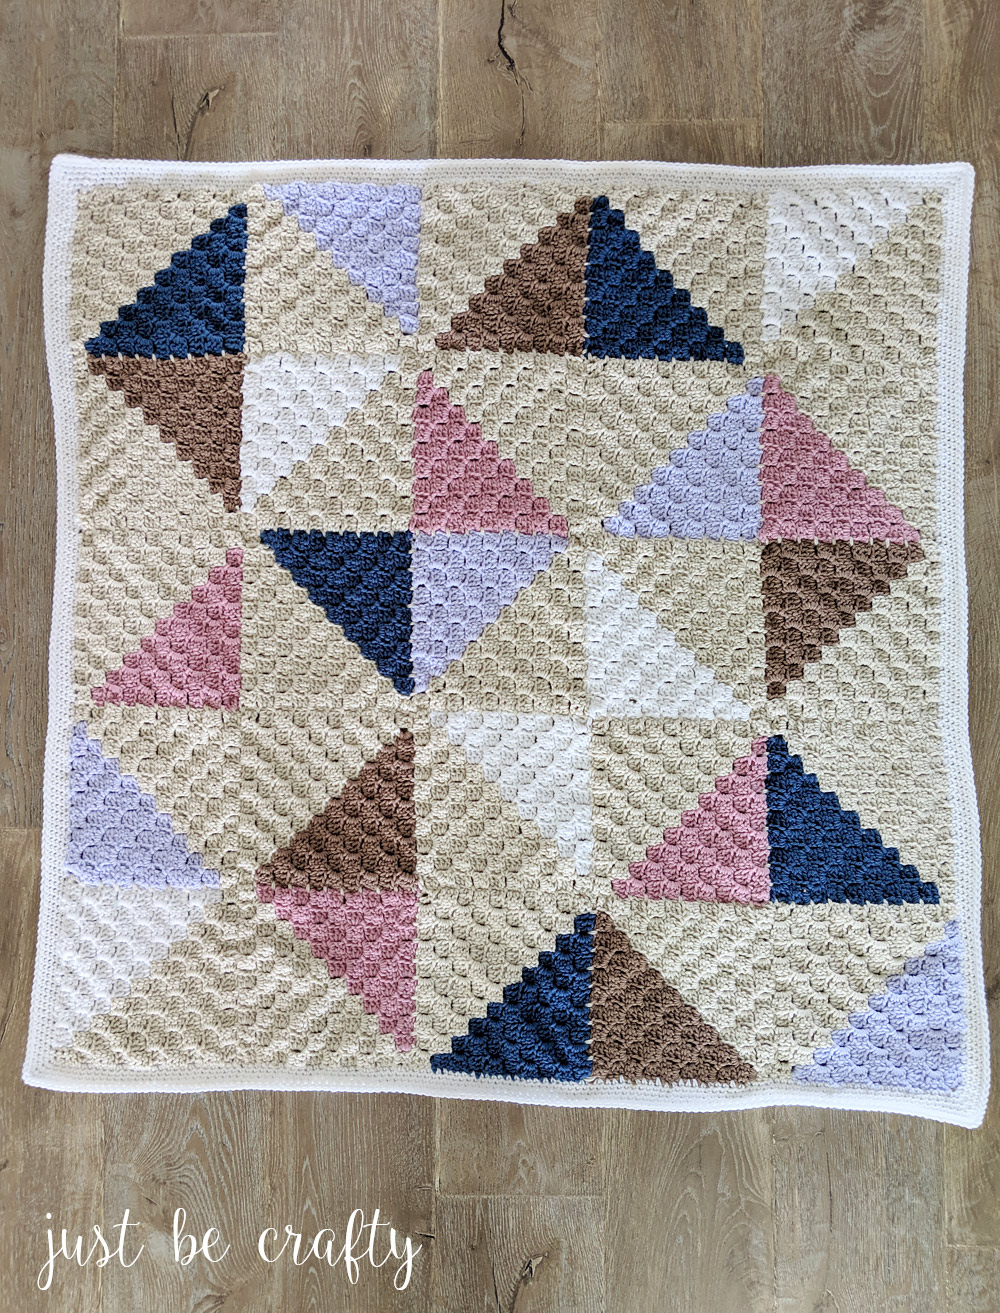
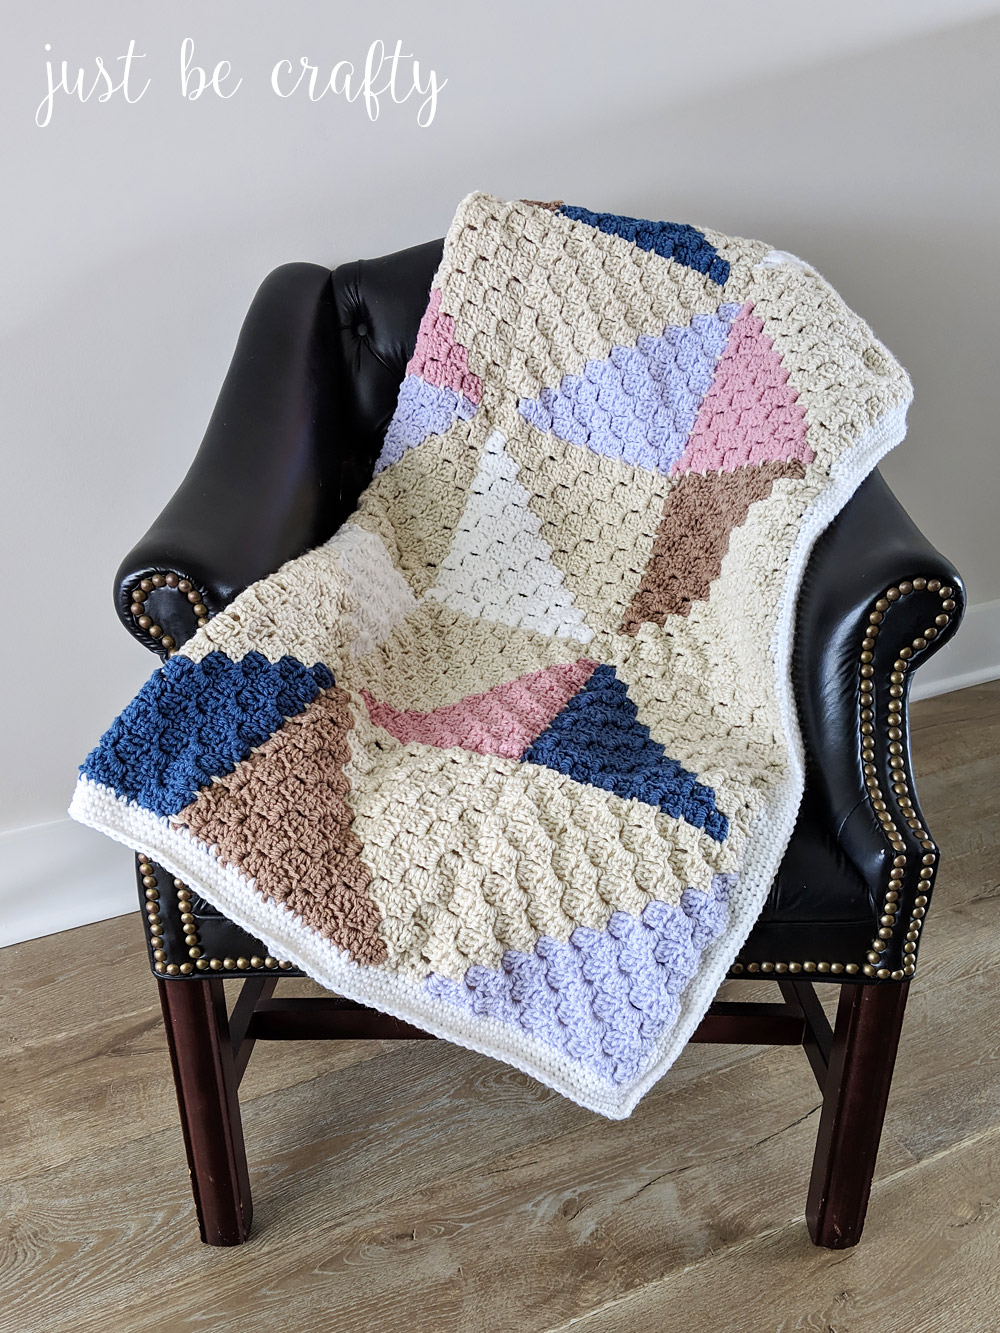
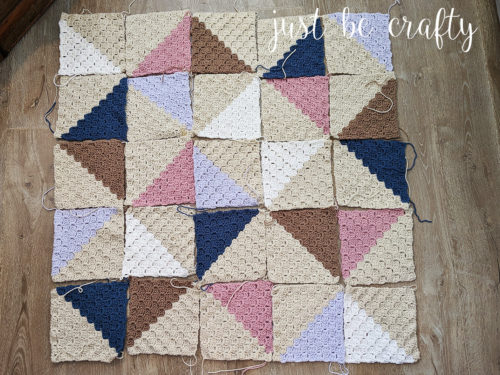
Yay – we are in the last stretch for this project! At this point all squares are blocked and we are ready to design our blanket by arranging the squares! You are more than welcome to get creative here and arrange your squares in anyway that you like!
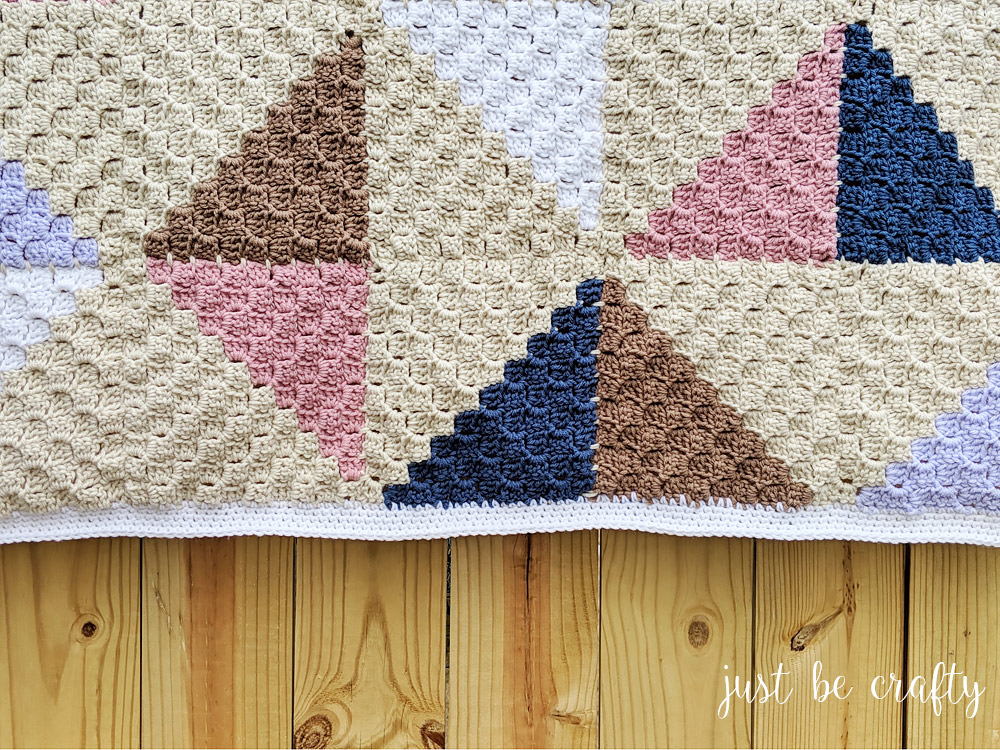
If you would like to use my layout, see the photo below as your guide. I made up the below “rules” and used them as a guide to help me arrange my squares.
- One contrast color per column and row (this kind of reminded of Sudoku, but with colors! Though if you look closely, you will see I didn’t completely follow this rule, lol.)
- Face each square in a different direction to form many triangular shapes
- Spread darker contrast colors evenly across the blanket to balance it out
Joining Your Squares Together
Now that your squares are arranged to your liking it’s time to work on joining them together! Using the above photo as a guide, join all vertical columns first. Then work on joining all of the horizontal rows next. Joining all squares going in one direction before moving on to the next will make your join lines much straighter. The end result is a blanket that looks like a million bucks!
The squares are joined by placing single crochets in the spaces formed between each square along the edge and making two chains between each single crochet. Below is a video tutorial where I show you exactly how I do this.
See video tutorial below!
If you have another joining method that you prefer you are welcome to use that method instead!
Next steps
Stay tuned for next week’s post to be released Tuesday, February 19th, 2019 were we will cover how to make the blanket border and weave in your ends!
Share your C2C progress on Instagram by using the hashtag #justbecrafty so I can see your latest creations! Happy crocheting!