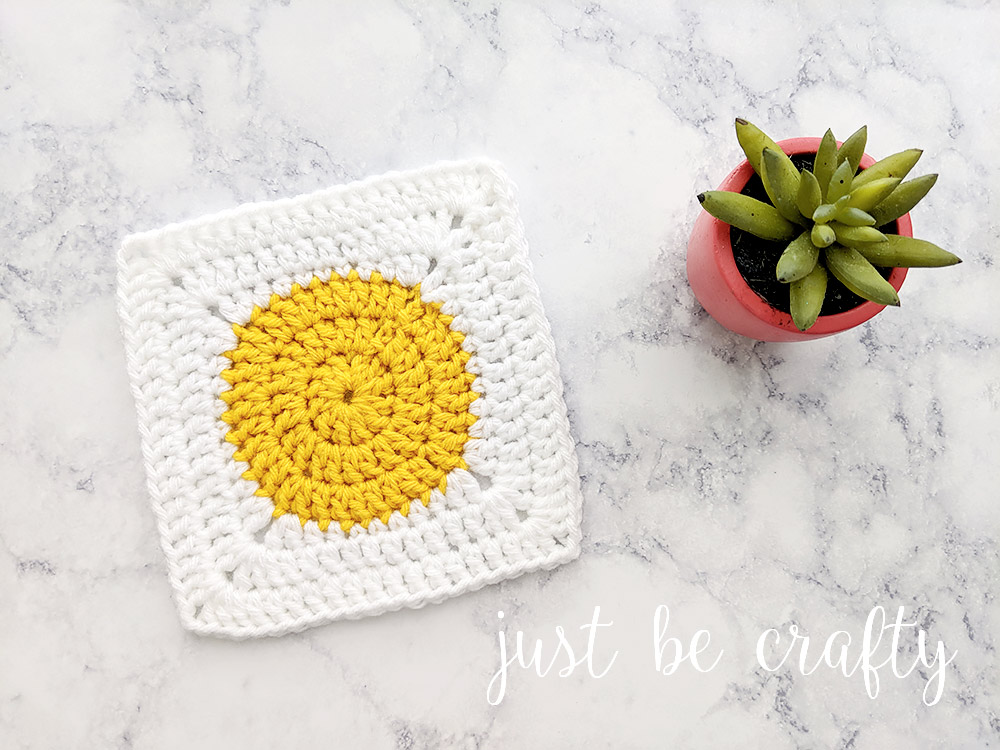
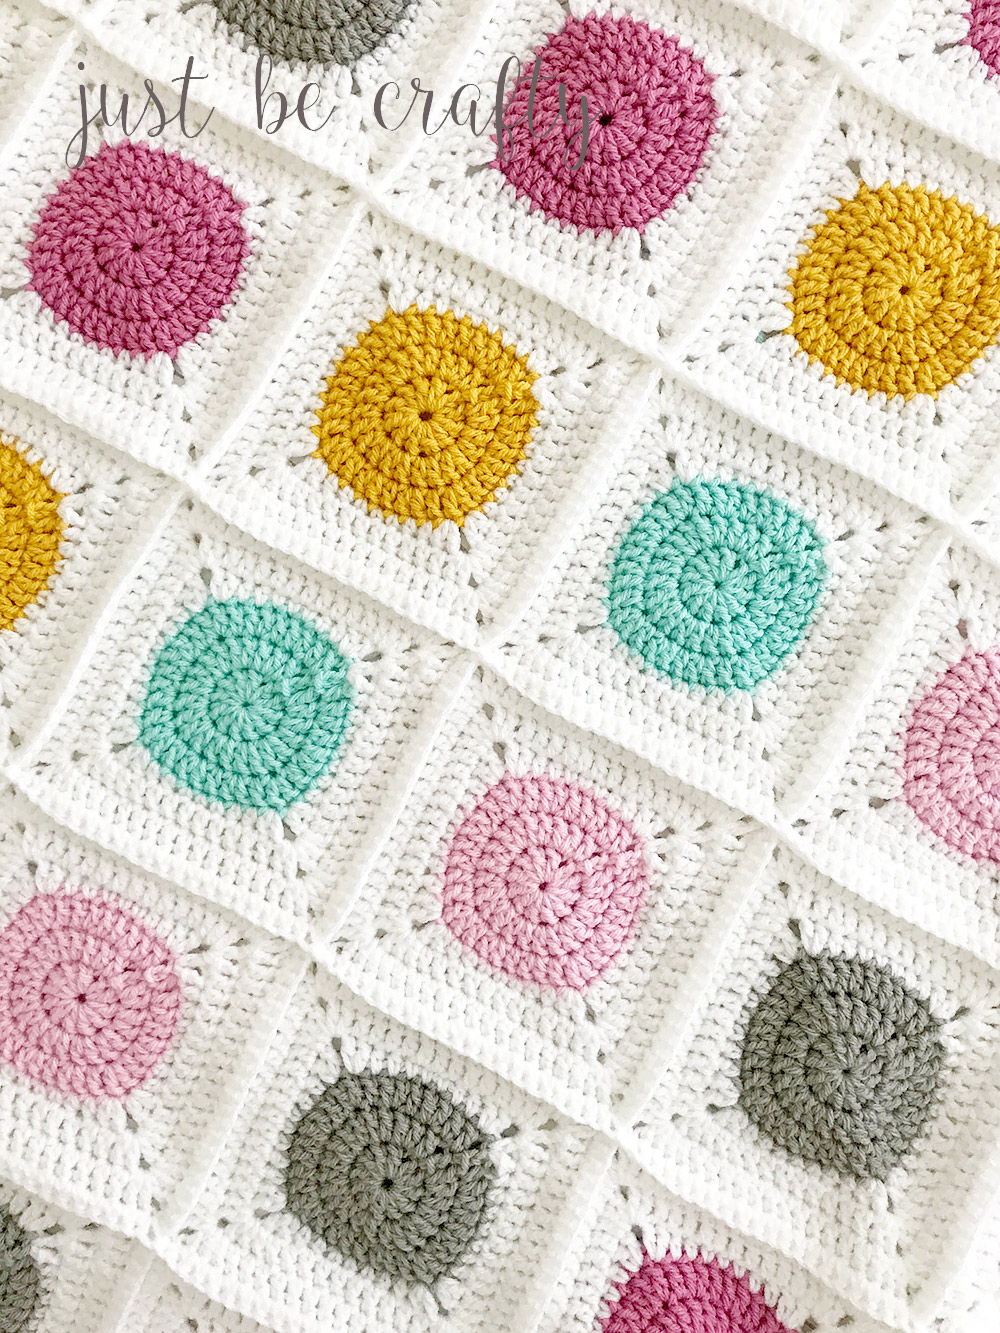
Learn to how to make this adorable circle to square granny square motif for a customizable modern crochet blanket! Purchase the complete ad-free printable Circle to Square Granny Square Blanket pattern PDF here.
Back in 2017 I shared a photo tutorial on how to make the Circle to Square Granny Square and it was pretty much an instant hit! Since posting that tutorial and then later the details on how to make a blanket with the squares I’ve received many requests for a video tutorial, so I’m super excited to dive into today’s post!
To learn more, keep on reading below!
All about the pattern + what you will learn in this post!
This post contains affiliate links. For more information please see my disclosures page.
The Circle to Square Granny Square is a modern take on the classic granny square and is a must try! I absolutely love this granny motif as it can be easily customized to suit any size and any taste and for that reason it makes for a super unique and thoughtful gift. Or, just a fun project for yourself!
In this post we will go over everything you need to know so you can make your BEST crochet blanket ever! The post will cover:
- Materials
- The Circle to Square Granny Square photo tutorial
- How to make the Circle to Square Granny Square blanket
- What yarn to use and substitutions
- Tips and tricks
- Color inspiration
- Arranging your squares
- Working up your squares
- Blocking
- Assembling your squares
- And of course the video tutorial on how to make the square
If you are looking for an easy project to work on while watching a favorite new series – psst… this is it!! To learn about all the topics mentioned above, keep reading below!
Purchase the complete ad-free printable Circle to Square Granny Square Blanket pattern PDF here.
Materials Needed
The below lists quantities to make a blanket that measures approximately 36 inches wide by 66 inches tall.
- Big Twist Value Yarn (5 skeins in White, and 1 skein in each of the remaining colors: Gold, Teal, Soft Gray, Blush Pink, and Medium Rose) Each skein is 371 yds.
- Size 5.0mm crochet hook
- Scissors
- Yarn needle
- Blocking Boards – optional
- Spray Bottle (for water) – optional
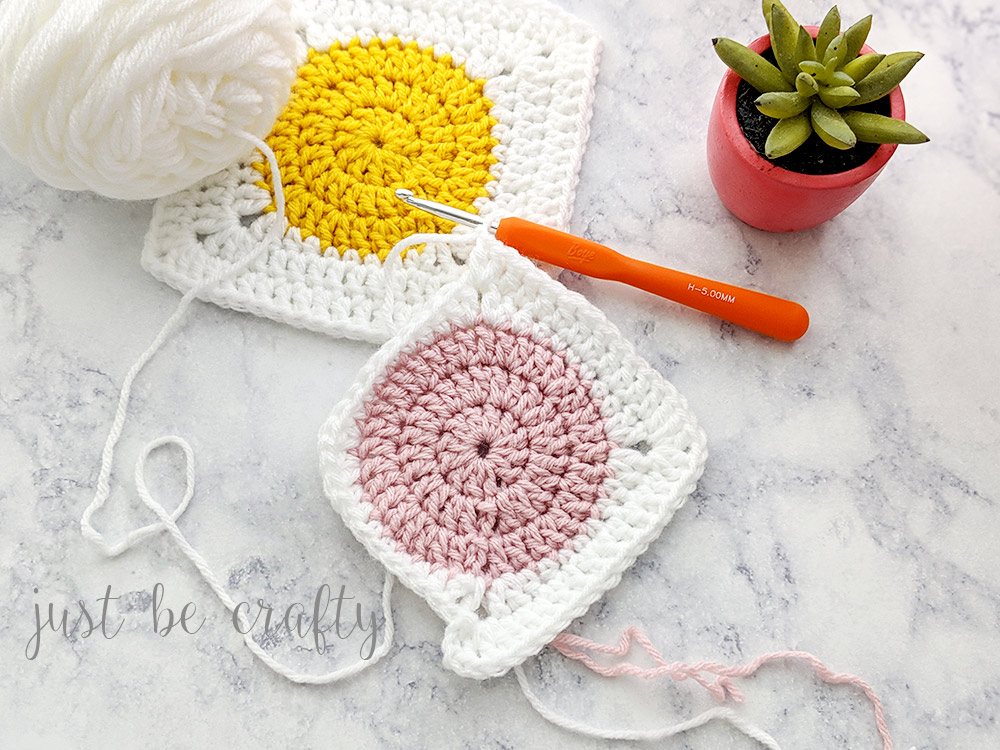
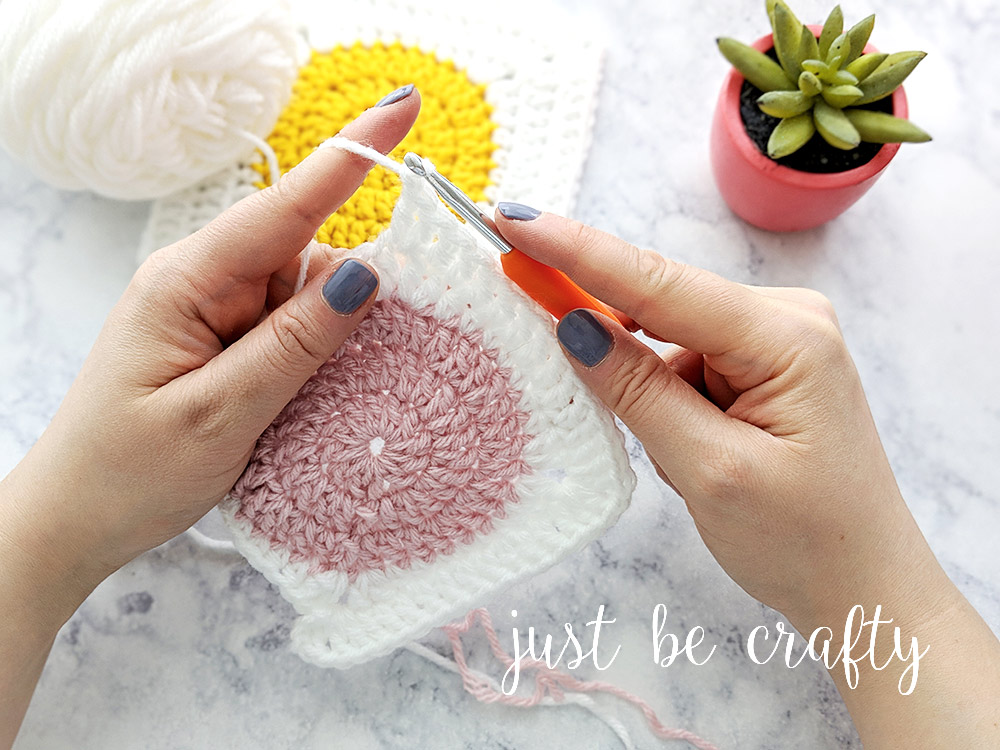
Circle to Square Granny Square Photo Tutorial
Prefer to see a step by step photo tutorial guide instead of a video? No problem – I have that for you! You can see my in depth Circle to Square Granny Square Photo Tutorial here!
Click here to see the step by step photo tutorial.
How to make the Circle to Square Granny Square blanket
After whipping up 60 of these little squares, I joined them into a blanket. I finished this project almost two years ago and to this day it remains one of my favorites! I talk all about how I made my blanket here and share:
- How many squares to make of each color
- A color schematic to assist with arranging your squares
- The joining method
- The pattern for the blanket border
Be sure to check out that post by clicking the link below.
Click here to read the post on how to make your blanket.
What Yarn to Use
For this project, I used JoAnn Fabrics brand Big Twist Value Yarns. Big Twist Value Yarn is a 100% acrylic medium 4 weight yarn and is super affordable. I absolutely love this yarn for blanket projects because it comes a variety of trendy colors, its budget friendly and is also quite soft!
Each skein is 371 yards.
I can’t find Big Twist Value Yarn, are there any substitutions?
Yes – there are many substitutions for this yarn!
If you aren’t able to find Big Twist Value near you, I suggest using Red Heart Super Saver as it is comparable in both composition and price and it also comes in an endless amount of beautiful colors.
Red Heart Yarn can be found at most large craft stores but if you are unable to find this yarn as well, a large craft store should have their own version of a 100% acrylic medium 4 weight yarn. Any 100% acrylic medium 4 weight yarn will work for this project.
Craft stores typically have yarn organized by fiber, so check out the acrylic yarn aisle of your favorite store. The yarn composition and weight information should be included right on the label!
Tips & Tricks
Choosing the best color combinations
While you don’t need to have a plan when choosing colors for your blanket, I suggest having some sort of color scheme in mind before purchasing your yarn. The reason I suggest to have a planned color scheme is that in the end, your blanket will have a more put together and professional look because the colors were carefully selected and thought out! This will make your blanket so much better for two reasons:
(A), it will most likely be made up of some of your favorite colors and (B), they will be colors that work well together in a way that pleases YOUR eye!
1. How to get color inspiration
You can get color inspiration from absolutely anywhere! My blanket colors were actually inspired by the colorful sprinkle dots in my blog header. I love those colors and thought that put together would make for a really pretty blanket! Look for color combos that inspire you everyday.
Not sure where to find your own color inspiration? Start by Google Image searching “pretty color combinations” and I bet you will find something you like! OR… find something you love in nature, snap a photo of it and pick out the main colors. Maybe it’s your favorite socks, or a piece of fruit! Find color combos that make you happy!
2. Square arrangement
Next you’ll want to figure out how many total squares you want total included in your blanket and how many of each color. My finished blanket is made up of 60 squares and measures to about 36 inches wide by 66 inches tall. You can find my blanket schematic on how I arranged my squares here! Each square measures out to be approximately 5.5 inches by 5.5 inches.
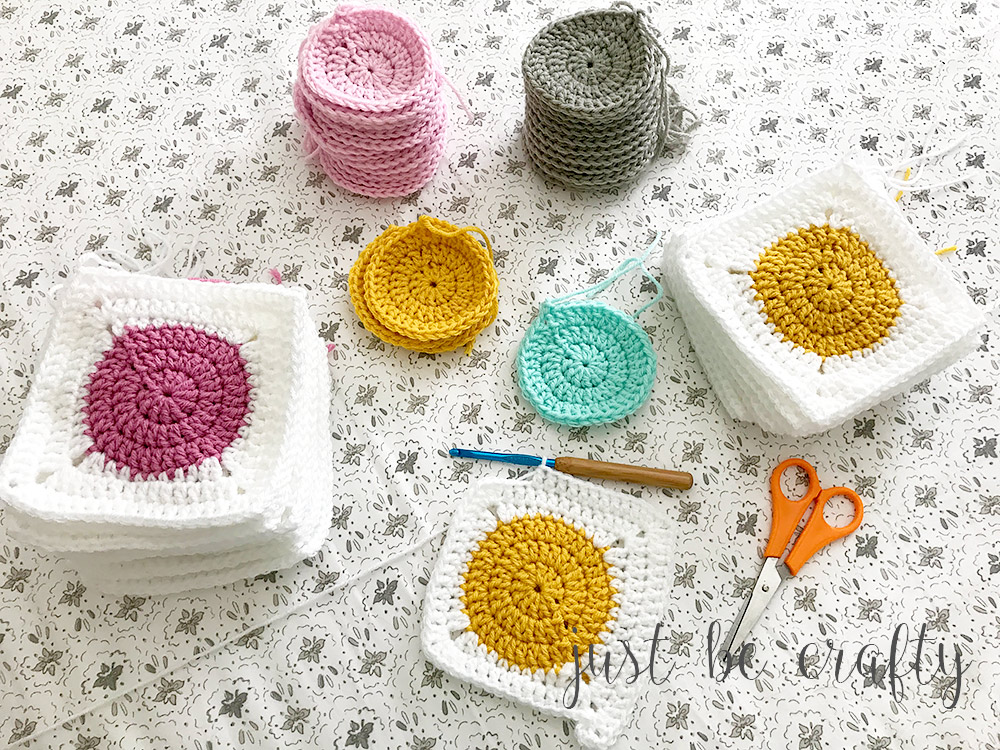
Working up your squares
I suggest to make all circles of one color first, and then moving on to making the borders around the circles last. I found that this made working up the squares much faster because I wasn’t constantly switching back and forth between colors. I enjoyed doing one color at a time because I felt that I was able to see progress much faster too, so it kept me motivated to actually finish the project in a relatively short amount of time!
I also found that this method helped me make my squares a more consistent size – which ended up saving me from doing the next step – the dreaded blocking! Though – I highly suggest you block, and I talk more about that below.
Blocking
I need to come clean – I actually did not block this project! I don’t know how I did it, (probably using the method I described above mixed with making all the squares within a week) but ALL of my squares ended up being about the same size – 5.5 by 5.5 inches. Because all of my squares measured out to be the same size I was able to skip blocking and my blanket still looks great.
IF your squares are not all the same size, it is imperative to block or your blanket will not lay flat. If squares are different sizes and your join them together, some squares will pucker and bubble while others will be stretched. Spoiler alert, you will be disappointed!
There was one blanket I made that I literally spent YEARS on that I did not block and that was the absolute WORST crochet decision I have ever made, lol! While it still looked OK, I know that it could have looked so much better had I just taken the time to block my squares!
If you put the hours and love into crocheting a special piece, you owe it to YOURSELF to block it properly before joining your squares. You will be thanking yourself in the end if you do!
Past Self: I guess I better block this. (grudgingly blocks ALL the squares.)
Future Self: (all squares are now dry and perfectly the same size) Thank you Past Self! I LOVE you and YOU are the BEST!!
And you know what? Blocking really isn’t THAT bad. Its really pretty easy – you literally set it and forget it! See the steps on how to block below.
Block as you go!
You might want to block as you go. If you work up your squares in the method I suggest above, block the squares as you finish each color so that way you are not waiting on all of your squares to dry at the end of the project in order to move on to joining. Also, waiting to block all squares at the end will require a TON of space!
How to block this project
Step 1: Measure your squares. Remember the largest measurement.
Step 2: Grab a spray bottle with water and spritz your square until damp.
Step 3: Shape and pin in place to the measurement of your largest square. I use this blocking set that can be found here.
Step 4: Allow to fully dry. (If you place in front of an oscillating fan, the square will dry faster!)
Step 5: Repeat process for all squares.
Assembling your squares
See this post where I talk about joining the squares here. To keep your square join lines straight, join all vertical rows first then join horizontal rows last.
The Video Tutorial
This video tutorial is for an intermediate to advanced beginner and assumes you already know how to do the following skills:
- Magic loop (Not sure how to do this yet? No problem! I have video tutorial here!
- Chain (Need help with this? No problem! Check out this tutorial here!
- Double crochet
- Half double crochet
- Single crochet
- Slip stitch
Once you have mastered the skills above, I am confident you will be able to tackle this project! Go ahead and watch the video below and get to crocheting!
Enjoy!
Love this tutorial?


Hi Brittany!
Loving this pattern!
Can I make 10” squares? And join those?
Thanks!
Linda?
Yes of course! You can make your squares bigger by increasing the circle size and border, or by just increasing the border. Both methods would have a really pretty look! Happy crocheting!
Thanks Brittany! ?
Since I already have at leadt three afghans in progress but loved this pattern SO much I’ve used kitchen cotton and made disclothes!
The perfect carry along project. Wish I could send a pucture ?
Thats such a great idea to make the squares into dishcloths!! I love it! Do you happen to follow along on Facebook and/or Instagram? You can find me @justbecraftyblog. If so feel free to tag me in your photo, I LOVE to see! 🙂
Somebody gave me 100’s of little circles, single crochet, ending in 30 SC’s. So I would like to use them, make them into squares and sew or crochet them together to make blankets. I used your directions and increased one more row by adding my own yarn, SC 4 then 2sc all the way around till I had 36, then followed your instructions to make it square. I’m still working on matching the yarn and hook size.
What a great idea! How lucky of you to stumble on so many circles – you’ll have a few blankets under your belt in no time! 😀
I love the look of this! I’d like to make my temperature blanket with these squares but I don’t want them to be over 4″. I’ll have to play around with it. I also am going to use Big Twist (just discovered this and the colors are beautiful!) and maybe some Hobby Lobby ILTY. Thanks for the pattern 🙂
I’m wanting make the boarder (white) another bigger with another round, do I just repeat the corners the same way with DC in between? If so does the Chain 2 continue or increase to a Chain 3 in the corner stitches?
Ive benn making afghans that use up my stash and this will be great for that! I can use various yarns in various colors for the circles and a solid for the rest of the square. Thank you!
Hi I made this blanket but when washed the inside of circle widened ( beginning hole). How could I have prevented this?
Thank you very much ?
I made it, it’s lovely