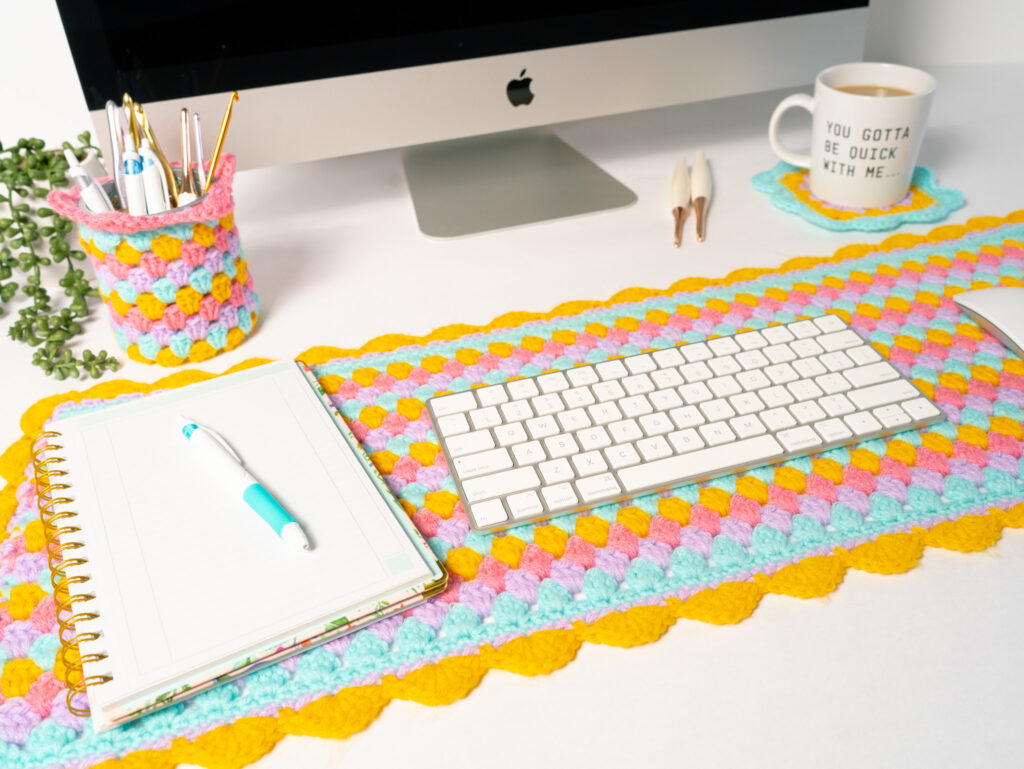
Spice things up with some fun crochet home decor! The Granny Stitch Desk Set will spruce up your office space. Learn how to make all three patterns by following along with the written pattern and the step by step video tutorial!
Prefer to print? Grab the printable version here (all 3 patterns included)!

Crochet home decor
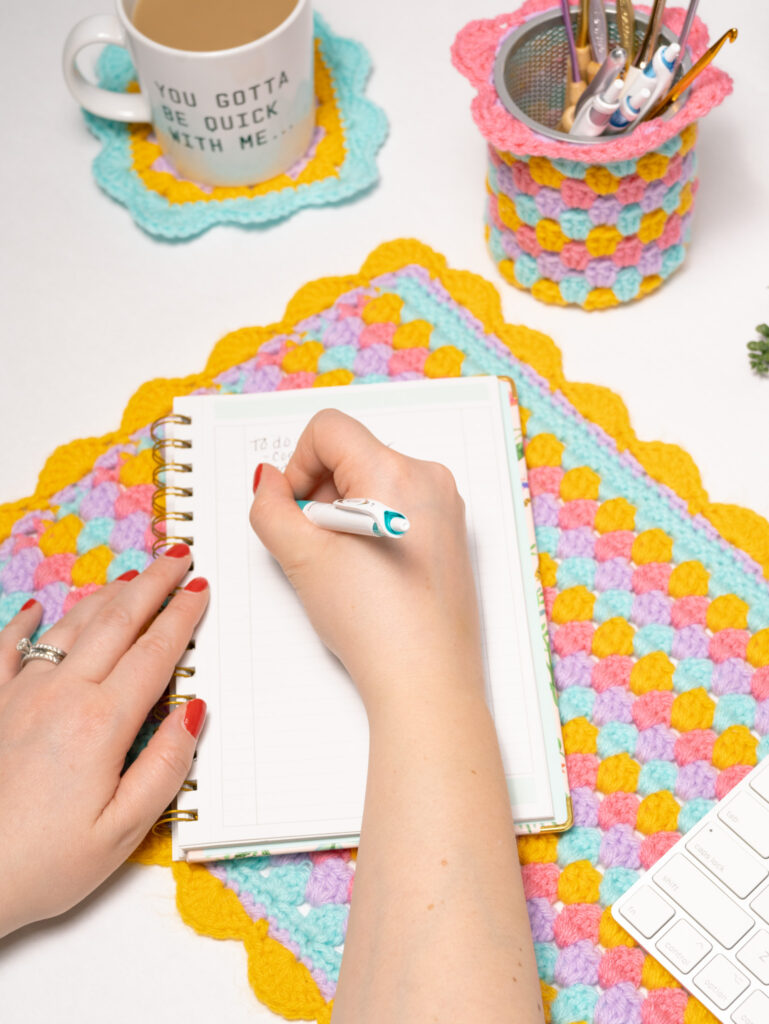
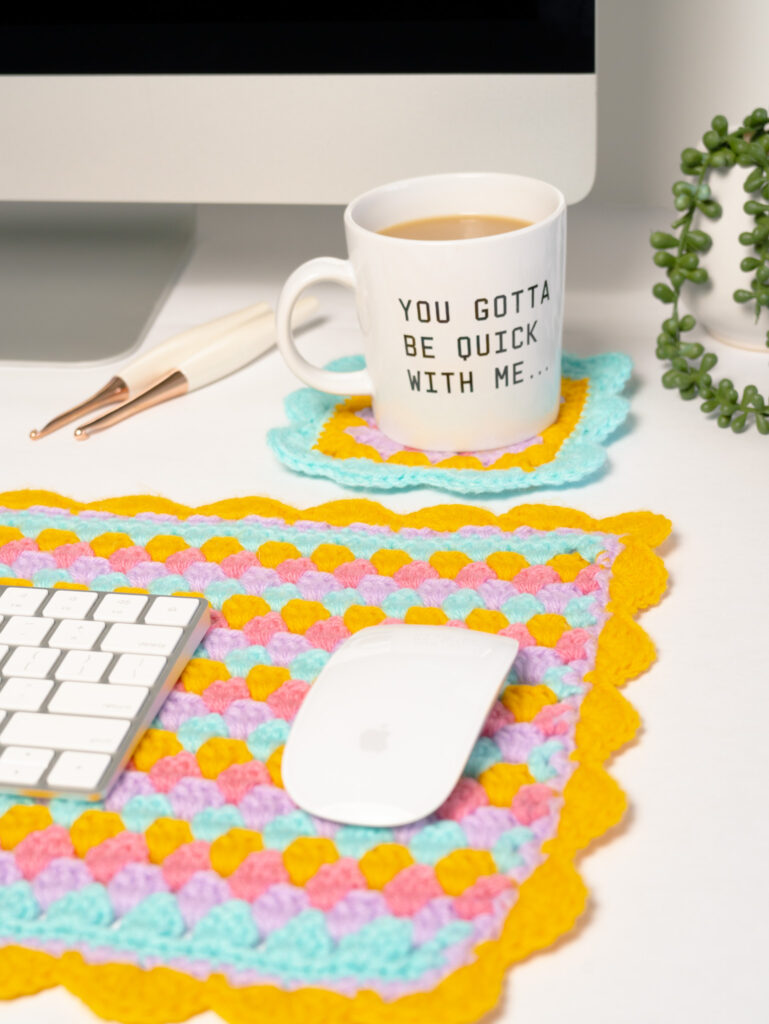
I want to start off that I made this desk set a little over two years ago and ever since making it I’ve been wanting to share the pattern but just hadn’t gotten around to it until now. I’ve been using these little pieces of crochet home decor on my desk ever since I whipped them up and I’ve been loving it.
Since I work from home, I’d been wanting to make my space a little more fun and a little more me and got to thinking. I ended up coming up with this pencil cup, desk mat and coaster. They really brighten up the space and add a personal touch.
If you’ve been wanting to spruce up your desk whether its at home or in the office, this set will for sure brighten up your space.
Why Crochet Home Decor?
Crocheting your own home decor can really add personalization to your space, especially if you work in a cubicle at the office or even from home.
If you’re going to be spending a large chunk of time on one space (like a desk, as many of us do) we might as well make it our own and pretty. Hanging out in a pretty space can definitely be a mood boost and help get our creative juices flowing.
Ways to Use This Desk Set
- Office or work-from-home desk
- Student dorm or study corner
- Craft table
- Gift set for birthdays or holidays
Watch the video tutorial!
Crochet Desk Set Full Tutorial
I’ve made a video to help you make this project! Check it out below:
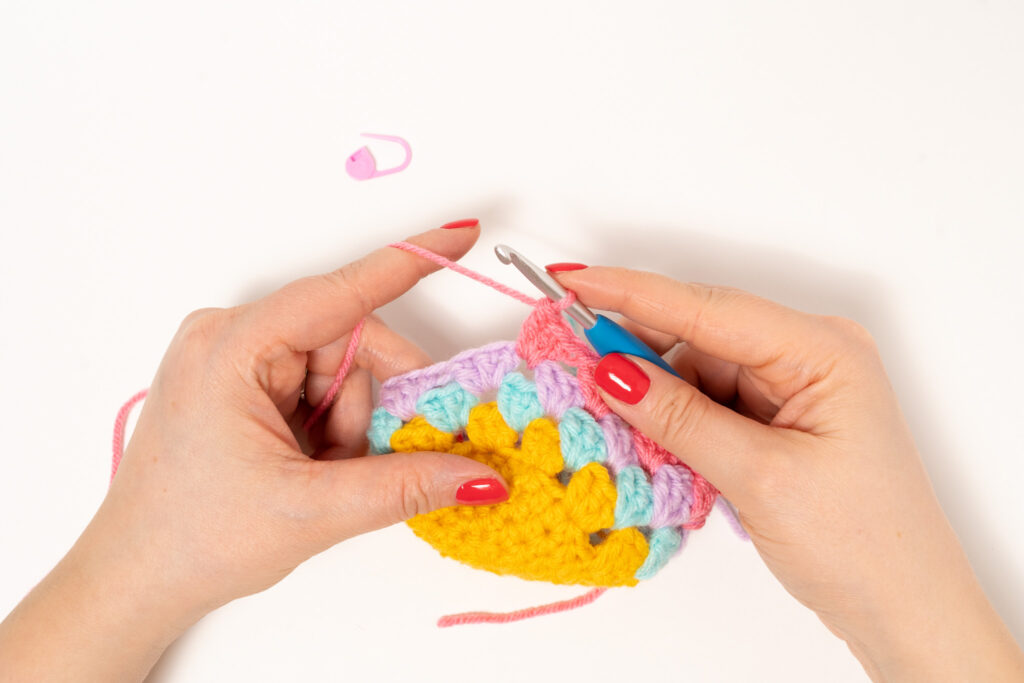
For extra help with the granny stitch
See my photo tutorial here, or check out the video below:
Techniques
These patterns are geared towards intermediate / beginner crocheters and higher and will utilize the following skills:
- Chaining
- Single Crochet
- Half Double Crochet
- Double Crochet
- Slip Stitch
The desk mat and the pencil cup cozy patterns use the granny stripe stitch technique. If you are unfamiliar with the technique, I go over it Crochet Desk Set Tutorial linked below.
If your’e looking for extra help with the granny stitch you will also find links to my Granny Stitch Video Tutorial and Granny Stitch Photo tutorial below.
Copyright & Use Policy
© Just Be Crafty 2025. All rights reserved.
All patterns, photos, and content on this site and in associated downloads are the intellectual property of Just Be Crafty and are protected under U.S. and international copyright law.
The following uses are strictly prohibited:
- Reposting, redistributing, or copying any part of the pattern, whether free or paid, including screenshots or rewritten instructions
- Republishing the pattern or its instructions on blogs, websites, or social media
- Using any photos from Just Be Crafty for sales listings, product displays, or promotional use without prior written consent
You may sell finished items made from these patterns under the following conditions:
- Items must be handmade by you (not mass produced, outsourced, or manufactured)
- Credit must be given to Just Be Crafty as the original designer, with a visible link to the pattern when sold online
- You may not claim the pattern as your own or use it to create derivative designs for commercial use
By using this pattern, you agree to these terms.
The Granny Stitch Desk Set Pattern
Want all 3 patterns in one easy place? Snag the printable version here!
Skill Level
- Beginner / Intermediate
Materials
- 4 balls Big Twist Value (or any #4 medium weight, 100% acrylic yarn) 380 yards / 347 m each
- 4 colors of your choice
- Pictured in Watermelon, Varsity Gold, Soft Purple, and Aqua
- 5.0 mm hook (I use this set)
- Yarn needle
- Scissors
- Stitch markers
- Pencil cup or emptied/clean soup can (with about 10 in. (25 cm) circumference, 3 in. (8 cm) diameter, 4 in. (10 cm) height)
- Blocking boards & straight pins
- Steamer OR spray bottle filled with plain water
Gauge
- Coaster: 4 granny rounds = about 4 in. (10 cm)
- Pencil Cup Cozy: 4 rounds of hdc (in a flat circle) = about 3.25 in. (8 cm)
- Desk Mat: 4 granny cluster stitches by 5 rows = about 4 in. (10 cm)
Sizing & Finished Measurements
- Coaster: One Size
- About 6 in. x 6 in. (15 cm x 15 cm) at widest points
- Pencil Cup Cozy: One Size, designed to fit a cup that is about 10 in. (25 cm) circumference and 4 in. (10 cm) height
- About 4 in. (10 cm) height, 3.25 in. (8 cm) base, 5 in. (13 cm) width pressed flat
- Desk Mat: One Size
- 11.5 in. (29 cm) x 30.5 in. (77 cm) at widest points
Key
- ch chain
- ch sp chain space
- dc double crochet
- hdc half double crochet
- inc increase
- sc single crochet
- sk skip
- sl st slip stitch
- sp space
- st stitch
- YO yarn over

Notes
Read over pattern in its entirety before beginning.
ALL PATTERNS
SCALLOPED BORDER In the last 2 stitches of the round, the border stitches may need manipulating to work out. Instead of skipping 2 stitches, you may need to only skip 1 or 3 to complete the border. You may need to play around with it.
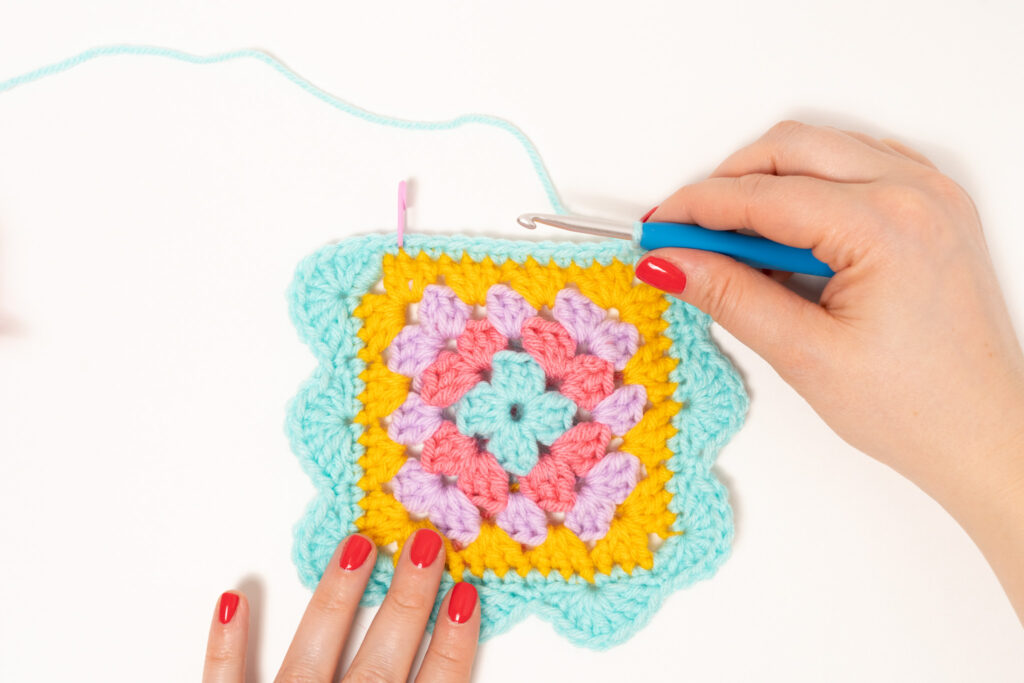
COASTER
- CONSTRUCTION Begins with a 4-round granny square, and then add a scalloped border edge.
PENCIL CUP COZY
- CONSTRUCTION Begins with a flat crocheted circle, followed by several rounds of granny stripe stitch in the round and finished with a scalloped border edge along the rim.
- BOTTOM OF THE CUP COZY For this section only, all rounds will be worked in hdc.
- The pattern will indicate which stitches will be increased.
- Use a stitch marker to mark the last stitch of the round to help keep your place. Replace stitch marker in the last stitch of each round.
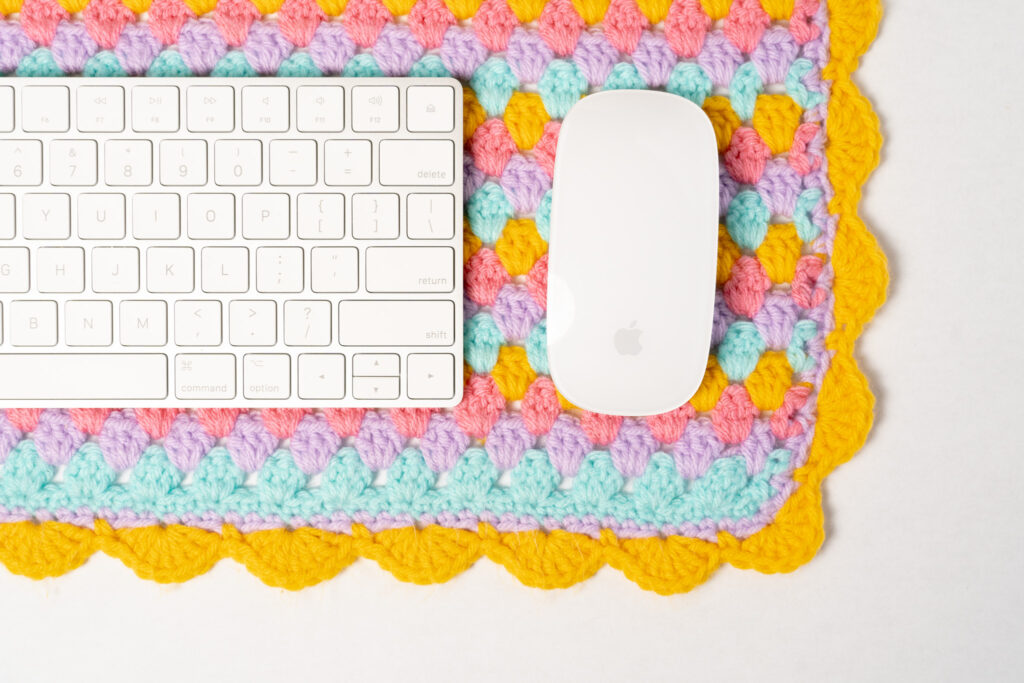
DESK MAT
- CONSTRUCTION Begins by working several rows of granny stripe stitch (worked flat) and finished with a scalloped border edge (in the round).
- GRANNY STITCH COLOR CHANGES Color changes occur at the end of each granny stitch row. On the last dc of each row, stop before completing the last YO. YO with the new color.
- USAGE I recommend still using a mousepad. Simply place mousepad on the mat to use.
Coaster Pattern
Read NOTES section before beginning.
COASTER BODY
Make 1 square.
Round 1:
Starting with aqua, in magic ring ch 5 (chain 5 counts as last dc of round plus a chain 2), 3 dc, ch 2, 3 dc, ch 2, 3 dc, ch 2, 2 dc; join with 3rd ch of the starting ch 5 using a sl st; sl st into the next ch 2 sp; cut yarn and fasten off.
Round 2:
Starting in any ch 2 corner sp, attach pink and ch 5 (counts as last dc of round plus a ch 2), make 3 dc in same corner ch sp; *(3 dc, ch 2, 3 dc) in next corner ch sp; repeat from * 2 more times; make 2 dc in starting corner ch sp; join with 3rd ch of starting ch 5 using a sl st; sl st into the next corner ch sp; cut yarn and fasten off.
Round 3:
Starting in any corner ch sp, attach purple and ch 5 (counts as last dc of round plus a ch 2), 3 dc in same corner ch sp; *3 dc in next cluster sp, (3 dc, ch 2, 3 dc) in next corner ch sp; repeat from * 2 more times; make 3 dc in next cluster sp, make 2 dc in 1st corner ch sp; join with 3rd ch of starting ch 5 using a sl st; sl st into next corner sp; cut yarn and fasten off.
Round 4:
Starting in any corner ch sp, attach gold and ch 5 (counts as last dc of round plus a ch 2), 3 dc in same corner ch sp; *make 3 dc in each of the next cluster sp’s until you reach next corner, (3 dc, ch 2, 3 dc) in corner ch sp; repeat from * 2 more times; make 3 dc in each of the next cluster sp’s, make 2 dc in 1st corner ch sp; join with 3rd ch of starting ch 5 using a sl st; sl st into next corner sp; cut yarn and fasten off.

BORDER
Round 1: Starting any corner ch sp, attach aqua and chain 1 (does not count as a st), *make 3 sc in same corner ch sp, sc into each stitch across until you reach the next corner ch sp; repeat from * 3 more times. Do not join. Place marker in last st to mark end of round.
Round 2: Sc in next st, sk 2 st, make 7 dc in next st, *sk 2 st, make 1 sc in next st, sk 2 st, make 7 dc in next st; repeat from * 8 more times. Join with 1st st of round using a sl st. Remove marker. Fasten off.
FINISHING
Weave in ends.
Pencil Cup Cozy Pattern
Read NOTES section before beginning.
BOTTOM OF THE COASTER
Round 1: With gold, make 8 hdc in the magic ring; do not join (8)
Round 2: inc in every st; do not join (16)
Round 3: inc in every other st; do not join (24)
Round 4: inc in every 3rd st, join with 1st st of round using a sl st (32) Do not cut yarn.
PENCIL CUP BODY
Round 1: With gold, make 8 hdc in the magic ring; do not join (8)
Round 2: inc in every st; do not join (16)
Round 3: inc in every other st; do not join (24)
Round 4: inc in every 3rd st, join with 1st st of round using a sl st (32) Do not cut yarn.
Rounds 3 – 10: Repeat Round 2 using the following color sequence below (or feel free to customize your color sequence!)
COLOR SEQUENCE
Round 3: purple
Round 4: pink
Round 5: gold
Round 6: aqua
Round 7: purple
Round 8: pink
Round 9: gold
Round 10: aqua
Round 11: Attach purple to any stitch, ch 1 (ch 1 doesn’t count as a st) and starting in 1st st, sc in every st around (36). Cut yarn and fasten off.
BORDER
Round 1: Attch pink to any stitch, ch 1 (ch 1 doesn’t count as a st), make a sc in 1st st, sk 2 st, make 7 dc in next st, *sk 2 st, sc in next st, sk 2 st, make 7 dc in next st; repeat from * to end of round, join with 1st st of round using a sl st. Cut yarn and fasten off.
FINISHING
Weave in all ends. Insert pencil cup into the pencil cup cozy.
Desk Mat Pattern
Read NOTES section before beginning.
BODY OF THE MAT
With aqua, ch 101
Row 1: Starting with aqua, and in the 2nd ch from hook, sc across the row; turn.
Row 2: Ch 3 (counts as a dc), make 1 dc in same st, sk 2 st, *make 3 dc in next st, sk 2 st; repeat from * to end making 2 dc’s in the last st; turn.
Row 3: Ch 3 (counts as a dc), *make 3 dc’s in next cluster sp; repeat from * through laster cluster sp, make 1 dc in the top of the turning ch from prev row; cut yarn and attach pink, turn.
Row 4: Ch 3 (counts as a dc), make 1 dc in sp between your last dc and cluster from prev row, *make 3 dc in next cluster sp; repeat from * to end of row; make 2 dc the chain space from prev row; cut yarn and attach gold, turn.
Rows 5 – 22: Repeat Rows 3 and 4 using the following color sequence:
Row 5: gold
Row 6: aqua
Row 7: purple
Row 8: pink
Row 9: gold
Row 10: aqua
Row 11: purple
Row 12: pink
Row 13: gold
Row 14: aqua
Row 15: purple
Row 16: pink
Row 17: gold
Row 18: aqua
Row 19: purple
Row 20: pink
Row 21: gold
Row 22: aqua
BORDER
Round 1: Attach purple to 1st st of Row 22; Ch 1 and make 3 sc in same st, sc across the row, and make 3 sc in the last st of the row; make about 32 sc evenly along the side edge of the mat; once you reach the bottom edge, make 3 sc in 1st st; sc across bottom edge, make 3 sc in last st, make about 32 sc evenly along the side edge; join with 1st st of round using a sl st; cut yarn and fasten off.
Round 2: Attach gold to any st that is not in the corner; ch 1 and make a sc in same st, sk 2 st, make 7 dc in next st, *sk 2 st, make a sc in next st, sk 2 st, make 7 dc in next st; repeat from * to end of round. (You may be a stitch or 2 off and that’s ok!) Sl st into 1st st of round to join. Cut yarn and fasten off.
FINISHING
Weave in ends.
BLOCKING (Optional)
If you notice that your desk mat or coaster are curling, you can steam or wet block them to help the stitches relax so the items can lay flat.
Place blocking boards out in front of you. Arrange mat and coaster onto blocking boards and pin in place to the proper measurements listed in the patterns. Lightly steam OR spritz with plain water using a spray bottle until dampened. Let dry. Once dry, remove pins and enjoy.
Want to take this pattern offline? Get the printable version here!
Q + A
Q: Is this a beginner-friendly project?
A: Absolutely! If you’re comfortable with double crochet and working in the round, you’re good to go. I walk you through each pattern step-by-step, and the granny stitch is a classic that’s easy to pick up even if you’re new to crochet.
Q: What yarn did you use for this desk set?
A: I used Big Twist (its currently unavailable but super easy to subsitute!) Its a standard 100% acrylic, #4-weight craft yarn you can find pretty much anywhere crafts are sold. Go neutral or colorful depending on your vibe!
Q: Can I customize the sizes?
A: Yes! All three pieces can be easily resized. I share some tips in each pattern to help you tweak as needed.
Q: Would this make a good gift?
A: 100%! A matching desk set is such a thoughtful handmade gift, thats perfect for teachers, coworkers, students, or anyone who loves cute spaces.
Q: Do I need to block these pieces?
A: For the mat and coaster, a light steam blocking helps them lay flat and hold shape. The pencil holder works great as-is.