How to Measure Crochet Gauge (Learn Step by Step!)
Have you ever followed a pattern exactly and ended up with a project that turned out way too big or way too small? You didn’t mess up, you likely just missed a little detail… gauge!
In this post, we’ll walk through what crochet gauge is, why it matters, how to measure it, and what to do if your gauge is off. No matter if you’re making a larger project like a crochet sweater or a cute mini basket, understanding gauge is the secret to making sure your project turns out just like its supposed to!
📌 Save for later! Click here to save this post to Pinterest now!
What is Crochet Gauge?
Crochet gauge is essentially your tension and refers to the number of stitches and rows (or rounds) that fit into a specific measurement, usually 4 inches (10 cm). It’s a way to measure your crochet how tightly or loosely you crochet with a specific yarn and hook combination.
Think of it sorta like your crochet handwriting. No two people stitch exactly the same way, and that’s totally normal! Gauge helps you match the size of your crochet stitches with the pattern designer’s so your finished piece turns out the intended size.
Why Gauge Matters in Crochet
Gauge is essential for fit. It determines the final size of your project—especially for wearable items like:
- Sweaters
- Socks
- Hats
- Cardigans
- Anything that needs to fit (and not just the body! Think mug cozies and things like that too!)
Even being just a couple stitches off per 4 inches can change your finished size by inches! That could be the difference between a sweater that fits just right and one that you’ll never wear.
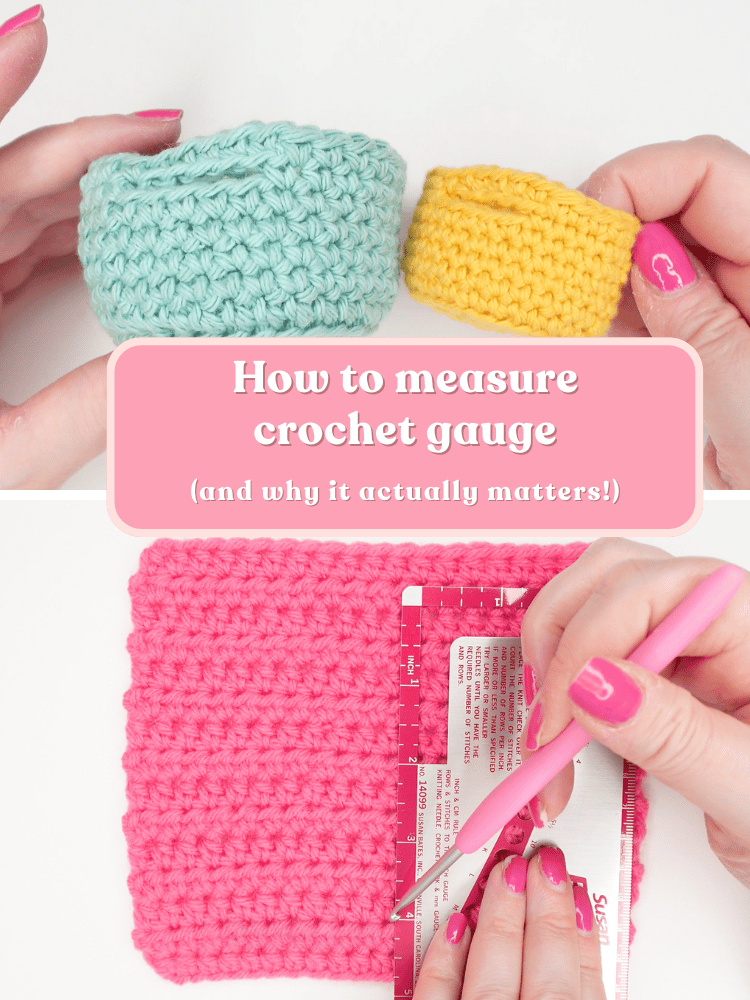
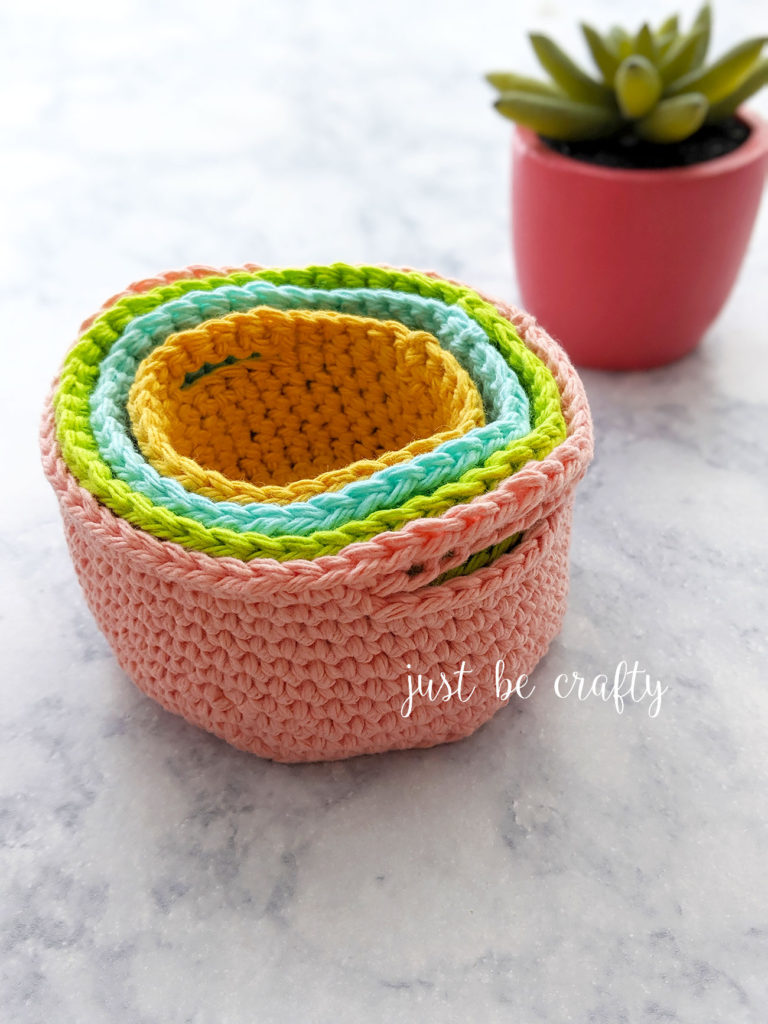
Real Example: Same Pattern, Different Gauge
Here’s one of my favorite real-life examples that shows just how much gauge can impact your project:
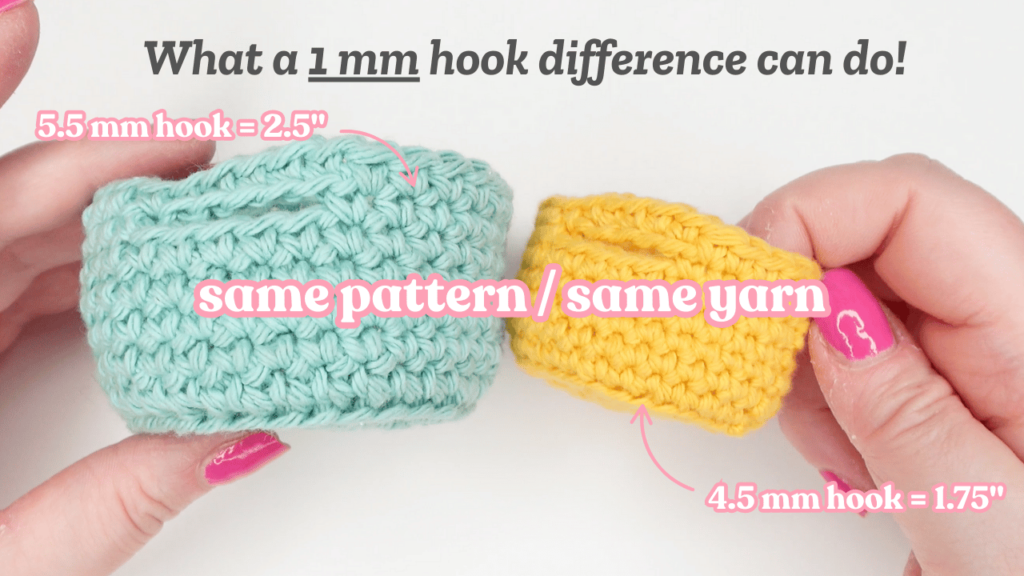
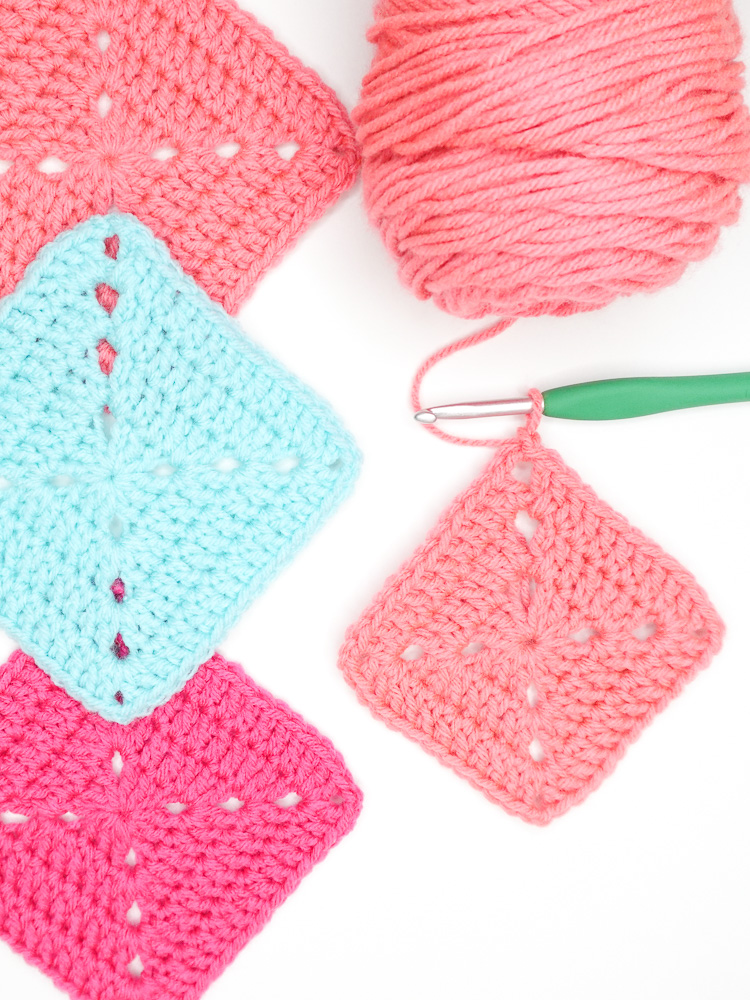
I crocheted two mini baskets using the same yarn and same pattern. The only difference was the hook size.
- Using a 4.5 mm hook, my basket base measured about 1.75 inches across after 4 rounds.
- With a 5.5 mm hook (just 1 mm larger), the basket base came out to 2.5 inches.
That’s a ¾-inch difference in just 4 rounds all from a simple hook change. Imagine how much that adds up over an entire sweater!
And here’s the really important part: this was me crocheting both baskets. Now imagine two different people crocheting the same pattern with the same yarn and hook size, but with different natural tensions. Their finished sizes could vary even more.
That’s why checking your gauge is always worth it, even if you’re following the pattern exactly. Because how YOU crochet needs to be taken into account.
📌 Love these baskets? Find the Crochet Mini Nesting Baskets Pattern here!
Watch the Video
Visual learner? Me to! Watch the video where I talk you through everything we cover in this blog post!
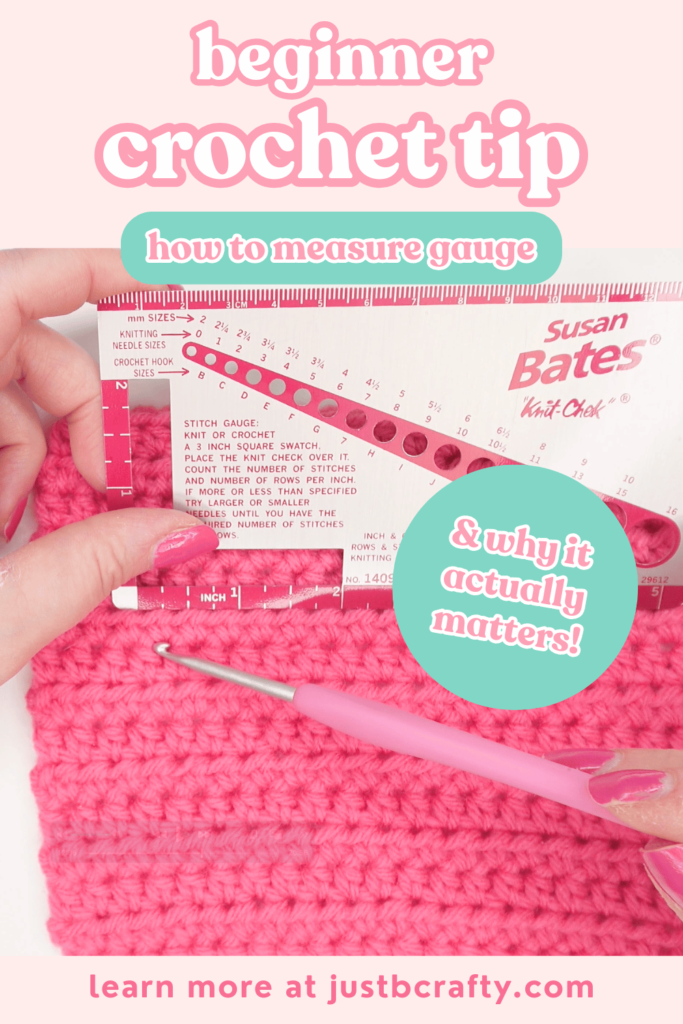
How to Measure Crochet Gauge (Step-by-Step)
To measure your crochet gauge, create a small swatch using the recommended yarn and hook size. This swatch will help you check if your stitch and row counts match those specified in the pattern.
What you’ll need:
- The yarn you’re planning to use for your project
- Crochet hook (as specified in the pattern)
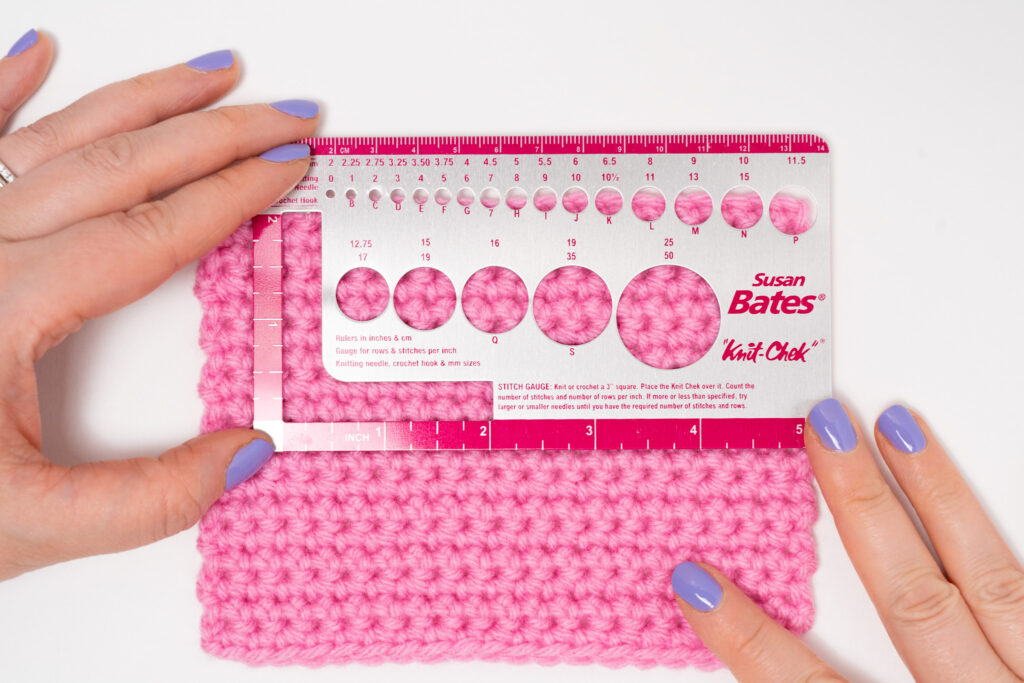
- Ruler or gauge checker (this one is my favorite because it easily fits in my crochet tools pouch!)
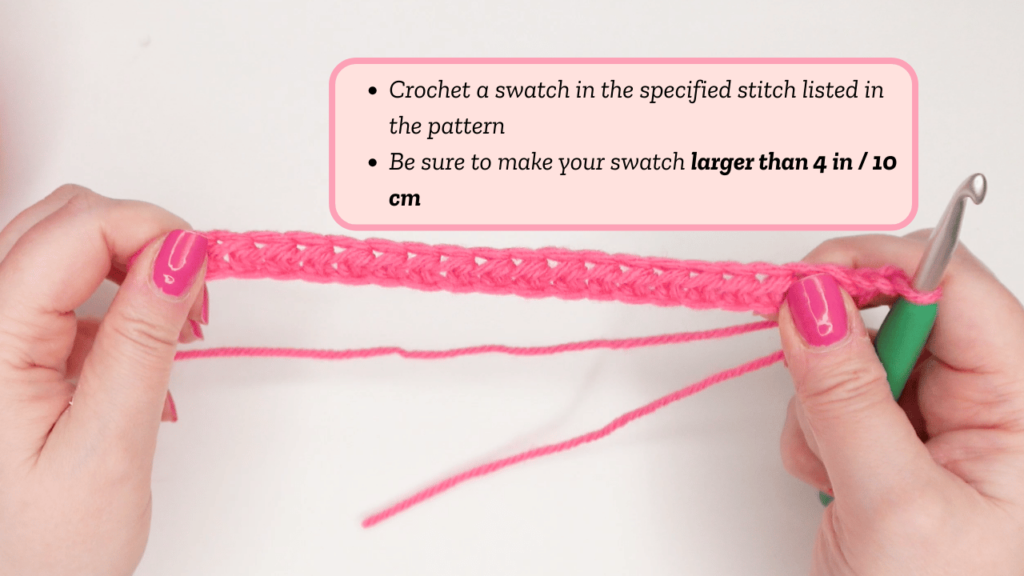
Step 1: Make a Swatch
Crochet a swatch using the same stitch as the pattern (and aim to make it larger than 4 inches to get the most accurate measurement. I usually try for a 6 inch square). This gives you enough space to measure away from the edges.
Step 2: Block Your Swatch (if needed)
If the pattern instructs you to block your piece, do the same with your swatch. Blocking can change your stitch size, especially with fibers like superwash merino, which can grow significantly when wet. You want to make sure that whatever you’re planning to do after you crochet your item (such as washing) you want to do the same to your swatch. Its the only way to truly know if you’ll be able to get gauge.
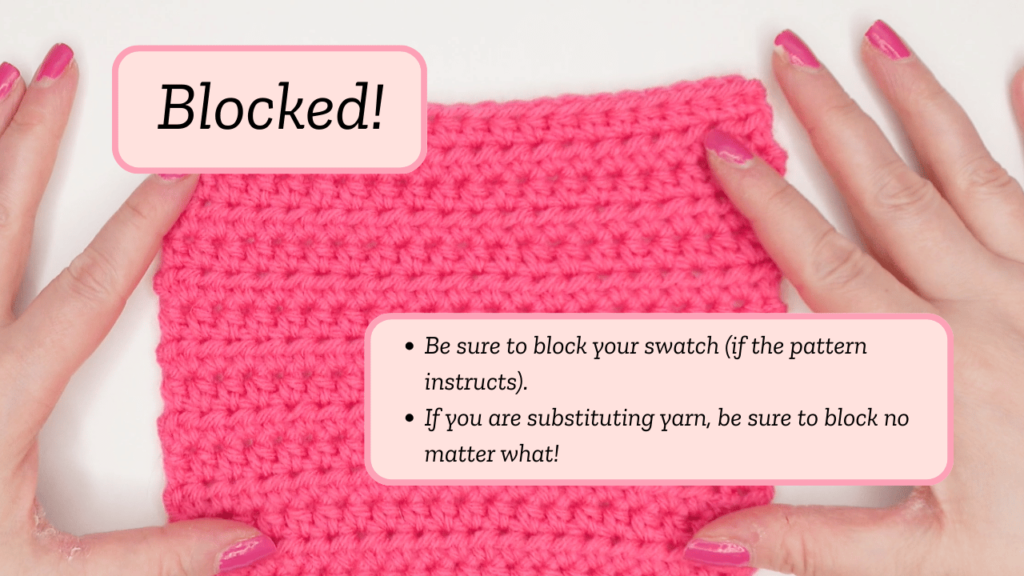
If blocking, make sure you let it completely dry before you measure your gauge!
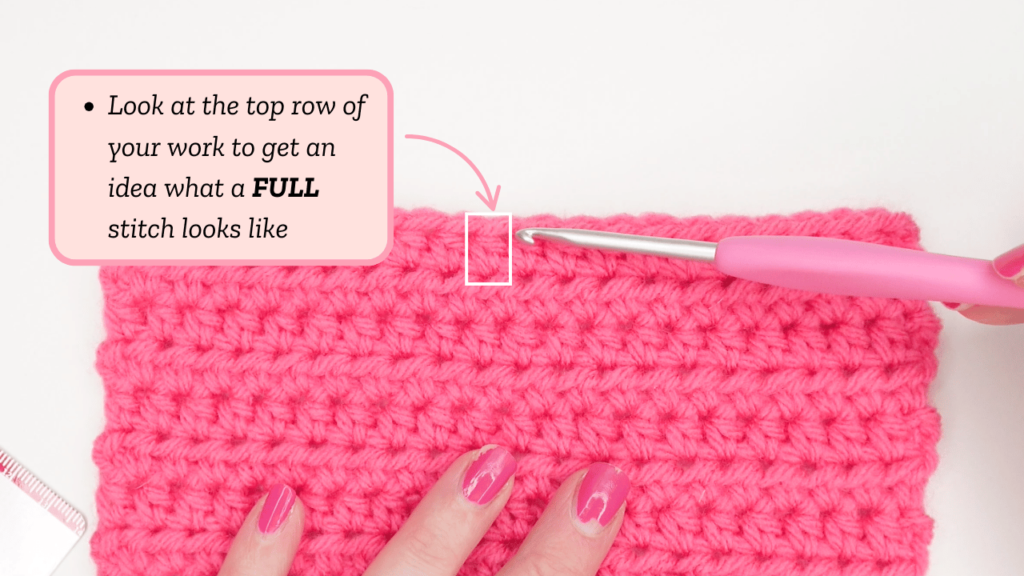
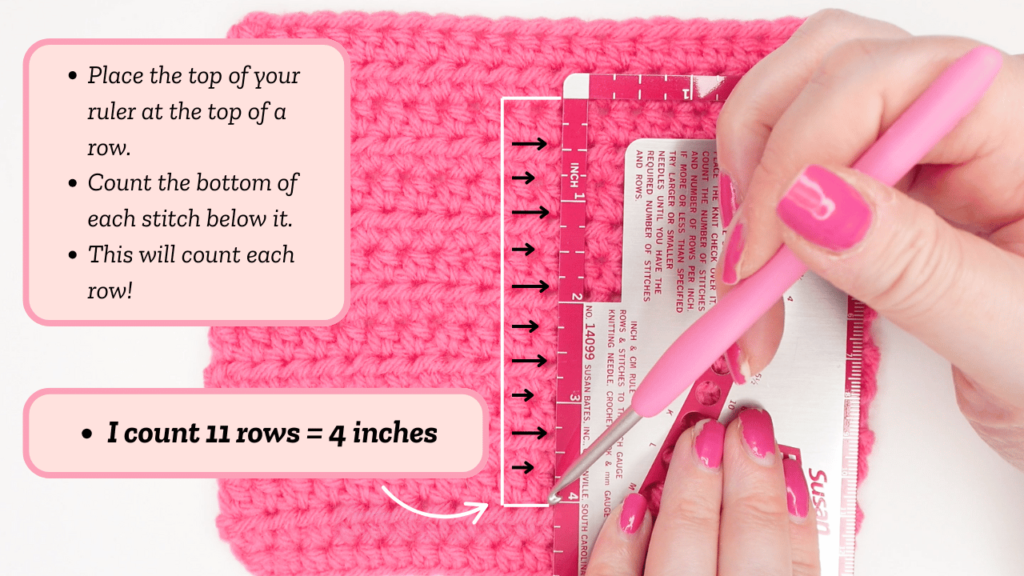
Step 3: Measure Your Swatch
Using a ruler or tape measure, count how many stitches and rows fit inside a 4-inch square in the center of your swatch. Make sure that you are taking into account the full stitch (from top to bottom and side to side).

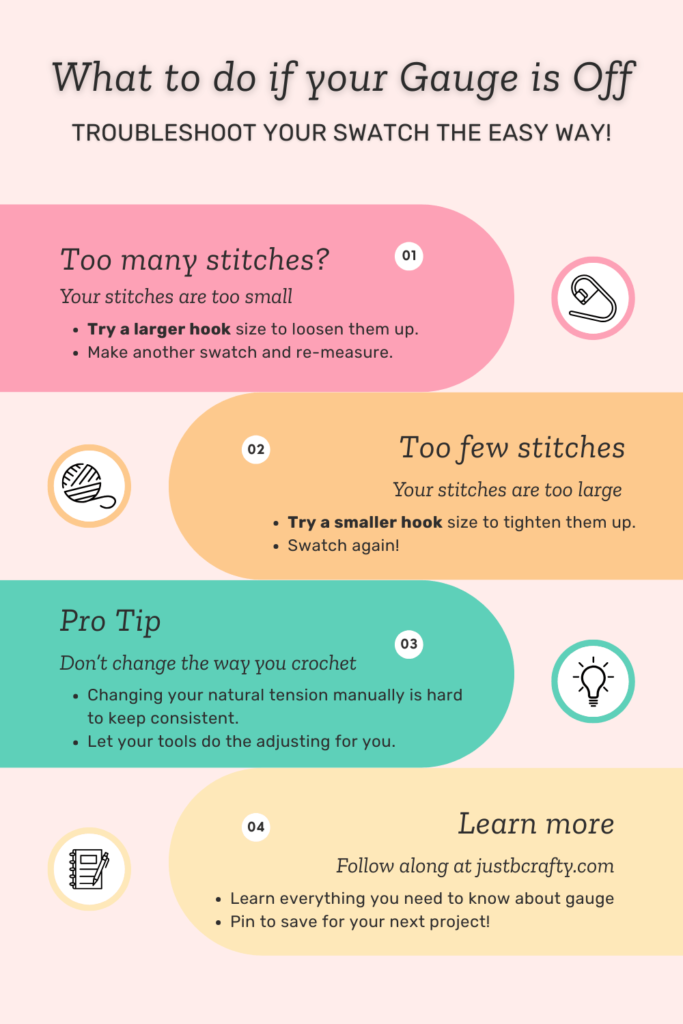
What To Do If Your Gauge Is Off?
If your gauge doesn’t match the pattern, you’ll need to your hook size and try again. See below for quick and easy reference:
- Too many stitches per 4 inches? → Your stitches are too small → Try a larger hook
- Too few stitches per 4 inches? → Your stitches are too big → Try a smaller hook
You’ll need to create a new swatch every time you change hook sizes. And yes, it takes a few extra minutes, but it saves HOURS (and frustration AND money) down the road!
Why Crochet Gauge Can Vary
Everyone crochets at a slightly different tension. Factors that affect your gauge can include:
- Your natural stitch style (tighter stitches vs. looser stitches)
- The hook size and even the material of the hook (like metal, wood, or plastic)
- The yarn weight and fiber content (cotton, acrylic, wool, etc.)
- Whether or not the piece is blocked
Even changing your hook from aluminum to bamboo can subtly shift your tension!
Save this for Later!
Pin it now so you can come back when you’re ready to measure your next gauge swatch! Click here to pin to pinterest!
Pro Tips for Crochet Gauge Success
- Always make a swatch, especially for garments!
- Block your swatch if the pattern is blocked (or treat your swatch how you’ll treat the finished project – like washing!)
- Invest in a crochet hook set so you can easily size up or down (Check out my favorites here!)
- Don’t stress, it’s just crochet after all!
Gauge = Confidence
Gauge is one of the most overlooked but is most the important piece to improving your crochet. It’s how you ensure that your project turns out just like the pattern photo and not three sizes too small (or too big!).
So next time you start a new project, take a deep breath, grab your hook, and swatch. Your future self (and your future sweater) will thank you.
Related Patterns
If you enjoyed today’s post, I think you’ll love these patterns!
Mini Nesting Baskets Pattern
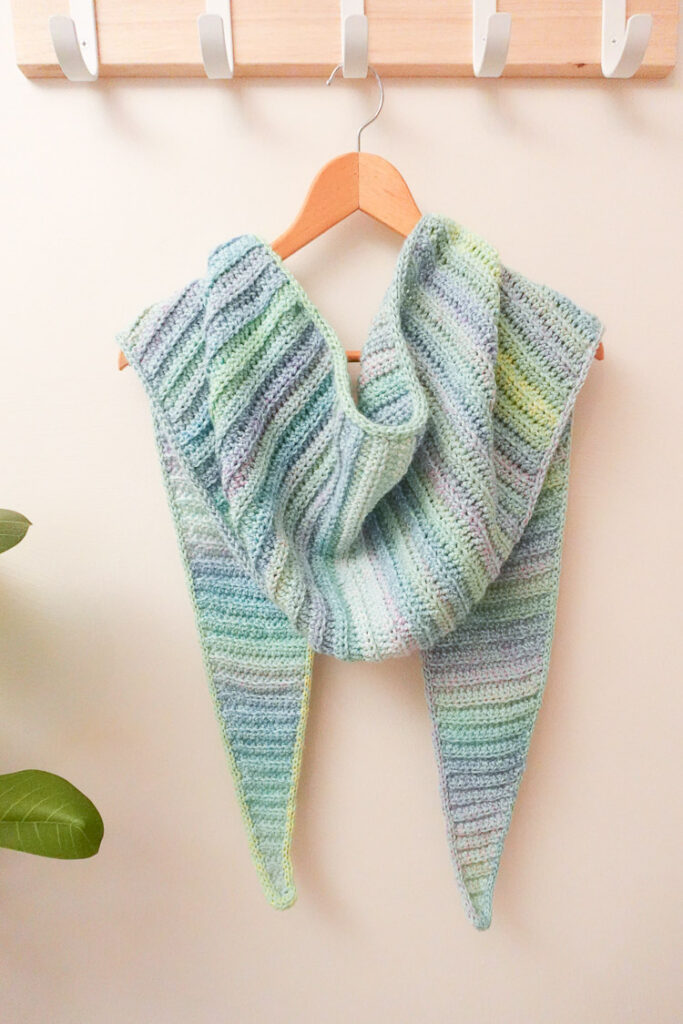
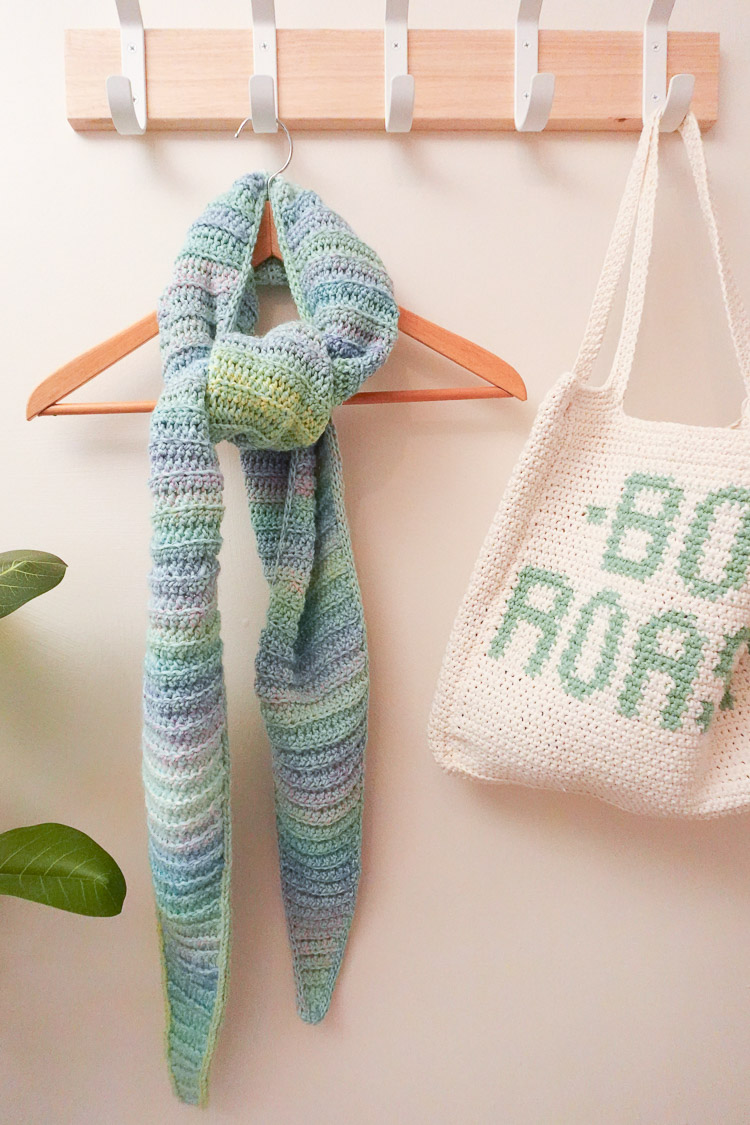
Watercolor Shawl Pattern

Veggie Stand Market Tote
Want More Crochet Tips?
Join my email list and get a free printable pattern, plus be first to know about pattern updates, and behind-the-scenes peeks at my creative process!
Happy crocheting!
Find this post helpful?

One Comment