Make Your Own Amigurumi Link, Wind Waker Style!
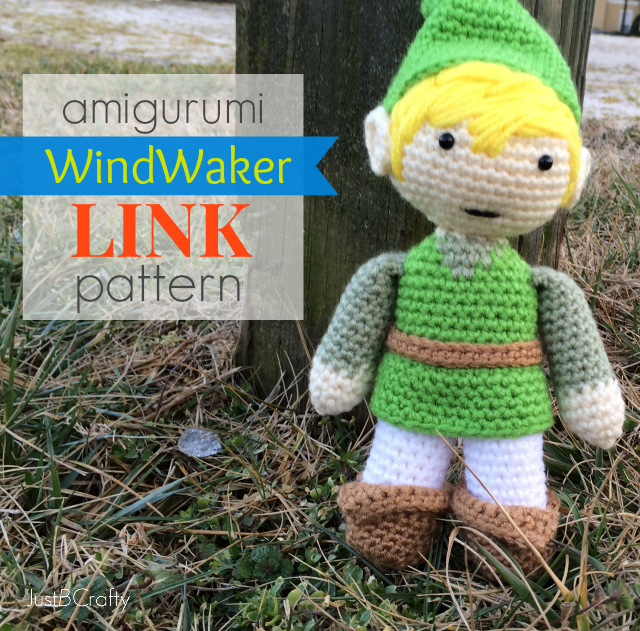
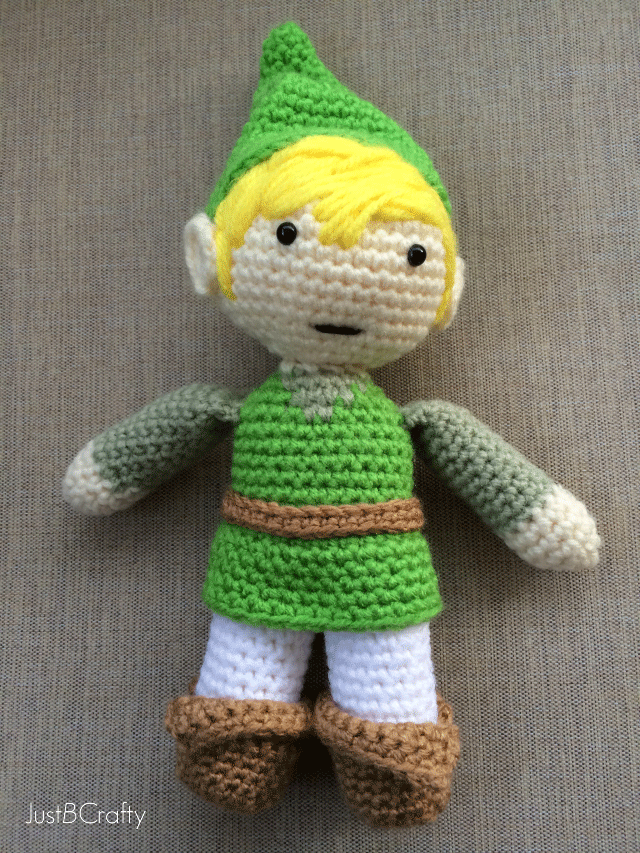
The weather was super crazy last week with snow, sleet and ice. Normally I would love myself a good snowstorm but it totally messed up my Valentine’s Day craft making plans! But let’s first back it up so I can give you a little back story. Trisden is a huge Legend of Zelda fan (a Nintendo video game for all you non-nerds, haha) so I figured Valentine’s Day would be the perfect opportunity to crochet up his favorite character from the series, Link.
I knew it would take about a week for me finish him up. I started the project on Monday knowing that if I would peck away at the project a little each day while Trisden was at work, it would for sure be done easily by Friday. Or…so I thought.
By Tuesday I was right on schedule and Link’s little head was completed. The plan was to get the majority of his body done on Wednesday afternoon as I only had to work a half day. Then, the storm of the century hit the Carolinas. Or, at least it was the storm of the century for the Carolinas.
Basically the second it started snowing businesses shut down and everyone left work to head home at the EXACT same time causing inevitable traffic jams and backed up intersections. Trisden and I were both sent home early due to the weather and it ended up taking up us 5 hours total to get home! Note that it’s normally about a 10 minute commute.
To wrap up the story, Trisden ended up having off on both Thursday and Friday because of the weather so I had to keep sneaking off in little spurts to crochet as to not tip off I was making him something. I at least got the project done in time, but had to really power through and crochet when he wasn’t paying attention. He ended up occuping himself with some computer games and was completely oblivious as to what I was doing (he, he, he) so it all worked out. Whew!
And…he loved it! I enjoy giving him handmade gifts on Valentine’s Day especially and nothing says I love you more than a 15 hour amigurumi project. Each stitch is crafted with love!
Inspired to go make your own??
Note: This pattern assumes you have a basic understanding of amigurumi and would be considered a more intermediate to advanced skill level project.
The Legend of Zelda: Wind Waker Link Pattern
Materials
- worsted weight acrylic yarn: grass green, pale green, yellow, peach
- size 3.5mm crochet hook
- Fiberfill or stuffing ( I use white scrap yarn!)
- safety eyes
- small piece of black yarn (for the mouth)
- yarn needle
Key (in US terms)
- dc = double crochet
- dec = decrease (make 1 stitch over two stitches)
- inc = increase (make 2 stitches into the same stitch)
- sc = single crochet
- tc = triple crochet
Pattern notes
- Every stitch of all rounds (unless otherwise noted), are worked in sc and increase/decrease stitches are marked accordingly.
- Do not join at the end of rounds. Each round is worked continuously without joins.
- To track your rounds, mark the last stitch of the round with a stitch marker. Move stitch marker to the last stitch of each round as you go.
- Need some help with attaching the limbs?? See this post here for some helpful tips!
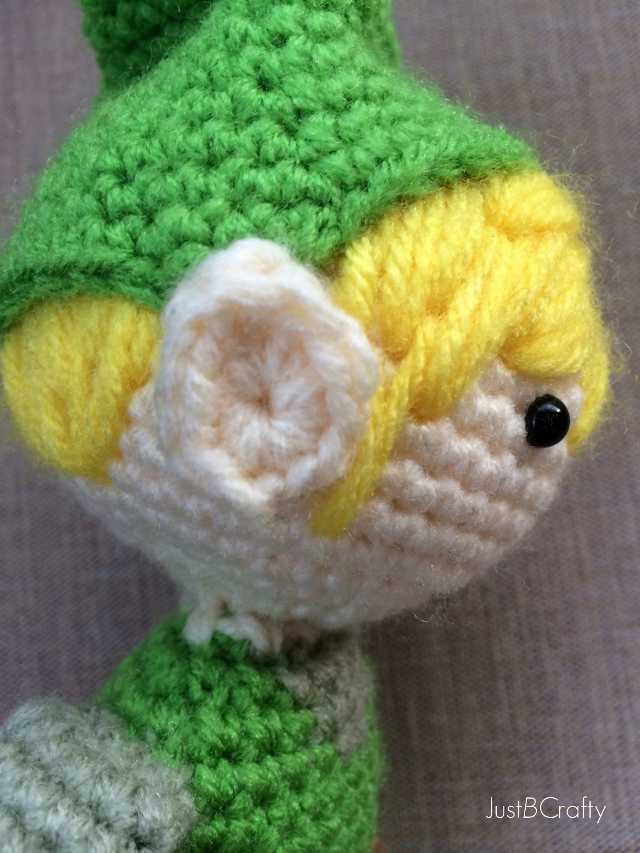
Ears (make 2):
Use cream yarn.
In magic ring: 6 sc, dc, tc, dc
Cut yarn leaving a long tail.
Head:
Use cream yarn.
Round 1: 8 sc in magic ring
Round 2: inc in every other (12)
Round 3: inc in every other (18)
Round 4: inc in every 3rd (24)
Round 5: inc in every 3rd (32)
Round 6: inc in every 4th (40)
Rounds 7 – 13: sc around for 7 rounds
Place the eyes and ears. Use the picture as a guide.
Start filling head piece with stuffing. Continue to fill piece as you begin your decrease rounds.
Decrease rounds begin
Round 15: dec every 4th (32)
Round 16: dec every 3rd (24)
Round 17: dec every 3rd (18)
Round 18: dec every other (12)
Round 19: dec every other (8)
Secure, and cut yarn leaving a long tail.
Fill head with filling as desired.
Stitch head piece closed.
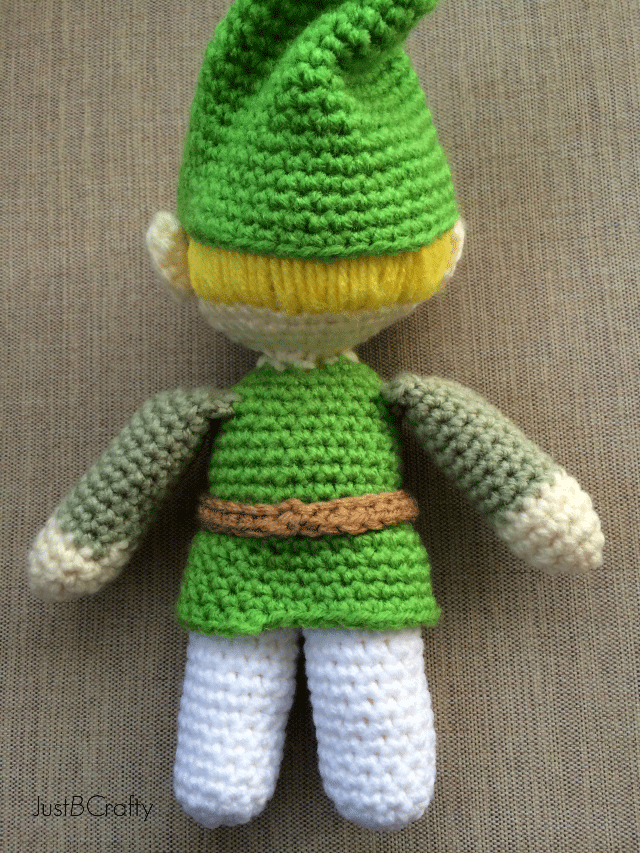
Using yellow yarn, stitch on the hair.
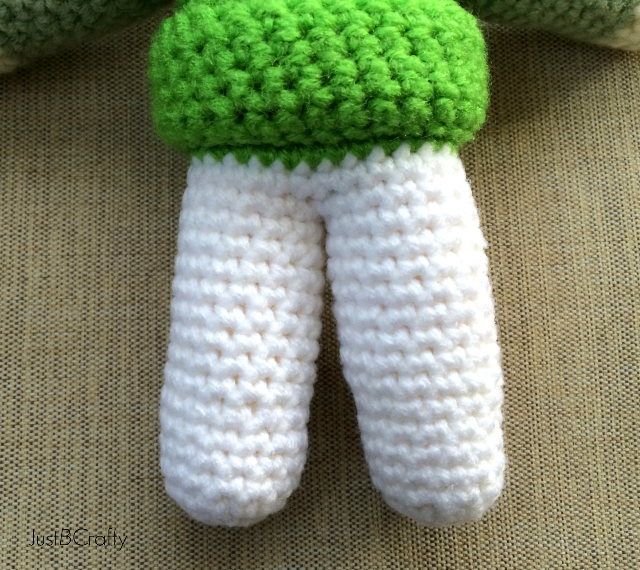
Legs:
Use white yarn.
Round 1: 4 sc in ring
Round 2: inc in every stitch (8)
Round 3: inc every other stitch (12)
Round 4: 2 sc in first sc, sc in next 5 stitches, 2 sc in sc, sc to end (14)
Rounds 5 – 18: sc for 14 rows
Secure and cut yarn
Repeat for leg #2. Do not cut yarn.
Making the waist
Line up the two legs side by side with the last stitches facing each other. Take those two stitches and join them with a single crochet. Place a stitch marker in that stitch to mark the beginning of the round. This will be Link’s backside.
Round 1: Sc around the first leg, along the back of the second leg until you reach back around to the stitch marker. Technically there should be 24 stitches (14 from each leg) but there may have been a stitch accidentally added or lost, but thats ok, no biggie!
Round 2: Sc around. cut white yarn and attach green. Continue to Waist.
Making the shirt flap:
Round 1: sc around (28)
Round 2: ch 1 and turn, you will now be crocheting in the opposite direction. Sc around in outer loops only (you will be single crocheting in the outer loops for this round only)(28)
Round 3: sc to the middle side of Link’s first thigh, inc, sc to the middle side of Link’s other thigh and inc. sc to the end. (30)
Rounds 4 – 7: sc for 4 rounds, cut yarn. Secure and weave in the tail.
The flap should now look like a skirt over Link’s white pants.
Torso/Shirt:
Go back up to the top of the green flap, where you had originally started. You will now be crocheting normally in the direction you had been for the majority of the project.
Round 1: Attach green yarn and sc in each of the inner loops of the top of the green Shirt Flap. (28)
Rounds 2 – 5: Sc around for 6 more rows. Continue to forming the shoulders.
Fill legs and begin to fill torso with stuffing.
Forming the shoulders:
Round 1: sc to first side of the body (where his shoulder will be); dec, sc to other side (where the other shoulder will be) and dec, sc to end (26)
Round 2: sc to side, dec, dec, sc to other side, dec, dec, sc to end (22)
Round 3: dec every other, cut green yarn, attach cream yarn.
Round 4: dec every other, secure and cut yarn.
Finish filling in torso.
Sew on head.
Arms (make 2):
Begin with Cream Yarn.
Round 1: 4 sc in ring
Round 2: inc in every stitch (8)
Round 3: inc in every other (12)
Rounds 4 – 5: sc 2 more rounds, cut cream and attach pale green yarn
Rounds 6 – 17: sc 12 more rounds
Stitch end closed, secure and cut yarn leaving long tail.
Sew arms to body.
Hat:
Green yarn.
Round 1: 4 in ring
Round 2: sc around
Round 3: inc in all stitches (8)
Round 4 – 5: sc
Round 6: inc every other (12)
Rounds 7 – 8: sc
Round 9: inc every other (18)
Rounds 10 – 11: sc
Round 12: inc every 3rd (24)
Rounds 13 – 15: sc
Round 16: inc every 3rd (32)
Rounds 17 – 19: sc 3 rounds
Round 20: inc every 4th (40)
Rounds 21 – 23: sc 3 rounds
Round 24: inc every 4th (50)
Rounds 25 – 27: sc 3 rounds
Secure, cut yarn leaving long tail.
Sew hat to Link’s head behind his ears.
Shoes (make 2)
Sole
Row 1: ch 5, sc in 2nd ch from hook, sc to end (4)
Row 2: ch 1, turn, 2 sc in 1st sc, sc 2, 2 sc in sc (6)
Rows 3 – 8: sc in rows for 6 more rows
Do not cut yarn. Continue on to shoe sides.
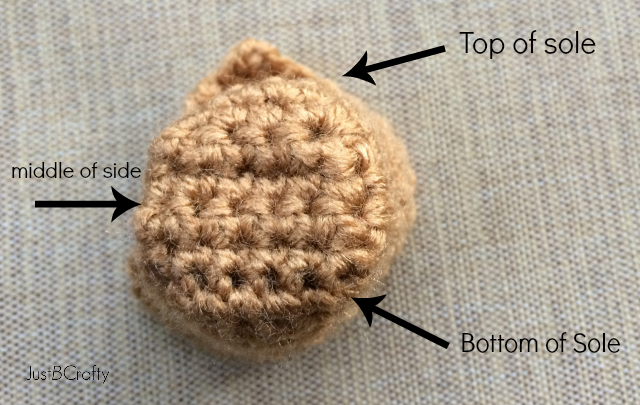
Round 1: sc around the outer edges of the sole to form the sides of the shoe.
Rounds 2 – 4: sc around for 3 more rounds
Cut yarn and secure.
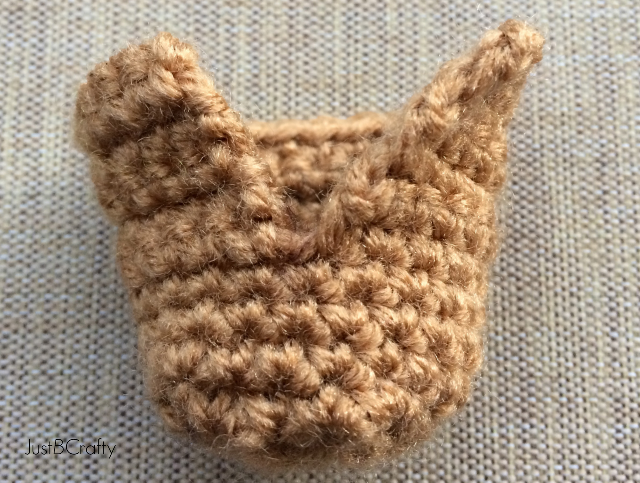
Left boot:
You will be working back and forth in rows.
Attach yarn to middle side of shoe.
Row 1: ch 1 and single crochet to end of round, turn.
Rows 2 – 7: Repeat Row 1
Cut yarn and weave in ends.
Right boot:
Repeat directions for left boot but work the rows starting on the opposite side.
Slide the shoes on Link’s feet!
Belt:
ch 30
Row 1: starting in 2nd ch from hook sc to end
Do not cut yarn.
Wrap belt around Link’s waist at top of shirt flap and join both ends of the belt with a slip stitch. Secure belt to doll with a yarn needle.
Mouth
Take yarn needle and black yarn and stitch on a smile for the mouth.

I LOVE this! I am a huge zelda fan and a huge crocheter, although I don’t do much amigurumi, this makes me want to get into it. LOVE it!
Thanks Bethany!! I hope you try it out!! 🙂
Windwaker is my favorite Zelda game! This looks great Brittany and I am sure it was well received! 🙂
I hope you weathered the storm all right. Wilmington freaked out as usual, but tons of people lost power, so it was mostly justified this time. Can't wait to see your next project!
Also I like the new small changes to the blog header, it looks very nice 🙂
Thanks RaChil! I haven't played any Zelda games yet but husband grew up playing them and loves them. I think they have windwaker for the ds so I might need to get it just so I can see what everyone is talking about!
I'm glad you survived the storm, haha. I'm so happy we didn't lose power…I honestly can't imagine because it was so so cold last week!
Aah! This is so cute! I just recently learned how to crochet, but will eventually try this.
That's awesome! Welcome to the wonderful world of crochet!! If you do decide to make this let me know, I'd love to see it!! 🙂
This has got to be the MOST AWESOME thing ever! I just adore the Zelda games!
Thanks Heather!! So glad you stopped by!! 🙂
Adorable!
Love it! I used to play The Legend of Zelda – all the time! Thank you for linking up at Link & Share Wednesday! and Congratulations! You were one of the most clicked projects! Rhondda http://www.oombawkadesigncrochet.com/2014/03/link-share-wednesday-a-crochet-twitter-hop.html
Awesome!! Thanks Rhondda for hosting Link and Share Wednesday, I look forward to checking out the projects every week!! 🙂
so cute!
Hi Brittany,
Do you mind if I use this as my Christmas elf pattern? I think it would work just fine.
Of course! 🙂
Thank you soo much for this pattern
I ws making a joker doll and I started with the legs but i had to idea how to attach the head or even make the shoulders thank you so much for this patten you saved me.
Wonderful blog by the way
And again thank you