| | |

Seed Stitch Dishcloths

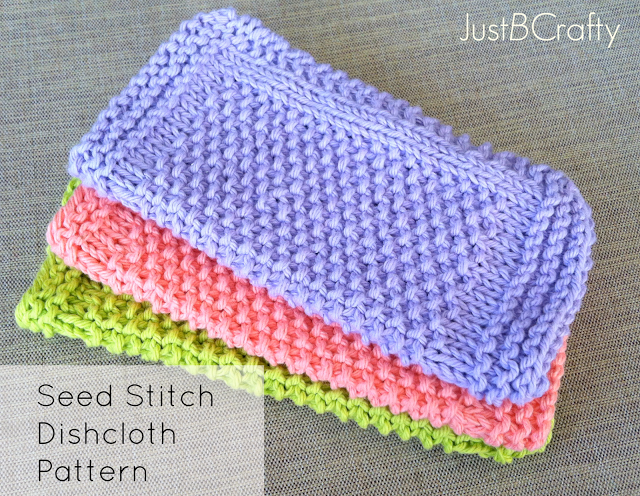
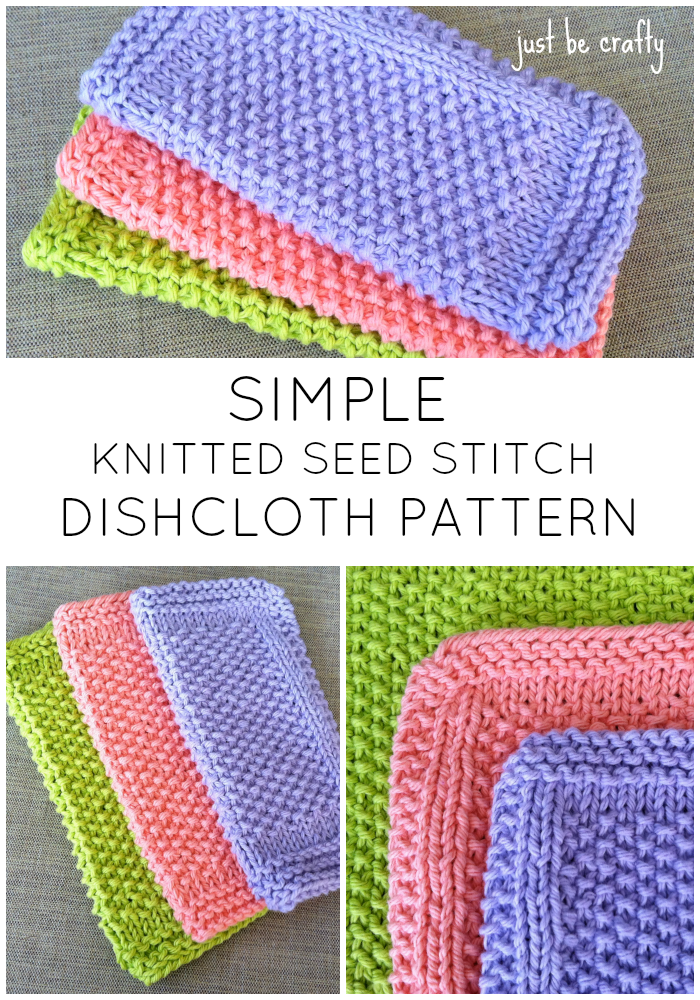
Brighten up your kitchen with this adorable seed stitch dishcloth!  This pattern is great for beginner and seasoned knitters alike!
Seed Stitch Dishcloth Pattern

This post contains affiliate links.  For more information please see my disclosures page.

This past weekend we took a trip to Wilmington to spend some time with Trisden’s family.  On Saturday we spent the entire afternoon fishing on the Kure Beach Pier.  I should say everyone else was fishing, I spent most of my time knitting but I’ll get to that later.  I am so mad at myself because I forgot my camera!

There were so many good photo opportunities that I would have loved to share but can’t.  Of it is always the times that you forget your camera that something crazy happens and this was one of those times.  It was a beautiful day out perfect temperature, the fish weren’t really biting, but that was ok, it’s just nice to sit out there and enjoy the waves.  After we were sitting out there for a while probably around dusk, we saw a shark!

Trisden noticed he had a sting ray attached to his hook and then we saw some big light colored thing circling around the sting ray, and realized it was a shark!  It was probably about 5 feet long, were not sure what kind, but does it really matter?  It’s a shark.  But Trisden reeled in the little sting ray.  It was so cute, they look like their undersides have a little smiley face, but anyway we untangled it from his hook and when he threw it back into the water the shark swooped in gobbled it up.

It was crazy, I have gone swimming there countless times and there were surfers that were not too far away from the pier.  The scary part was that we were fishing in the surf and not that far off from shore!  It’s kind of creepy to know what you’re swimming with at the beach.  But in addition to that shark, I guess Trisden had seen 3 earlier that day swimming around the pier so we are pretty sure that the fish weren’t biting that day because of the sharks.  Sorta scary!

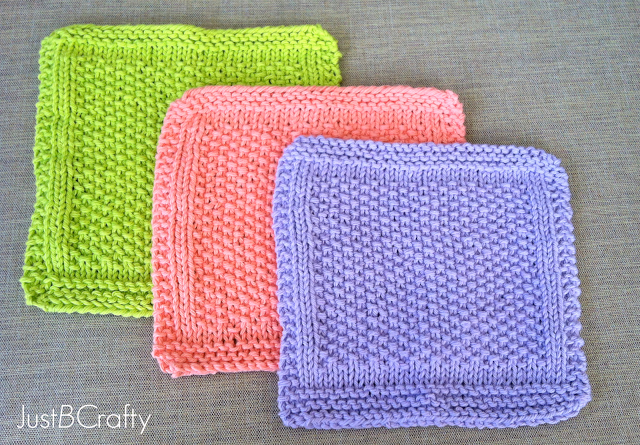
But anyways back to knitting.  I have been wanting to make some of my own dishcloths for a while now and I finally came up with simple little pattern.  The majority of the cloth is made up of seed stitch which is really nice because because it is double sided and will make for a good scrubbie surface for washing dishes.  They knit pretty fast, and make for excellent gifts.  Knit them in all sorts of pretty colors to brighten up your kitchen.
Seed Stitch Dishcloth Pattern

Seed Stitch Dishcloth Pattern

Need help with the seed stitch?  Learn more about this stitch in the video below!

A printable version of this pattern is available for purchase here.

OR… gain instant access to this pattern PDF as well as my entire PDF pattern library!  Click here for more information.

Seed Stitch Dishcloth Pattern

Materials:

Finished Measurement:

  • Approximately 7 inches by 7 inches

Key:

  • k – knit
  • p – purl
  • right side – front of work
  • wrong side – back of work

Pattern:

Cast on 31 stitches

Rows 1 – 5: knit


Row 6: k2, purl to last two stitches, k2

Row 7: knit

Row 8: k2, p2 *k1, p1; repeat from * to last 5 stitches; k1, p2, k2

Row 9: k4, *k1, p1; repeat from * to last 5 stitches; k5

Row 10: k2, p2 *k1, p1; repeat from * to last 5 stitches; k1, p2, k2

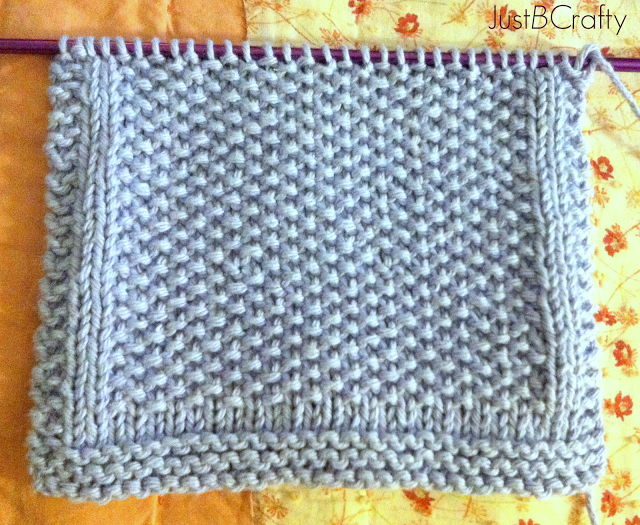
Repeat Rows 9 and 10 until piece measures about 6 inches from cast on edge.  Your last row should be a repetition of Row 9.

Your piece should now look like this:
Seed Stitch Dishcloth Pattern

You should be starting on the “wrong side” of work.

K2, purl up to last 2 stitches; k2

Knit the next 5 rows.

Bind off.  Weave in ends, your done!

I’m looking for pattern testers and now accepting applications!  Click here to learn more information!
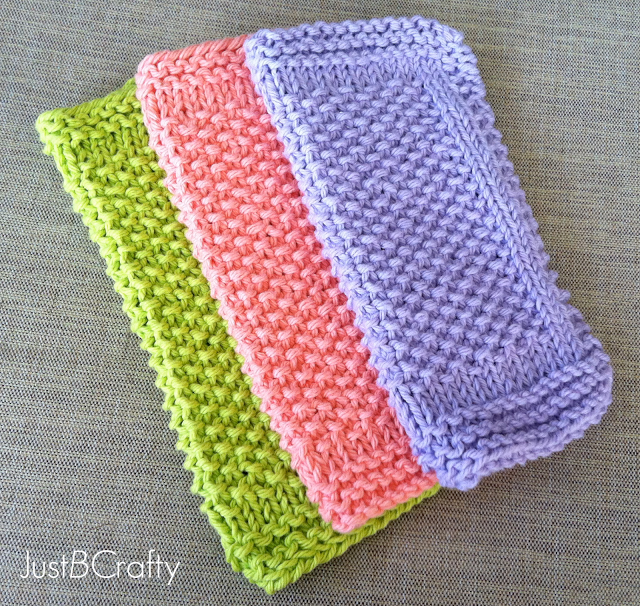
Seed Stitch Dishcloth Pattern

Seed Stitch Dishcloth Pattern

If you enjoyed this pattern, check out my newest dishcloth to feature the seed stitch!
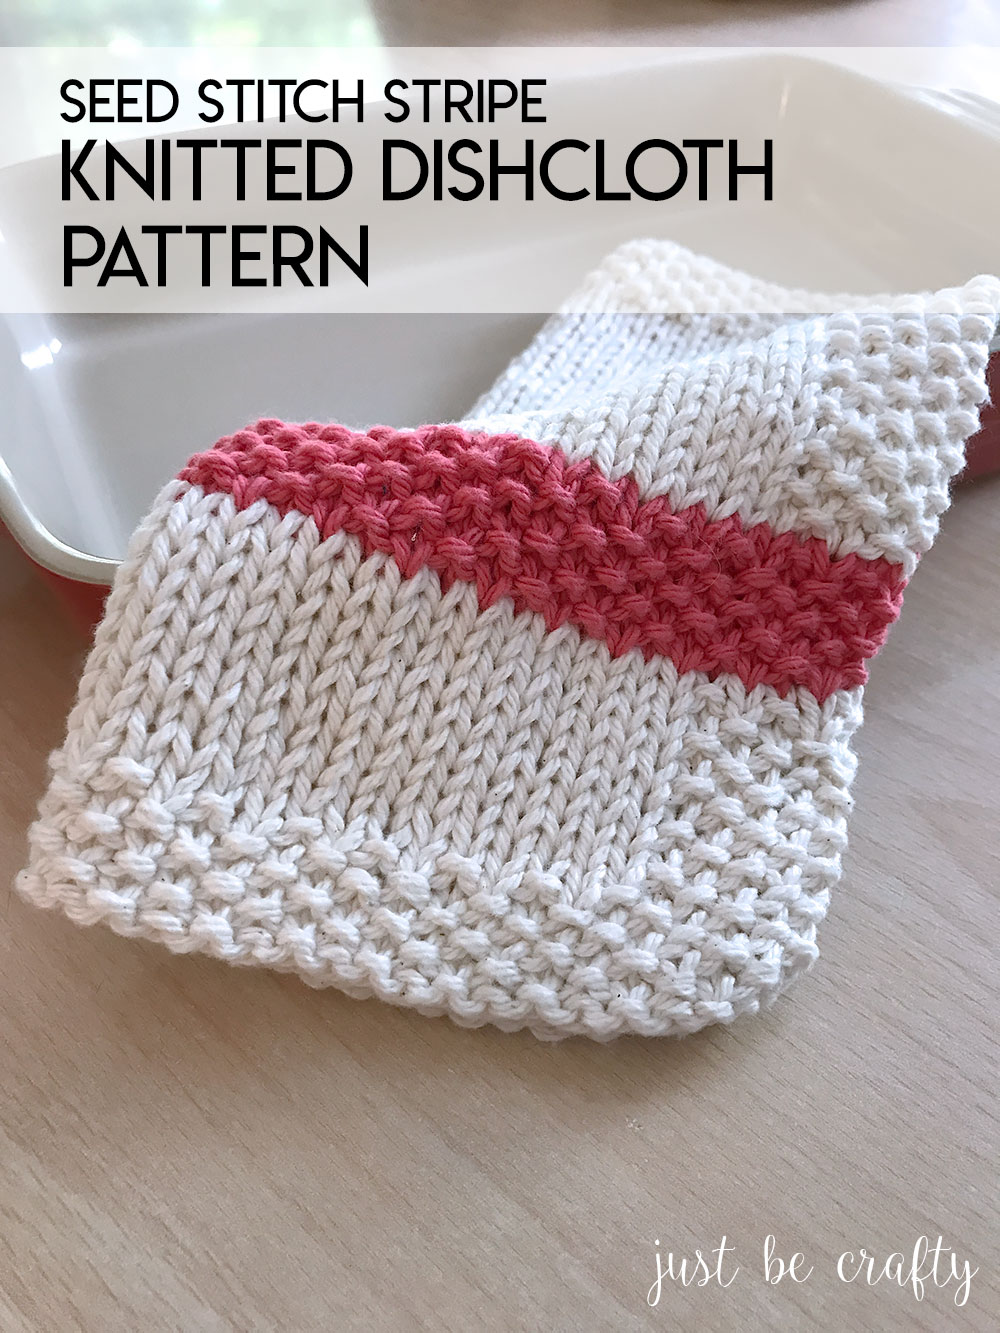
Seed Stitch Stripe Dishcloth Pattern


Similar Posts

113 Comments

      1. Hi Debra! To remove the piece from the needles you will want to “Bind off”. I do not have a tutorial on binding off yet, but YouTube has many wonderful tutorials demonstrating how to bind off.

        1. Bind off; knit 1st 2 stitches tog, return one stitch 2 needle on the left. Repeat process until one stitch remains, pull remaining thread thru last stitch…wah la!

          1. Belendia, I have not tried this method before. I’m going to cover it a shot. It seems easier for arthritic fingers. Many thanks!

    1. I love to make these washrags, but I always find that cotton yarn shrinks a lot in the wash.
      Any help for this?

    2. Hi Patty! Unfortunately that does tend to happen but once I get them wet again to use they stretch back out. You could also try not putting them in the dryer and just reshape it and lay flat to dry. Hope that helps!!

    1. Awesome, I am so glad to hear that! This is a great starter pattern as it features some of the most basic stitches and will help you practice switching between knitting and purling! Let me know when you make them, I would love to see!!

  1. Love these cloths and will add them to my collection of dishcloth patterns. One question, the colors in some of the cotton yarns seem to run. Especially the darker colors. Any suggestions?
    Thanks.

    1. Great comment!! I have actually only worked with the light colors and so far I haven't noticed the colors running but just fading. The only cotton yarn I have worked with so far is Lily's Sugar and Cream, so honestly I think it's just going to be trial and error, or possibly looking for reviews before selecting yarn. Hope that helps!! 🙂

    2. My aunt would put epsom salt (1tbsp) equal parts white vinegar and equal parts warm water. If the color is dark it will run a bit the first few washes. I suggest you wash them separately in the sink. 100% cotton does run. Jeans is a good example 🙂

  2. I am always looking for new and interesting dishcloth designs. I usually give some as a bridal shower/wedding gift. I love using the seed stitch, too. I think it is just neat looking . I will definitely be adding this one to my pattern stash. Thanks!!! Btw: watch out for sharks next time you are at the beach. Glad no one got hurt–except the sting ray. 😉

    1. Hi Christine! Hahah, thanks for the advice, I think I'll definitely be scoping out that water before I go near it next time. And I'm so glad you like the pattern, thanks for stopping by!! 🙂

  3. The pattern looks great! I will add it to my pattern book! However, I have a question about the pattern – Your instructions go from Rows 1-10; then underneath the light blue pictured cloth, it starts again? Or is that a continuation of the pattern? I have read about seed stitch but have not done one before, and the way the pattern is listed on your site is a little confusing – just want to clear it up that it is a continuation of the pattern. Thanks!

    1. It's just the continuation of the pattern. Because you will be repeating rows 9 and 10 until the seed stitch portion reaches six inches, the number of actual rows may be different for everyone.

      The photo is showing you what your work should look like after repeating rows 9 and 10 for six inches. And then you'll start following the instructions under the photo to finish the cloth. This may sound confusing, but trust me once you start knitting it and get to that point it will make sense!

      If you are having trouble with seed stitch, check out the link to a tutorial I provided in the post. Hope this helps!!

  4. I think this would make a cute, easy baby blanket. Any advice on how to calculate # to cast on for a nice sized blanket?

    1. That's such a great idea! You can really make this however big as you want it. To scale this to a different size, you'll want to cast on a multiple of 4 for the border on either side, and an odd number of stitches for the seed stitch middle. But exact number of cast on stitches for a specific size I'm not sure.

    2. Thank you! Just knowing the border multiple and # for the center gives me a good starting point. I think I will try it!

  5. I started knitting this dishcloth, but by following your instructions it does not give me a seed stitch.

    1. Are you ending up with ribbing instead?

      So starting in row 8 you will alternate knit and purl stitches (working k1, p1). Then in row 9 you will knit into the purl stitches and purl into the knit stitches as they face you for the rest of the seed stitch rows. The instructions are correct. If you need a visual I linked to a youtube tutorial in the post. Hope this is helpful! Happy knitting! 🙂

  6. Thanks for the clear up on the instructions, the prompt reply and the tutorial! Looking forward to starting it. Beautiful pattern!

    1. Awesome, that makes me so happy to hear! I'd love to see them! If you follow along on facebook feel free to post photos of your work on the page!

  7. my pdf doesn't seem to be working….is there any way that I could just ask the pattern to print to my printer.?

    1. Highlight the pattern, then ctrl P, this will wake up your printer, print all. this should print the whole pattern that you have highlighted for you.

    2. You can copy and paste it onto a Word (or similar) document then print it out. That is what I have done and since I make marks on my page to keep track I can always print another copy.

  8. Nice Pattern was looking for something like it, would like a smaller print version of that pattern, do not need 8 pages printing for the pattern alone

  9. Love the pattern but help! I'm having problems with the right and wrong side and figuring out how to switch back and forth! In my simple mind I don't seem to have a choice with how the starting point only seems to give me one option!!! Be gentle…..I am a beginner! Thanks!

    1. Hi Annette, happy to help! I just added the "right side" and "wrong side" in there so you know which side of the work is facing you as you knit each row. It's not an extra step or anything like that, but more of a landmark.

      Basically, as you knit all of the odd rows (rows 1, 3, 5, etc..), the "right side" or front of the work will be facing you, and as you knit the even rows (rows 2, 4, 6 etc..) the "wrong side" or back of the work will be facing you.

      Hope this helps, and if you come across any more problems don't hesitate to ask! Enjoy your weekend, and happy knitting! 🙂

    2. can I add another way that makes it real simple to know the right and wrong side.
      when you cast on from your skein of yarn, you have that tail of yarn. The right side of your project that tail of yarn will always be on your left side. When it is on your right side, then you are working on the wrong side, or back of the pattern.

  10. Brittany….Now it makes sense! Thanks so much for responding!!!! Love the pattern and u taught me something to add to my stash of knitting knowledge…..every little bit helps!

  11. I've been making washcloths all week and when I came across yours I totally fell in love with how great they look!! Can't wait to get started making these today!! . Thanks for posting your wonderful patterns!!!

  12. I've been making washcloths all week and when I came across yours I totally fell in love with how great they look!! Can't wait to get started making these today!! . Thanks for posting your wonderful patterns!!!

  13. Hi- I just started the pattern and am getting stuck at rows 9 and 10. I have what looks like a rib stitch. Could you please explain those rows a little further? I'd really appreciate it! 🙂

    1. Hi Mary Jo! So, starting in row 8 you will alternate knit and purl stitches (working k1, p1). Then in row 9 you will knit into the purl stitches and purl into the knit stitches as they face you for the rest of the seed stitch rows.

      If you need a visual I linked to a youtube tutorial in the post. Hope this is helpful!

      Happy knitting! 🙂

  14. Thanks for the cute pattern, I will knit some on the way to Kure Beach for wa vacation soon

  15. Love dishcloths have made 5 so far I have tried others on the computer but this one beats all others. Thank you linda

    1. Hi Sharon, I am sorry but I am not sure the exact ounce measurment. I know that I can get a few washcloths out of a 3 oz ball of Lily Sugar’n Cream cotton yarn though.

          1. Hi Paula! So, starting in row 8 you will alternate knit and purl stitches (working k1, p1). Then in row 9 you will knit into the purl stitches and purl into the knit stitches as they face you for the rest of the seed stitch rows.

            If you need a visual I linked to a youtube tutorial in the post. Hope this is helpful!

  16. Thank you so much for the pattern, just love
    It very much, I have made total of 12,, and
    Love them all, I am going to give them out
    For Christmas,,, but down deep I don’t want
    To let them go?, but I will,?, de

    1. Thank you so much. I have been knitting and ripping out for days trying to figure this pattern out. I will try knitting the 3 stitches to begin row 9

      1. Hi Ellen and Susan!

        The pattern is correct as written. If you only knit 3 on row 9, you won’t have the same border as the pattern.

        If you have questions I am happy to help out!

        Happy Knitting!
        Brittany

  17. I’m just learning how to make dishcloths and have not knitted a lot. Question, when you say the right or wrong side, what do you mean,? thanks!

  18. Hi Brittany!
    Thanks for the awesome Seed Stitch dishcloth pattern! It has definitely become my favorite; I love the look of it!
    Thanks,
    Donna

  19. For row 8 do I repeat the k2 p2 k1 k1 the whole row? I was unsure because of the star not sure if I should just repeat the k1 p1 or the whole thing.

    1. Hi Kristen!

      For row 8 you will k2, p2, then you will work in k1, p1 for the rest of the row until you have 5 stitches left, then you will k1, p2, k2. The asterisk (*) is placed in the pattern to show were you begin the repeat.

      For example, row 8 written out is: k2, p2 * k1,p1; repeat from start until the last 5 stitches; k1, p2, k2. Meaning you will complete the k2, p2, and then you will repeat the directions following the (*) until you have 5 stitches remaining on the needle. Then you will k1, p2, k2.

      I hope this helps! If you have any more questions along the way please feel free to reach out!!

      Happy knitting!
      Brittany

  20. I love this design and think that they would make lovely blanket squares!

    I would like to make them 6 inches x 6 inches instead of 7 x 7. please can you suggest how many stitches I need to cast on. I’m pretty new to knitting, and haven’t quite got the hang of gauges yet!

    Many thanks!

  21. Hi there.
    A heads up on the final 3 rows of the seed dishcloth pattern before the bind off.
    I believe that the pattern should read
    Knit a row, purl a row and then knit a row.
    This way you’ll duplicate the beginning 3 rows showing all purl stitches.
    See what you think.
    Love your work.
    Andrea

    1. Hi Andrea! Actually, the pattern is correct as written. The last rows should read knit for each row as the both the bottom and top border are garter stitch, which is done by knitting on both the front and back.

  22. I have tried this pattern several times and I keep getting ribs instead of seed stitches. It would be helpful if the pattern stated exactly what to do instead of knitting into purls and purling into knitted stitches. I’m going with the rib stitch for now.

  23. Love the dish cloth patterns. I’ve started loom knitting with a group of friends. Do you ever convert your patterns for loom knitters?

    1. Thanks Rhonda! And you know, I have not tried loom knitting yet! I have no idea how to do it, but hope to learn soon! 🙂

  24. I have always likes knitted dishcloths but I think this one is my favorite. My first one I didn’t get the seed stitches but watched the tutorial and saw what I did wrong. Once you do a few you hardly need the directions and that makes it easy to do while watching TV.

  25. You are very patient with your explanations which I think is helpful to your followers I to love making dishcloths and have made a smaller version for small children s car trips when they need a clean up quickly just wet them and carry in their own zip lock baggie for each child

    1. Hi Mary! Thank you so much! And thats a great idea to wet the cloths and bring on the go, and very eco friendly! 🙂

  26. Hi! In row 9, it says to k1 p1 until the last 5 stitches, then to k1 k4. Is it supposed to say k1 p4, or just k5? Thanks!

  27. Than you so much Brittany for this pattern! I searched ALL over for a pattern to match the “At Your Service Knit Cloth” by Bernat Design Studio and your pattern matches wonderfully!! Have you thought of linking this to the ravelry site? Thank you again!! Sometimes its these simple patterns that can really shine!!

  28. Hi brittany i love your seed stitch pattern wadh cloth i am busy making some up for gifts to send to my step daughter and a few friends. I Think that there is nothing nicer then receiving or giving a hand make gift ad i believe it shows a lot of love for the person recieving and giving.
    Hope you and your family have a truly wondetful xmad and a safe and secure 2018.

    1. Hi Denise! Thank you so much for the kind words! I completely agree with you about handmade gifting. I’m sure your step daughter and friends will cherish the dishcloths! I’m so happy you enjoyed the pattern and I wish you and your family a wonderful holiday and happy new year! 🙂

  29. I love your dishcloth patterns! I just had a quick question about Row 9. At the end you have “k1, k4” but I feel like maybe you meant purl 4? I just wanted to make sure!

    1. Hi Stephanie! For row 9 its really knit 5 (k1, k4). I break it up that way because the k1 ends the seed stitch, and the k4 is for the border. Thanks for checking! Happy knitting! 🙂

  30. I love this pattern, super easy and a great way to learn knitting basics! I will also say this has been my go to dishcloth. It works so well and scrubs better than most knitted cloths.
    Knit on!!

  31. Is Row 9 correct? K1, K4?. That’s the same as K the last 5 remaining? Does each row alternate between WS RS? It was mentioned in the index but not in the pattern

    1. Yes, you will just knit 5. I have it written like that because the k1 is the last stitch of the seed stitch portion, and k4 is the border. And yes, this is knit across back and forth in rows so after completing a row, you will flip and work the other side.

  32. I have been knitting for over 50 years, this is a great pattern as it makes the dishcloth more durable, meaning it has a “ knobbier” texture for scrubbing. I taught my 3 daughters, my son and 6 granddaughters how to knit, even 1 “lefty”….I’m looking forward to teaching my great-granddaughters when they get older. Yes, the darker yarns do fade/bleed…I pre wash them in cold water by hand before I use them, or include a note when given as a gift. Keep up the great work

    1. Hi Marty! Thank you so much for stopping by! Thats a great tip to prewash the darker colors in cold water before using them! Happy knitting to you and your family!!

  33. I love this pattern! I have been making these as “Prayer cloths”. I work in a hospital . I don’t have time to make prayer shawls for everyone but I do have time to make these for my seriously ill patients. It really helps them to realize that I care about them.

    1. Hi Joy! Thank you so much for sharing your story, that is so incredibly kind of you! I am sure your patients love receiving your dishcloths made with such care. Happy knitting to you!

  34. Hi I am an advanced crocheter, but a newbie at knitting. I have been knitting these dishcloths and they have turned out really beautiful. Thank you so much for sharing this great easy to understand pattern I absolutely love it!

  35. Hi Brittany! I am very new to knitting and I am loving this pattern. I am finding the seed stitch fun to knit! I am almost finished with my washcloth, just finished the seed stitch, and am on the right side of my washcloth like in your picture and I am wondering if there should be a row of knit like row 7 before before the “k2, purl until last 2 stitches k2” step. There is a note at the top of the pattern that says it has been updated. Thanks for your help and for a fun pattern!

    1. Hi Shelly!

      Once you’ve finished the seed stitch portion, you’ll want to make sure that you finish on a Row 9 repeat which will be a “right side” row. Your next row after that should begin on the “wrong side”. The “k2, purl until the last 2 stitches, k2” row will look like Row 7 on the front side of your work, if that makes sense.

      Let me know if you have any other questions! Happy knitting!

  36. Thank you for the beautiful pattern! I am a beginning knitter and recently discovered that if I slip the first stitch purlwise, it makes a nice, neat edge. Can I do that with the first stitch on each row with this pattern?
    Thank you!

  37. Thank you! i need a gift for my mom this mother’s day, and this is a great pattern! Thank you so super much!!

Leave a Reply

Your email address will not be published. Required fields are marked *

This site uses Akismet to reduce spam. Learn how your comment data is processed.