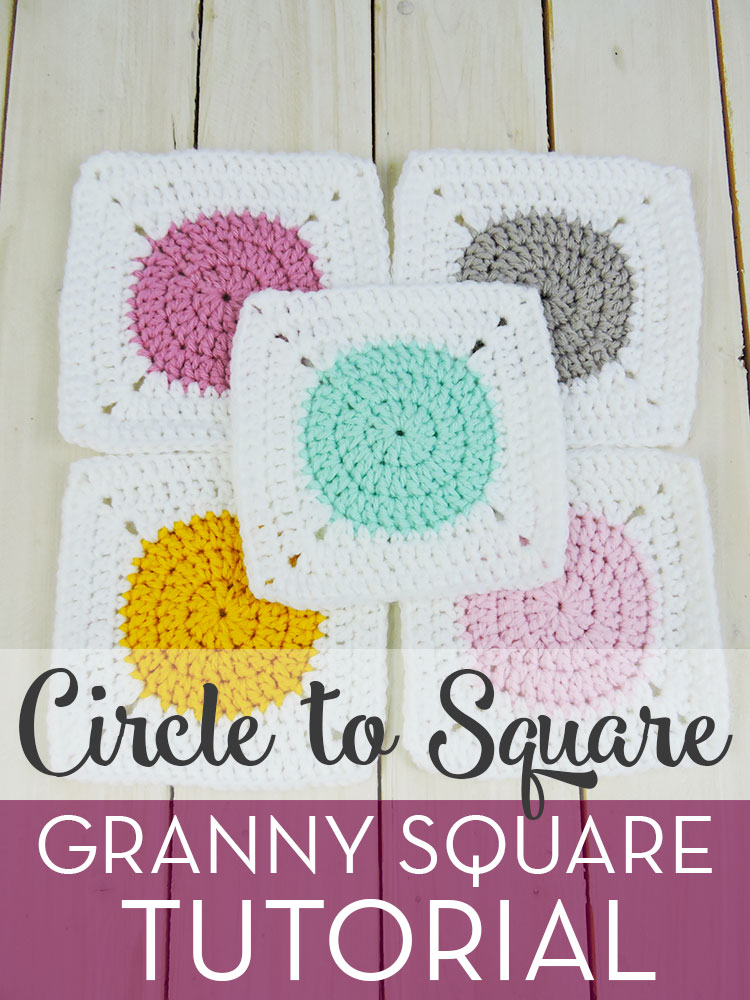
Circle to Square Granny Square Tutorial
This circle to square granny square is a fresh take on the classic granny square which results in a more modern flair to a cherished classic! Purchase the complete ad-free printable pattern PDF here.
This post contains affiliate links. For more information please see my disclosures page.
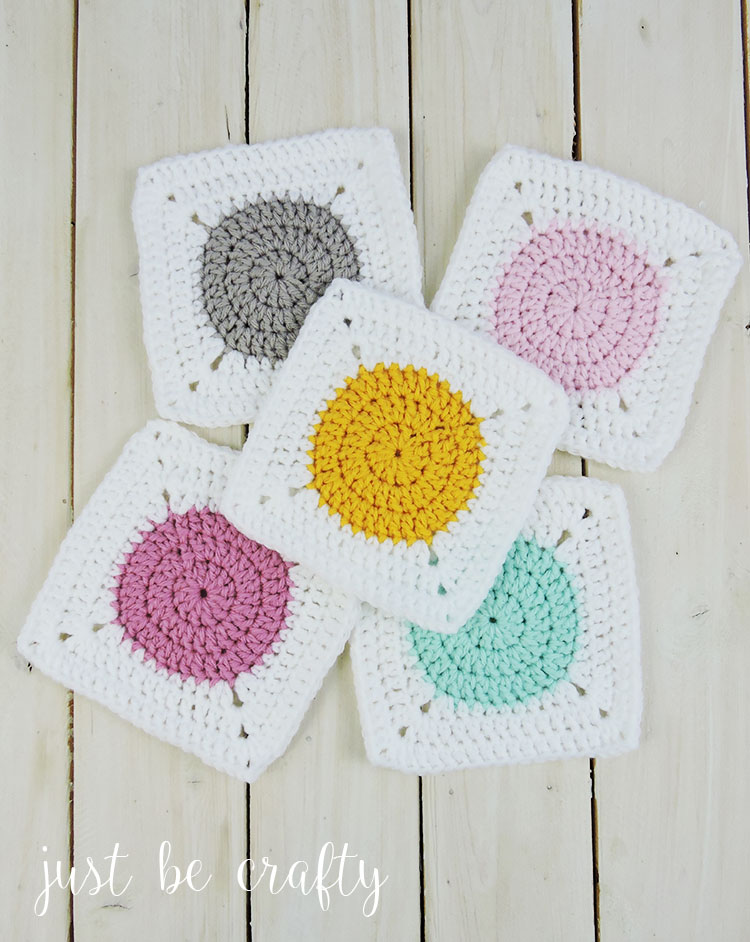
Hey guys, and happy April! To kick off the arrival of spring I’m sharing a different take on the classic granny square in a few beautiful and cheery spring shades! You may recognize these colors from my post a couple of weeks ago in the Granny Ripple Tutorial. If you missed it, you can check it out here.
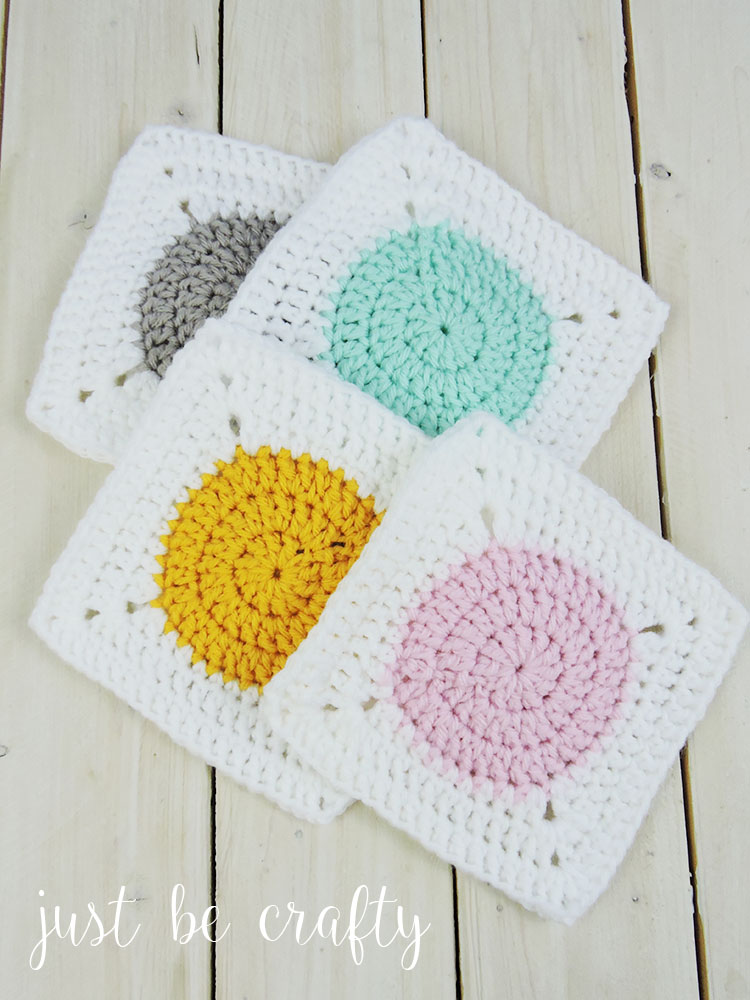
What makes this granny square different is that it’s a solid granny square that begins as a circle and gradually turns into a square.
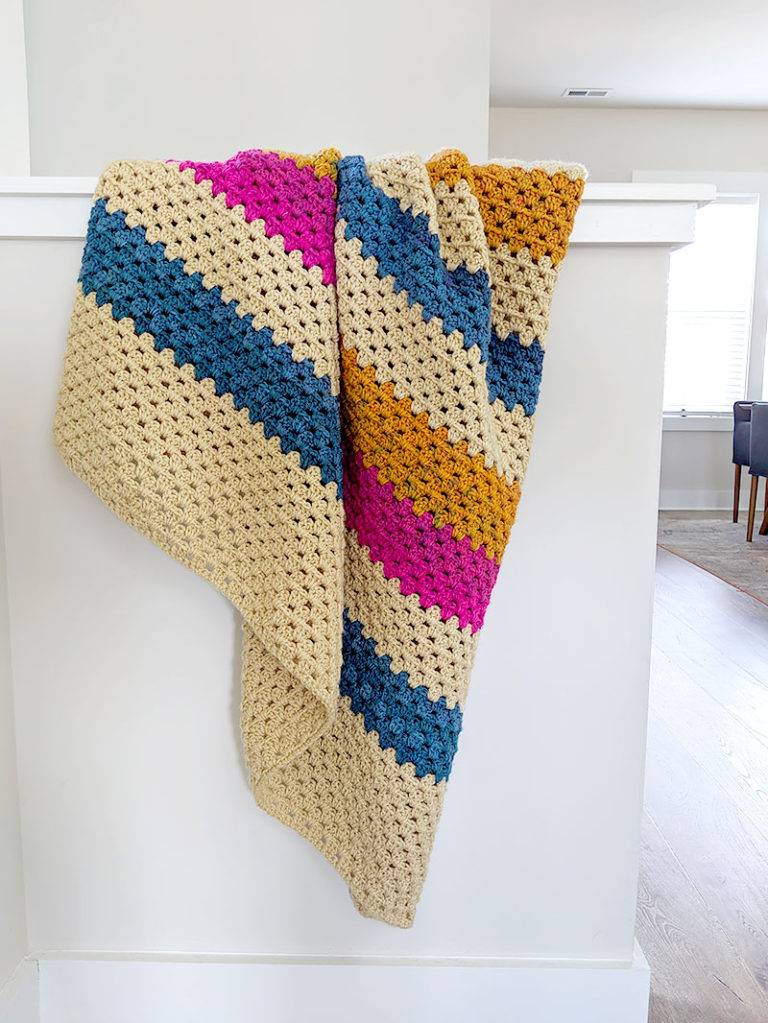
I love the look and think these would be gorgeous stitched together as a baby blanket, lap wrap or afghan for the couch! Just like a classic granny square, the possibilities for these little suckers are really endless!
I used Big Twist Value yarn for these squares, which can be purchased at JoAnn Fabrics. It is a medium worsted weight acrylic yarn, and I LOVE the pretty colors this brand offers! The line has so many bright, cheery and pastel colors to make both classic and trendy items alike!
If you have not worked with this yarn yet, I highly recommend it! (And I’m not even sponsored by the brand, I just like this yarn that much :)).
Check out the tutorial below to make your own!
**Update – I made a blanket with this pattern and talk about the details here!
**Check out the new video Circle to Square Granny Square Video Tutorial below!**
Circle to Square Granny Square Tutorial
Purchase the complete ad-free printable Circle to Square Granny Square Blanket pattern PDF here.
OR… gain instant access to this pattern PDF as well as my entire PDF pattern library! Click here for more information.
The printable pattern includes the below step-by-step photo tutorial for how to make the squares in an easy to read printer ready format.
Materials:
- Big Twist Value Yarn (pictured in White, Gold, Teal, Soft Gray, Blush Pink, and Medium Rose)
- Size 5.0mm crochet hook
- Scissors
- Yarn needle
Finished Measurement:
- Approximately 5.5 ” by 5.5″ square
Key:
- ch – chain
- dc – double crochet
- sl st – slip stitch
- st – stitch
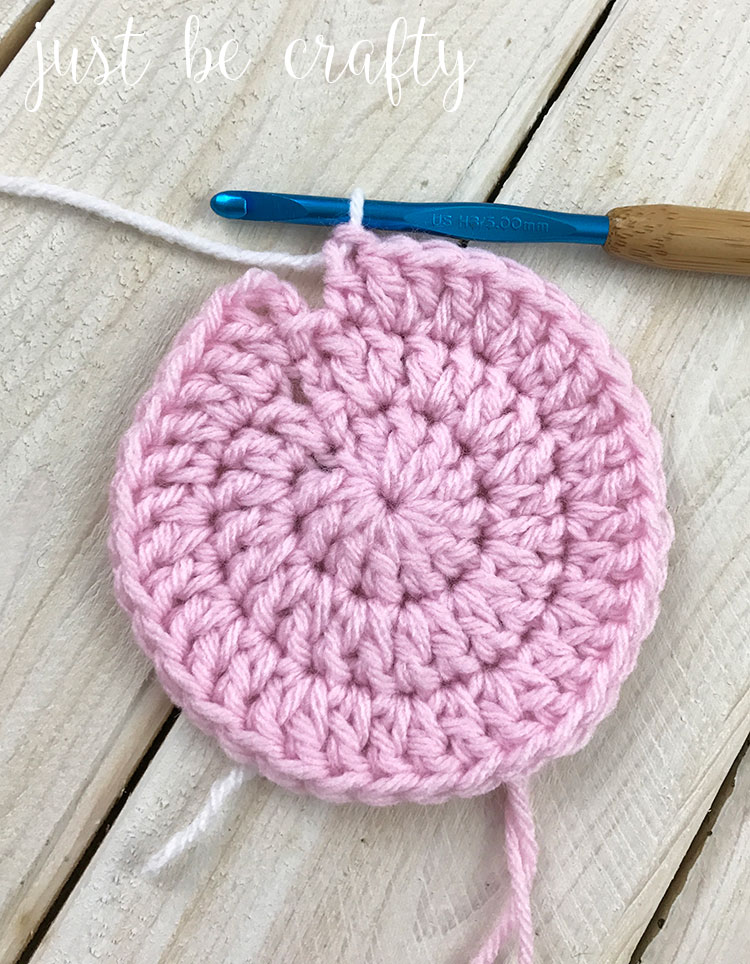
Round 1: In magic ring, ch 3 (counts as 1st dc), and dc 11 (12)
Join with the 3rd chain of the starting chain 3 with a slip stitch.

Round 2: ch 3 (counts as 1st dc), dc in same stitch as ch 3, 2 dc in each stitch (24)
Join with the 3rd chain of the starting chain 3 with a slip stitch.

Round 3: ch 3 (counts as 1st dc), and dc in that same stitch, dc in next stitch, *2 dc in next stitch , 1 dc in next stitch, repeat from * to end (36)
On the last dc of the round, stop before your last yarn over, cut yarn, and yarn over with new color. Join with the 3rd chain of the starting chain 3 with a slip stitch.
Round 4: ch 3 (counts as 1st dc), dc in that same stitch, ch 1, 2 dc in next stitch, hdc in each of the next 2 stitches, sc in each of the next 3 stitches, hdc in each of the next 2 stitches, *2 dc in next stitch, ch 1, 2 dc in next stitch, hdc in each of the next 2 stitches, sc in each of the next 3 stitches, hdc in each of the next 2 stitches; repeat from * 2 times;
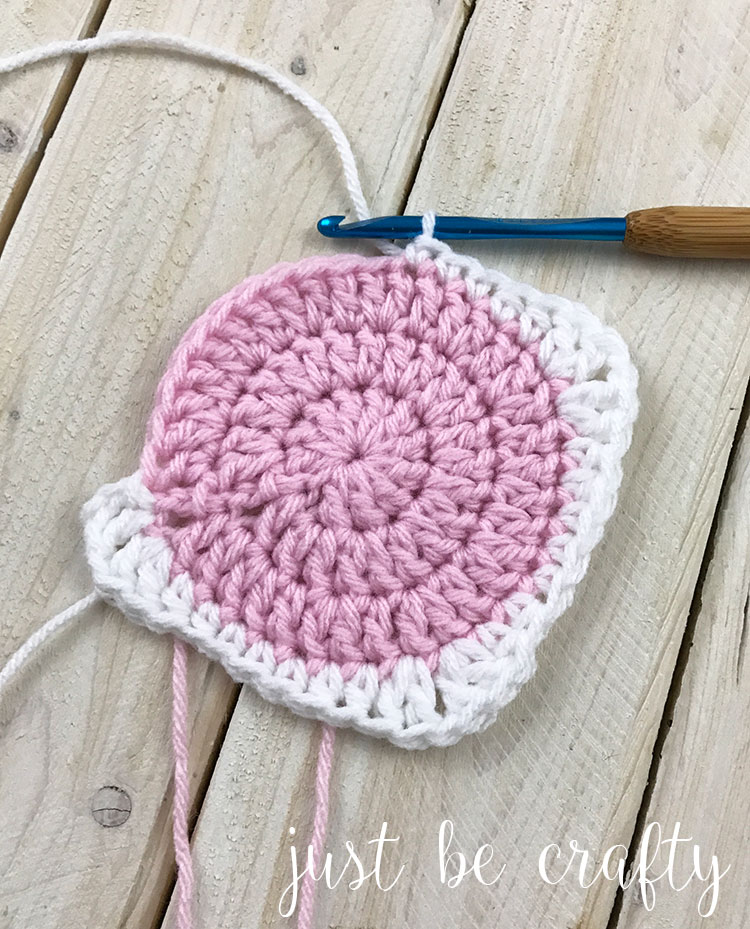
Join with the 3rd chain of the starting chain 3 with a slip stitch, and slip stitch to the next corner ch 1 space.

Round 5: ch 3 (counts as 1st dc), dc, ch 1, 2 dc in corner space, dc in each stitch until you reach the next corner. See below arrows pointing to where you will put your first dc after making your corner (you may have to move your corner stitches over a little bit so you can see this stitch).
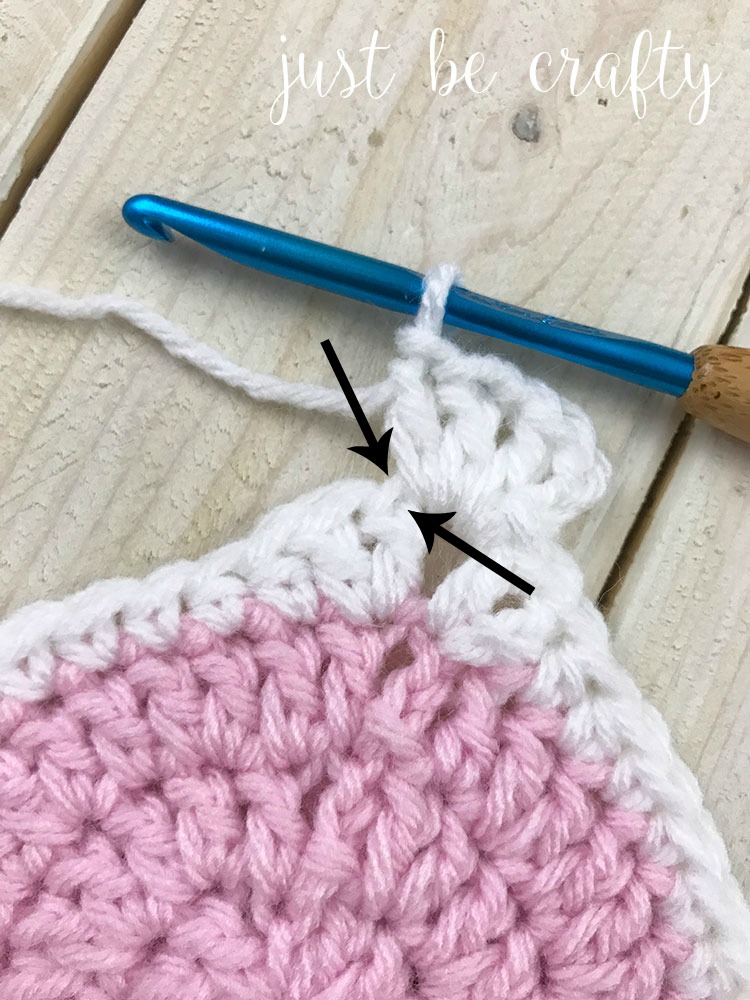
Not counting the corner stitches, you should have crocheted 11 stitches along your straight edge side; 2 dc, ch 1, 2 dc in the corner space. Repeat this process until you reach the end.

Join with the 3rd chain of the starting chain 3 with a slip stitch. Slip stitch into the next corner space.
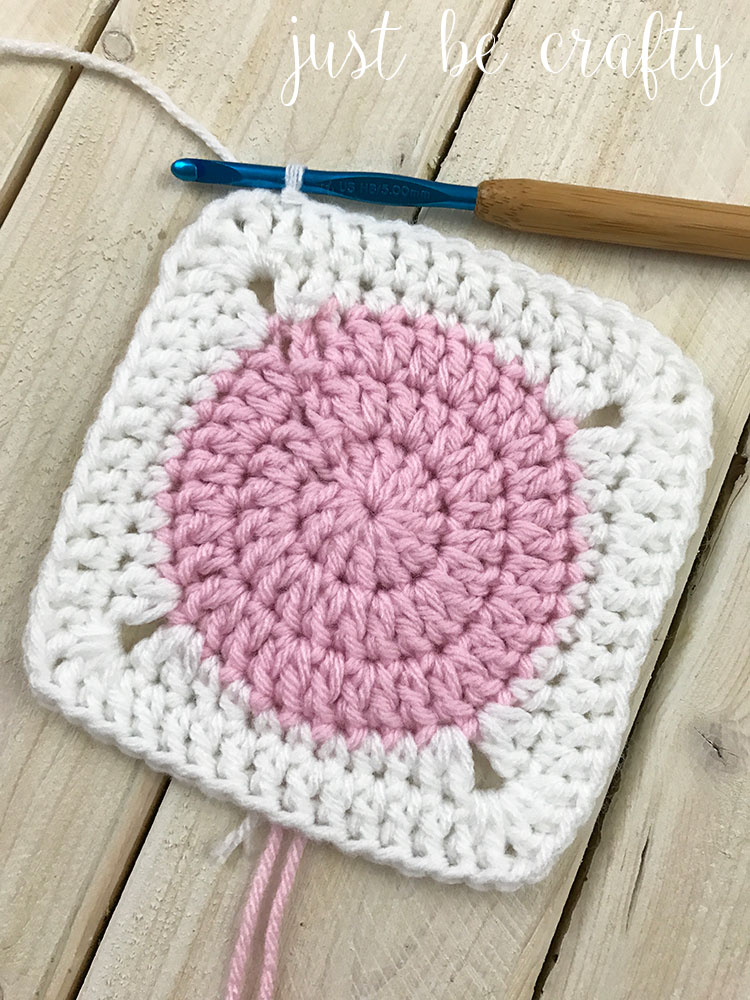
Round 6: Ch 3 (counts as 1st dc), dc, ch 2, 2dc in corner ch sp, dc in each stitch until you reach the next corner (not counting your corner stitches, you should have just crocheted 15 stitches along your straight edge), 2dc ch 2, 2dc in corner space; repeat this process until you reach the end of the round.

Join with 3rd chain of the starting ch 3 with a slip stitch and slip stitch into the next corner space. Cut yarn and secure.

Make your desired amount for a beautiful blanket!

Enjoy!
Love this tutorial?


Thanks for the great tutorial. I made one and they stitch up pretty quickly. Great use of all my scrap yarn.
Crystal in Cedar City
Hi Crystal! Great, I’m glad you enjoyed it! 🙂 🙂
A must try
Thanks Sylvia! If you try it out, let me know what you think! 🙂
Great tutorial! Thank you! 🙂
Do Ike your pattern but am confused? row 6 corner picture shows 2dc,2ch,2dc but write up is. dc,2ch,dc. ?????????
Hi Lynda! OMG, thank you for catching that! You are correct, it should read 2dc, ch 2, 2dc. I have updated the pattern.
Hi Brittany
Would it be ok if I used your pattern to make a few lap throws that I make regularly for my local hospital. They are so bright and cheery. They are not sold only given to patients that could use a little comfort .
Lynda
Yes of course, how thoughtful of you!! 🙂 And actually I do give permission to sell the items you make from my designs. For more information see my pattern’s permissions page.
And I’d love to see your finished blankets! Feel free to share finished/work in progress pictures to the Just Be Crafty Facebook page or on Instagram with #justbecrafty! 🙂
I will be definitely be giving this onemail a try ….soon .
Iris
I crocheted the pattern if the squares and used several colours on dom of the circles. I will start joining it tomorrow as I made 88 squares 11 x 8. This is to match my young granddaughter’s quilt with ice icr eam pattern. Im trying to design a borer now. Thanks for sharing the instructions.
Hi Antoinette! That sounds beautiful! I’m so glad you found the tutorial helpful. Happy crocheting to you!
Just made a turquoise square to try out your pattern, love it! I’m going to make a throw out of them. I make and donate crochet throws to the breast cancer association, so fun to make and I hope the ladies get a little comfort from all the pretty cheerful colors I make the throws with. Your squares will make a beautiful throw! Thank you again for the pattern.
Hi Donna! I’m so happy your are enjoying the pattern! And that is so wonderful you donate your crochet throws the breast cancer association! What a nice thing to do! I’m sure the ladies feel the love with each stitch on those blankets!
Also, I’d love to see your finished project!! Please feel free to share your completed blanket to the Just Be Crafty Facebook page or using the hashtag #justbecrafty on Instagram! Happy crocheting!
How would you recommend joining these?
I am making an afghan using a dark colour as the outer colour. I have found that the join between the circle and the square did not blend well so I do an extra circle In the outside colour navy and this improved the edge. I think it works better with a paler shade though but my daughter chose her colours as I am making it for her 40th birthday. Only another 40 or so squares to go!
Lovely tutorial!
Hi Caroline! If you follow the tip at the end of round 3, you should get a smooth color change no matter the color of yarn you use. Happy crocheting! 🙂
Lovely
How would you recommendo joining these
Hi Carol! I will be getting a tutorial up on this soon! (I used a single crochet join with the seam on the front.)
This was really fun to make. Thank you for the clear instructions. I’m a beginner and this was a great project to start with and count a success.
Hi Pam! I’m so happy you enjoyed the pattern! 🙂
Hi, is a beautiful pattern. Do you have advice on how to connect the squares in an easy way? Thank you
Hi Ana! Thank you! I joined mine with a single crochet join, with the seam showing on the front. I am working on a post for this and hope to have it out soon!
Thank you Brittany, love your modern take on this!
Hi. This pattern is beautiful. Can you give me instructions to add another row to the circle as I want to make slightly bigger squares?
Hi Charlotte! To add an extra round of the circle portion you will want to begin your new round with a ch 3, (this ch 3 counts as 1st stitch), *make 1 dc in each of the next 2 stitches, 2 dc in next stitch; repeat from * to the end of the round. You’ll then be able to start round 4 but just note, your circle will have more stitches, so the stitch count will be different, but you will follow the same basic directions. Hope this helps!
so how any dc plus chain 3 in the 4th new row and how would you adjust the stitching in what row 4 now 5 would be with the hdc? love love your instructions. easy to follow and lve the way its coming out.. I also would like to add the extra row to the circle
never mind – i figured it out- thanks anyway
Hi! Love this pattern. Adding the 4th round myself. Curious if I wanted to continue to add rounds before the border would I just continue with the same numerical system?
Hi Arielle! Yes you would keep increasing in the same numerical way for the center circle, but this will alter the stitch count of the next round when you work to square off the circle.
Hi there! I came across your lovely afghan while browsing Pinterest. I am excited to make this using a variety of colors. I make afghans for my local Hospice house. Thank you for posting easy to follow step by step tutorial.
Hi Nancy! That’s such a great way to give back, and I am sure it means so much to your recipients. I’m glad you found the tutorial helpful! 🙂
I just tried this pattern & just love all of the possible color combinations.?
Thank you!! I am so glad you enjoyed the pattern! 🙂
Hey Brittany, I found a great site where I can do granny squares and send them to make blankets for people in Africa. I have done the circle design before but love the simplicity of this pattern. I’ve got tons of yarn and I’m going to start making squares today. I will try to come back and post a few as I get them done. there may be some wild colors used tho…LOL.
That sounds like a great organization! Do you care to share the name of it, I’d love to check it out!? And I would love to see your finished squares! Feel free to upload photos to the Just Be Crafty Facebook page or use the hashtag #justbecrafty on Instagram so that I can see!
I can’t find your facebook page?
Hi Nancy! My facebook page can be found here: https://www.facebook.com/justbcrafty
Hi I love this patern however I want to increase the square rows by another 3 rows – can you advise how to do this as I am a beginners and need step by step guidance.
I want the pattern to remain as you have then add 2 extra rows in one collor and the last Row in another color.
I’ve been crocheting for 40 years and am not familiar with your beginning “magic ring” to get started. Please enlighten me. thanks a lot
Hi Karen! The magic ring is my favorite technique for beginning a crochet circle. Here is my video tutorial showing how to do this: https://youtu.be/_yNj1ZGy0PA
I just found your post on Circles to Squares. I love the colors and your tutorial is spot on !!! I was wondering if you did a post on joining the squares together? Can’t wait to start these to make a beautiful blanket. Thanks!
Hi Debbie! Thank you so much! And yes the post on the joining method is here: https://justbcrafty.com/2017/09/circle-to-square-granny-square-blanket-pattern.html
Thank you!
Can I make this with caron simply soft yarn?
Yes that would be lovely! Your squares just might end up a bit smaller.
Hello! Absolutely love this design! You have clear instructions which is great. Went out and bought the yarn to make this for future Grandbabies but I am having trouble with getting the 11 dc and the 15 dc! I must be doing something wrong ? Can make the 11 but not sure it’s right, and when it comes around to the 15 dc things just don’t work out to start making the corners.
I’m sure I have thoroughly confused you as to what I’m talking about.
I can’t figure it out ?.
Hi Cindy! My suggestion would be to make sure that at the end of round 3 you have 36 stitches, and at the end of round 4 you have 44 stitches total. If these stitch counts are correct, and you pay particular attention to the photo in round 5 for placement of your first stitch after making your first corner of that round – your numbers should work out. Remember, the counts of 11 and 15 are not counting the corner stitches. I hope this helps! If you still have issues please let me know!
I had alot of scrap yarn and couldn’t make up my mind what to do with it and then I found your circle to square pattern. I LOVED IT so I made one of the squares it was SUPER EASY no problems at all following the instructions giving that I knit and haven’t crocheted in years!! I’ll be making a blanket for each grandchild (3). Thank you!!!!!
Hi Angie! Thank you so much for your comment, I’m glad that you found the tutorial and pattern helpful! This project is a great stash buster! Your grandchildren are going to absolutely love your blankets! 🙂
This pattern sounds so cute, but I’m a little confused. Round 1 says to start in magic ring. What is this? Do I creat it by joining a certain number of chains?
I’m new to crochet but I’ve made a ton of blankets and scarves. I’d like to make this square but I have no idea what a ‘magic ring’ is or how to make the 1st 11 double crochets a circle. I must be missing something very fundamental here. Can you explain it a bit to me? I’m just learning to read patterns. Thank you! ~Sharon
Hi Sharon! Welcome to the world of crochet! Here is a video tutorial where I show step by step how make the magic ring/loop. https://youtu.be/_yNj1ZGy0PA
Thank you so much! 🙂
I’ve made several circle to square afghans but I just continued crocheting all around and adding the corners. I made one by starting with brown, changing to goldish/ yellow, to green. I call it my sunflower Afghan. In the circle I used bobble stitches to make it look like sunflower seeds. Super cute!!
Hey Brittany
I’m about 30% into this blanket and I was wondering what method you use as he far as making all the circles first and then adding the squares to them or completing each motif completely before moving on to the next? Which is faster for you?
I made all the circles first and then went back and completed them with the white. Not only was this quicker for me but also made my square size more consistent. I suggest to block your squares in the pattern – but I ended up skipping the blocking step because my squares ended up all the same size :).
Hi Brittnay! This will be my next project the Big Twist Value yarn is no longer available from JoAnns would other options from their line be comparable (ie big twist Sincerely). Thanks!
– Christina
Hi Christina! This yarn is still available at my local JoAnn store, but you could you use any worsted weight acrylic yarn for this. (Red Heart Yarn would be a very similar substitute and can be found at Walmart, Michaels, AC Moore, JoAnn’s and possibly other stores.)
How many skeins of each color did you use for the circles and the background color ?
Great tutorial! I love the way it turned out! I will be using this for my 2019 temperature blanket ( circle high temp and square low temp for each day.
Hi! I am making dish clothes or wash clothes with this pattern. The middle circle I am using tulle for a scrubbie. They are super cute!! Thank you!!
Hi Seferina! That’s such a great idea – I love it!!! Thanks for sharing!! 🙂
Hooray! Now I found a way to use all my little balls of yarn in many colors. Thank you for thus great pattern.
Yes! It’s a perfect stash buster!! Happy Crocheting!
Thank you Brittany, this was a superb tutorial.
Great camera position, not too fast not too slow.
Very well explained.
Looking forward to more tutorials from you.
Thank you so so much Dawn! I really appreciate it and I’m glad you enjoyed it!
I was piddling with 5 different skeins of yarns making squares. Didn’t know what I was going to do with them until I came across your pattern. Ripped out the squares and started the circles to square. When you say, join in the 3rd chain, you mean join in the 3rd chain ! I must have ripped out Round 4 three or four times before I figured out where I was going wrong. Finished with the first square. Great tutorial !!!
Oh good, I’m glad you got it! This pattern is a great stash buster! Happy crocheting to you!!
Forg’ve my ignorance but whats “hdc” on round 4? I’m new to crochet and dont understand.
Hi Alison! hdc = half double crochet. You will yarn over before inserting your hook into the stitch, grab your working yarn, draw up a loop, yarn over and draw through all 3 loops on your hook.
Thanks very much! 🙂
Amazing! Thank you so much for your quick response.
On rows 4 and 6, you put 2 sc between the 2-dc in each corner, but on row 5 there is only 1 sc between them. Is this correct? Thanks for the great pattern!
Hello and thank you for your question! For rounds 4 and 5, each corner will be 2 double crochets, chain 1, 2 double crochets. For round 6 you will complete 2 double crochets, chain 2, 2 double crochets. If you prefer to have a chain 2 or chain 1 for all corner rounds you totally can, and that would work just as well.
I complete a chain 2 for all corners in the last round because it really squares off the corners in that last round.
Hi,
How many skiens would I need for this blanket? Nice pattern!
Hi Nicola! You can find all the details for the blanket here: https://justbcrafty.com/2017/09/circle-to-square-granny-square-blanket-pattern.html
Thank you!
I will give it a try as soon as I have finished the three I am doing right now.
Great! Happy crocheting to you!
I decided to do some of the squares and I found a mistake but I fixed it on my written copy. Mistake 1. At the beginning of Round 4 it should be: Ch2 , dc in same st, ch1, 2dc in same st. That is the corner. Mistake 2 or I am doing it wrong: sl st to corner ch 1. Did I do something wrong? I have ripped it out and it still is not working!!
Hi Sheila! Thank you for your comment! Round 4 is correct as written. ch 3 (counts as a double crochet) dc in that same stitch, ch 1, 2 dc in next stitch. Round 4’s corners are developed over two stitches (instead of just one). This is where you begin to square off your circle. It sounds like you are trying to make your Round 4 corners into one stitch and that is where your stitch count is off.
Starting round 5, your corners will be worked into the chain spaces as usual. Please let me know if there is anything else I can help with!
Happy crocheting to you!
I have some squares done and was wondering how many are there in the blanket.
Hi Sheila! I used 60 squares in my blanket and it came out to 36 inches wide by 66 inches tall (which is a good lap sized throw). I have a pictured schematic that shows my square layout and I talk about it here (https://justbcrafty.com/2017/09/circle-to-square-granny-square-blanket-pattern.html) but you can off course make your own custom sized blanket by using however many squares you would like and the colors or your choosing!
I have 2 questions about round 6. It says “Round 6: Ch 3 (counts as 1st dc), dc, ch 2, 2dc, dc in each stitch until you reach the next corner ”
#1: is that a 3rd dc at the end? Should it be Ch 3, dc, ch 2, 3 dc?
#2: after that first grouping, does the ch3 become dc instead?
Thank you!
Hi Amy! For Round 6, you’ll start with a ch 3 which counts as the first double crochet, followed by another double crochet, then a chain 2 and 2 more double crochet into that same corner chain space. You’ll the double crochet into each stitch until you get to the next corner. Once at that next corner (as well as all remaining corners) you’ll complete 2 double crochets followed by a chain 2 and 2 more double crochets.
I added the bold text to Round 6 to clarify any confusion:
Ch 3 (counts as 1st dc), dc, ch 2, 2dc in corner ch sp, dc in each stitch until you reach the next corner
That clarified it for me. Thank you!!
Hi Brittany, Is there any way I can get a printable version of your circle to square granny? Thank you and I enjoy your tutorials very much.
Do you have a video of how to join the squares? I need a video, the directions are confusing to me.
tuto trés bien fait avec une voix charmante
Thank you so much! 🙂
Now in quarantine lockdown I am going to make this afghan. Go to Mister Domestic on instagram to see his version of this pattern. Beautiful. Thanks for the pattern♥ Be safe and well!
I love this pattern! I made a purse with it. Turned out fantastic. Thank you!
I’m so glad you enjoyed the pattern! Your purse sounds lovely!
I just finished the circle to square granny square. I would like to join the squares. Can you create a tutorial to show how to do it?
Thanks,
I seem to be getting an uneven at the corner where I start the white section, seems more bulky than the other corners and looks like I have more stitches when I don’t. Has this happened to you- would you know what I am doing wrong. lol
This pattern is so good and easy to do! I’m currently making two different baby blankets with it 🙂 thank you Brittany!
I will be using this for a granny square sweater I’m making. It’s going to have some squares with flowers, and some just plain, and some may have a color I haven’t decided. But I’m now planning on using this pattern for all, been looking for a pattern that doesn’t have a ton of holes.
I have been searching for new patterns to make. I belong to a group called the Happy Hookers and we crochet blankets, lap robes, baby blankets, spreads for beds, hats, scares, mittens and etc to donate to the needy at Christmas time. I just love the look of this pattern and am sure I can use a lot of my left over yarn. thank you so much for posting this for free… I will defiantly do this. Be Blessed…
love this pattern!! made a super cute wash cloth for my moms christmas present! super easy to follow!
I am going to add a 7th row to match other squares I have made. Would you recommend 2 or 3 c between the two dc at the corners? Thank you for your pattern and I look forward to your suggestion for the corners of an additional row!
Love this pattern! I added one more row. I’d like to make a blanket alternating these squares with “classic” granny squares. Any thoughts on how to get a classic granny square to be the same size? (23 stitches per side by row 7) Thank you!