This granny ripple tutorial is a step by step guide to make your own customized ripple blanket. This stitch would make for a beautiful baby blanket, throw blanket or afghan!

This post contains affiliate links. For more information please see my disclosures page.
Today’s post features one of my favorite stitches of all time, the granny ripple. The granny ripple makes a beautiful pattern of alternating peaks and valleys, and one of the best things about it is that its pretty mindless once you get a few rows under your belt. Perfect for Netflix watching!
**Update as of April 2019** I made a video tutorial on this stitch! I have also simplified the foundation chain math and made a super cool cheat sheet to help you figure out how long to make your foundation chain. And… it’s FREE to download! The cheat sheet also includes a list of common blanket sizes and suggested foundation chain lengths!!!
Grab your free download here!!!
My Angel Cloud Afghan Pattern is a fluffy all white version of the granny ripple and since posting this pattern I have received many requests to make a tutorial using regular worsted weight yarn so without further ado, lets dive in!
**UPDATE** Please note, since posting this tutorial I have edited the Angel Cloud Afghan Pattern.
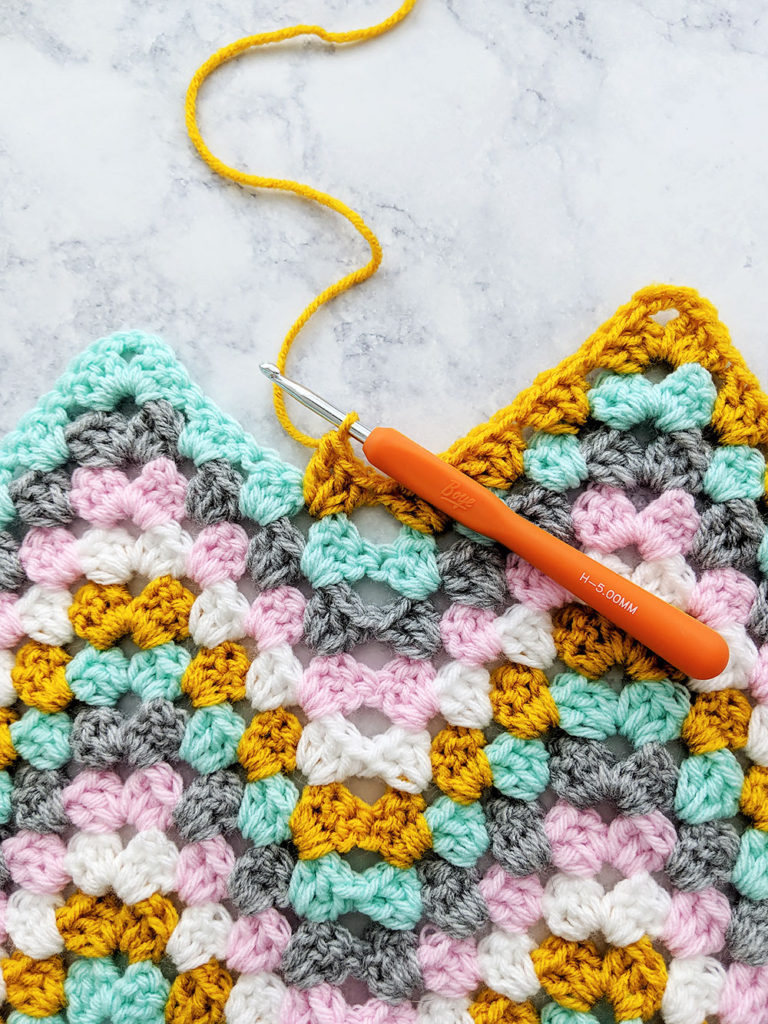
This ripple tutorial features a four cluster peak and valley, meaning there are four clusters of 3 double crochets leading up to each peak, and 4 clusters of 3 double crochets leading down to each valley.
This tutorial demonstrates a sample swatch of the granny ripple and NOT a finished afghan size, but the perfect thing about this pattern is that you can easily customize it to make any size you would like!
This Granny Ripple is worked in multiples of 24.
To make a blanket out of this pattern, you will want to chain in multiples of 24. Once you have the desired amount of chains, you will want to add on an additional 19 chains to even out the pattern so that your piece will look the same on your starting and finishing end. After adding adding on your desired amount of chains, you will want to add on 3 extra chains to begin.
For my example below we will chain 46 (here’s the breakdown: 24 + 19 + 3)
See below diagram for a visual of the chain for this tutorial. From the start of the chain to the white stitch marker is 24 chains, from the white marker to pink marker is 19 chains, and after the pink marker is 3 chains.

To view the video tutorial and get the FREE foundation cheat sheet download click here!
Materials:
- worsted weight acrylic yarn in desired colors (pictured yarns include: Big Twist Value Yarn in Gold, Light Teal, and Soft Gray)
- 5.0 mm crochet hook
- scissors
- yarn needle
Chain 46
Row 1: starting in 4th ch from hook, make 3 dc, skip 2 chains, 3 dc in same chain, skip 2 chains, 3 dc in same chain, skip 2 dc, (3 dc, ch3, 3 dc) in same stitch, skip 2 chains
3 dc in same chain, skip two chains, 3 dc in same chain, skip two chains, 3 dc in same chain, skip 5 chains

3 dc in same chain, skip two chains

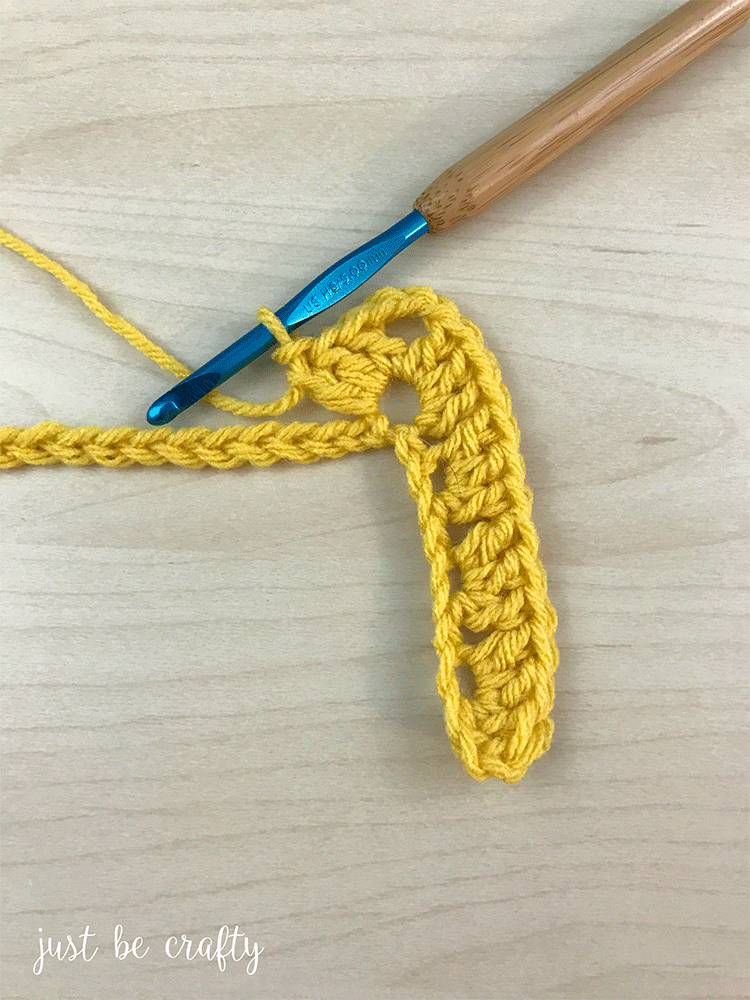
3 dc in same chain, skip two chains, 3 dc in same chain, skip two chains, 4 dc in same chain
*Please note, you will want to complete 4 dc in the last cluster of your row to match the first cluster (the chain 3 + 3 dc you began Row 1 with), this will occur only in Row 1.
*Color change note: On the last dc of the row, do not complete your last yarn over, cut yarn and yarn over with your new color. This will give you a clean color change!
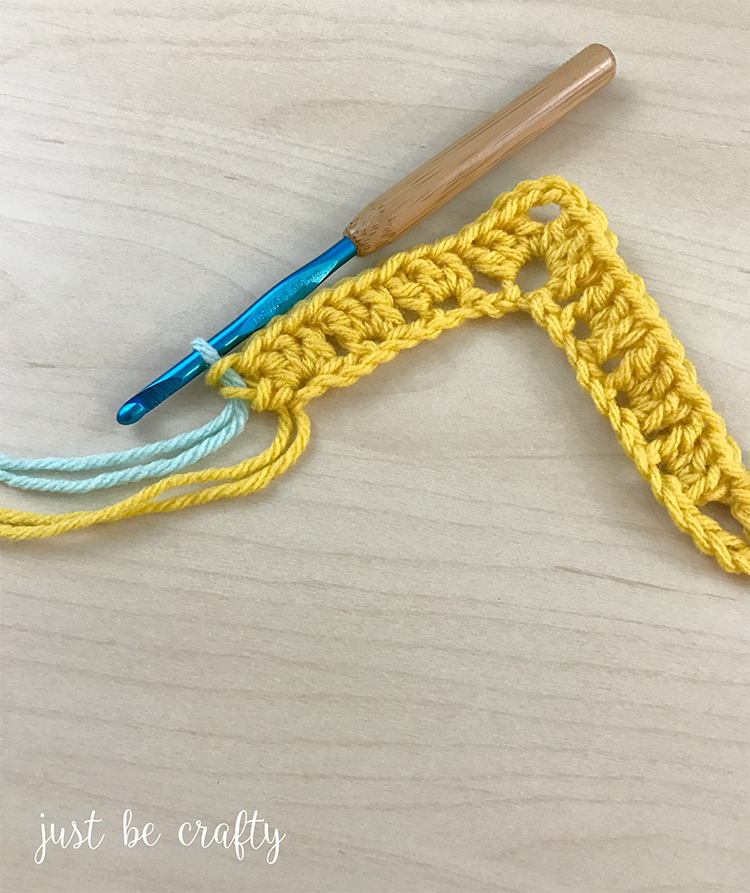
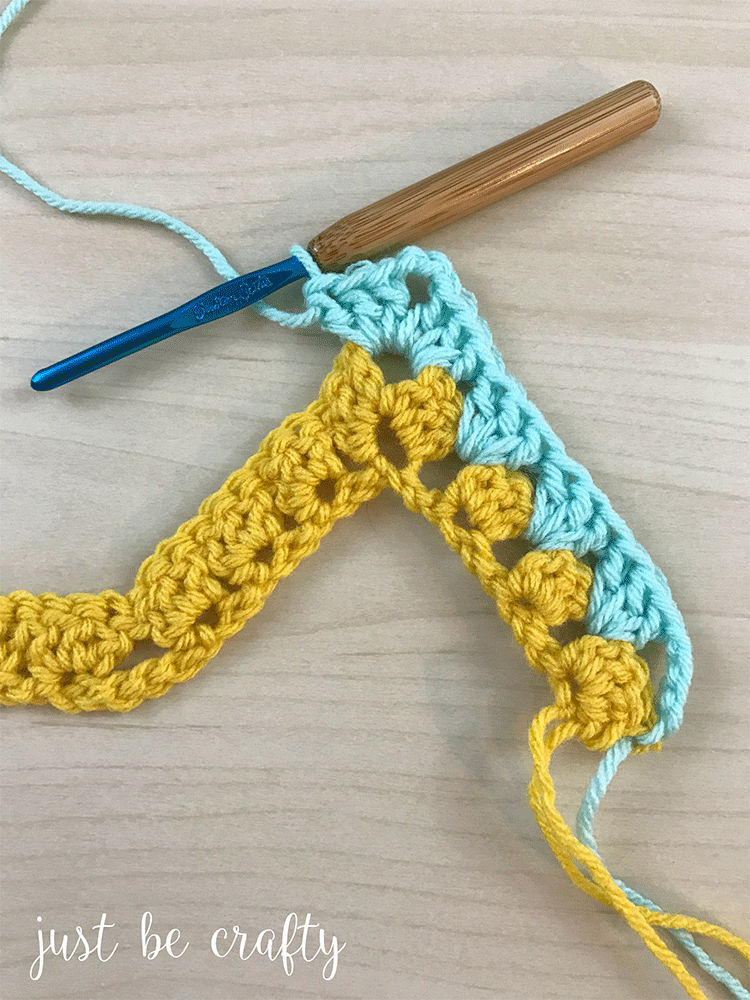
Row 2: Turn work and chain 4
Using photo below as a guide, make 3 dc in the first cluster space
Make 3 dc in each of the next two cluster spaces, make 3 dc, chain 3 and 3 more dc in the peak cluster space
make 3 dc in each of the next 3 cluster spaces, skip over the middle cluster space (the 5 chain space from the previous row)
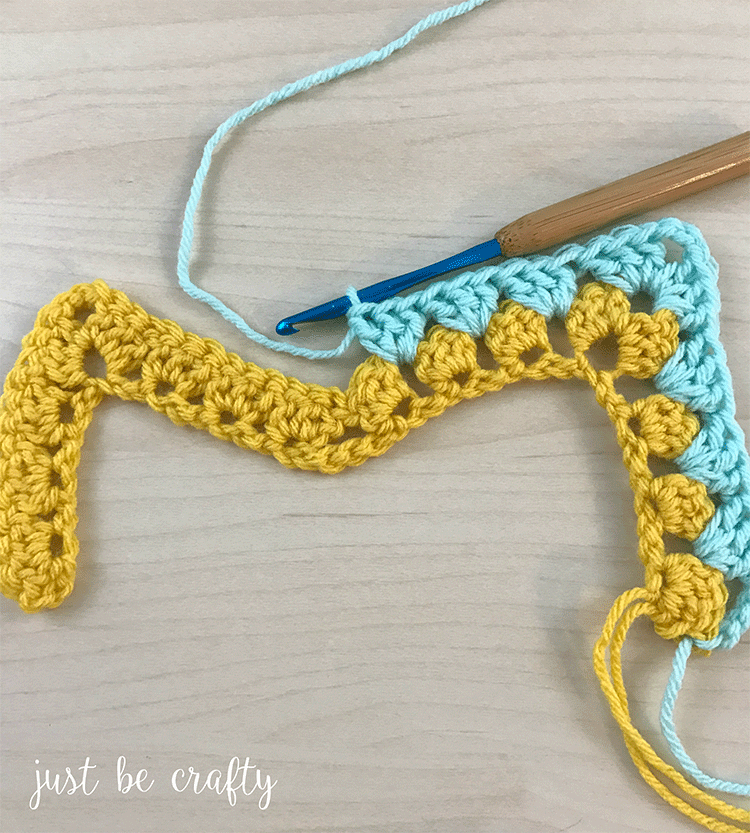
make 3 dc in next cluster space (see photo below)
and make 3 dc in each of the next 2 cluster spaces, make 3 dc, chain 3 and 3 more dc in same peak space

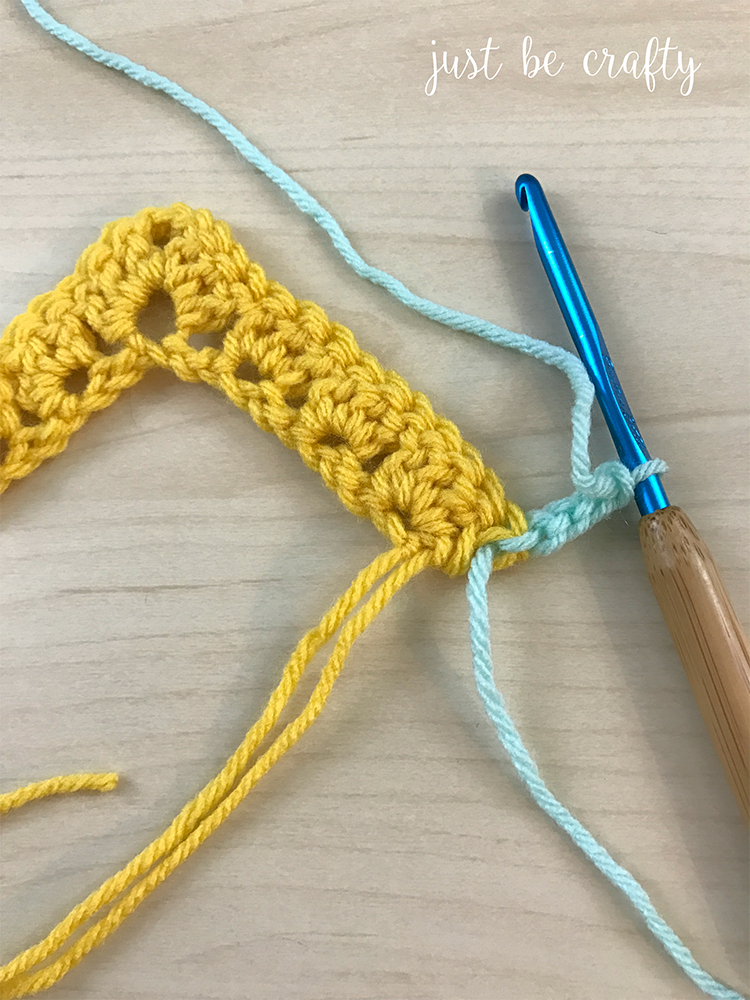
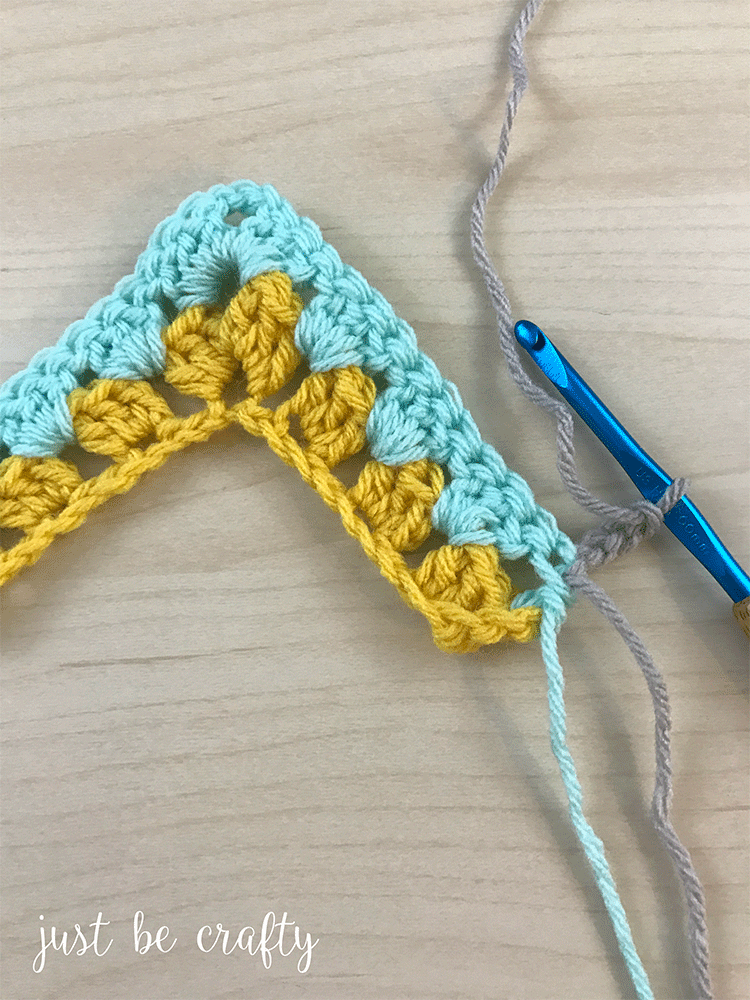
make 3 dc in each of the next 3 cluster spaces, make one dc in the chain space of the previous row (see arrow for placement of your dc below)

And remember to complete your last dc up until the last yarn over, cut yarn and complete your last yarn over with your new color

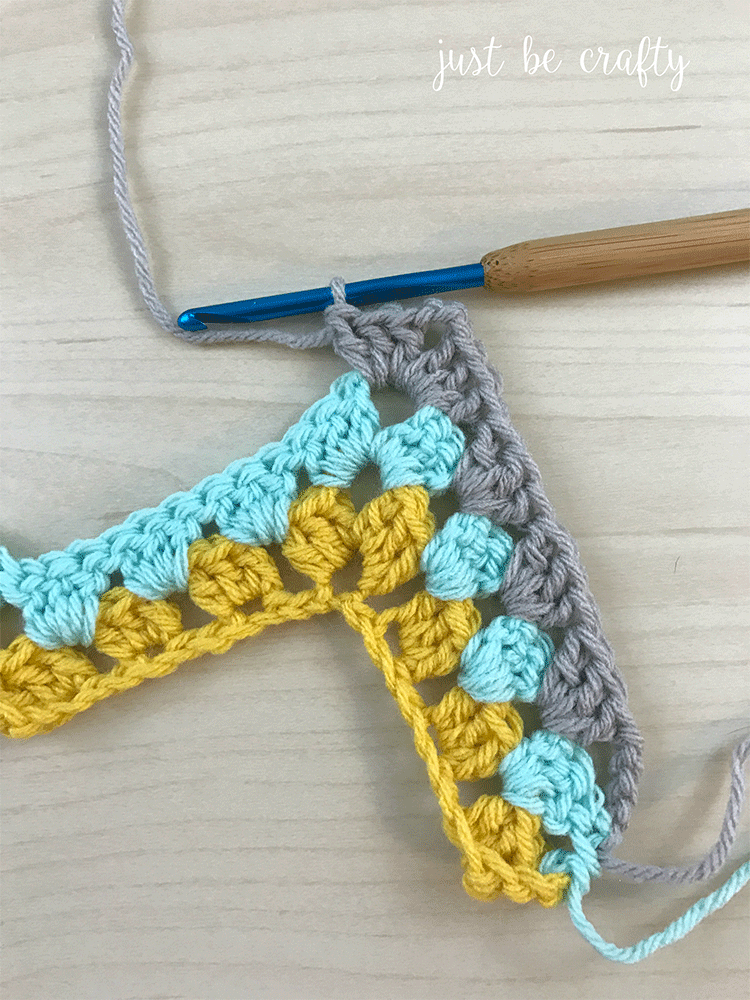
Row 3: Repeat Row 2, but we’ll run through the instructions one more time!
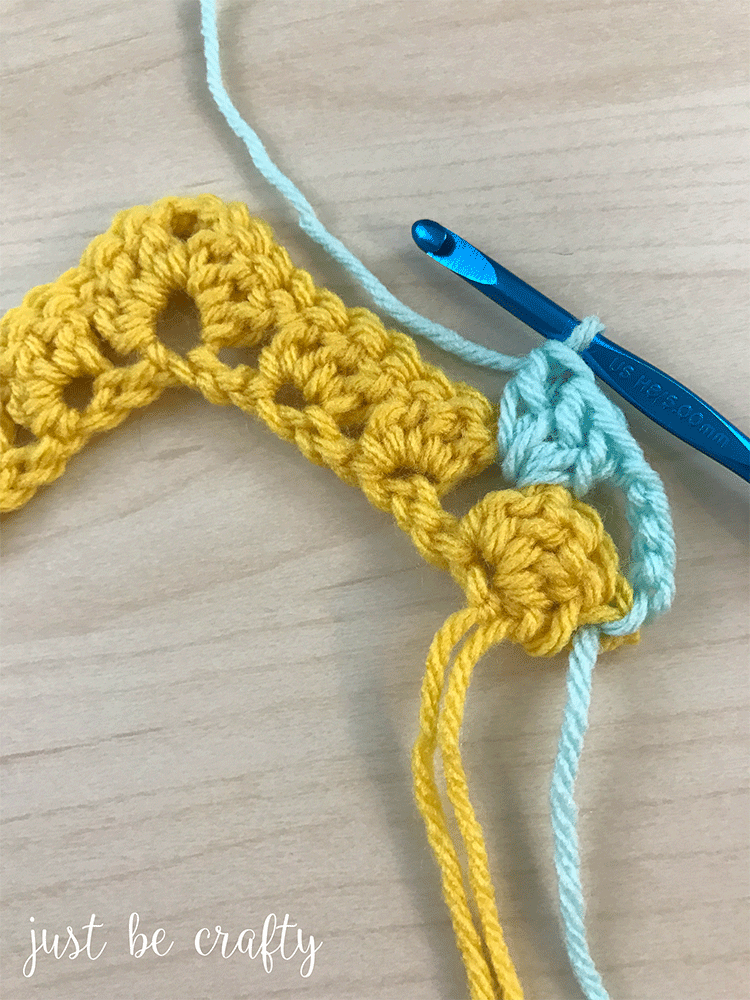
Turn and chain 4
In 1st cluster space, make 3 dc, and make 3 dc in each of the next two cluster spaces, make 3 dc, chain 3 and 3 dc in the peak space
make 3 dc in each of the next 3 cluster spaces, skip over middle valley cluster space, and make 3 dc in each of the next 3 cluster spaces

make 3 dc, chain 3, 3 dc in peak cluster space, make 3 dc in each of the next 3 cluster spaces, dc in chain space from the previous row (and remember to use the color trick described in rows 1 and 2!)

Keep repeating Row 2 until you reach your desired length.
Weave in any ends, and enjoy!
I’m looking for pattern testers and now accepting applications! Click here to learn more information!
I hope you found this tutorial helpful! Are there other tutorials you would like to see? Let me know in the comments!


Awesome, instructions & pictures, thanks for pic, of where the DC at end goes, sometimes, it is hard to know, where to put it.
Thanks Cheri!!
Seriously? She shows you in the pictures.
Seriously? That’s what they said thank you for. Going off the rest of their post you can see that the commas aren’t there to break up the sentence, that is just how they write.
Just have a quick question does it get big or do you need to ch more to have it longer?
The pattern will require more chains in the beginning for a wider Afghan; the number of rows that you crochet will determine the length.
The original 24 plus 19 plus 3 chains is to only show you the pattern of the peak and valley. For a good size afghan, you would need to chain about 218 chains for your beginning base for crocheting your rows. This is 215, plus 3 chains….
so,109 for a lapghan/baby blanket?
Thx! I was wondering how many I would need for a bigger blanket!
.I have been crocheting 40 years and this is the best instructional pattern with photos I have “ever” seen. Thank you.
Thank you Juanita!! I am so happy you found it helpful!! 🙂
How many skeins of yarn are needed for a regular sized afghan?
This is great really informative and easy to follow. Could you explain a stitch I have seen but cannot figure out. It is call Tje Dragon / Alligator stitch. I know if you did a instruction on I could do it.
Thanks
D
Thank you Doris! I am happy the tutorial was helpful! And I have not actually tried that stitch yet, but I will look into it, thank you for the suggestion! 🙂
The Red Heart yarn site has instructions for the alligator stitch.
redheart.com/how-to/articles/ultimate-beginners-guide-to-the-crocodile-stitch
Hope this helps.
Great tutorial. Would be great if we could download in pdf format.
download “print friendly” app to computer/laptop
I am obviously missing something….I end up with left over chain despite several attempts which was very frustrating….
The instructions she has written and the sample she shows are not compatible with each other. She gives instructions for 1 peak and 1 valley but shows 2 peaks in her sample.
Hi Diane! I’m sorry you are having issues – that can be frustrating! Where specifically are you having the issue? If you follow the tutorial you should end with 2 peaks and 1 valley.
Hello!
I was wondering how many you’d recommend to chain for a throw sized blanket?
Thank you so much!
Gracie
I’m excited to start this never done this sort of pattern before and I look for easy patterns thanks for sharing
any way you can write the pattern for a bigger afghan cause I ch 218 like you told another person but I don’t know how to follow the pattern I’m getting confused
Is there a .pdf version of this pattern? It’s lovely!
Hi Beth! I do not have a PDF version of this yet, but hope to get one up in the near future! 🙂
it’s the end of oct,2018…any closer to that PDF? thanks.
what if you want to make a small size baby blanket? would you make 48 chains or 72 chains +19+3??
I would like to try this pattern.
Please let me know.
thanks,
Jane F
Hi Jane! Yes if you’re using the same or a similar yarn and same size crochet hook as I used in the pattern, I would start with 72 chains then you’ll need to add 19 + 3, for a grand total of 94 chains.
I need to know how much yarn and what sized hook to use for an average-sized afghan. Also, the number of stitches to chain at the beginning. I am pretty new to all of this, so I need some help! Thank you
Hi Nancy! This is a tutorial is to show you how to complete the granny ripple – sort of a new stitch to have under your belt that can be customized for your needs and not a specific pattern. The amount of chains and amount of yarn you will need for your specific project will vary depending on the yarn and crochet hook you choose.
To figure out sizing, I would make a swatch of the granny ripple by following this tutorial. Measure your finished swatch, and from there calculate the amount of chains to add on in order to meet your desired length. Just remember the chain needs to be in a multiple of 24, and then add on 19 chains + 3 chains on top of that.
You can also check out my pattern for the Crochet Angel Cloud Afghan that uses the granny ripple technique.
I hope this helps!
Thanks a lot! Easy to follow instructions. You have helped a beginner a lot. I’ll try it.
Thank you for this tutorial. Its was so easy to follow and my project is going nicely.
Could you tell me the # of stitches for a twin throw, would I still then follow the pattern?
Thank you
RoseMary
Hi, thank you for this tutorial. I LOVE this pattern! I’m fairly new to crochet so please excuse my questions that may be more obvious to some. I understand this is a small swatch tutorial, if we want to continue the pattern after the swatch ends where do we start repeating finish the first row? Thank you!!!
Hi Amber! If you continue on the swatch and work back and forth in rows you would end up with a long and skinny piece of fabric (which would actually make a cute scarf!). If you are planning to make a blanket you will need to have a larger foundation chain than what is used in the tutorial. I actually just made a video tutorial and a cheat sheet with foundation chains for common blanket sizes as well as instructions to calculate a foundation chain for any size blanket. I think this post might answer your questions. Feel free to check it out and if you need any help, please let me know!!
https://justbcrafty.com/2019/04/granny-ripple-stitch-video-tutorial-free-cheat-sheet-download.html
It looks like little bows I love it gonna try with 2 pinks and a white thanks for the tutorial! ?
I am not very good at reading pattern. I am a visual learner. Your instructions are perfect.! Also, I really appreciate the explanation of how many stitches to count out. I have not seen that in any other instructions. And believe me, I have read a lot. Thank you soooo much!!!!!!
Hi Jen! I am so glad you found this helpful!!!!
Love your ripple blanket pattern, but can I just check you use US crochet terms, so your double crochet is our treble crochet in UK terms, thanks so much Jo xx
Hi Jo! Thanks so much! All of my patterns are written in US crochet terms. Happy crocheting!
Agree with others you have the best instructions for this pattern! I now think I can try it! 🙂
Thank you so much!! Please do let me know how it goes! 😀
I’m wondering if you could explain how to add a few rows of DC I between the granny ripple rows? I’m working on a blanket from a picture that has granny ripple rows and then DC rows in between but I’m not sure exactly how. Any help would be great!
Hi
Love this pattern made a HUGE blanket with it. Could you recommend a border?
Thanks
Holly
I LOVE this pattern and it’s turning out much better than the last time I tried a wavy patterned blanket. Would you recommend edging on this pattern? I feel compelled to do one round of it just because my chain row looks so flimsy.
Thanks!!