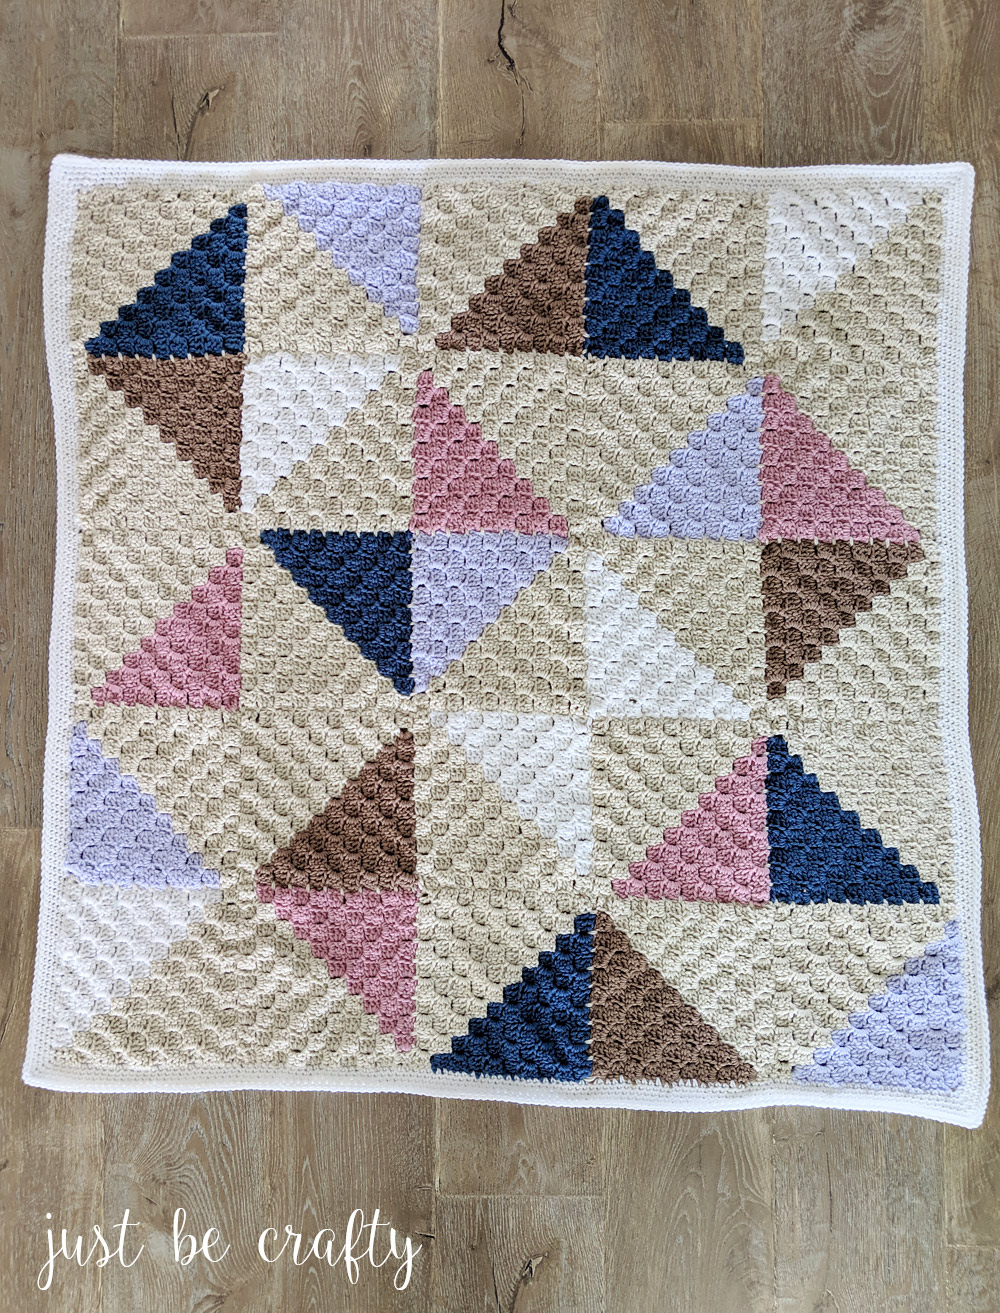
The Crochet Afghan Quilt – Three Part Series will turn your pile of yarn balls into a brand new beautiful blanket! Today’s post features Part 3 of the series and will cover how to make the border and weave in your ends. Purchase the ad-free full pattern in printer ready format here.
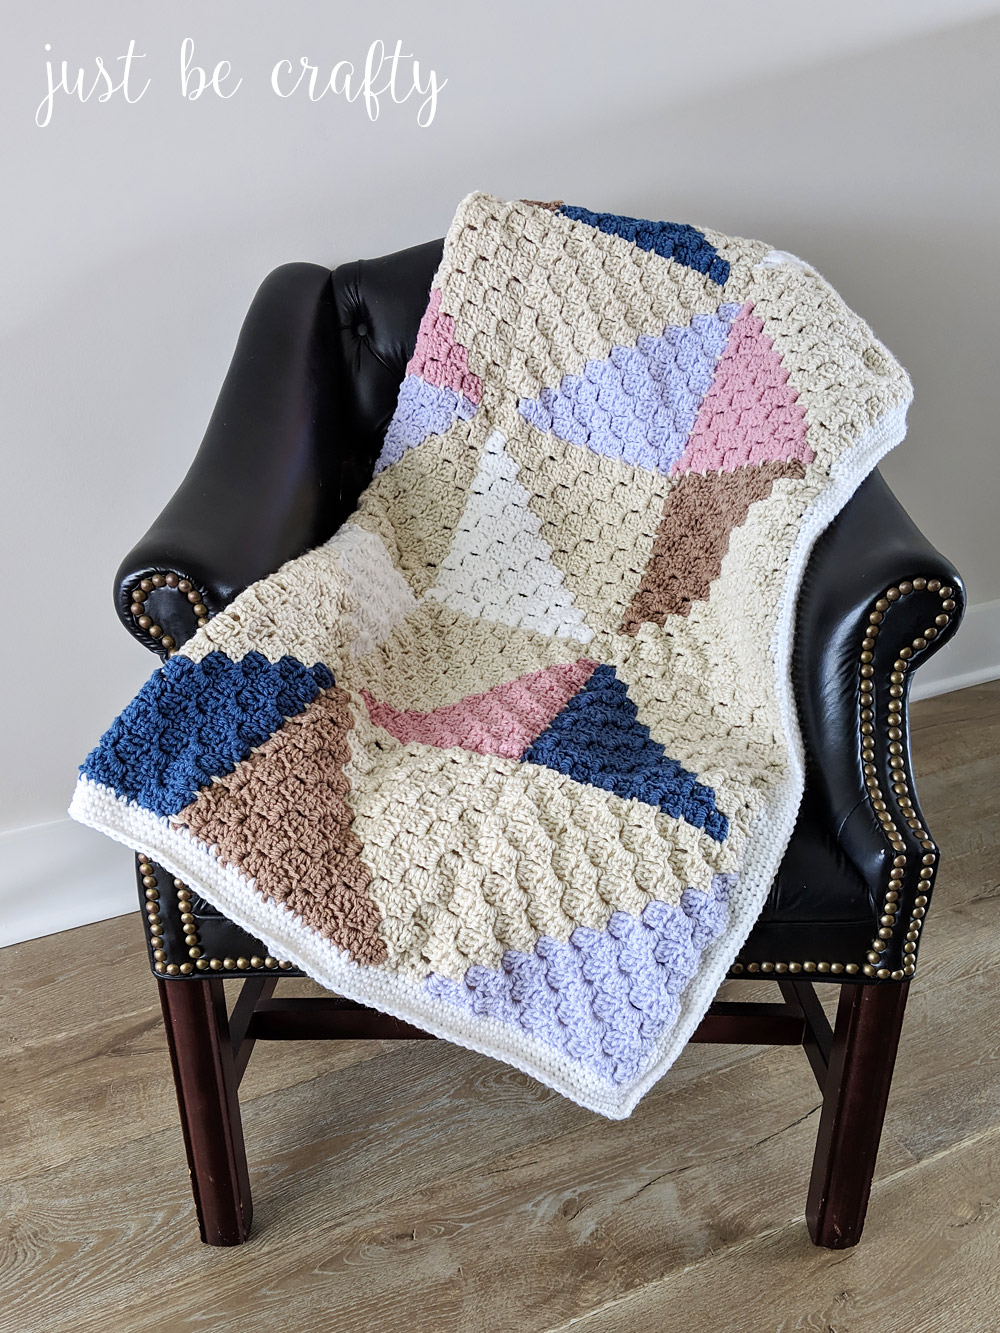
Hello and Happy Tuesday! The blanket featured in today’s photos is comprised of multiple small corner-to-corner crochet squares joined together to make one squishy blanket. There’s a lot to love about the corner-to-corner crochet technique but what I love most is that it looks complicated when really its actually quite easy once you get the hang of it!
I have broken the pattern into a three part series in order to take a deeper dive into how to complete each step. If you are a new crocheter, or maybe haven’t even tackled your first project yet, I invite you to participate in this series! I also invite seasoned crocheters to join in too! 
Today’s post is Part 3 of the series. If you missed Part 1 and Part 2, you can catch up here and here!
Below is an outline of the Crochet Afghan Quilt Series and what you can expect to see covered each week.
Part 1:
Part 1 is all about the Corner-to Corner (C2C) technique, and how to make a square! If you’re new to the world of C2C, the technique can be a bit intimidating at first. This is why I have provided both a video tutorial and a photo tutorial guide to help get you started. The tutorial covers:
-
What is C2C?
-
Materials needed for the entire project
-
C2C increasing
-
Color changes
-
C2C decreasing
If you missed Part 1, you can check it out here.
Part 2:
Part 2 covers everything you need to know about assembling your blanket together! The tutorial goes over:
-
Blocking your squares
-
Arranging your squares into a beautiful layout
-
Joining your squares together
Part 3:
In today’s post we are picking up where we left off last week to go over how to make the final finishing touches on your blanket. This section will cover:
-
Creating the blanket border
-
Weaving in your ends
This post contains affiliate links. For more information please see my disclosures page.
Crochet Afghan Quilt Series Part 3: Making the Border and Weaving in Ends
Purchase the ad-free full pattern in printer ready format here.
Part 3 Materials:
- Assembled afghan
- 6.0mm crochet hook
- Scissors
- Yarn needle
- Yarn for border (I used Caron One Pound in White)
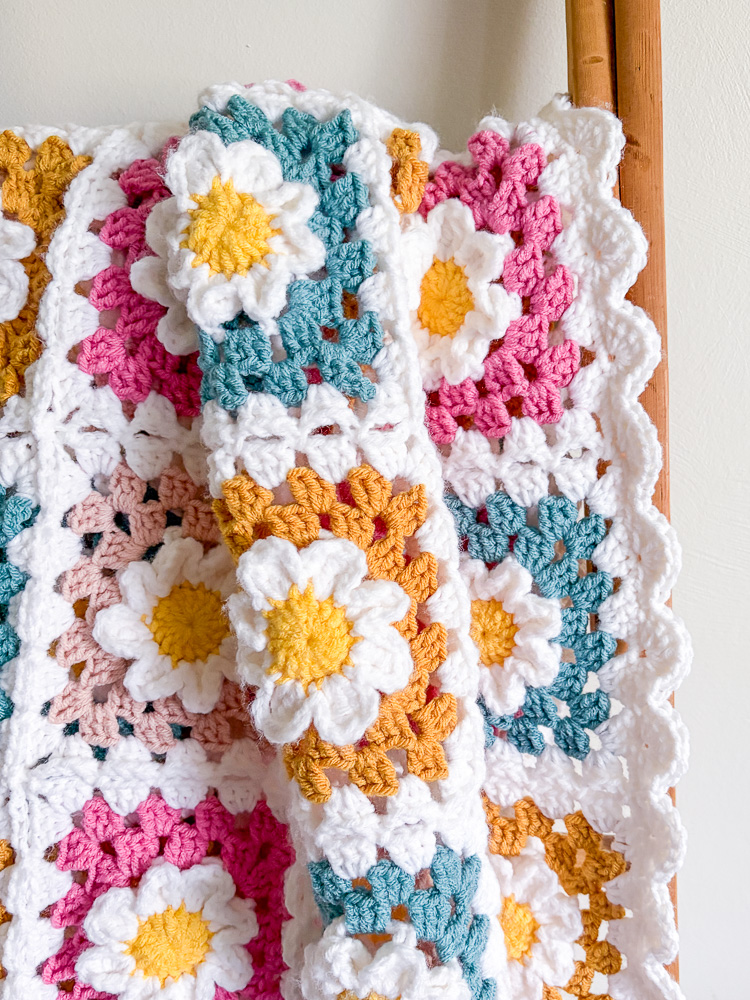
Creating the Blanket Border
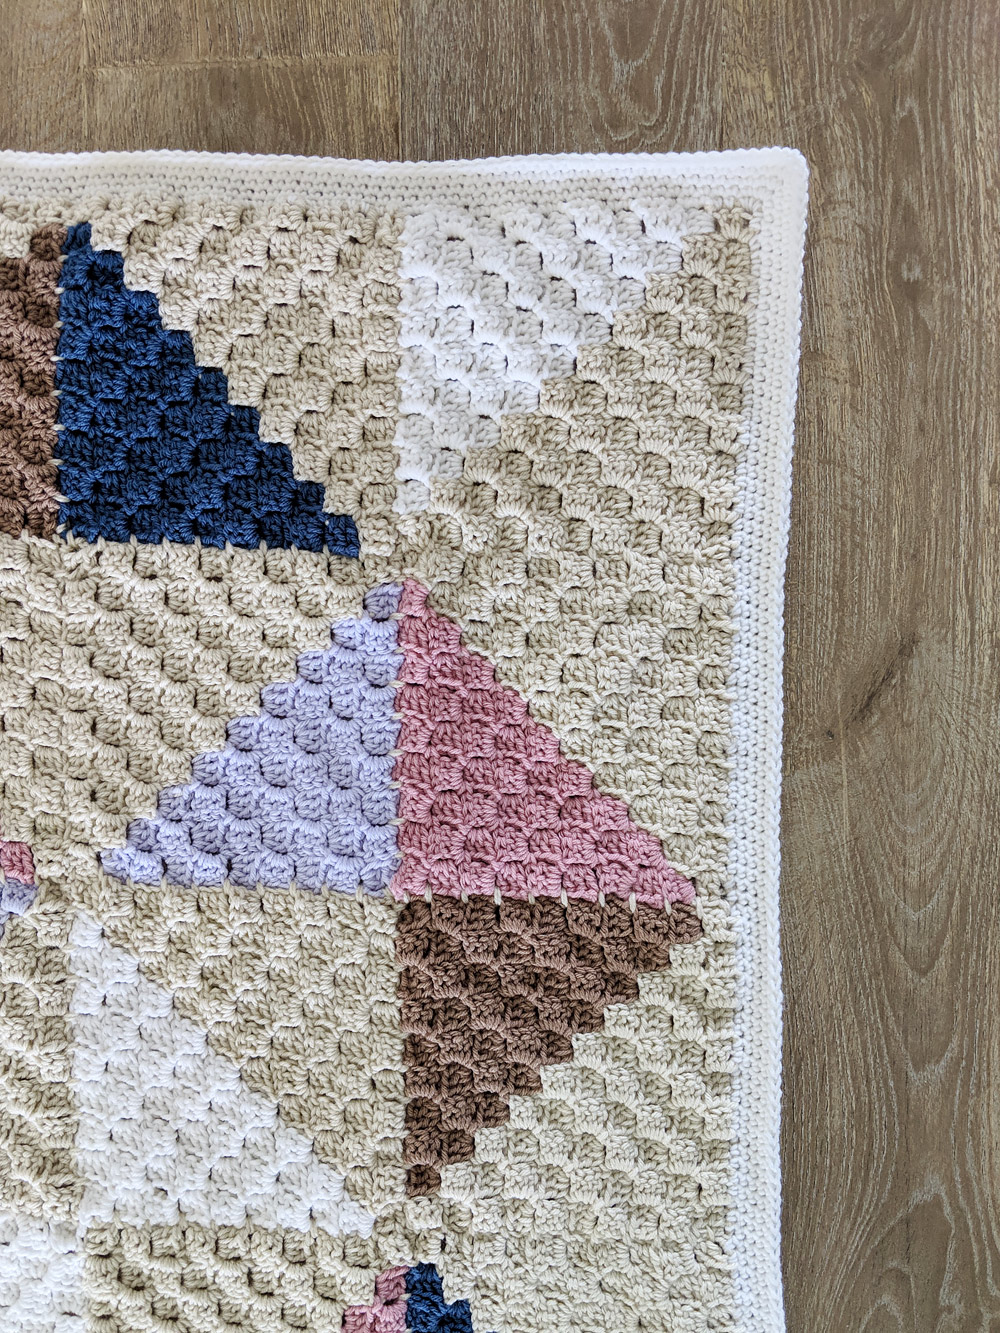
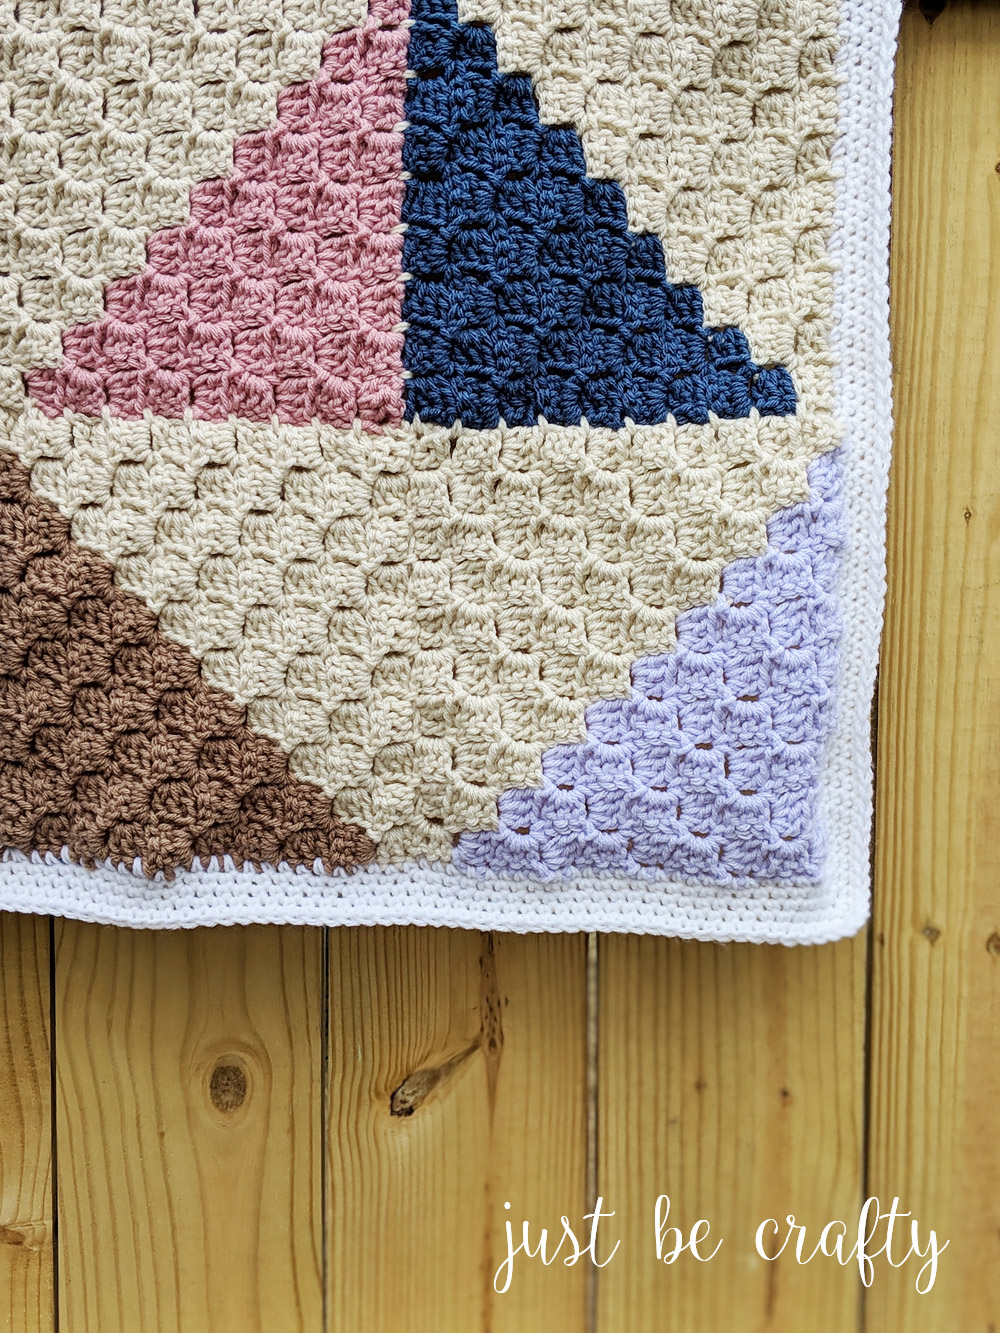
At this point you should have all 25 C2C squares joined so we are all ready to crochet the border! The blanket border is simply five rounds of single crochet. For a detailed explanation and video tutorial please see below!
- Lay your blanket flat out in front of you with the front side facing up.
- Using your border color, attach yarn along the outer edge of the blanket in any any one of the 4 corners.
- Chain 1, and make 3 single crochet’s in the corner st. Make single crochets evenly along blanket edges by placing 2 sc’s along the edge of the horizontal cluster squares and 1 sc in each of the 3 dc’s of the vertical cluster squares as they face you.
- Make 3 sc’s in each of the 4 corners. Join with 1st sc of round using a slip stitch.
- Complete 5 total border rounds of sc’s with 3 sc’s in each center corner st.
Weaving in your ends
We are at the final step – can you believe it?! Time for the daunting process of weaving in those pesky ends! Because this step can get a little boring, I suggest settling in with your favorite show, a cup of coffee, tea OR martini (gin, dirty, shaken – not stirred :D) if after 5 pm to make it a little more fun.
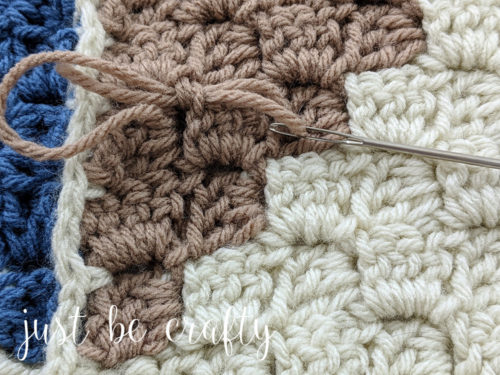
Using a yarn needle (large eyed blunt needle) and one strand at a time, thread your needle and weave in your loose strands inside like colored clusters as inconspicuously as possible – weave back and forth and up and down to secure ends so that they will not fall out or come loose. Repeat for each loose tail.
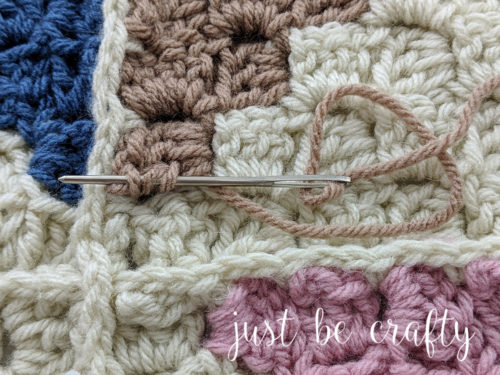
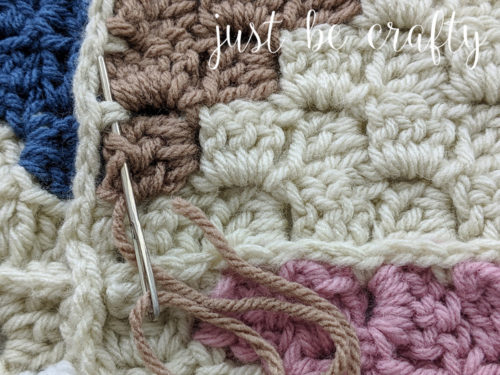
Take care to weave all ends on the back side of your blanket. Below is a photo guide on weaving in your ends.
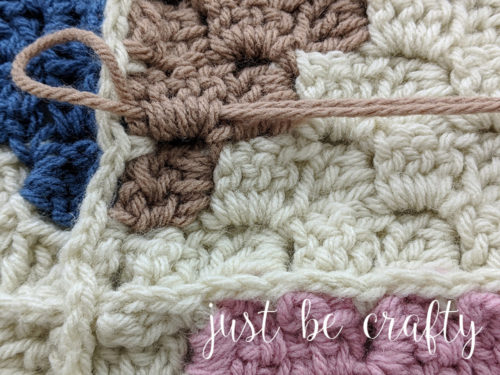
Step 1: Thread yarn needle with loose tail and bring tail to the back side of your work.
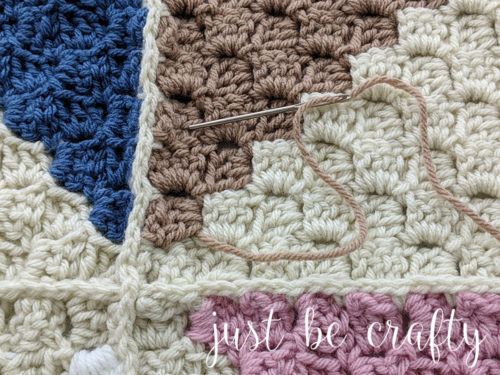
Step 2: Begin by weaving in your tail into the like color cluster stitches as inconspicuously as possible.
Step 3: Weave in your tail in different directions such as up, down, back and forth.
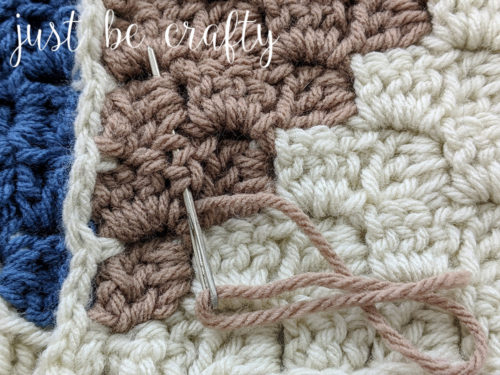
Step 4: Once sufficiently weaved in, cut your tail.
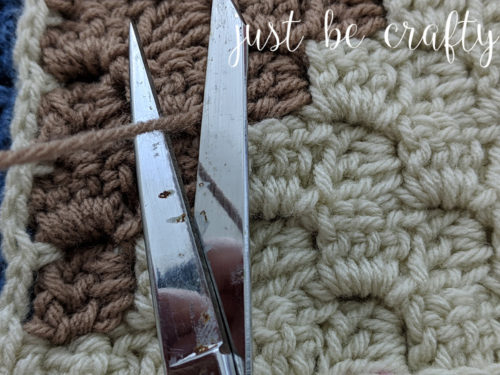
Can you tell where the end was weaved? I know I sure can’t!
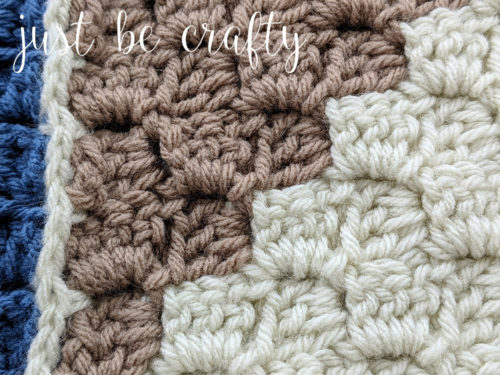
Repeat process for each tail. Once all ends are weaved in, marvel at all of your hard work!
Congratulations! You have finished your afghan!
Did you try out this pattern?! If so, I’d love to see your work! Share your C2C progress on Instagram by using the hashtag #justbecrafty so I can see your latest creations! Happy crocheting!


Where can ifind printable instructions for this 3 part afghan.looks like a good take along project
I would also like to get the pattern please