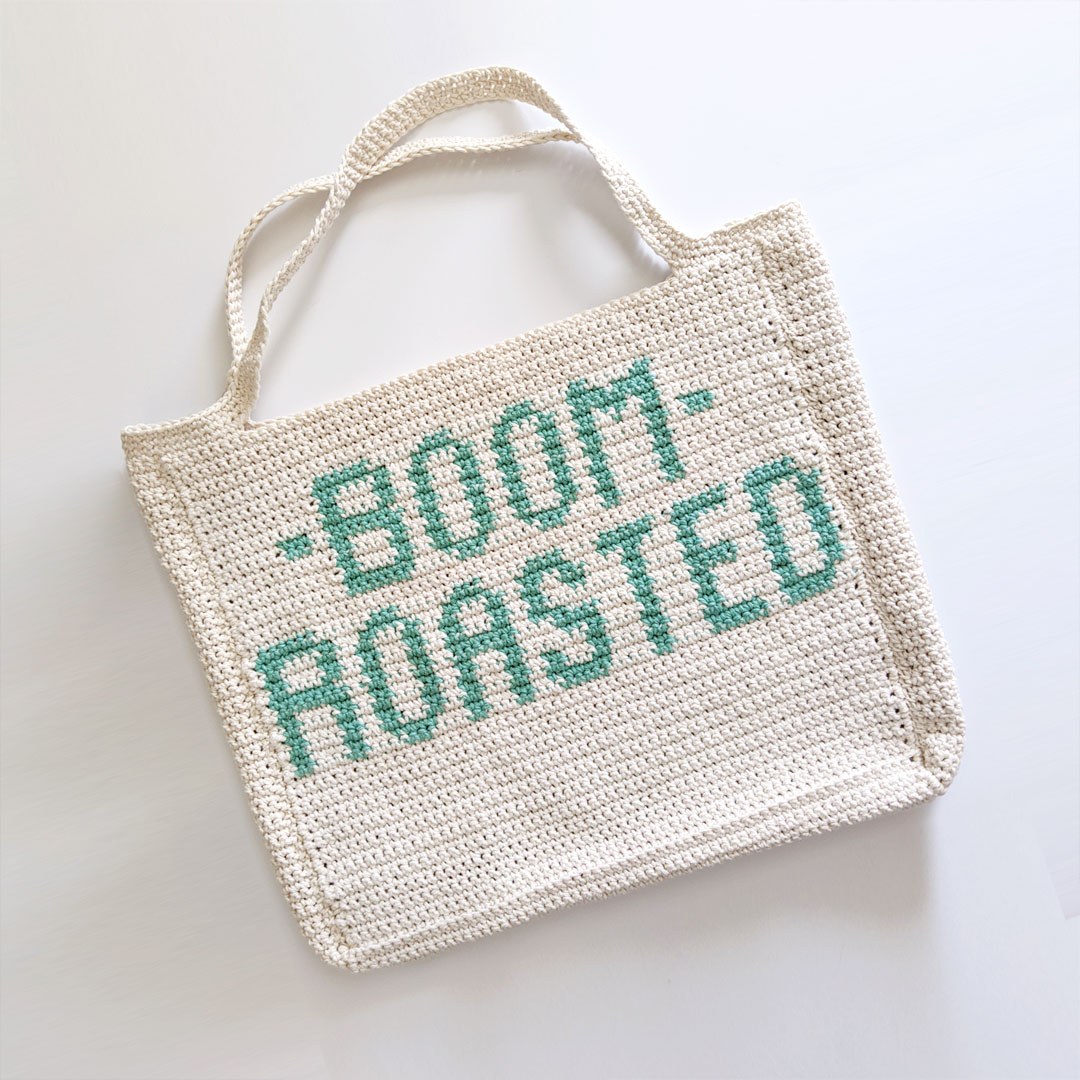
Boom Roasted Market Tote
Calling all fans of The Office! Learn how to make the Michael Scott inspired Boom Roasted Market Tote. For the full pattern and video tutorial keep scrolling below!

Hi friend, I’m so happy you are here! In today’s post I’m going to share how to make this really fun Boom Roasted Market Tote inspired by Michael Scott from my absolute favorite show, The Office!
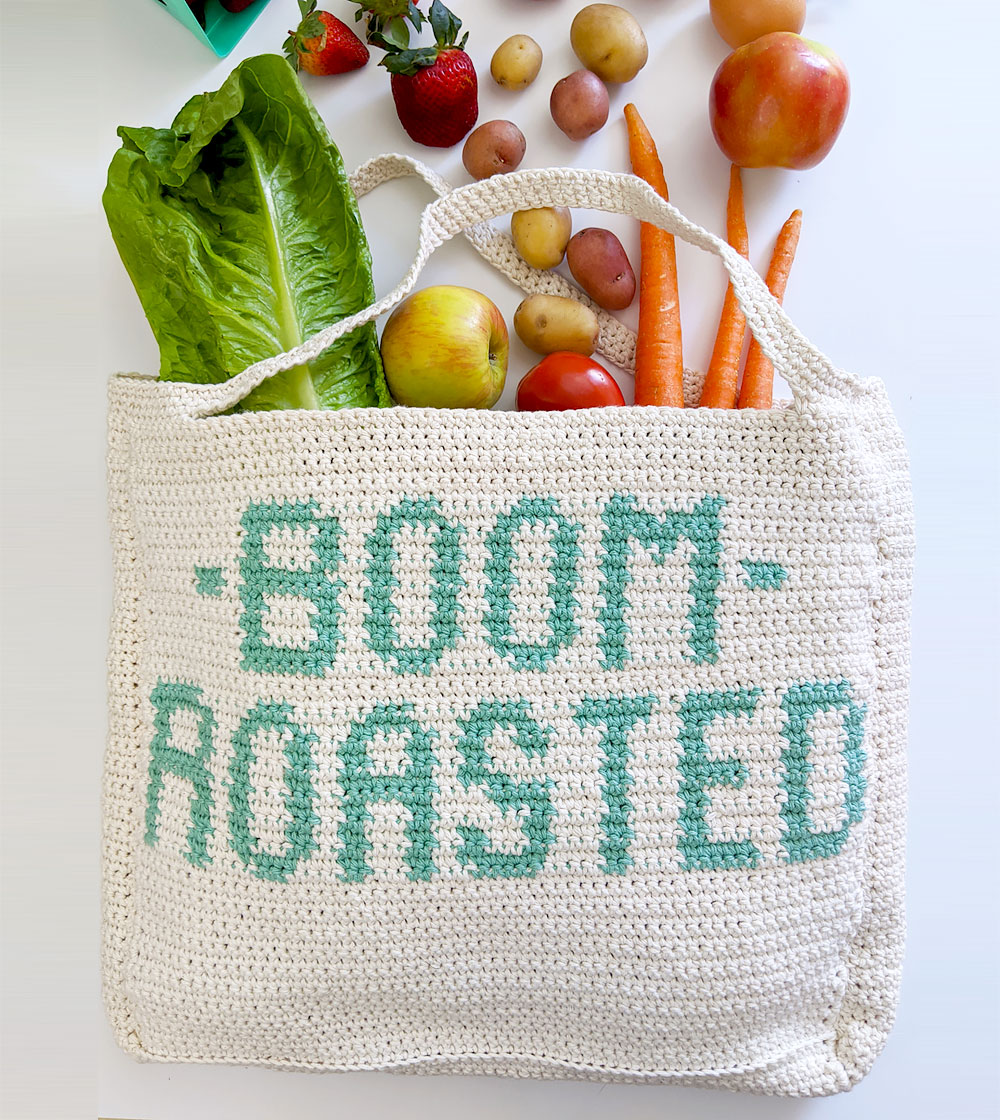
Even if you’re not a fan of the show, the quote is still funny and quite applicable, think Boom, Roasted… vegetables! Or not a fan of the text but need a good crochet tote? Ignore the color work completely and make a bag in your favorite solid color! Or stripes… the possibilities are really endless here!
Boom Roasted Market Tote Video Tutorial
This pattern and video tutorial is geared towards intermediate/advanced crocheters and assumes you already know the following skills:
- Chaining
- Single crochet stitch
- Basic knowledge of intarsia/tapestry crochet
- Slip stitch
- Whip stitch
While this pattern is not difficult and I think a very determined beginner could totally do this – I would not recommend this as a first project.
Click the play button below for the full video tutorial!
Boom Roasted Market Tote Written Pattern
Ad-free printable PDF pattern – coming soon!
Materials
- 5.0 mm hook
- 3 balls of Lily Sugar n’Cream in color Ecru, 4oz (100% cotton, medium-4 weight yarn)
- 1 ball of Bernat Handicrafter Cotton DeLux in color Seaspray, 4 oz (100% cotton, medium-4 weight yarn)
- scissors
- yarn needle
- stitch markers
Finished Measurement
- Approximately 13 inches (depth) by 17 inches wide when laying flat. Measurement does not include handles.
Gauge
- 4 inches = 19 rows by 17 stitches of single crochet
Intarsia Notes
- Intarsia grid is worked in sc. Each row starts with a ch 1 (ch 1 does not count as a stitch). To help keep track, cross out boxes as you complete your stitches.
- Carry and sc over unused colors as you work.
- Color changes – Upon reaching last stitch before next color change, begin sc but stop before completing last yarn over. Yarn over with new color to complete sc.
Intarsia Grid

Back panel of the bag
With main color, begin with a slip knot and chain 63.
Row 1: Working into the back bar of your foundation chain, starting in 2nd ch from hook, sc across row, turn. (62)
Row 2: ch 1, sc in each st across row, turn. (62)
Rows 3 – 62: repeat Row 2
Bottom panel of the bag
Row 1: ch 1, working in the back loop only, sc in each st across the row, turn. (62)
NOTE: You have just created a little “ridge” that will help define the bottom of the bag. This ridge you have created will mark the “outside” of your bag. You will make another “ridge” later, and this will also be on the outside of your bag as well.
Row 2: ch 1, working in both loops as usual, sc in each st across row, turn. (62)
Rows 3-10: ch 1, sc in each st across row, turn. (62)
Front panel of the bag
Row 1: PM in 1st st, ch1, working in the back loop only, sc in each stitch across the row, turn. (62)
NOTE: We have just created our second “ridge” and completes the defined area of the bottom of our bag.
Row 2: ch 1, sc in each stitch across row, turn. (62)
Rows 3 – 20: ch 1, sc in each stitch across row, turn. (62)
Begin Intarsia – see grid above
Rows 21 – 51: Work intarsia grid back and forth in rows using main color and contrasting color (see Intarsia Notes for additional information)
Finishing the front panel
Continue with main color working back and forth in rows until your back panel reaches 13 inches – which should be approximately the same as your front panel ending after completing a wrong side row.
Cut yarn and secure.
Turn work so that the right side faces up.
Side Edge Clean-up
Rotate your piece to the left so that the right most side is facing the top.
Attach yarn to your rightmost corner. Ch 1, and starting in same space as chain 1, sc 55 stitches evenly along back panel side edge ending with the 55th stitch in the next closest stitch marker.
Make 10 sc along bottom panel side edge (in between the ridges we formed), replacing your stitch markers to the 1st and 10th sc of your bottom panel stitches.
Make 55 sc stitches evenly along front panel side edge ending in the next corner.
Cut yarn and secure.
With the “outside” of your bag still face up, rotate your work 180 degrees to the right and repeat this same side edge clean-up process on the other side. (Just note that instead of working from back panel to front panel, you’ll be working in the direction of front panel to back panel – but same concept still applies.)
Building the Sides of the Bag
With the “outside” of our bag still face up, rotate your work so that one of your side edges are towards the top. We will begin by working on the side edge that faces towards the top.
Looking at your bottom edge stitch markers for the side you are working on, attach main color yarn into the stitch with the right-most stitch marker.
Row 1: Ch 1, starting in same stitch as ch 1, sc in each stitch making last sc in stitch with the next stitch marker; turn (10)
Remove stitch markers.
Rows 2 – 62: Ch 1, sc in each stitch across (10)
Cut yarn and secure.
Repeat process on opposite side edge.
Bag Assembly
With “outside” of bag facing up, fold bag in half so that the front panel top end touches the back panel top edge.
Your bag should now be inside-out. Rotate the piece so that the bag’s opening is positioned towards the top.
Working one side at a time, fold your side edge upward so that the end of your side edge is positioned towards the bag’s opening.
Line up your side of the bag stitches with your front and back panel side edges. Use stitch markers to pin in place.
Thread a yarn needle, and working your front and back panel separately, use whip stitch your bag sides closed.
Cut yarn and secure.
Repeat process on other side.
Turn back right-side out.
Placing the handles
Count 8 stitches inward from the left-most and right-most seam on both your front and back panels, and mark those stitches with stitch markers
These stitch markers will mark your handles.
Position bag so that the front is face up.
Attach main color 3 stitches before your right-most stitch marker.
Round 1: Ch 1, starting in same st as ch 1, sc in each stitch until you reach your stitch marker, sc in stitch with stitch marker, remove stitch marker; ch 65, place next sc in stitch with next stitch marker (making sure your chain is not twisted), remove stitch marker, sc in each stitch around bag until your reach next stitch marker, make a sc in stitch with stitch marker, remove stitch marker; ch 65, place next sc in stitch with next stitch marker (making sure your chain is not twisted), remove stitch marker, sc in each stitch until you reach the end of the round. Do not join.
You will work in continuous rounds without joining.
Round 2: sc in each stitch around until you reach your handle chains, sc in each handle chain and repeat process around until you reach the end of the round.
Rounds 3 -4: sc in each stitch until you reach the end of the round.
Slip stitch into the next two stitches to smooth out any little bump that may be present at the end of Round 4.
Cut yarn and secure.
Weave in all ends.
Enjoy!


What does PM mean at the start of the front panel?
Hi Mikala! PM means to place marker. I just realized I didn’t include my abbreviations chart – will get that added to the post! Thank you!