Winter Walk Crochet Mittens Pattern
A quick and easy crochet mittens pattern that can be completed in 2 hours or less! Follow along with the free pattern and video tutorial. Learn more below!
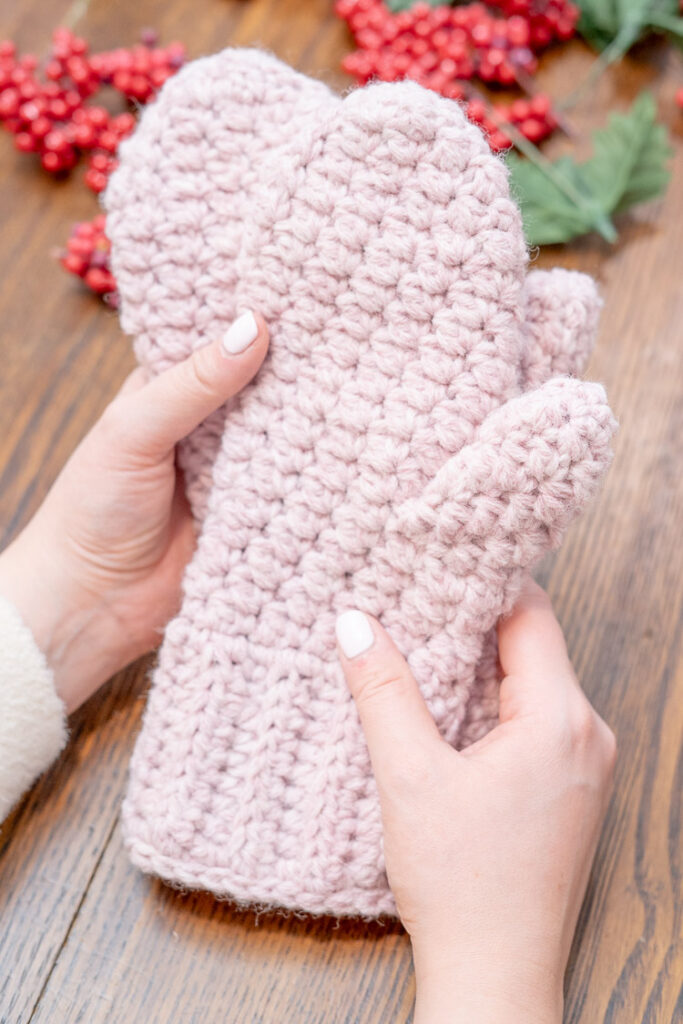
Welcome to the world of cozy and stylish winter accessories with my latest creation – the Winter Walk Crochet Mittens! Crafted with love, these mittens are more than just a crochet project; they’re a warm snuggle for your hands during the chilly season.
Why You’ll Love This Pattern:
- Skill Level: Perfect for crochet enthusiasts of all levels, this patterns perfect whether you’re just starting or have been crocheting for years.
- Unique Features: This pattern also utilizes a single crochet + double crochet combo stitch to create a luxurious and beautiful beautiful fabric.
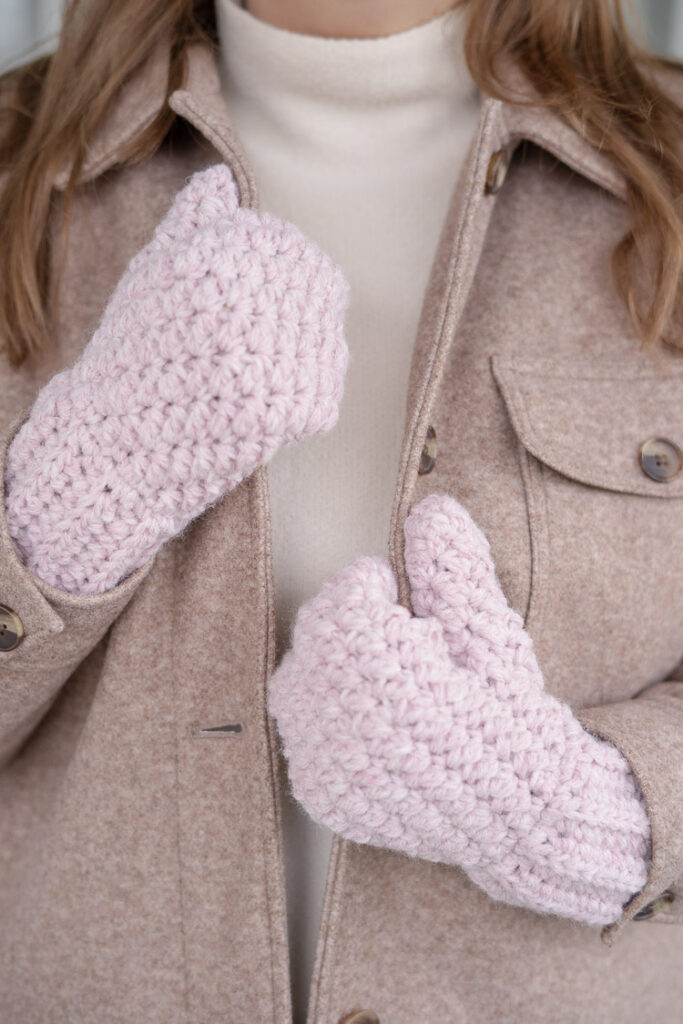
- Yarn Selection: Lastly, the Winter Walk Mittens is worked with a wool blend yarn and entire project is worked double stranded, meaning you’ll crochet with two strands of yarn as if it is one for maximum warmth.

Get ready to beat the chill with our Winter Walk Crochet Mittens. These mittens are like a cozy hug for your hands, perfect for those chilly morning walks or just playing in the snow. They’re fun to make and even more fun to wear, keeping you snug and stylish all winter long!
What’s Next? Dive into this project today! View the pattern below in this blog post or download the crochet mittens pattern from my Etsy shop for a printable PDF version. Also, don’t forget to join my mailing list for more exciting patterns and crochet tips.

Video Help
I’ve created a video tutorial to assist you in making this pattern. To view, simply click on the play button below!
Winter Walk Crochet Mittens Pattern
Purchase the ad-free printable PDF pattern here!
OR… gain instant access to this pattern PDF as well as my entire PDF pattern library! Click here for more information.
*This post may contain affiliate links. Please see my disclosures page for more information.
All patterns on this blog are for personal use only and may not be redistributed, copied, blogged, or sold as your own. You may sell items made by my patterns as long as the item is made by you personally (not mass produced) and that proper credit is given back to me and my site, Just Be Crafty. You may not use my photos for your online sales listings.
Materials
- Yarn
- #4-medium weight, 80% acrylic, 20% wool yarn, 394 yrds / 360 m / 170 g
- Yarn is held double
- Suggested Yarn
- Lion Brand Wool Ease (197 yds / 180 m / 85 g)
- 2 balls Blush Heather
- Yarn is held double (2 balls makes 1 set of two mittens)
- Lion Brand Wool Ease (197 yds / 180 m / 85 g)
- Suggested Hook
- 5.5 mm hook (from this set.)
- Notions
- Scissors
- 4 Stitch Markers (I love these and these.)
- Yarn needle
Gauge
- 3 in. (8 cm) = 10 st by 8 rows of stitch pattern worked in the round (with yarn held double).
Finished Measurements
- One size
- 7.5 in. (19 cm) finished circumference
Abbreviations
- ch chain
- dc double crochet
- dc dec double crochet decrease
- dec decrease
- hdc half double crochet
- hdcblo half double crochet back loop only
- sc single crochet
- sc dec single crochet decrease
- sl st slip stitch
- st stitch
Terminology
Single Crochet Decrease (sc dec): Insert hook into next st, draw up a loop, insert hook into next st, draw up a loop, yarn over and pull through all 3 loops on hook.
Double Crochet Decrease (dc dec): Yarn over, insert hook into next st, draw up a loop, pull through 2 loops, insert hook into next st, draw up a loop, yarn over, and pull through 2 loops, yarn over, pull through 2 loops.
Notes
CONSTRUCTION
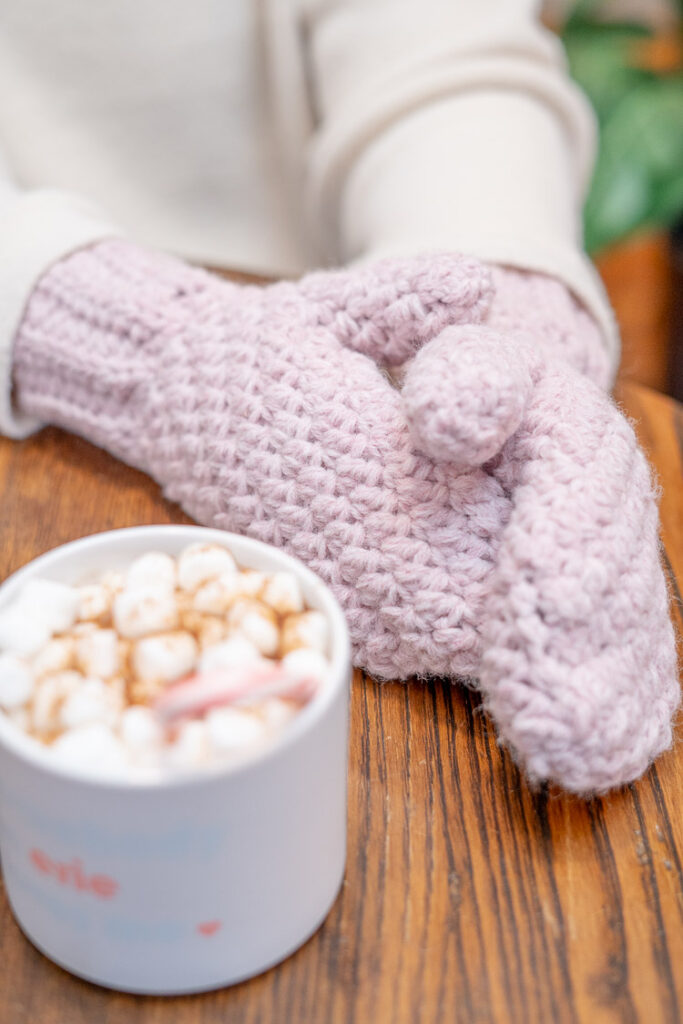
These Winter Walk Crochet Mittens are constructed bottom-up and worked in the round for a seamless finish. In addition to being worked in the round, this pattern utilizes a double-strand technique, using two strands of yarn held together throughout, which adds to the thickness and warmth of the mittens.
Key features to this pattern include a ribbed cuff, a thumb hole created with increases, and a decrease pattern for shaping the mitten top. And it’s designed for practicality and comfort, suitable for intermediate crocheters.
YARN IS HELD DOUBLE THROUGHOUT PROJECT
Throughout this project, we will be working with the yarn held double. This means you’ll crochet with two strands of yarn at the same time, treating them as a single strand. A handy tip for managing this is to pull one strand from the center of each skein simultaneously.

Winter Walk Crochet Mittens Pattern starts here:
Read complete pattern and NOTES before beginning.
CUFF
As a quick reminder, remember to hold two strands of yarn together throughout the entire project!
With two strands of yarn, ch 11.
Row 1: Working into the back bar of the foundation chain, and starting in the 3rd ch from hook, hdc in each ch across, turn. (9)
Row 2: Ch 2, hdcblo across, turn. (9)
Rows 3 – 17: Repeat Row 2
Fold piece in half, so that starting and ending edges are touching. Line up your stitches, and sl st the outer loops of your edges together to form cuff. This will be the inside of the cuff.
Turn cuff right side out.
WRIST
Round 1: Ch 1, and make 1st sc of round in same sp as this ch 1 and make 21 more sc evenly along the cuff’s edge. You should end this round with 22 stitches total. Do not join at the end of the round. (22)
Round 2: Starting in the 1st st of the round, make a sc, dc into the next stitch, *sc into the next st, dc into the next st; repeat from * to end of the round, ending with a dc st. (22)
Place a stitch marker on the seam of the cuff. You will be using this marker as a landmark to approximate where the round ends.
Round 3: *In next st, sc + dc into the same st, sk a st; repeat from * to end of round (22)
For this stitch pattern, unless otherwise noted, you will be working a single crochet and double crochet stitch into the single crochet stitches from the previous round, and skipping over the double crochet stitches.
Each paired single crochet and double crochet will be referred to as a cluster.
Round 4: Repeat Round 3, place last cluster of the round in the single crochet stitch of the cluster that’s most centered over the stitch marker.
THUMB HOLE
We want to center the thumb hole over our cuff seam. To do this, we should have ended Round 4 in the cluster that’s most centered over our stitch marker.
Pro-tip: This doesn’t need to be perfect, just eyeball it!
Round 5 (increase round): Make an increase by working a sc and dc into the next st (which should be a dc stitch from the previous round). You’ve just made an increase. Mark the dc stitch you just made with a st marker. Starting in the next st, (which should be a sc st) continue to work in pattern to the end of the round. (24)
Round 6 (increase round): Repeat Round 5, making an increase in the marked stitch. Replace stitch marker over this increased cluster. Continue working in pattern. End Round 6 by stopping one cluster before the marked increased cluster at the beginning of the round. (26)
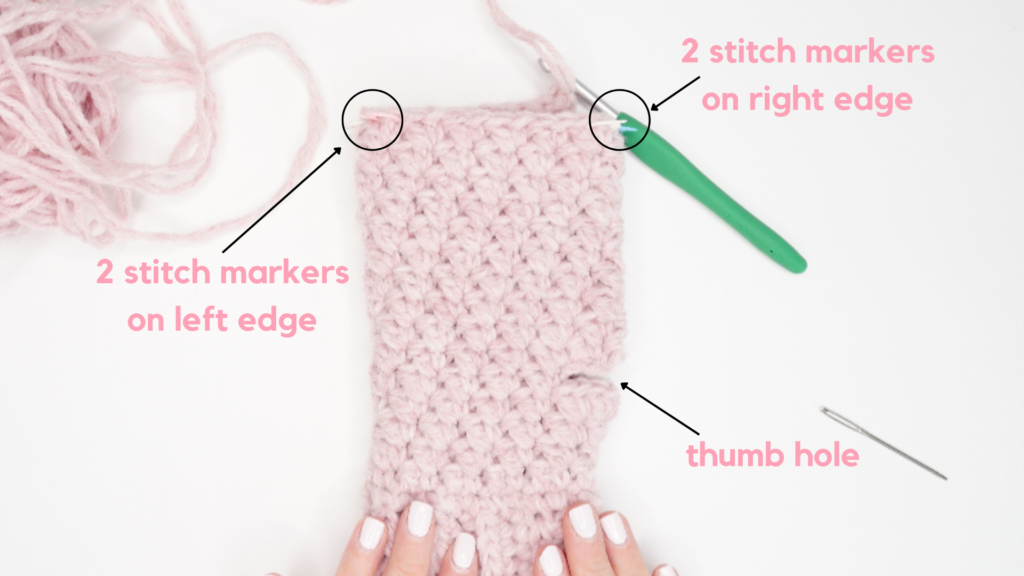
Round 7: Place marker in next st (should be a dc st). Starting with the marked st, count over 9 stitches, place a marker in the 9th st (this should be another dc st). Ch 6, taking care to not twist your ch, make a sc and dc st in the next st after the 2nd marker. Continue working in pattern. End Round 7 when thumb ch begins.
I suggest keeping these stitch markers in place to help with working the thumb later on.
Round 8: Starting in 1st thumb ch, make a sc, make a dc in next ch, *sc in next ch, dc in next ch; repeat from * across ch. In next st after the ch (should be a sc) make a sc and dc in this same st; continue in pattern to end of round.
Resume to using cuff seam as a landmark to approximate where the rounds end.
Rounds 9 – 17: Continue working in pattern.
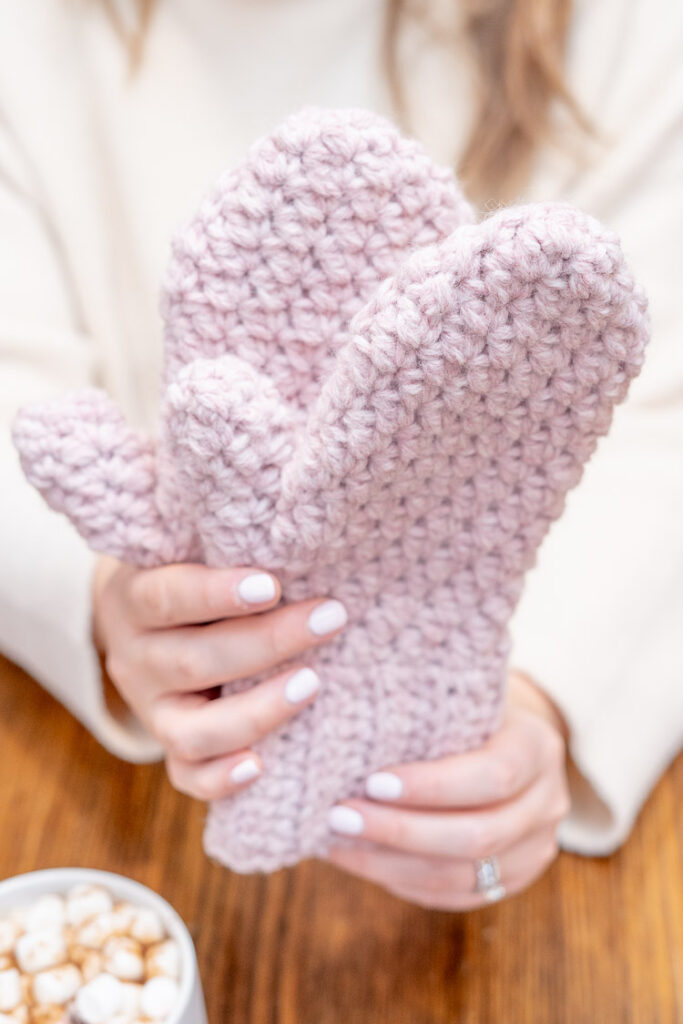
Try mitten on. The length of the mitten should be about level with your pinky. Add or remove rounds to get to that length if needed.
DECREASING THE MITTEN TOP
Prepping for the decreases
Lay mitten in front of you and flatten it out so that the thumb hole is centered over the cuff seam. Find the two clusters from the last round that are most centered over the cuff seam. Pull out a cluster or two, if you crocheted too far in Round 17. Mark both of these clusters each with a stitch marker.
And then, reposition mitten by flattening it out again, with the thumb hole now positioned at the rightmost edge. Count 5 clusters over from 2nd marker (leftmost), and place marker. Mark next cluster with a marker. These marked clusters indicate where your decreases will go in Round 18.
Round 18: Over 1st marked cluster, make 1 sc dec over the two stitches of this cluster, make 1 dc dec over the two stitches of the next cluster. These two decreased stitches will be grouped together as one cluster. Mark this cluster with a stitch marker (this will count as the 1st cluster of the round). Continue in pattern to next marked cluster and repeat the sc dec, repeat dc dec in next marked cluster. These two decreased stitch will be grouped together as one cluster. Mark this cluster with a stitch marker; continue in pattern to end of round. End this round after completing the last cluster before the next marked cluster.
Round 19: Make a sc dec over 1st marked cluster, make a dc dec over the next cluster. Mark these two st together as one cluster, and continue in pattern to next marked cluster, make 1 sc dec over marked cluster, make 1 dc dec over next cluster. Mark these two st together as one cluster, and continue in pattern to end of round. End this round after completing the last cluster before the marked cluster.
Repeat Round 19 until 10 stitches total remain.
Sl st into next stitch or two to even out top edge. Cut yarn and fasten off leaving a 12 inch length tail.
Cinching the mitten hole
Thread yarn needle and whip stitch around the top edge. (To whip stitch, insert needle into each stitch, working from inside the mitten out. Repeat around.) Pull yarn tail to cinch hole closed.
Turn mitten wrong side out and bring yarn needle and tail to the wrong side of the mitten. Pull tail to re-cinch top hole if needed, make a stitch or two to close any remaining hole/gap at the top if needed. Secure in place with a knot or two. Weave in remaining tail.
MAKING THE THUMB
Prepping for the thumb rounds
Grab two stitch markers and place one marker in the stitch of the 1st thumb hole ch. Place a second marker in the st of the 6th thumb hole ch.
You should have 4 markers positioned on the thumb hole. Two markers on the top outline, representing the 1st and 6th chain for the thumb hole. And two markers on the bottom outline, representing the 1st st and the 9th st for the thumb hole.
Note: In the video tutorial, I only have markers on the top outline (on the 1st and 6th ch). But having all 4 markers may help you keep your place a little better for the Round 1 decreases. The stitch markers won’t be needed after this round (yay!).
When instructed to attach yarn, continue to work with 2 strands.
MAKING THE THUMB
Round 1 (decrease round):
On the bottom outline, and starting with the rightmost thumb hole st marker, count over 4 st (this should be a sc st) and attach yarn. Ch 1 and make a sc dec over this cluster, make a dc dec over the next cluster, in next st make a sc, make a dc dec over the next two marked stitches (this should be the last dc of the bottom thumb hole outline, and the 6th ch of the thumb hole top outline).
In next ch make a sc, in next ch make a dc, make 1 sc dec over next 2 ch, make 1 dc dec over the next 2 marked stitches (this should be the 1st ch of the thumb hole top outline and the 1st st of the bottom thumb hole outline), in next st make a sc and dc, sk next st; you’ve reached the end of the round (10 st).
Rounds 2 – 6: Continue working in pattern, by making a sc and dc in every sc st of the prev row.
Try on mitten. Your mitten thumb should be about level with your thumb (or just barely sticking out). Feel free to add/remove rounds to get the correct length.
Round 7: *Make a sc dec over next cluster, make a dc dec over next cluster; repeat from * until 5 stitches remain.
Cut yarn leaving a 12 in. tail and fasten off.
Next, you’ll thread a yarn needle and whip stitch around the top edge of thumb hole, just like we did with the mitten top. Pull yarn tail to cinch hole closed. Turn mitten thumb wrong side out and bring yarn needle and tail to the wrong side of the mitten. Pull tail to re-cinch top hole if needed, make a stitch or two to close any remaining hole/gap at the top if needed. Secure in place with a knot or two. Weave in tail.
Weave in any remaining tails.
FINISHING (OPTIONAL)
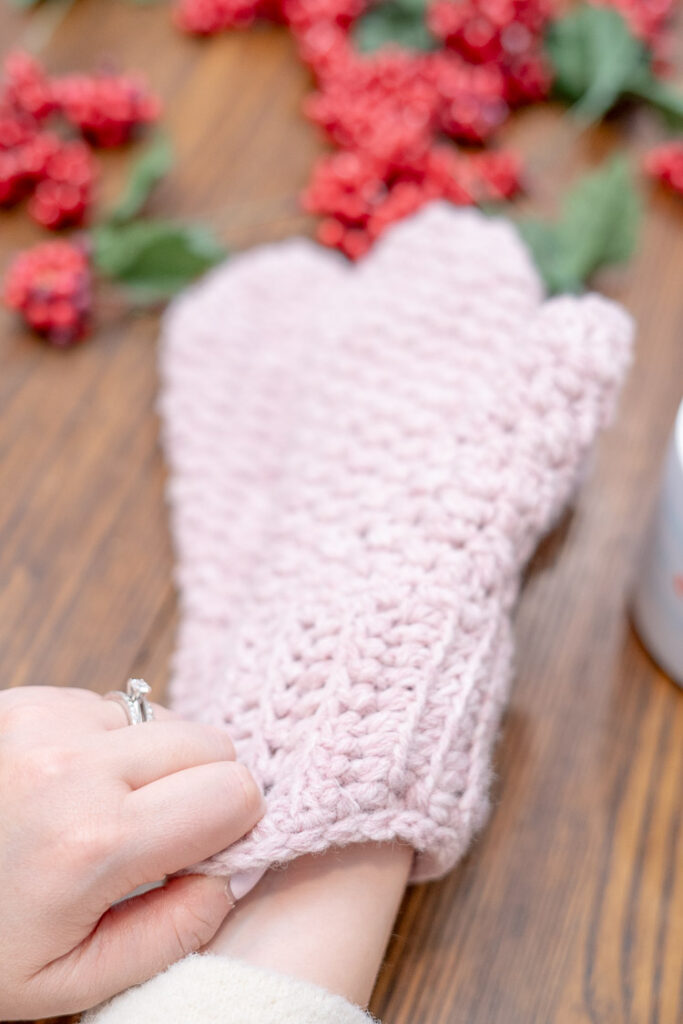
I like to tighten the bottom of my mitten cuff to keep snow and cold air out of my mitten. If you prefer not to tighten your mitten cuff you can skip this step altogether and be on your merry way! If you want to tighten your mitten, proceed to the following directions!
With two strands, attach yarn at mitten cuff seam.
Round 1: ch 1, starting in same space as ch 1, make 24 sc evenly around this edge. Feel free to make a few more or less st to suite your unique fit and preference.
Round 2: sl st into each st around. Join with last st of round with a sl st.
Cut yarn, fasten off. Weave in ends.
Repeat for second mitten.
Enjoy!

Love this pattern?


Hi, I made the boysenberry mittens for adults. Could you please tell me how to make these smaller for children? I am new to crochet, I just need less stitches in the cuff, and also how to decrease the number of stitches for the thumb hole. I have looked on you tube for children’s mittens, but I like your pattern the best. I am thinking the pattern could be decreased pretty easy, but I am not experienced enough to even try.
Thank you so much, and Happy Holidays.
Hi Linda! I unfortunately do not have a children’s mitten pattern, but will put this on my list to do for the new year!