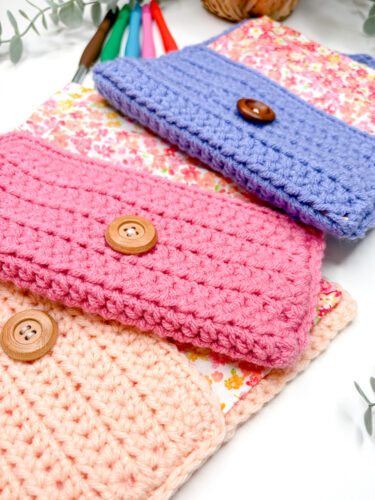
Looking for a hook case crochet pattern free of charge? This lined little pouch is one of my favorite things I’ve ever designed and I think it’s about to become yours too.
You know that moment when you’re digging through your bag looking for your crochet hook and you can feel literally every other object in there except the one you need? I’ve been there more times than I can count, haha!
That’s what inspired this free hook case crochet pattern. I wanted something that would keep my hooks organized, look cute, and be something I made myself. And you know what? This little pouch exceeded every expectation I had for it.
This is one of my favorite crochet patterns free on the blog right now. It’s beginner friendly, it works up fast, and it has the most beautiful fabric lining that makes it look so polished and intentional. So whether you’re making it to keep your own hooks organized or gifting it, this one is a total winner.
Save This Pattern For Later!
Not ready to make it just yet? Pin this free crochet hook case pattern to your favorite crochet board on Pinterest so you can find it when you’re ready!
Why You’ll Love This Free Crochet Hook Case Pattern
There are a lot of crochet pouch patterns out there, so let me tell you what makes this one worth your time.
- It’s genuinely beginner friendly. If you know how to half double crochet, you can make this. The body of the pouch is worked flat in simple rows.
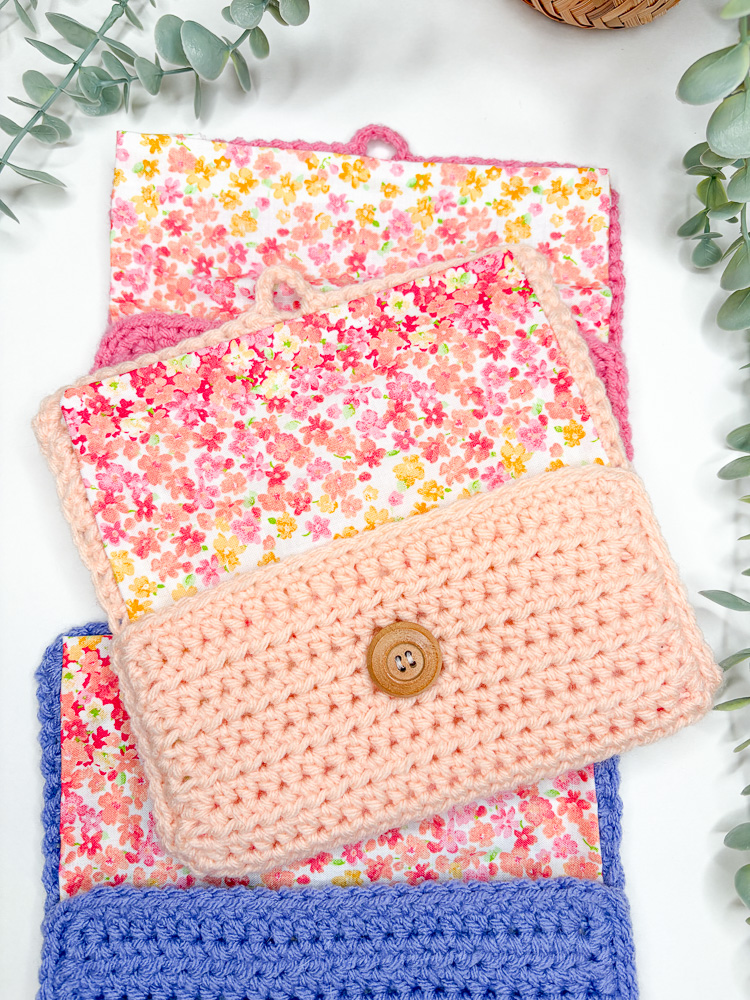
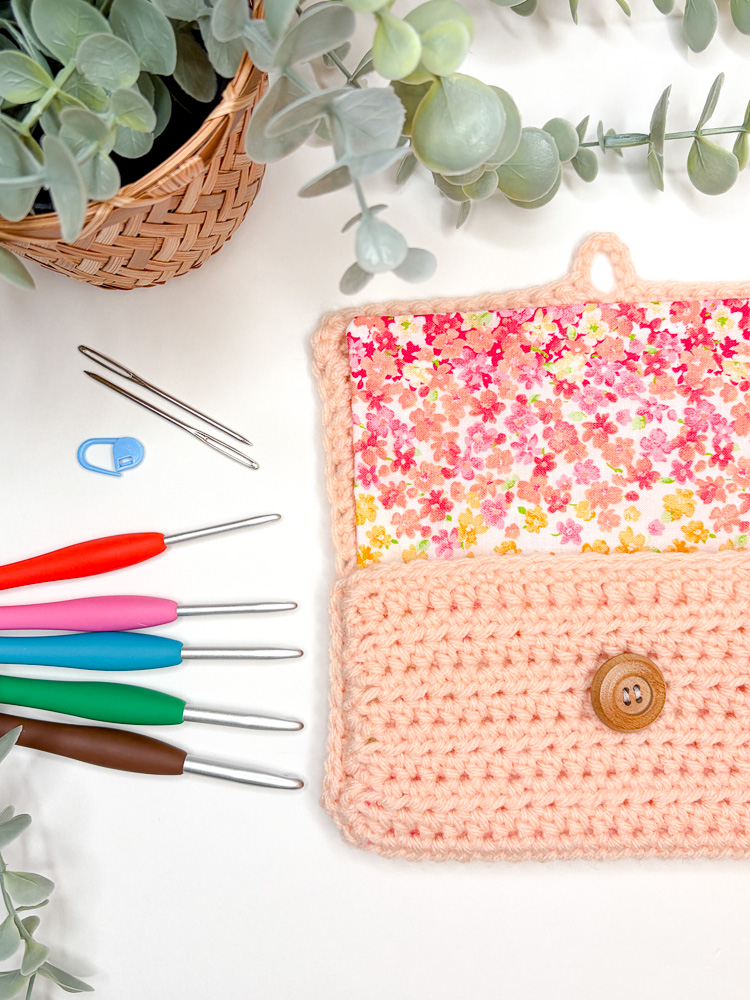
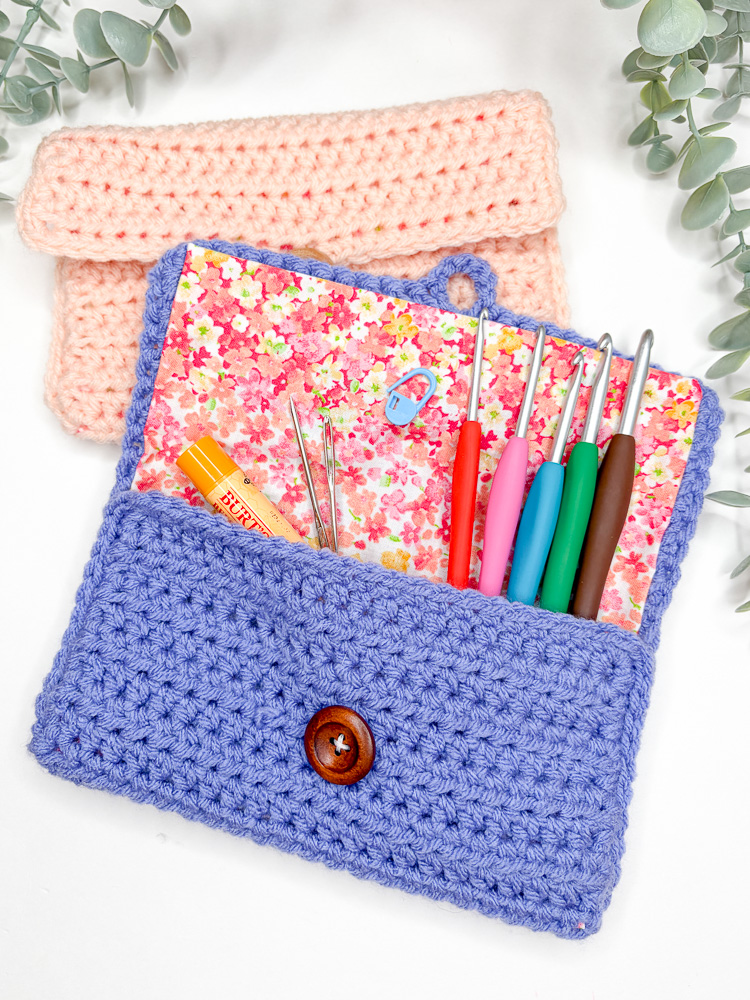
- The fabric lining takes it to the next level. This is what sets this crochet hook pouch apart from many other patterns out there. A simple cotton lining gives the inside a clean, finished look. And don’t worry, it’s no sew!! I used fabric glue to attach mine!
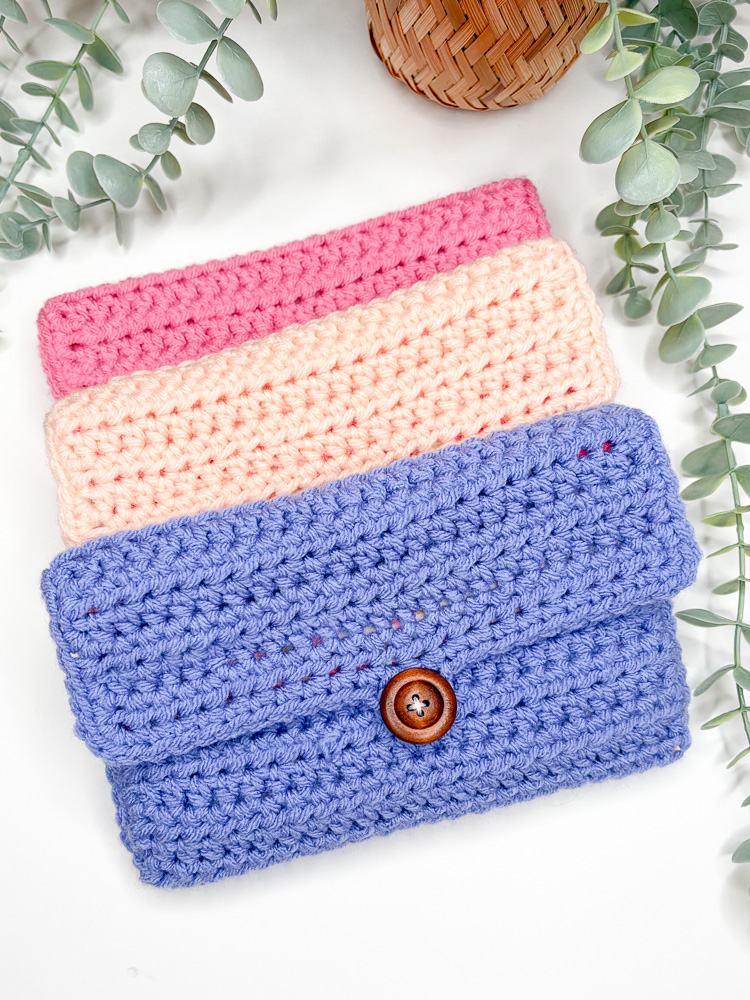
- It’s a one skein project. You only need about 187 yards of worsted weight yarn, so this is a perfect one skein project for using up what you have on hand.
- It makes a perfect handmade gift. Know a crafter? A handmade crochet hook organizer is a gift that people genuinely would use every single day. Pair it with a nice set of hooks and you’ve got a gift basket that will make anyone smile!

What Makes This Crochet Hook Organizer Pattern So Functional
When I was designing this, functionality was everything. A hook case needs to actually work, it needs to close securely, hold its shape, and be easy to open and close on the go.
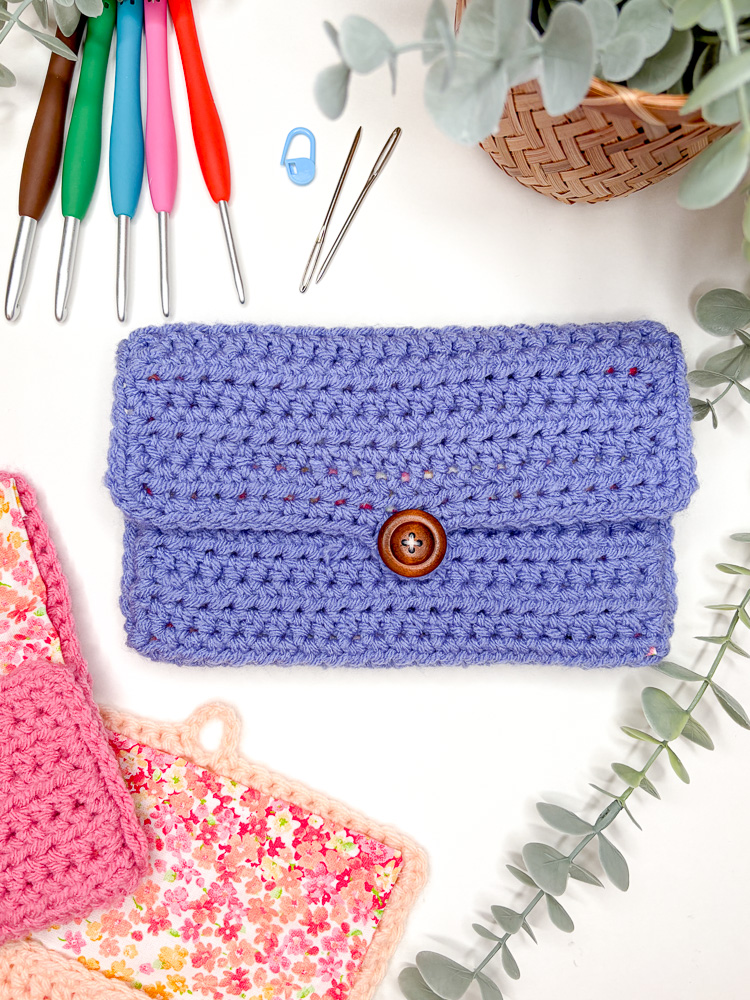
This pouch checks all of those boxes. It closes with a wooden button and a simple crocheted loop. The finished assembled size is about 7.75″ x 4.25″, which is big enough to fit your everyday hooks comfortably, small enough to tuck right into your project bag without taking over.
The construction is also really approachable. You crochet a simple rectangle, add a border with the button loop, and then glue on the lining, fold it, and seam it into shape. There’s no complicated construction to figure out, which makes this one of my favorite small crochet bag patterns, free or otherwise.

The Fabric Lining: Yes, You Can Do This! (& No Sew!)
I know the words “fabric lining” might sound intimidating if you’re primarily a crocheter, but I promise it is so much easier than it sounds. No sewing machine required!
The lining is attached using fabric glue, which means the whole process is really just cutting, folding, and pressing. It takes a little patience while everything dries, but the result is so worth it. The inside of your crochet hook pouch goes from looking like the inside of a crochet project to looking like something you’d find in a boutique.
I walk you through every single step of the DIY fabric lining for crochet process in both the written pattern and the video tutorial, so you’ll never feel lost.
A few tips for the lining:
- Use freshly pressed cotton fabric. Wrinkles will show, so iron your fabric before you cut. The flatter it is going in, the cleaner the finished result.
- Go slow with the fabric glue. A thin, even line is all you need. You don’t want it seeping through to the front of your work.
- Let it dry fully before assembling. Overnight is best if you can wait. Rushing this step is the one thing that can affect the final result, so be patient. It’s worth it!
Is This Pattern Good for Beginners?
Yes! This is truly one of the most beginner friendly crochet patterns on the blog. The crochet portion uses only half double crochet stitches worked in flat rows. There’s nothing tricky about the actual crochet part at all.
The slightly more advanced step is the border round where you create the button loop, but the pattern walks you through it step by step and the video tutorial shows you exactly what it should look like.
If you’ve made a dishcloth or a simple rectangle before, you have every skill you need to make this crochet hook pouch. And if you’re brand new to crochet, this is honestly a fantastic first project because it practices all of the foundational skills: chains, half double crochets, working flat rows, working a border, and seaming. All in one project!
Skill Level
Any skill level can do this! As I mentioned above, this would even make a really great first crochet project. But before you get started, you’ll want to have an understanding of these skills. Click through the skills below to jump to the video tutorials.
Learn the crochet basics:
- How to make a slip knot
- How to make a foundation chain
- How to half double crochet (hdc) into a chain
- How to half double crochet
- How to single crochet
- How to fasten off
- How to weave in your ends
Once you have these skills under your belt, you can totally tackle this crochet pattern!
Video Tutorial
Want to follow along while you make it? I’ve got a full video tutorial walking you through the entire pattern from start to finish, including the fabric lining and button attachment. Click play below!
Disclosure
*This post may contain affiliate links. I may earn a small commission when purchases are made through these links (at no additional cost to you!). Please see my disclosures page for more information.
All patterns on this blog are for personal use only and may not be redistributed, copied, blogged, or sold as your own. You may sell items made by my patterns as long as the item is made by you personally (not mass produced) and that proper credit is given back to me and my site, Just Be Crafty. You may not use my photos for your online sales listings.
Purchase the Digital Version! In an Easy To Read, AD-FREE & Printer Ready Format!
Materials
Here’s everything you’ll need to make this project:
Yarn:
#4-medium weight, 100% acrylic yarn
- 187 yds
- 99 g
- 162 m
Suggested Yarn:
- 1 ball Loops & Threads Soft Classic, 100% acrylic #4-medium weight (pictured in Pink)
- each ball is 354 yds / 198 g / 324 m
Suggested Hook:
- 5.5 mm https://amzn.to/445LSfu
- Or hook size needed to obtain gauge.
Notions + More:
- Freshly pressed cotton fabric for lining (add measurements here)
- 1″ wooden button
- Scissors https://amzn.to/43FOvVg
- Yarn needle https://amzn.to/3JEOHNO
- 2 locking stitch markers
- Fabric glue
- Hand Needle and thread (for the button)
- Blocking materials (optional)
- Blocking boards + anti-rusting pins
- Steamer (or spray water bottle)
- Iron (optional)
Abbreviations:
- ch chain
- hdc half double crochet
- RS right side (front of work)
- sc single crochet
- sl st slip stitch
- st stitch
- WS wrong side (back of work)
Gauge:
- 6.25 stitches over 5 rows = about 2″ measured over half double crochet
- Be sure to check your gauge!
Finished Measurements & Sizing:
This pattern is written in one size.
Finished Pouch Measurement (ASSEMBLED):
About 7.75″ x 4.25″ (20 x 11 cm)
Finished Un-folded Measurement:
insert size
Notes:
See important project notes below.
Construction:
- You’ll start this project off by working flat back and forth in rows to create a crocheted rectangle. You’ll finish the crochet portion with a 1-round border where you’ll create the button loop. You’ll then attach your button. From there we will add our fabric lining and finish off by seaming the edges together to form our pouch.
- This is a great project for all levels! It makes for a fantastic first project because it practices foundational crochet skills and walks you through each step of the way.
Pattern:
Read complete pattern and NOTES before beginning. (Be sure to check your gauge!)
BODY OF THE POUCH
Ch 24
Row 1 (RS): Starting in the 3rd ch from hook, hdc across the row; turn. (22)
Row 2 (WS): Ch 2 (does not count as a st), hdc in each st across the row; turn. (22)
Rows 3-30: Repeat Row 2
BORDER
Arrange work so the RS is face up. We will now be working around the perimeter of the crocheted rectangle.
Round 1: See instructions below:
- Step 1: Ch 1, make sc in next 11 sts. Ch 6, sc into next st. This forms the button loop. Sc across next 9 sts. Make 3 sc in last st of row to form Corner 1.
- Step 2: Work 30 sc evenly along the side edge of your work. In first st of the bottom edge, make 3 sc to form Corner 2.
- Step 3: Work in sc along the bottom edge. Make 3 sc in the last bottom edge st to form Corner 3.
- Step 4: Make 30 sc evenly along remaining side edge. Make 2 sc into same st with the first st of the round. Join with first st of the round with a sl st.
Cut yarn. Fasten off. Weave in all ends.
BLOCKING (optional, but recommended!)
Blocking is a really great way to clean up edges and make your project look super polished. You don’t have to do this, but it will really take your project to the next level.
For acrylic yarn:
Pin your crocheted pouch piece to a blocking board to match the finished un-folded measurements. Gently steam the piece to relax the stitches into shape. (DO NOT TOUCH AN IRON TO ACRYLIC YARN, as acrylic yarn will melt!) If you don’t have a steamer, lightly dampen the piece with a spray bottle of plain water.
Let dry completely.
For wool yarn:
Soak the piece in a cool water bath for 10 minutes. Gently press out excess water between dry towels (do not wring). Pin to your blocking board to match the finished un-folded measurements.
Let dry completely.
ADDING THE BUTTON
Step 1: Arrange the crocheted rectangle WS face up.
Step 2: From bottom edge, count up 12 sc sts along the border edge, and fold the bottom upward at that point.
Step 3: Fold the top edge down over the bottom edge. (Similar to how you would fold a letter to be mailed.)
Step 4: Use a stitch marker to mark the center spot on the bottom flap exactly where the button loop falls.
Step 5: Unfold the pouch. Using needle and sewing thread, attach button to marked spot, ensuring the button is on the RS (front) of your work.
LINING
Step 1: Cut freshly ironed fabric to the size of your rectangle piece with a 1″ seam allowance all the way around. Should be roughly: 9.5″ x 13″ (24 x 33 cm).
Step 2: With the WS of the fabric face up, fold in about a 1″ (2.5 cm) hem on all four edges so the fabric is just slightly smaller than the crocheted piece. Pin folds in place. (Optional but highly recommended: Iron or steam the folds so they hold their shape.)
Step 3: Remove pins. Fold and glue down the two short edges first. Next, create mitered corners by folding the corners inward at an angle (like dog-ears on a page) and gluing them flat. Finally, fold and glue down the two long edges to finish your hem.(You can also use a sewing machine or hand sew the hems if you prefer.)
Step 4: Arrange crochet piece WS face up. Place the hemmed fabric piece RS face up on top of the crochet piece. Line everything up so the lining sits just inside of the crochet border.
Step 5: Apply a thin line of glue around the WS edges of the fabric piece and press it securely onto the crocheted rectangle.
Step 6: Allow piece to fully dry (preferably overnight).
FORMING THE POUCH
Step 1: Once the glue has fully dried, lay piece flat out in front of you with the lining side facing up.
Step 2: Count up 12 sc stitches from the bottom along the side border, and fold the bottom upward at that point. Use locking stitch markers to hold the sides in place.
Step 3: Rotate the piece so that the right-hand edge is positioned to the top. Line up the stitches of the front and back layers. Attach yarn to the bottom-most sts and sl st the outer loops together to seam the pouch closed. Cut yarn and fasten off.
Step 4: Rotate the piece so that the left-hand side is positioned towards the top. Attach yarn to the top-most sts and sl st the outer loops together to seam the remaining side closed. Cut yarn and fasten off.
Weave in all remaining ends. Place your essentials in the pouch and enjoy!
Frequently Asked Questions
What is the best free crochet hook case pattern for beginners?
This one! The body of the pouch is worked entirely in half double crochet rows, making it accessible for all skill levels. The most advanced step is the border round, which is fully explained in both the written pattern and video tutorial.
What yarn should I use for a crochet hook pouch?
A worsted weight acrylic or cotton yarn works beautifully for this project. You only need about 187 yards — making it a perfect one skein project for stash busting. I used Loops & Threads Soft Classic in Pink, but any smooth worsted weight will give you great results.
Do I need a sewing machine for the fabric lining?
Nope! The lining in this pattern is attached using fabric glue, so no sewing machine or hand sewing is required. The pattern walks you through every step of the DIY fabric lining process, and the video tutorial shows you exactly how it’s done.
How big is the finished crochet hook organizer?
The finished assembled pouch measures about 7.75″ x 4.25″ (20 x 11 cm) — the perfect size to hold your everyday crochet hooks without taking up too much space in your bag.
Can I sell items made from this pattern?
Yes! You can sell finished items as long as they are handmade by you personally (not mass produced) and you credit Just Be Crafty. Please see my pattern permissions page for full details.
More Quick Crochet Makes You’ll Love
If you’re into crochet projects that are practical, fast, and a little bit special, you’re going to love these from the Just Be Crafty pattern library:
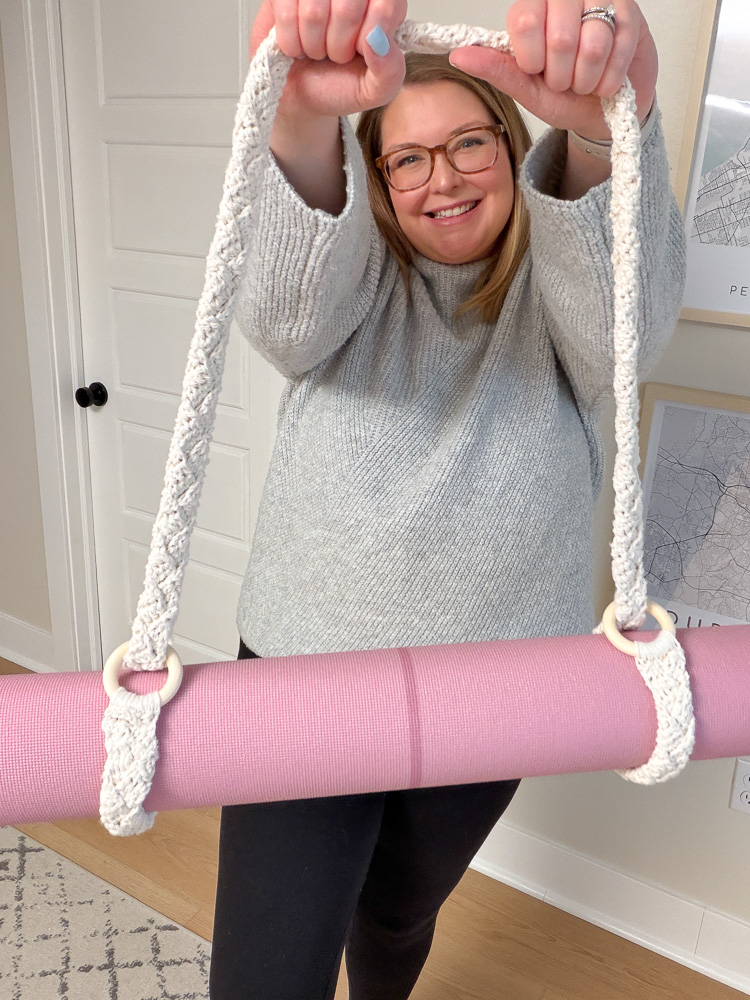


- The Crochet Yoga Mat Strap — functional, beginner friendly, and so satisfying to make
- The Pop Rock Scrunchie — a perfect stash buster that works up in one sitting
- The Crochet Exfoliating Bath Mitt — a spa-worthy handmade gift everyone loves
Now go grab your hook and let’s make something you’ll use every single day! And when you finish your pouch, I’d love to see it. Tag me on Instagram @justbecraftyblog and use #justbecrafty so I can see your makes!