If you’re new to crochet, understanding how to read crochet patterns can seem like learning a new language. With all the abbreviations, symbols, and special stitches, it can feel overwhelming at first. But no worries! Once you familiarize yourself with the common terms and techniques, you’ll be ready to try out any crochet design you want.
In this detailed guide, I’ll walk you through everything you need to know about reading crochet patterns, from understanding abbreviations to understanding more complex instructions and even troubleshooting some common issues.
What is a Crochet Pattern?
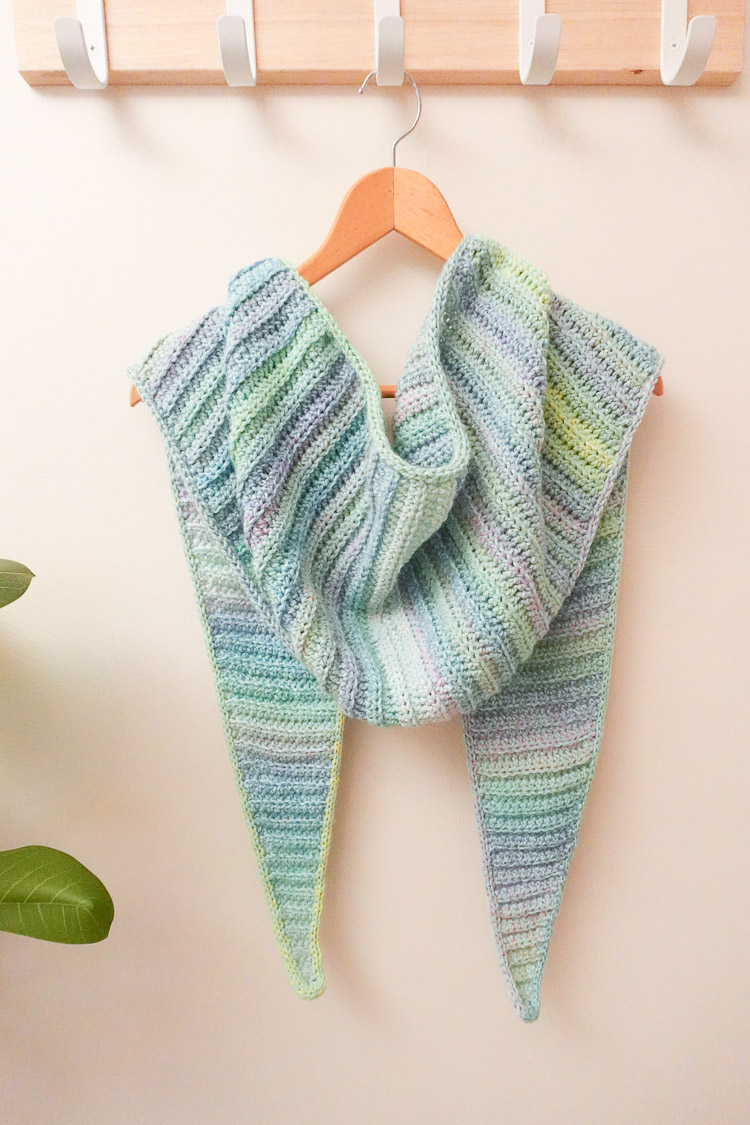
The best way to describe it, a crochet pattern is a set of instructions that tells you how to crochet a specific item. It might be a scarf, a shawl, or sweater. Every pattern is basically just a recipe that breaks the project down step by step.
Types of Crochet Patterns
- Written Instructions: Written instructions are the row-by-row (or round-by-round) explanations of the stitches you need to complete, in the order you need to complete them in. This is what you’ll mostly find here at Just Be Crafty!
- Crochet Charts or Diagrams: Some patterns are represented visually, using symbols to indicate different stitches. Charts are often used for complex lacework, intricate stitch patterns, and/or symbolize colorwork.
- Combination of Both: Many patterns provide both written instructions and charts to convey the pattern directions. I currently have a few patterns that utilize a combination of written instruction and charts. They are for colorwork. (See here and here.)
Learning how to read crochet patterns is a key step in learning how to crochet!
Common Terms and Abbreviations
Most crochet patterns use a shorthand system of abbreviations to save space and make the pattern easier to read. If you’re new to crochet, it’s super important to familiarize yourself with these abbreviations. As it’s these abbreviations that make up the bulk of the pattern. If you learn what the abbreviations mean, you’re about 90% of the way there on learning how to read a pattern!
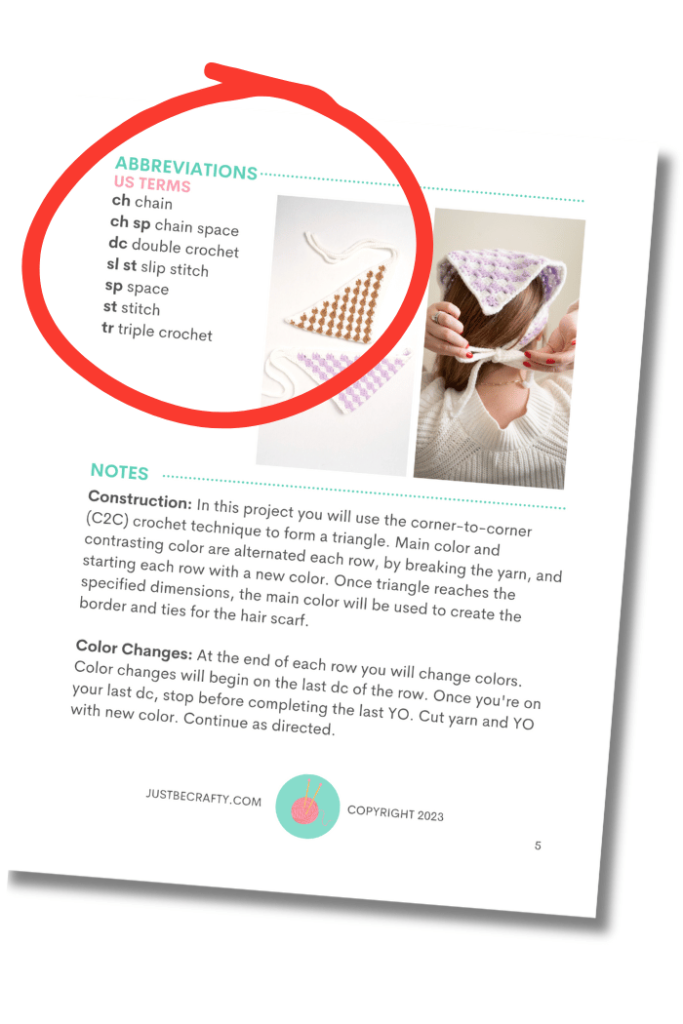
It’s also important to note that crochet terms are different depending on your location. For instance, the UK and US have different terms for the same stitches and it can get confusing. Patterns should always specify if they are using US or UK terms.
Here are some of the most commonly used crochet terms (using US terminology):
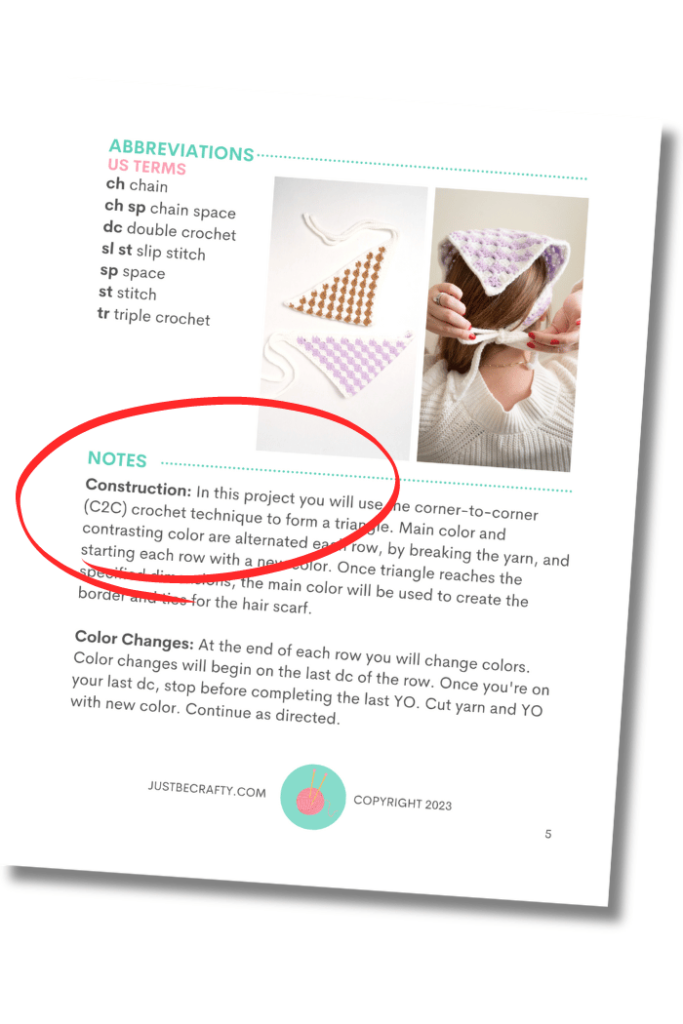
- ch – Chain
- sc – Single crochet
- hdc – Half double crochet
- dc – Double crochet
- tr – Treble crochet
- sl st – Slip stitch
- rep – Repeat
- st(s) – Stitch(es)
- inc – Increase
- dec – Decrease
- sk – Skip (as in “skip the next stitch”)
Most patterns also include special stitches or techniques that are specific to that project. For example, you might see fpdc (front post double crochet) or bpdc (back post double crochet), which are more advanced stitches used to create different textures (usually ribbing).
Special Symbols and Characters
Patterns often use additional symbols, such as:
- [ ] Square brackets indicate a section of stitches that needs to be repeated.
- ( ) Parentheses are used for stitch groups or to indicate the number of stitches in a section.
- *** ** An asterisk shows the beginning of a repeated stitch sequence.
For example:
Row 1: ch 1, sc in each st across. (10 sc)
This tells you that once you complete Row 1, you should have 10 single crochet stitches.
Sections You’ll Find in a Crochet Pattern
Materials
Every crochet pattern will have a materials list. This section tells you what type of yarn, how much yarn, hook size, and other tools or extras you’ll need in order to complete the project.
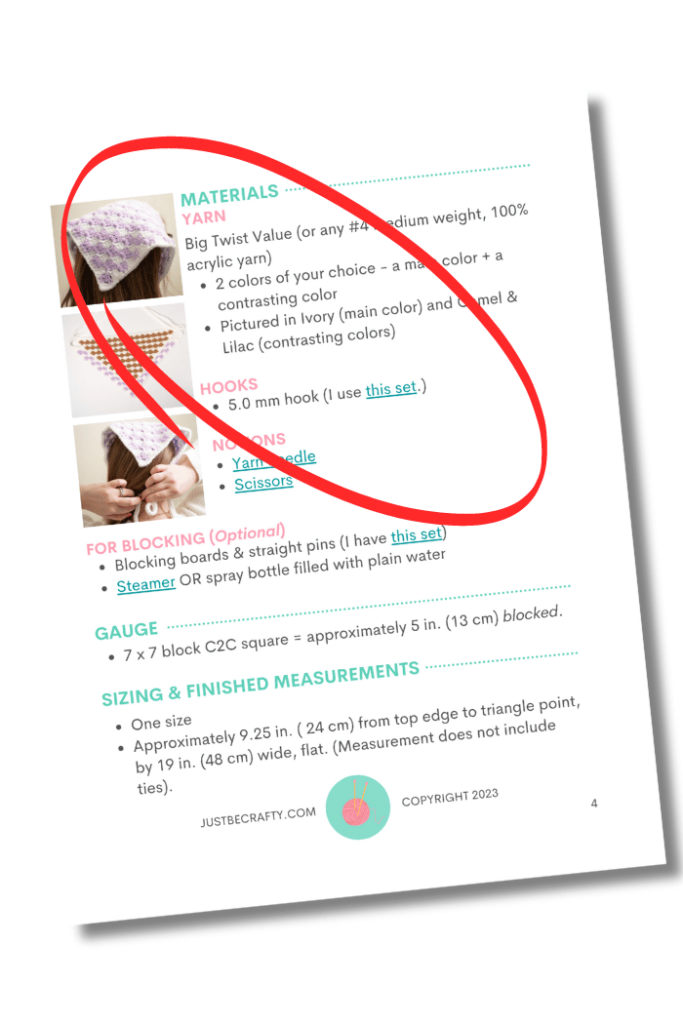
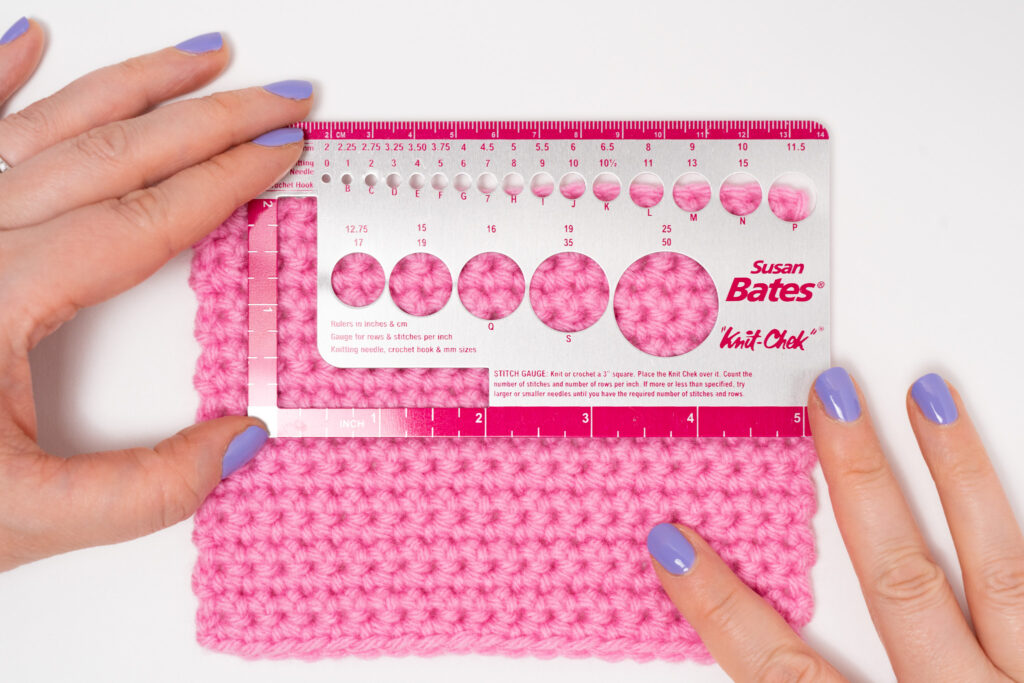
Gauge
Next, check the gauge section. Gauge refers to the number of stitches and rows per a certain measurement (usually a 4×4″ (10 cm) square) using the recommended yarn and hook size. Matching the gauge is crucial, especially for wearable items, as it ensures your finished piece will be the right size. (Think sweaters, hats, mittens, etc…)
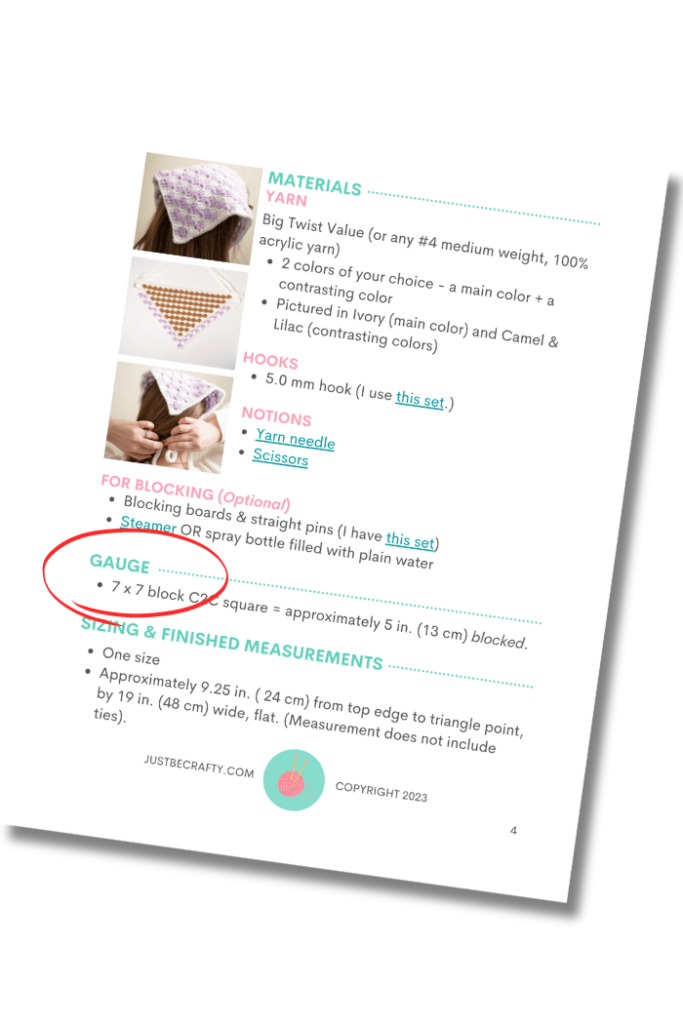
To check your gauge, make a small swatch using the pattern’s instructions, then measure the stitches and rows. If your swatch doesn’t match the pattern’s gauge, you will need to adjust your hook size. And try again until you’ve matched gauge.
Interested in learning more about gauge? Read this blog post here.
Finished Measurements
The Finished Measurements section of a crochet pattern provides the final dimensions of your project once it’s completed. These measurements are crucial, important references when making wearable items, as they ensure the piece will fit as intended. This is why its imperative to check gauge! If you didn’t get gauge, then the measurements will be off.
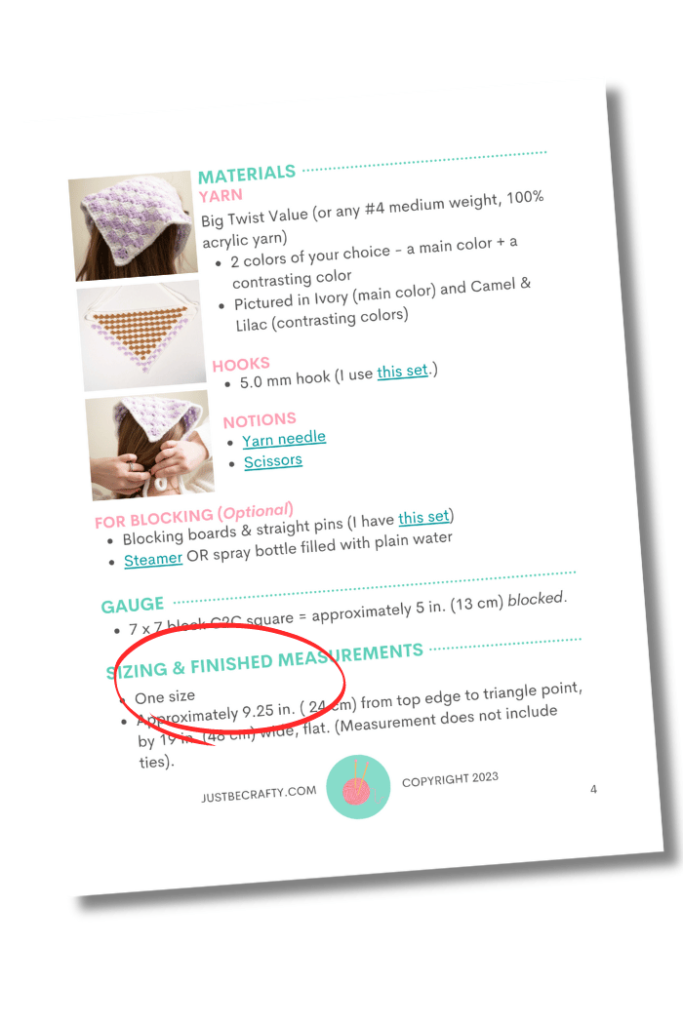
Here’s what you need to know when reading finished measurements:
- Width: This refers to how wide the piece will be from side to side.
- Length: This measurement tells you how long the item will be from top to bottom.
- Circumference: This measurement tells you how big around the item is. (Typically included for projects worked in the round, or that are seamed together at the end.)
For example, a pattern for a scarf might state:
- Finished Measurements:
- Width: 8 inches (20 cm)
- Length: 70 inches (178 cm)
Or, a hat pattern might state:
- Finished measurement: 9″ assembled and flat. (This would be a finished 18″ circumference)
- Designed to fit a head circumference that = 20″
It’s important to note (again) that your finished measurements might vary depending on your gauge, yarn, and tension. To ensure accuracy, always measure your work as you go and compare it to the measurements provided in the pattern.
Kinda referred to gauge a lot here and repeated myself a bit, but its because its THAT important.
Abbreviations
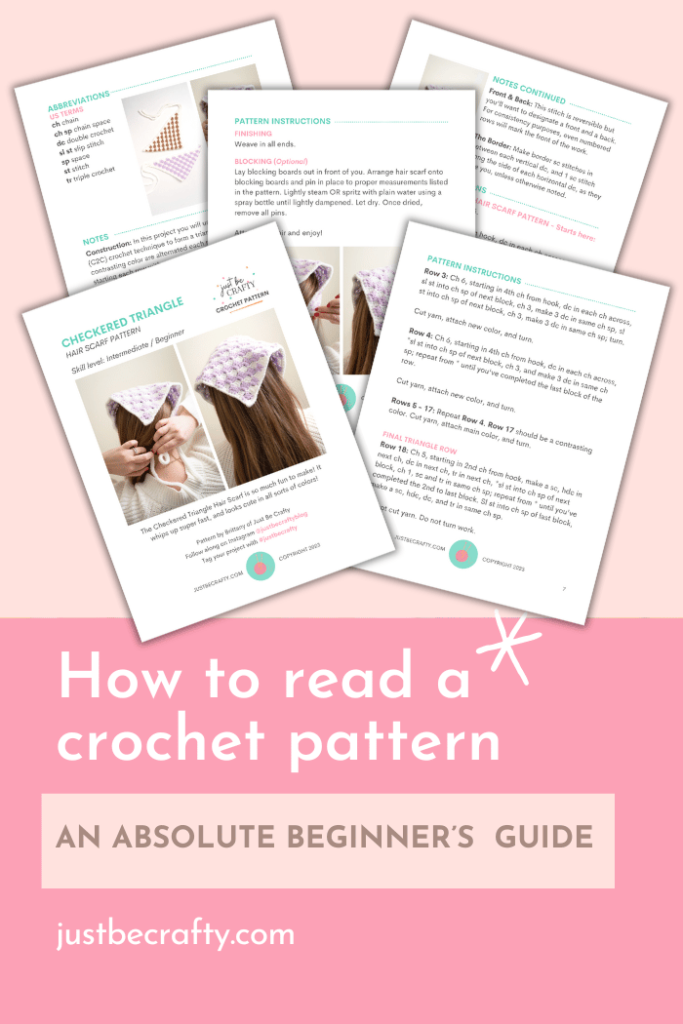
As I mentioned earlier, crochet patterns are written in shorthand to help make reading them easier. The shorthand language is made up of lots of abbreviations. All crochet patterns should include an abbreviations section so you know exactly what each abbreviation means.
Notes
Most patterns will include a notes section and its in this section where you’ll find important information you’ll need in order to complete a project – and will need to take these notes into account when following a pattern. Always check to see if there is a notes section in your pattern and read it fully before starting your project.
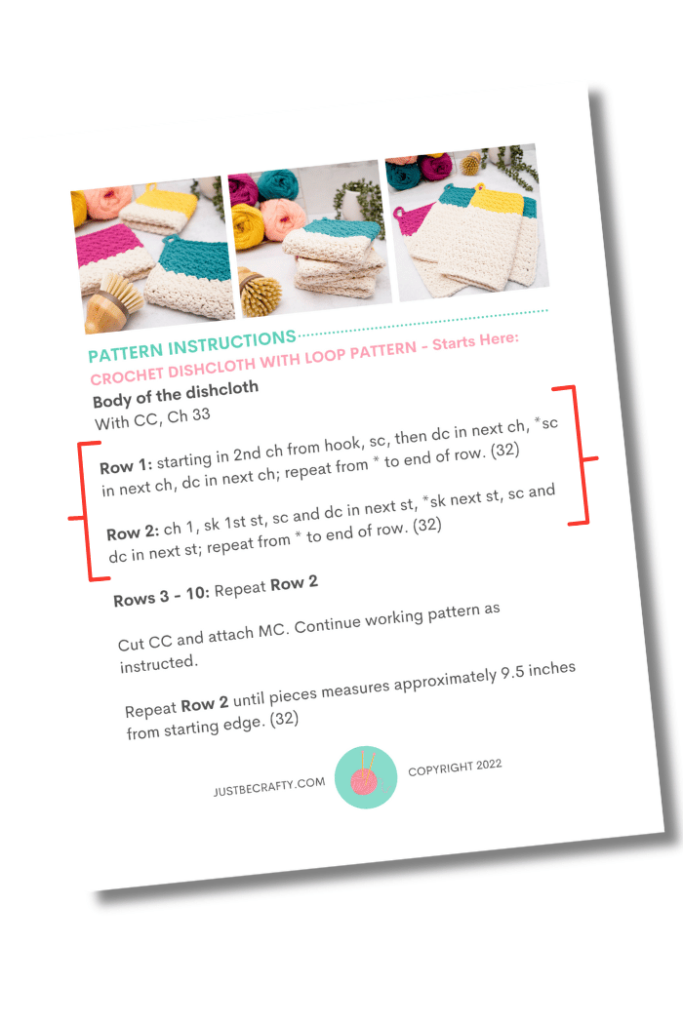
Structure of Crochet Pattern Directions
Patterns are usually broken down into rows or rounds. Here’s an example of a basic pattern for a rectangular scarf:
Ch 31:
Row 1: starting in the 2nd ch from the hook, sc in second ch from hook and across, turn. (30)
Row 2: Ch 1, sc in each st across, turn (30).
Repeat: Repeat Row 2 until scarf measures 60 inches long.
Each row gives you clear directions for which stitches to use, and what to do. Many patterns will also let you know how many stitches are at the end of each row or round (listed in the parenthesis at the end of the instructions).
Repetition and Brackets
Understanding how to interpret repetition symbols is important when learning how to read crochet patterns. Brackets, parentheses, and asterisks are often used to indicate repeats.
For example, you might see:
Row 3: [sc in next st, ch 1] 5 times.
This means you should work “sc in next st, ch 1” five times in a row.
Or, you may see:
Row 3: *sc each of the next 2 st, ch 1, sk a st, repeat from * to the end of the row.
This means you should go back to the (*) and repeat the following instructions over and over until the end of the row.
Understanding Crochet Charts
In addition to written instructions, some patterns also come with crochet charts or diagrams. These visual representations use symbols to indicate different stitches and are especially helpful for lace, motif, and colorwork patterns.
How to Read Crochet Charts
Crochet charts are typically read from bottom to top (but each individual pattern should tell you where to start). Each symbol represents a stitch:
- Dot: Slip stitch (sl st)
- Circle: Chain (ch)
- X or +: Single crochet (sc)
- T: Double crochet (dc)
Let’s say you’re working on a granny square pattern that includes a chart. The pattern might begin with a central ring, represented by a small circle of chain stitches, and then expand outward, showing where you should place double crochets, chains, and slip stitches.
If you’re a visual learner, crochet charts can be a lifesaver, especially for intricate patterns where following written instructions alone may be difficult.
They are also great for making patterns universal in language.
How to Read Advanced Crochet Patterns
Once you’re comfortable with beginner patterns, you’ll eventually want to try out more advanced designs. These patterns often incorporate techniques like color changes, shaping, or seaming multiple pieces together.
Color Changes
Advanced patterns might ask you to work with multiple colors of yarn. Typically, instructions for color changes will look like this:
Row 5: With Color B, dc in each st across.
To switch colors, simply drop the current yarn and pick up the new yarn at the end of the previous row.
Shaping
Shaping is used in garments and accessories like hats or sweaters so they fit properly. In shaping, the pattern will include increases (adding stitches) and decreases (removing stitches).
For example, you might see:
Dec Row: [sc2tog] 4 times, sc in next 10 sts.
Here, the pattern instructs you to decrease by crocheting two stitches together (sc2tog) four times before continuing the row with regular single crochets.

But once again, its really coming down to learning and getting comfortable with the meanings of the abbreviations.
Troubleshooting Common Pattern Mistakes
Even experienced crocheters can make mistakes when following a pattern. Here are some common issues and how to fix them:
Miscounting Stitches
It’s easy to lose track of your stitch count, especially on long rows and complicated stitch patterns. If you find that you have too many or too few stitches, count your stitches at the end of each row or every few rows and correct any mistakes right away.
Pattern Confusion
If a pattern isn’t clear or you find a technique you’re unfamiliar with, don’t hesitate to look up a video tutorial or a stitch guide for the particular technique. Many pattern designers also provide tutorials or contact information where you can ask for clarification.
Gauge Problems
If your project is turning out too small or too large, your gauge is likely off. Try adjusting your hook size to match the pattern’s gauge or experiment with different yarn.
Tips for Getting Comfortable With Crochet Patterns
Here are a few more tips to help you succeed:
- Start with Beginner Patterns: Look for simple projects like scarves, dishcloths, or blankets that use basic stitches.
- Take Notes: As you work through the pattern, highlight where you leave off between sessions, make notes on any adjustments you make, or note areas that were difficult for you.
- Use Stitch Markers: These help you keep track of where you are in a pattern, especially when working in the round.
- Practice Stitches Separately: If a pattern calls for a new stitch, practice it on scrap yarn before trying it on your project.
Frequently Asked Questions (FAQs)
What if my pattern has mistakes?
Sometimes patterns contain errors. Check the designer’s website for pattern corrections or “errata” section. Or send them an email. Many crochet communities online also share tips for fixing common pattern mistakes.
Can I adjust the pattern size?
It really depends. It depends on your skill level, the complexity of the pattern, and your comfortability to making adjustments. For something easy like a scarf made of entirely double crochet stitches – of course you can adjust the size! In this case you could make a foundation chain as long or short as you’d like, and crochet for however long you’d like.
But, if the scarf has a certain stitch pattern or shaping that requires a certain number of stitches and row counts, its not so cut and dry. If you feel comfortable playing around with stitch and row counts, I say go for it! But do note that adjusting the sizing of the pattern is something that you as the maker would be willingly trying out and the designer may or may not be able to provide guidance (as this is essentially a re-write of the pattern).
Before You Go
Learning how to read crochet patterns is an essential skill for any crocheter. While it may seem challenging at first, with patience and practice, you’ll soon be able to follow and understand any pattern you come across. Whether you prefer written patterns or visual charts, understanding pattern reading will open the door to so many different crochet projects.
Now that you’ve got the basics, grab your hook and yarn, and start your next project!
Here’s a few ideas!