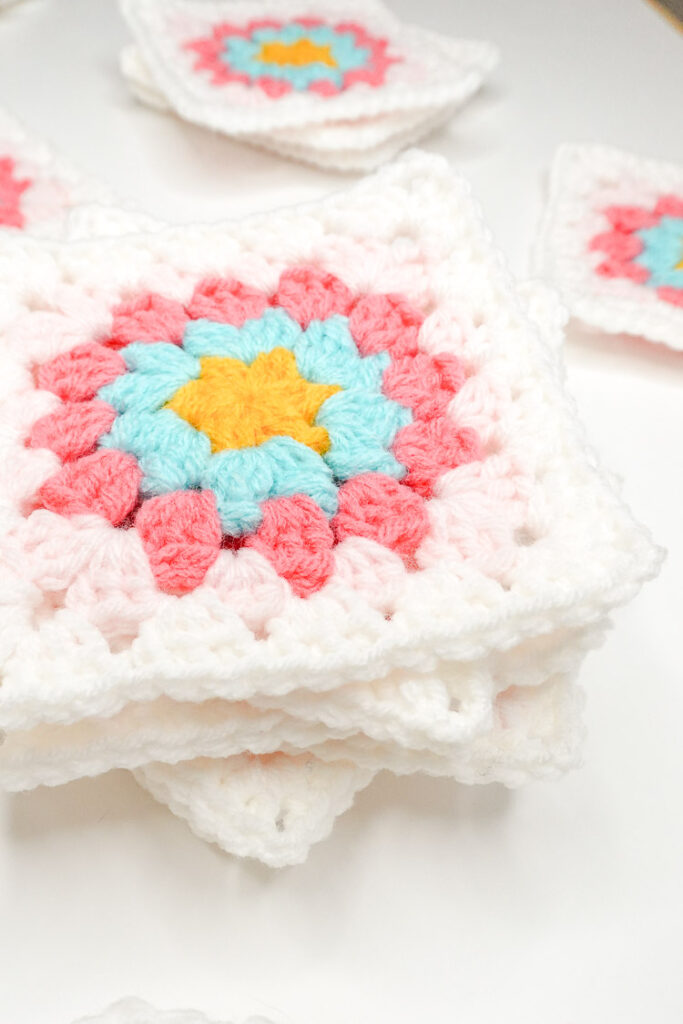
Raspberry Sprinkle Granny Square Motif
Learn how to make the Raspberry Sprinkle Granny Square right along with me in the video tutorial below!

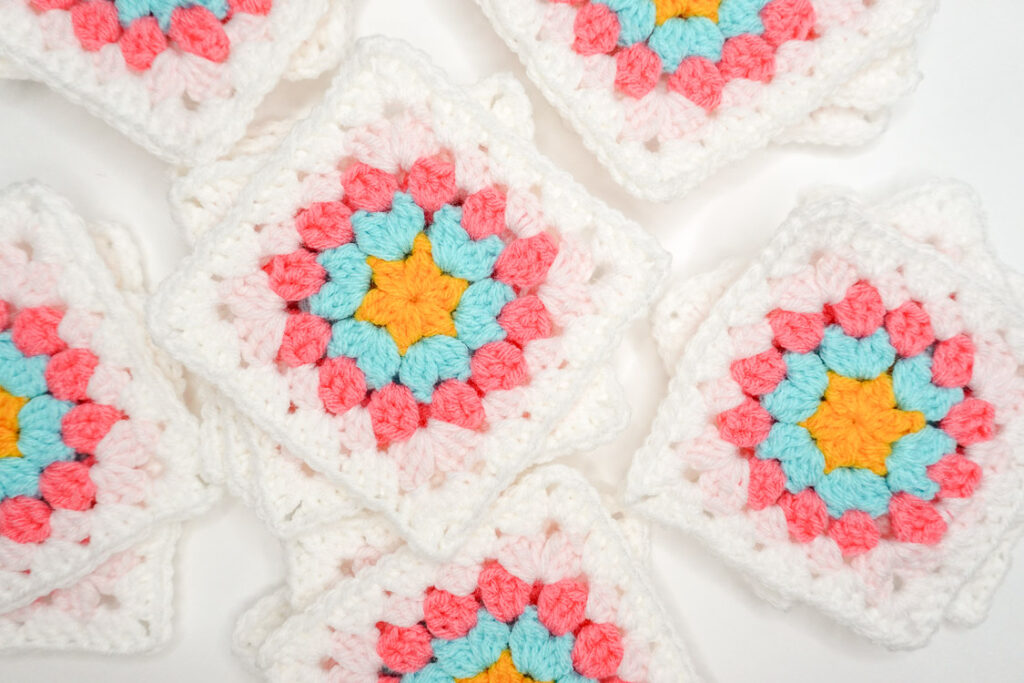
In this tutorial, I introduce the Raspberry Sprinkle Granny Square, a fun take on the classic granny square pattern. This design uniquely blends a circular motif within a traditional square format, offering both a cute aesthetic and a refreshing switch-up for granny square lovers.
Whether you’re looking for something fresh or are trying a granny square for the first time, the Raspberry Sprinkle Granny Square is a versatile addition to your crochet arsenal. Its unique design is suitable for a variety of projects, from blankets to accessories and lots of things in between.
Stay tuned in the coming weeks as I’ll walk you through assembly into different forms to make a couple of fun projects with these squares. But in the meantime, let’s learn to make the Raspberry Sprinkle Granny Square.
Video Help
I’ve made a video tutorial to help walk you through this project. To watch click on the play button below!
Raspberry Sprinkle Granny Square Motif
Materials
- Suggested Yarn
- MC – Red Heart Super Saver in Soft White (100% acrylic, #4-medium weight yarn)
- CCs – Big Twist Value (100% acrylic, #4-medium weight yarn)
- CC1 – Varsity Gold
- CC2 – Aqua
- CC3 – Watermelon
- CC4 – Baby Pink
- Yarn
- Any #4-medium weight, 100% acrylic yarn in 5 of your favorite colors
- 5.5 mm crochet hook (I’m using the one from this set)
- scissors
- yarn needle
Raspberry Sprinkle Granny Square Motif – Written Pattern
Round 1 (first petal): With CC1 make a magic ring. In ring, ch 2 (counts as a st in petal 1) *YO, insert hook into ring, draw up a loop, YO pull through first 2 loops on hook; repeat from * two more times. YO and draw through all 3 loops on hook. Ch 1.
Round 1 continued: Remaining Petals – *YO, insert hook into ring, draw up a loop, YO, pull through first 2 loops on hook; repeat from * two more times. YO and draw through all 4 loops on hook. Ch 1.
Repeat above Round 1 Remaining Petals instructions 4 more times, for a total of 6 petals.
Join with the first petal of the round with a sl st. Sl st to next ch 1 sp.
Cut yarn and fasten off.
Round 2 (first petal): In any ch 1 sp, attach CC2 and ch 2 (counts as 1st st in petal 1) *YO, insert hook into ch sp, draw up a loop, YO pull through first 2 loops on hook; repeat from * two more times. YO and draw through all 3 loops on hook. Ch 1. And working in same ch sp, make a second petal by following the instructions below:
Round 2 continued: Remaining Petals – *YO, insert hook into ch sp, draw up a loop, YO, pull through first 2 loops on hook; repeat from * two more times. YO and draw through all 4 loops on hook. Ch 1.
Repeat Round 2 Remaining Petals instructions above making 2 petals in each ch-sp around. You will end Round 2 with 12 petals total.
Join with 1st petal of the round with a sl st. Sl st into next ch sp.
Cut yarn and fasten off.
Round 3: In any ch sp, attach CC3 and ch 3 (counts as 1st dc of 1st granny cluster), and then make 2 dc in same ch sp, *make 3 dc in next sp, repeat from * to end of round. You will end this round with 12 granny clusters.
Join with the top of the starting ch 3 with a sl st, sl st to next granny cluster space.
Cut yarn and fasten off.
Round 4: In any granny cluster sp, attach CC4 and ch 5 (counts as a dc + ch 2), in same cluster sp, make 3 dc, in next cluster sp make 3 hdc, in next cluster sp make 3 hdc, *in next cluster sp make (3 dc, ch 2, 3 dc), make 3 hdc in next cluster sp, make 3 hdc in next cluster sp; repeat from * 2 more times, make 2 dc in starting corner. Join with the 3rd ch of the starting ch 5 of the round with a sl st, sl st into the next corner sp.
Cut yarn and fasten off.
Round 5: Starting in any corner ch 2 sp, attach MC and ch 5 (counts as a dc + ch 2), in same corner sp, make 3 dc, in each of the next three cluster spaces make 3 dc in each sp, *in next corner make (3 dc, ch 2, 3 dc), in each of the next three cluster spaces make 3 dc in each sp; repeat from * 2 more times, make 2 dc in starting corner. Join with the 3rd ch of the starting ch 5 of the round with a sl st, sl st into next corner sp.
Cut yarn and fasten off.
Weave in ends. And block!

Remember to stay tuned in the coming weeks for new projects to come with the Raspberry Sprinkle Granny Square motif!
Enjoy!


Thank you so much for this written