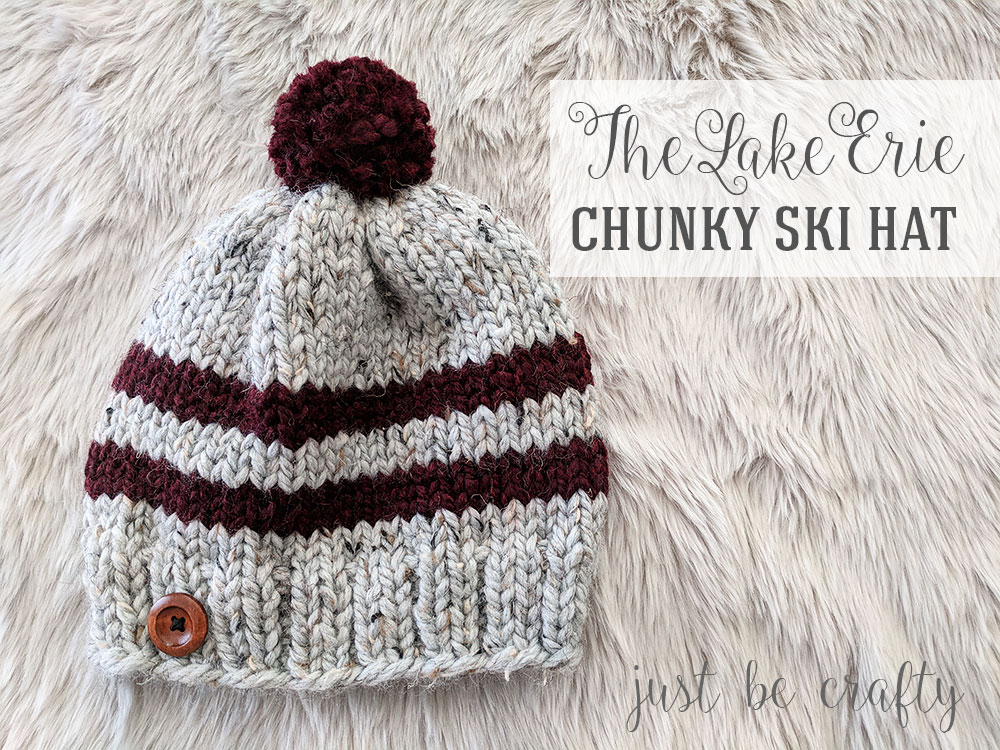
Keep warm in the coldest of winters with the Lake Erie Chunky Skit Hat! Made with soft chunky yarn, this project whips up in no time at all!
To start I want to say thank you to All Free Knitting for including me in their 2017 top 100 list! I’m honored! If you’d like to see all the other awesome designers and projects that made the list you can check them out here!
I hope you had a wonderful holiday and Happy New Year! Trisden and I spent Christmas break in our hometown of Erie, PA. It was a beautiful white Christmas, and let me tell you… boy was it a white Christmas! With over five feet of snowfall within two days, we found ourselves snowed in for the majority of our trip.

If you’re from Erie, then you know that snow is no big thing but FIVE FEET?! It was crazy! With the icy temperatures in mind I wanted to whip up a hat that would keep me warm in coldest of places – even Erie! 🙂
The pattern features Lionbrand Wool-Ease Thick & Quick which is a chunky blend of wool and acrylic. The yarn’s chunkiness and composition blend make for a super toasty hat guaranteed to keep the head and ears warm!
If you want to make one for yourself, keep on scrolling!

This post contains affiliate links. For more information please see my disclosures page.
A printable version of this pattern is available for purchase here.
The Lake Erie Chunky Ski Hat Pattern
Materials
Hat:
- 1 skein of Lion Brand Wool-Ease Thick & Quick in Grey Marble (main color)
- 1 skein of Lion Brand Wool-Ease Thick & Quick in Claret Rouge (contrasting color)
- 20 inch circular knitting needles in US size 11 – I use this interchangeable set
- yarn needle
- scissors
Pom Pom (optional):
- pom pom maker (or you can use your hands like I did – see this tutorial here to see how!)
Button (optional):
- 25mm wooden button
- embroidery floss in coordinating color (I used black)
- sewing needle
Gauge
- 4 inches is equal to 10 stitches by 15 rows
Finished Measurement
- Approximately 9 inches wide and 8 inches long laying flat
Size
- One Size – adult women
Pattern
With main color, cast on 51.
For this project, you will be working in the round. (When beginning Round 1, be sure your stitches are not twisted!)
Rounds 1 – 7: *k2, p1; repeat from * to end of round
Rounds 8 – 9: knit to end of round
Cut main color, attach contrasting color
Rounds 10 – 12: knit to end of round
Cut contrasting color, attach main color
Rounds 13 – 15: knit to end of round
Cut main color, attach contrasting color
Rounds 16 – 18: knit to end of round
Cut contrasting color, attach main color
Rounds 19 – 30: knit to end of round
Round 31: *k1, k2tog, repeat from * to end of round
Cut yarn, leaving a long tail. Thread tail into your yarn needle and insert through each loop on your knitting needle, slipping the loops off the knitting needle as you go.

Gently pull tight and stitch top hole closed.

Weave in any ends.
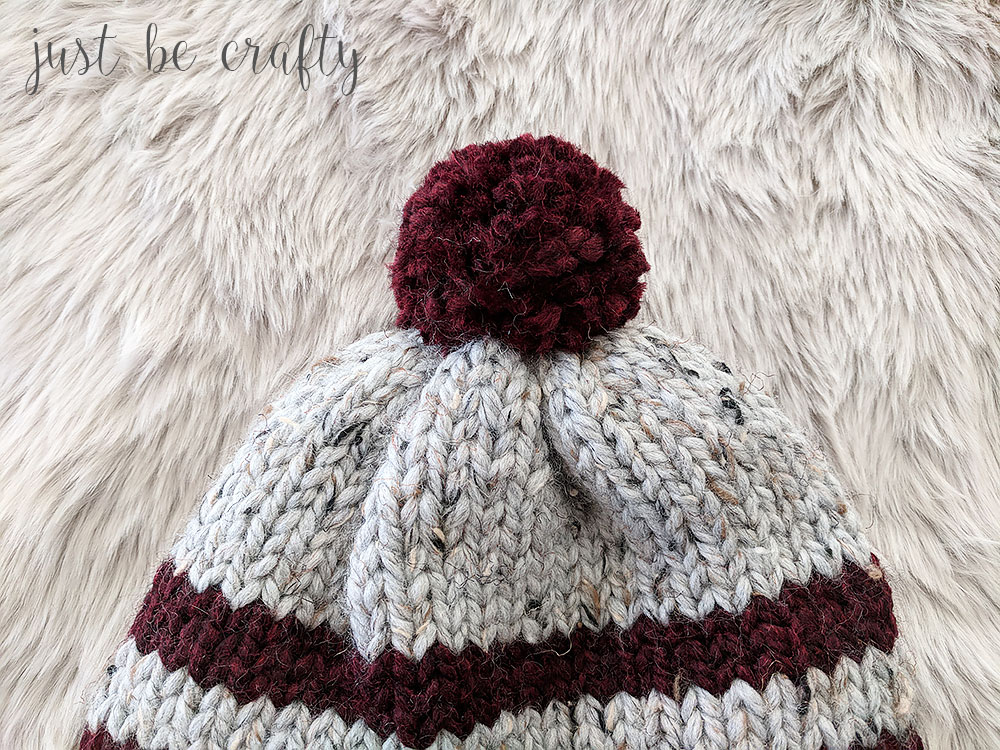
Pom Pom (optional)
With contrasting color, make a pom pom. See this tutorial for making a pom pom with your hand and a pair of scissors or use a pom pom maker.

Attach pom pom to the top center of your hat. Knot to secure and weave in your ends.
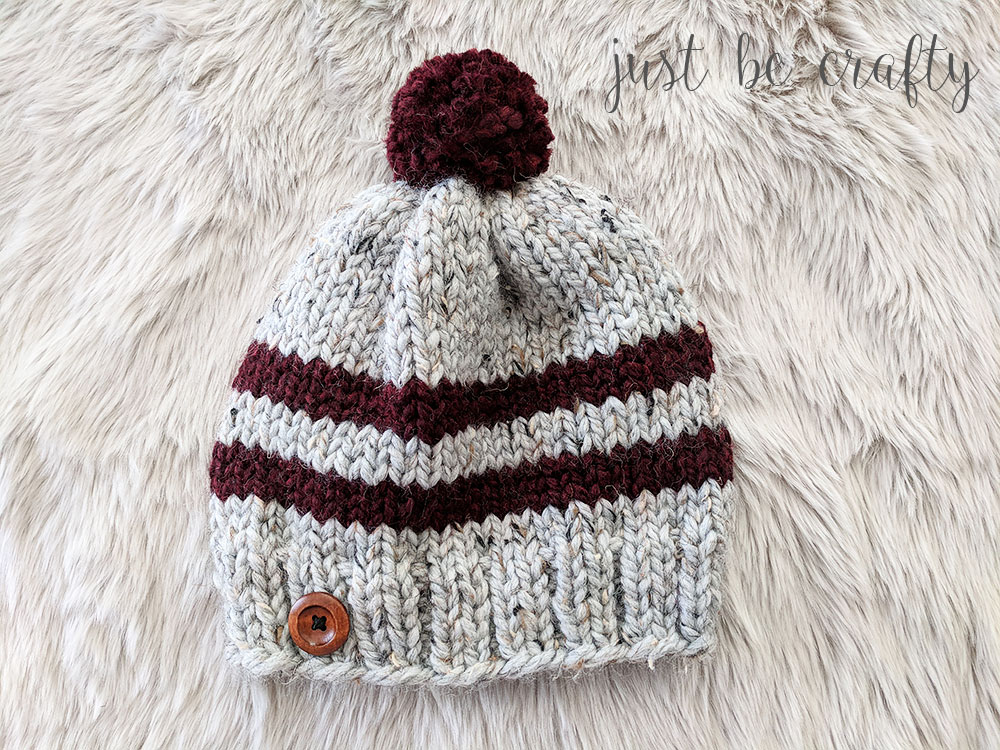
Attaching the button (optional)
With needle and embroidery floss, stitch the button on to the hat ribbing using the photos as placement reference. Secure and cut ends.
Enjoy!


Very pretty and warm looking.
Thank you! 🙂
This is a great pattern. Do you have it in pdf?
Hi Erica! Not yet, but I hope to get it up soon! 🙂
That would be fantastic. Thanks
I can’t wait to try this pattern!!
Thanks! I hope you have fun with it! 🙂
Hi! I like the name of your hat as I live in north eastern Ohio, 30 min west of Erie. We didn’t get quite as much snow as Erie did but we did get plenty. The dreaded phrase “Lake Effect Snow” always makes me shiver.
Your pattern is cute and quick and your tutorial is so well done. Now I want to get some Wool-Ease thick and quick and whip up a couple of hats because it’s still cold here!
Thanks for the pattern.
Hi Cynthia, thanks for stopping by! That’s so fun that you’re so close to Erie – practically a neighbor! I now live in NC but travel back to Erie often. And haha yes, the dreaded Lake Effect Snow – though when I was still in school I hoped it would bring on a snow day!
Thank you so much, I hope you enjoy the pattern :).
Cannot wait to get this adorable pattern on my needles…!!!! I live in Erie, and the winter weather so far has been frigid and the amount of snowfall since Christmas has been RIDICULOUS..?❄️… Having a new pattern to try and a cup of coffee are just what the doctor ordered for this avid knitter … Thanks and God Bless..
Hi Mary! Thanks for stopping by my blog! I love that you’re a fellow Erie native! Living in NC, I really miss home, but just not the snow so much :)… though it is beautiful! Stay warm and happy knitting – I hope you enjoy the pattern!
Just found your hat and will definitely be knitting it up. I live in Erie and I agree it was awful!! By the end of the first week of January we were up to almost 7 feet. But it left me with plenty of time to catch up on some projects!! Love the hat!
Hi Emily! Thanks for saying hi – I love hearing from fellow Erie friends! The amount of snow is unbelievable, hahah. I hope you stay warm and happy knitting!
Thanks for this cute pattern! I also live in northwestern PA (south of Erie thankfully!!) and I’ve been knitting like crazy in my spare time!! Somehow it’s getting me through these freezing temperatures!! I can’t wait to try your pattern 🙂
Hi Ally! Thanks for stopping by!! There is nothing better than knitting when it’s cold outside… so relaxing! Stay warm and happy knitting! 🙂
Hi Brittany,
Could you tell me the measurements of the hat. I am making one with smaller needles but with bulky yarn but need to know if I should end at 6″ or 5″ before decreasing
Hi Paulette! Laying flat, the hat is approximately 9 inches wide, with an 8 inch depth.
Hi Brittany, I was so excited when I came across this pattern, knowing someone from Erie had to have made it…then to see it was from a Brittney…could it be…yes, its you, ha!! I just finished a few scarves for my grandaughters and will put this next on my to do list. Do you have a place where you post other patterns? Will let you know how the hat turns out…thank you!
Hi Vicki! Haha that’s so fun that you stumbled onto my blog! I do share other patterns and they can be found on my homepage and in the menu bar on my page: https://justbcrafty.com/. If you try the hat, please do let me know how it turns out! Happy knitting to you and tell the fam I say hello! 🙂
Wow, what a nice easy pattern. I live in Lancaster County!
Hi Pat! Thanks so much, I hope you enjoy it! I hope you stay warm! 🙂
Hi Brittany,
I have to admit the hats name is what caught my attention as well! It has been a crazy winter here in Erie! Lol. I am a self taught crocheter but now that Christmas presents are done my goal is to learn to knit! This will help me get started!
Hi Donna – fellow Erie friend! With the weather so cold out and so much snow, there’s no better time to learn to knit! I wish you the best of luck, I think you will enjoy knitting! Let me know how making your hat goes! 🙂
So cute and looks easy! I have been knitting for 11 years and no one has ever told me about interchangeable circular needles! The ones you link to only have cables as low as 20″ did you need to purchase 16″ and do you have a brand you recommend?
Hi Kristin! Thank you for catching that! I actually did use the 20″ needles that came in the case (I’ve updated the pattern). And yes! They are a complete life saver, because you’ll pretty much always have every size you’ll ever need! The brand is Needlemaster and they do sell other size cords to accompany the set (such as a 16 inch cable).
This is such a great pattern for a super-bulky beanie! I made one with the same yarn, and it fits me great!
Hi Michelle! How are you doing!? Are you still blogging/designing? I always enjoyed seeing your new crochet creations! And thanks so much, I’m glad you enjoyed the pattern!
Thank you so much! This hat looks so warm & sport & the best part of the pattern is that one doesn’t have to use DPNs! Thank you for sharing!
Oops….should be “sport like!”
Just wondering if you have any ideas as to how to use this pattern and knit it for children around 4 years old? I would like to send it to a friend of mine for her little girl. Thanks,
Hi Barbara! You could probably decrease the cast on stitch count by about half but just make sure your count is divisible by 3. And you’ll want to decrease the amount of rounds until you reach the desired hat depth.
Can’t find the ChaioGoo 20 inch circular needles you mention. any suggestions? I’d love to find both 18″ and 20″ circulars.
Hi Pat! I use the Needlemaster Interchangeable set. It can be found on Amazon here (https://amzn.to/2Svyv4B), or it can be also found at most craft stores like Michaels, Joann’s or AC Moore.
I was born and raised in Erie, now live in Waterford, PA, about 10 or so miles south of Erie…..where we live in the country on a dirt road ( supposed to be paved this year!!)
Thanks SO much for the hat pattern…..will be making it soon….
Hi Marie! Thanks so much for stopping and saying hi! I have cousins that live out in Waterford. It’s so pretty out there and I used to LOVE going to Heritage Days every year! And the Sugar N’Spice restaurant – so good!!! I’m from McKean, but moved to NC about 8 years ago. All of my family still lives in the Erie area (McKean, Millcreek, Edinboro and Harborcreek).
Hi I’m working on this hat now and directions say to knit rounds after ribbing. That’s the garter stitch but picture shows a knit and purl pattern. So should I be doing a knit and purl to finish hat?
Hi Sherry! When you knit in the round, it creates stockinette stitch, because you are not turning your work back and forth. If you were knitting the hat flat, you would need to alternate between knitting on the front and purling on the back. Once you get going and knitting each round, you’ll see what I mean :).
Great looking hat
Can you make this using straight needles, if so what size
Thanks carol